Last weekend I took another quantum leap in developing my sewing and personal design skills. As always, Sarah Veblen was at the heart of this experience.
Sarah was here in Chicago to teach a workshop she calls “Choose Your Focus.” Instead of having a predetermined topic such as fitting or jacket fit and construction, this workshop provides an opportunity for each participant to work one-on-one with Sarah with whatever project or projects are at the top of that person’s wish list. It is basically private instruction in a group setting. This is the second Choose Your Focus Workshop I’ve attended and it definitely won’t be my last.
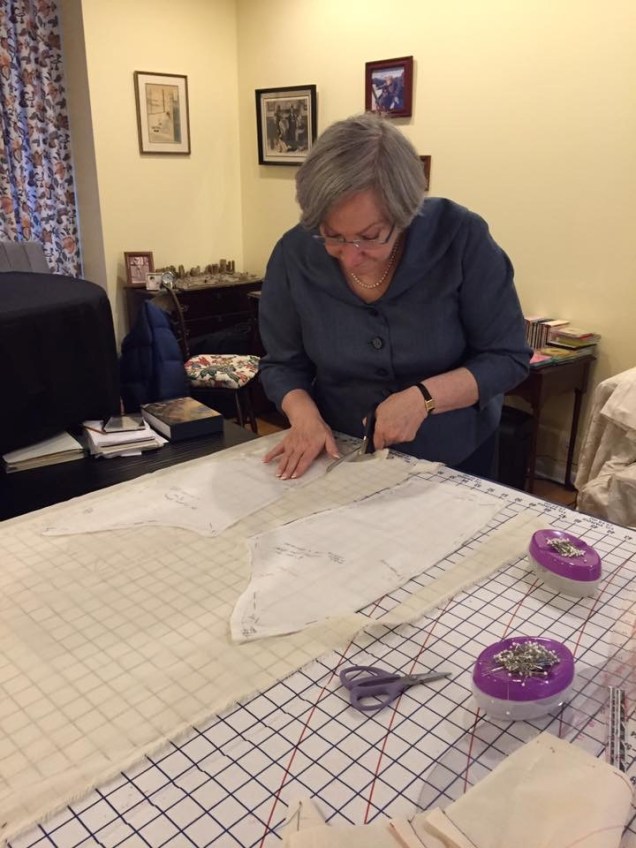
All levels of skill are welcome in these workshops and Sarah is more than capable of meeting each participant’s particular needs. Everyone’s experience in these workshops is unique. Steph has shared her perspective on her blog, 10 Sewing Machines & A Serger, and she also generously allowed me to use her workshop pictures in this post. I always start out with the intention to document with pictures, but often don’t follow through.
The first morning, the group gathers and each participant discusses what she hopes to accomplish in the workshop. Often we’ve emailed Sarah in advance to give her an idea of what we will be bringing, but this is everyone’s opportunity to crystallize their thinking and Sarah’s opportunity to formulate an idea of workflow and how she can most effectively help the participants reach their goals. Some topics come up that will best be handled with a demo, which the entire group will benefit from watching. This exchange also allows other participants to learn from the other projects that are being worked on.

I arrived with a list of projects in order of priority that I placed into two categories: “required” (a/k/a “gottas”) and “extra credit.” The workshop was three days long, but I only had 2½ days because of a volunteer commitment. Factor into that my lack of speed in all things sewing and patternmaking and I knew that I needed wiggle room in my list of goals.
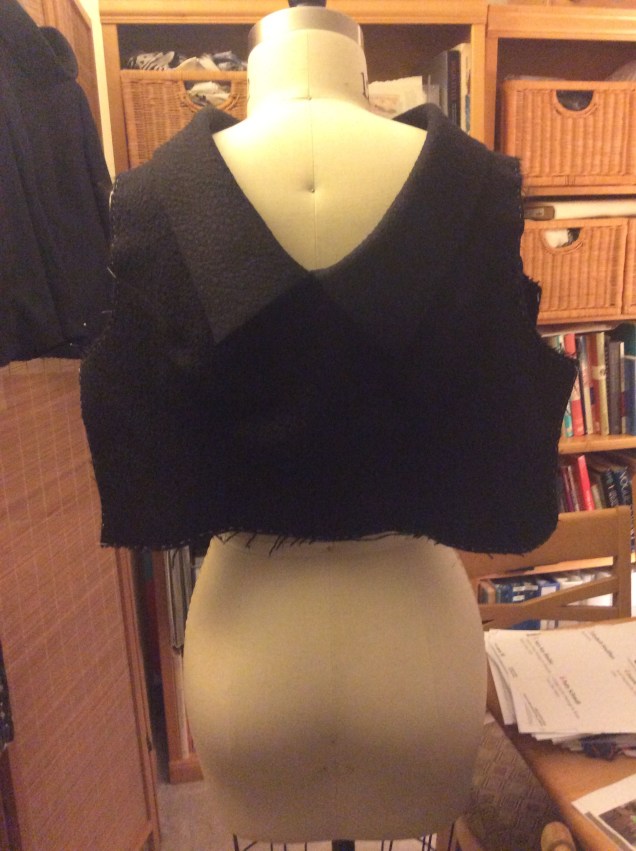
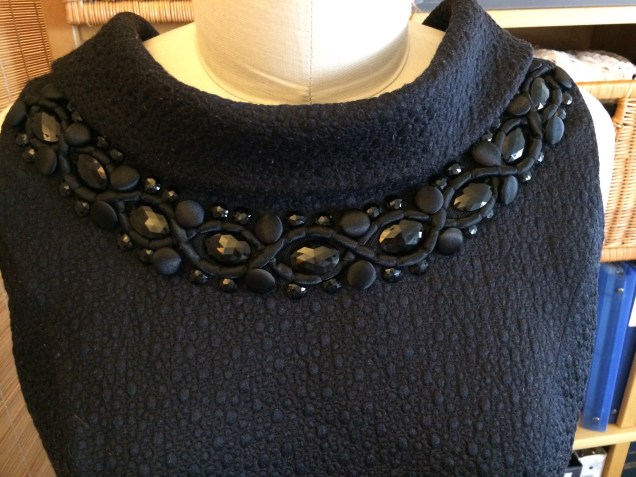
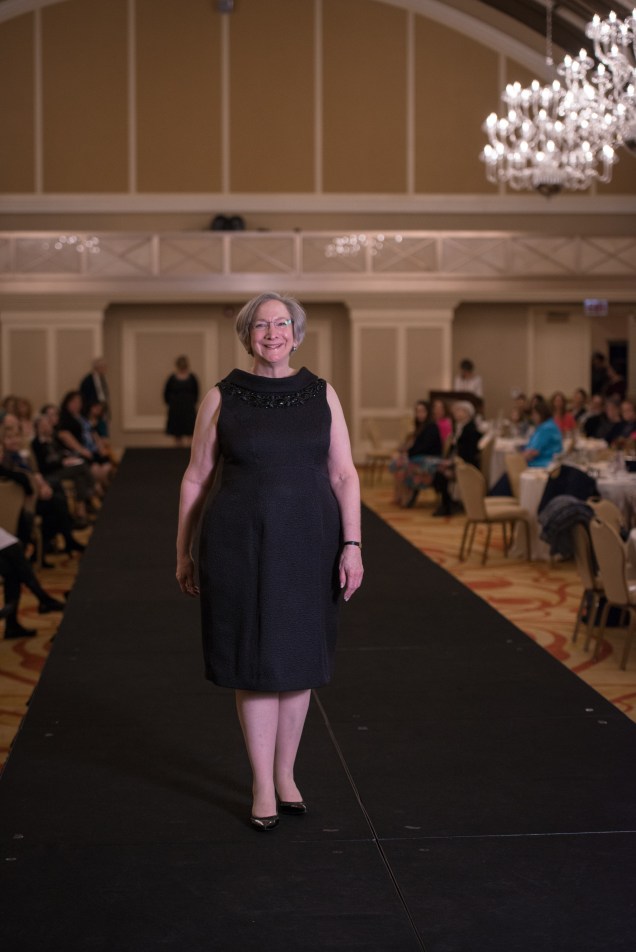
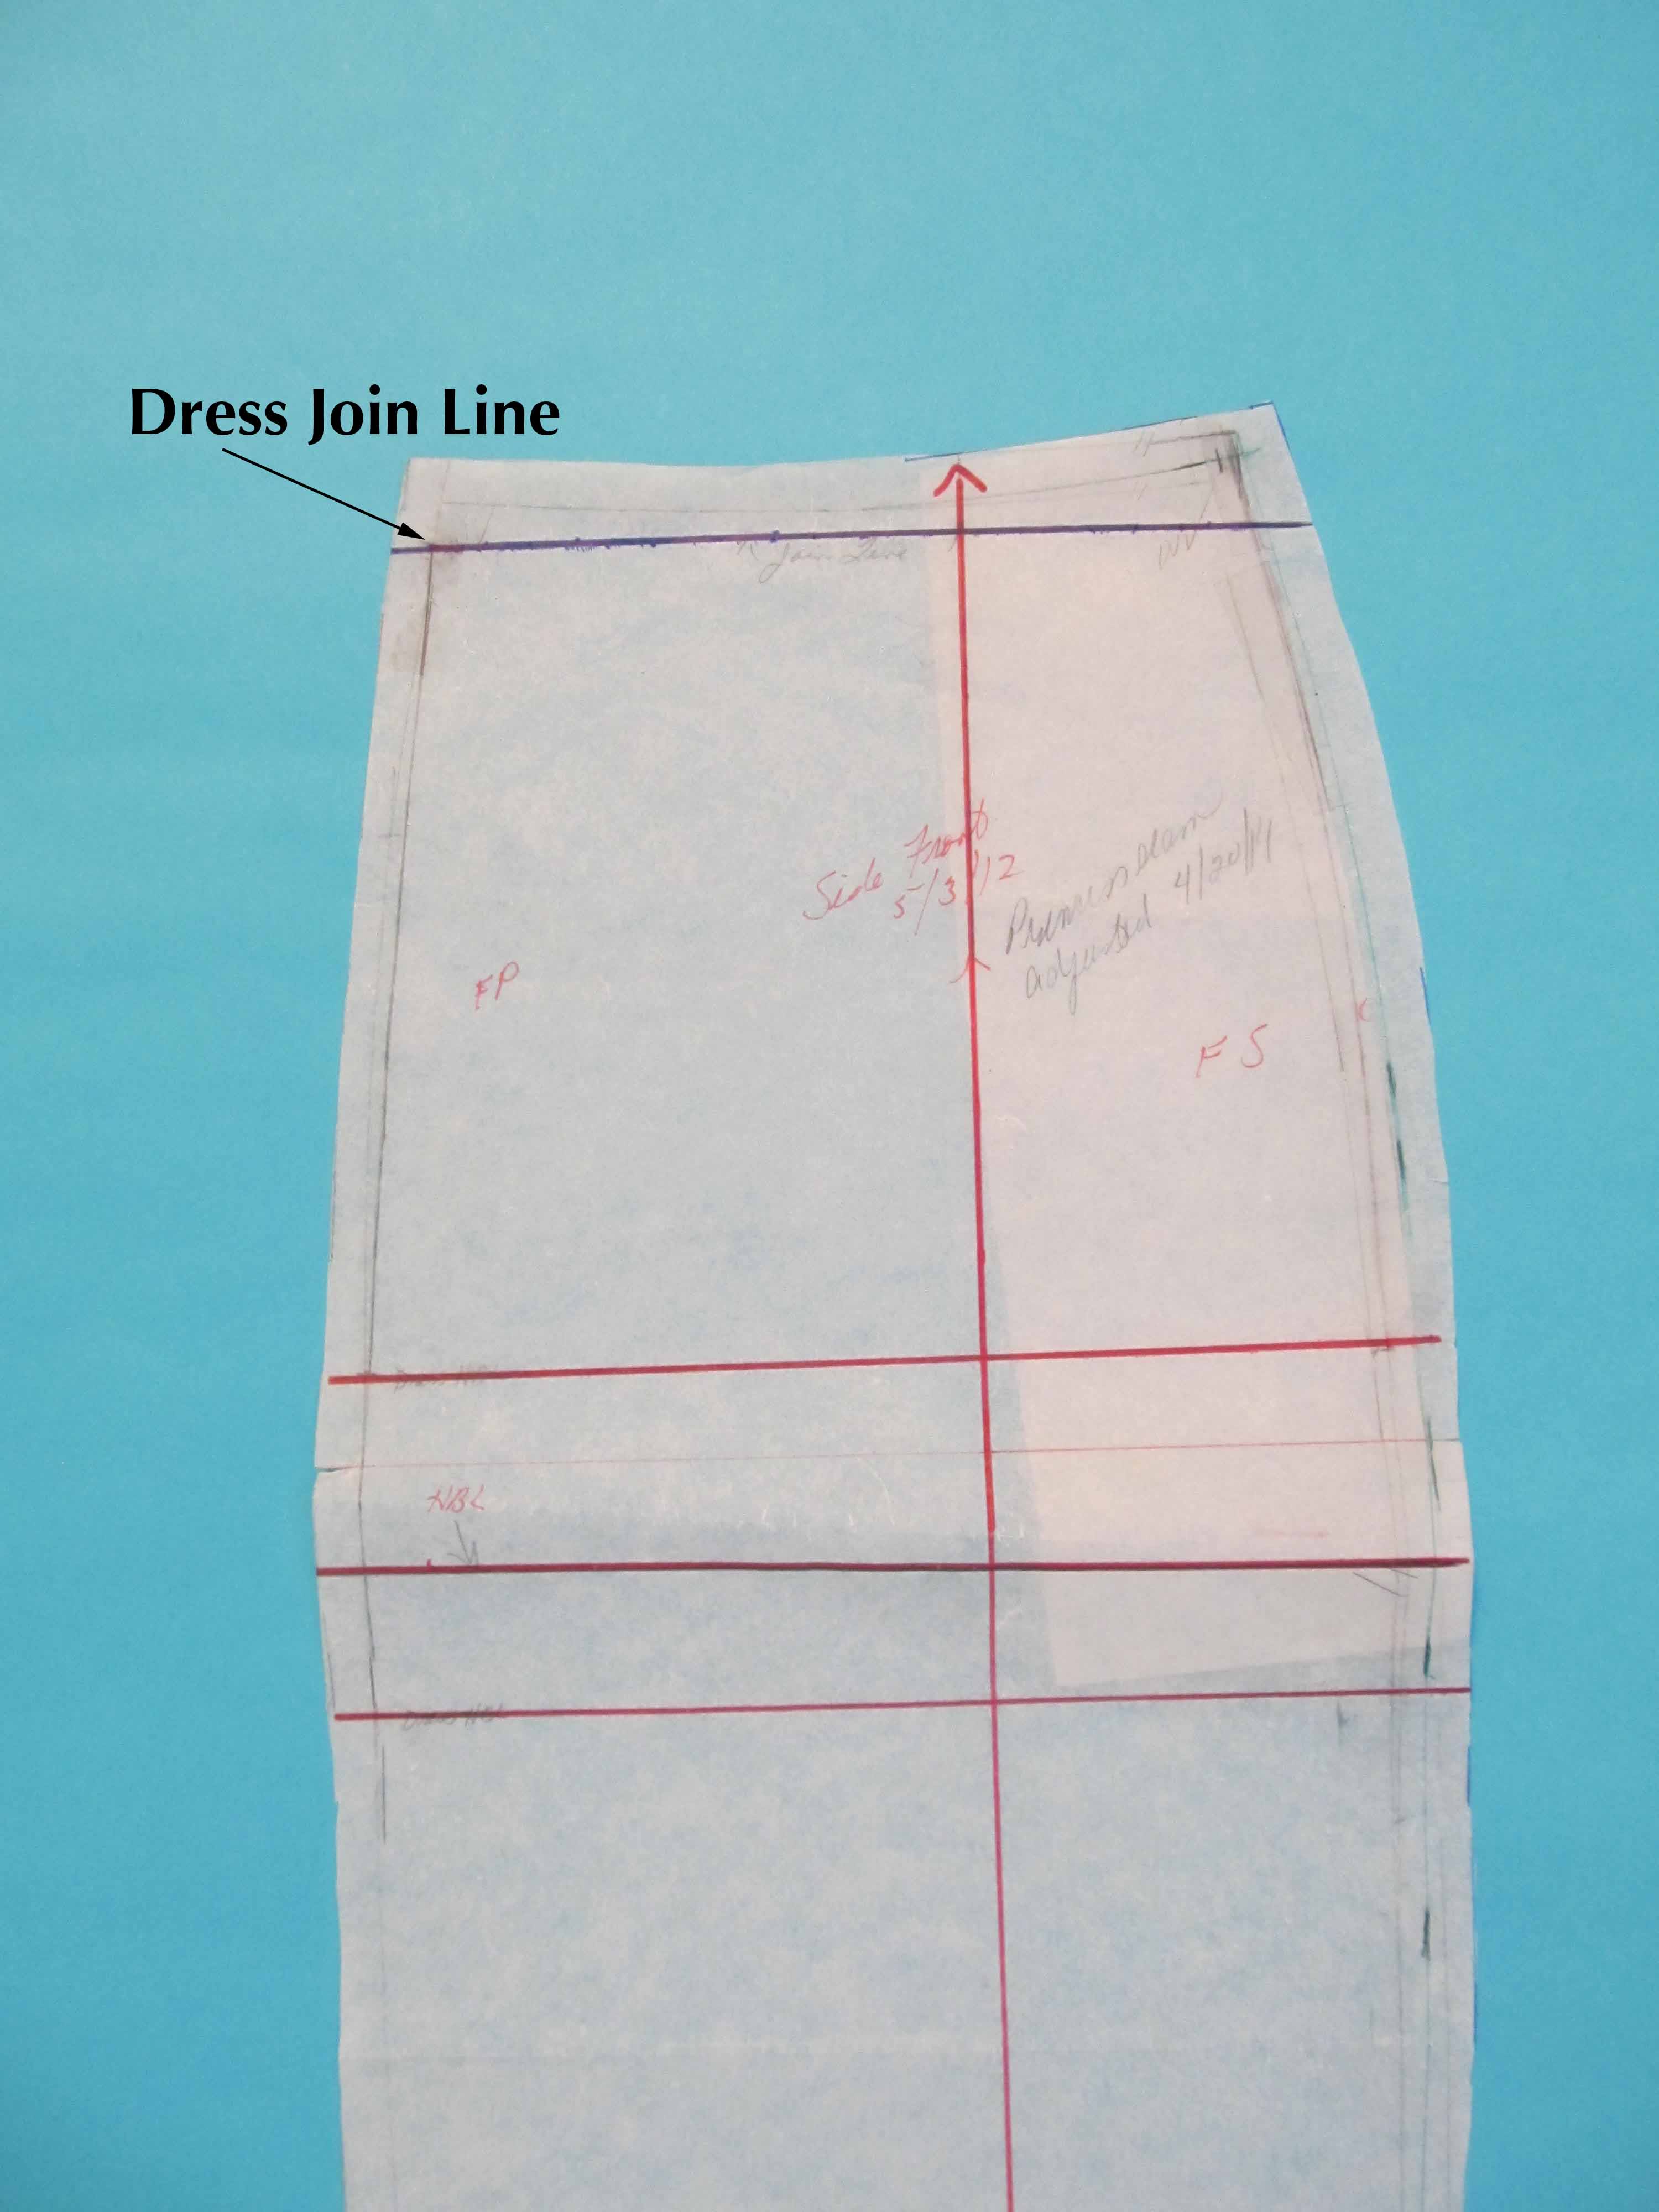
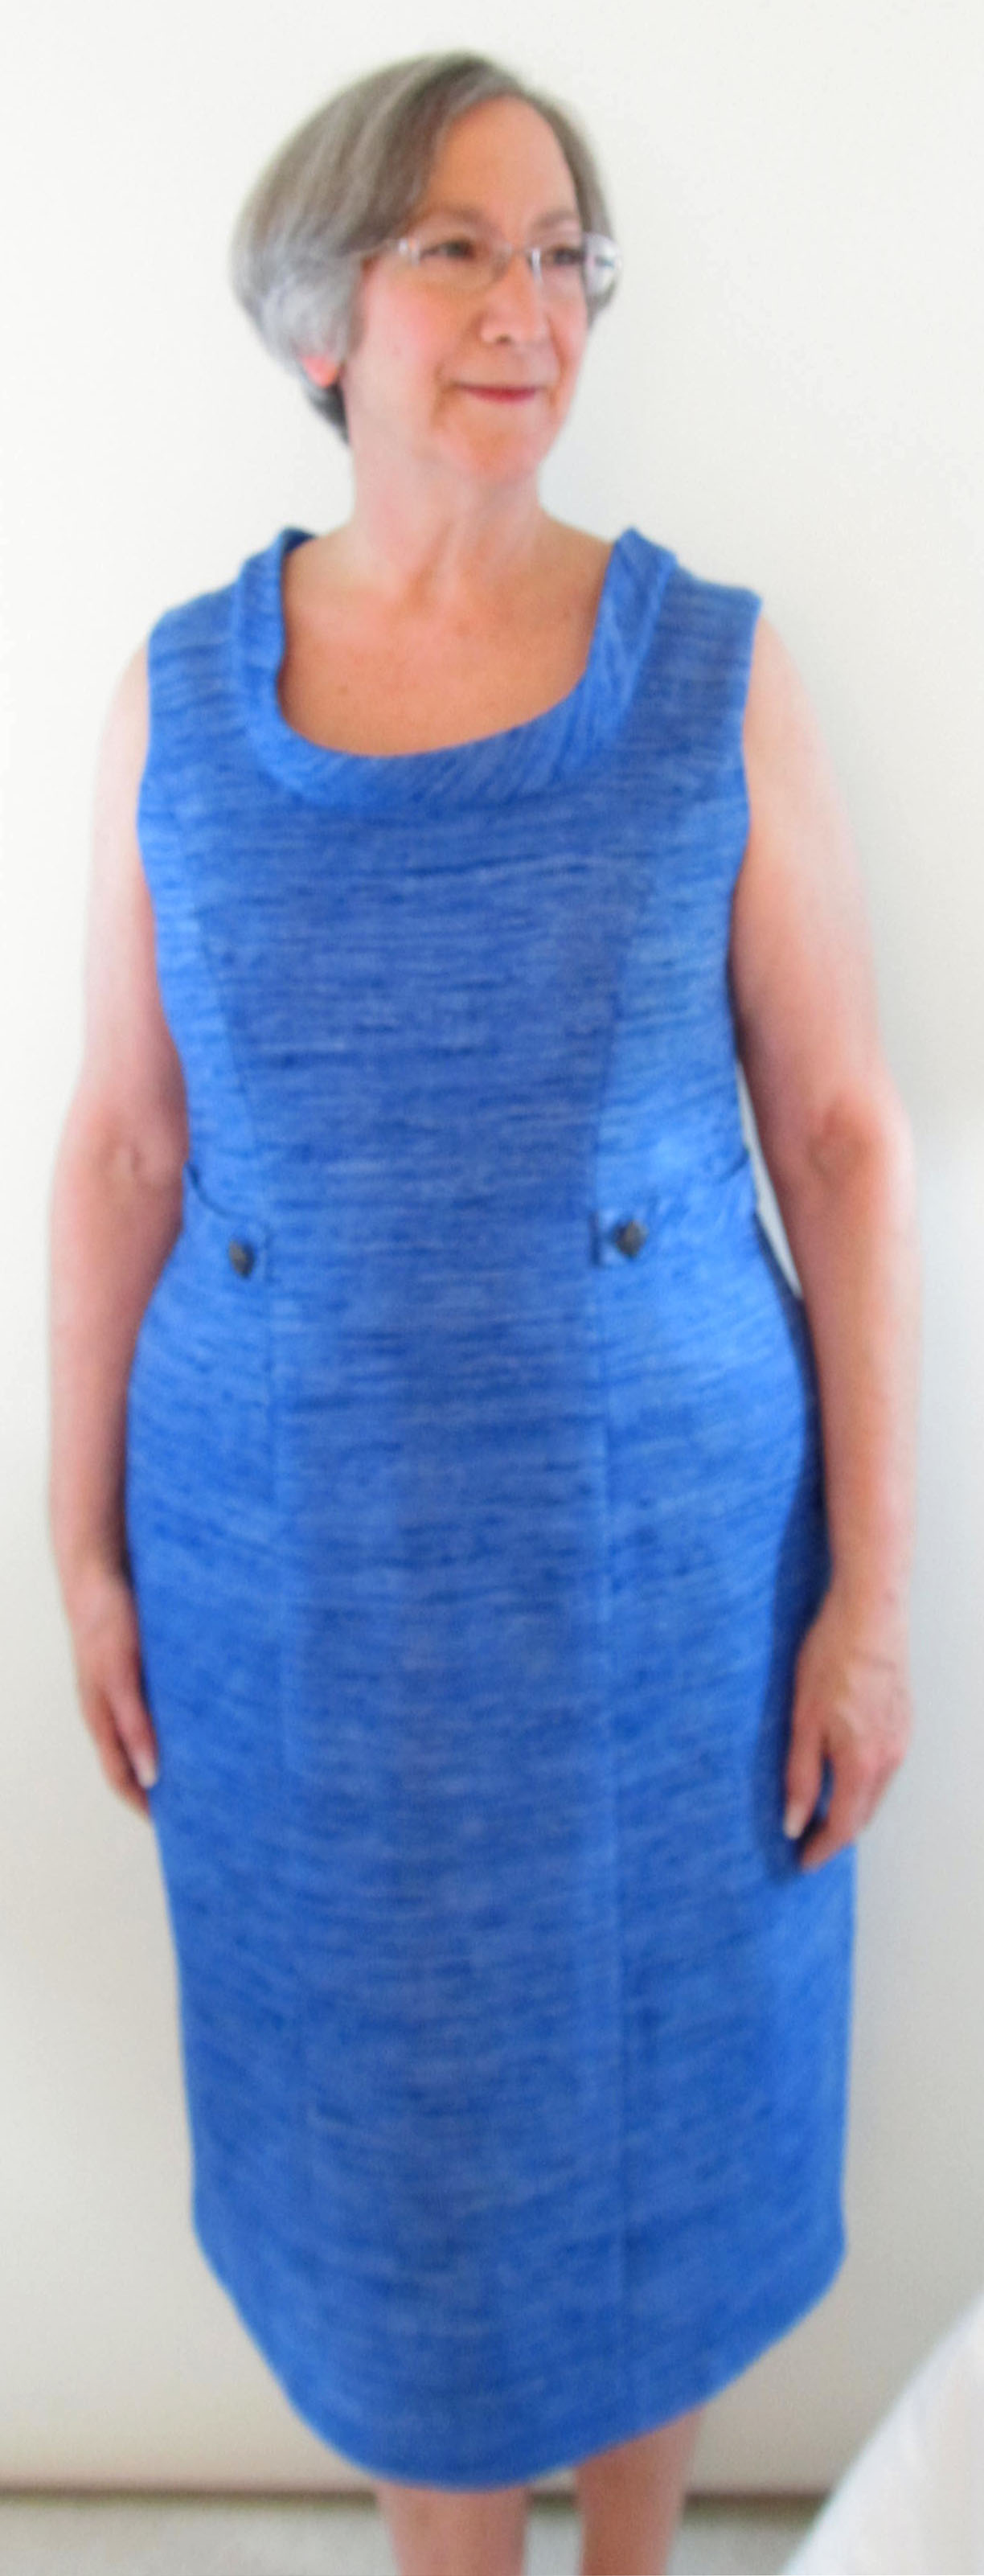
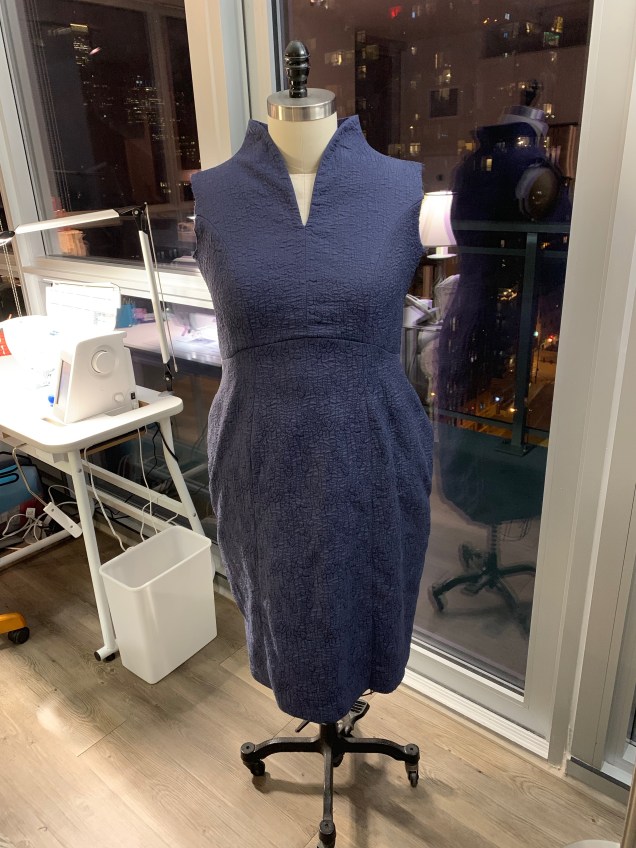
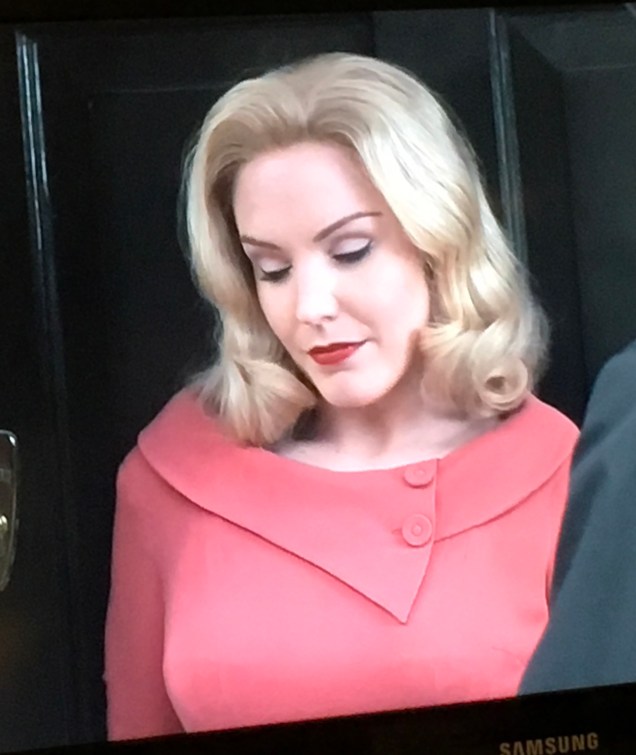
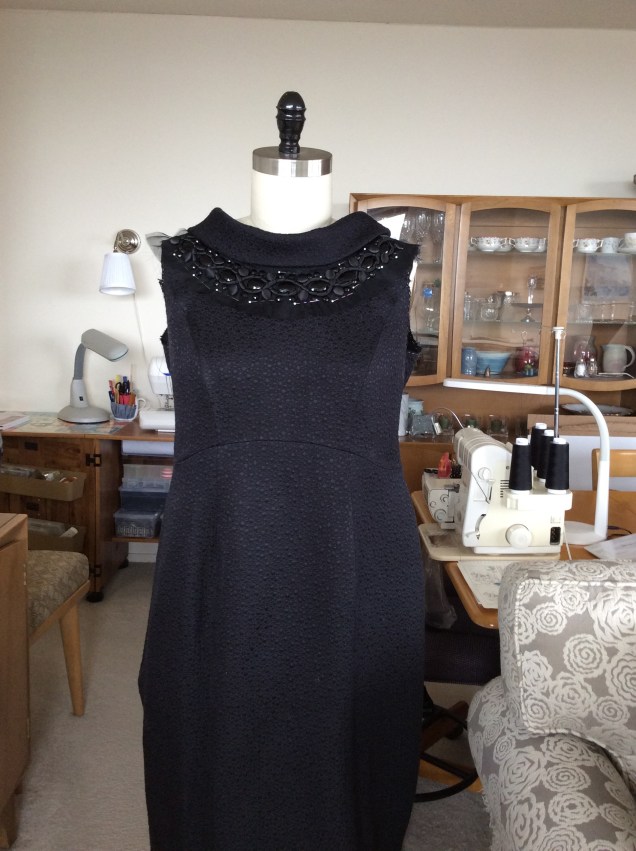
At the top of my “gotta” list was finalizing the design, pattern, fabric, embellishment and construction methods for a Little Black Dress to wear to a wedding in June and, I hope, model in the Haute Couture Club of Chicago fashion show that I’m co-chairing in April. I had chosen a lovely matlesse that I bought at A Fabric Place outside Baltimore (known as Michael’s Fabrics online) when I had worked with Sarah at her home studio a while back. I had questions about whether I should make the collar out of a different fabric and whether I should go with my original plan to add a few black faceted beads or use the fabulous embellishment piece made of beads and covered buttons that I bought at Soutache quite some time ago with no idea what I would do with it.
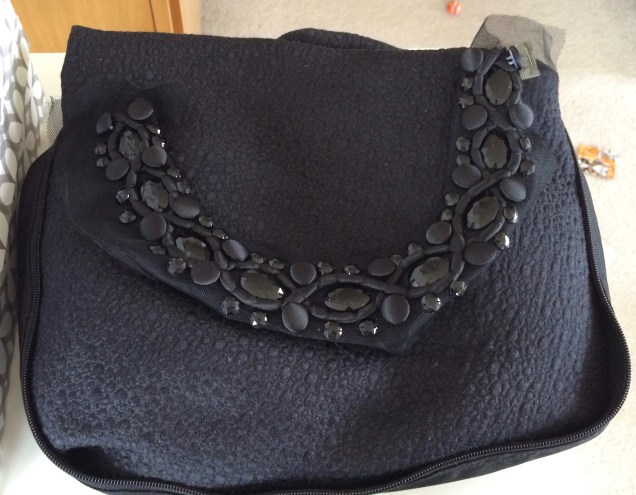
The verdict was to use it on this dress and Sarah demonstrated to the group how I should handle it. The collar will be made of the same fabric as the rest of the dress. I also asked about underlining—yes, with silk organza—and confirmed that I will be using China silk lining.
I also had questions about fabric choice, closure placement and design details for the dress I’m making to wear to the luncheon portion of the upcoming fashion show and to a bridal shower I’m co-hosting the following week. (It’s going to be a ridiculously busy spring). Those questions were answered and I was able to check that item off my list.
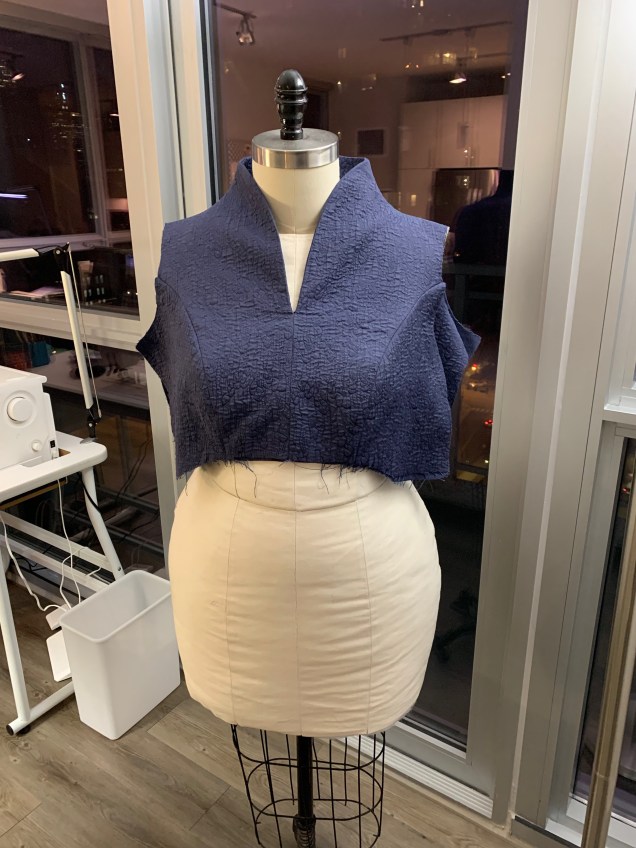
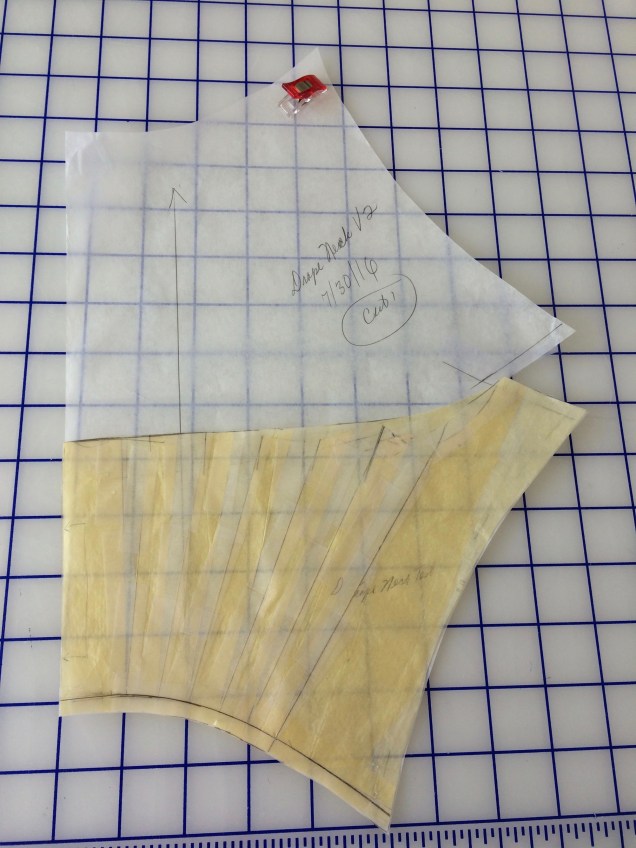
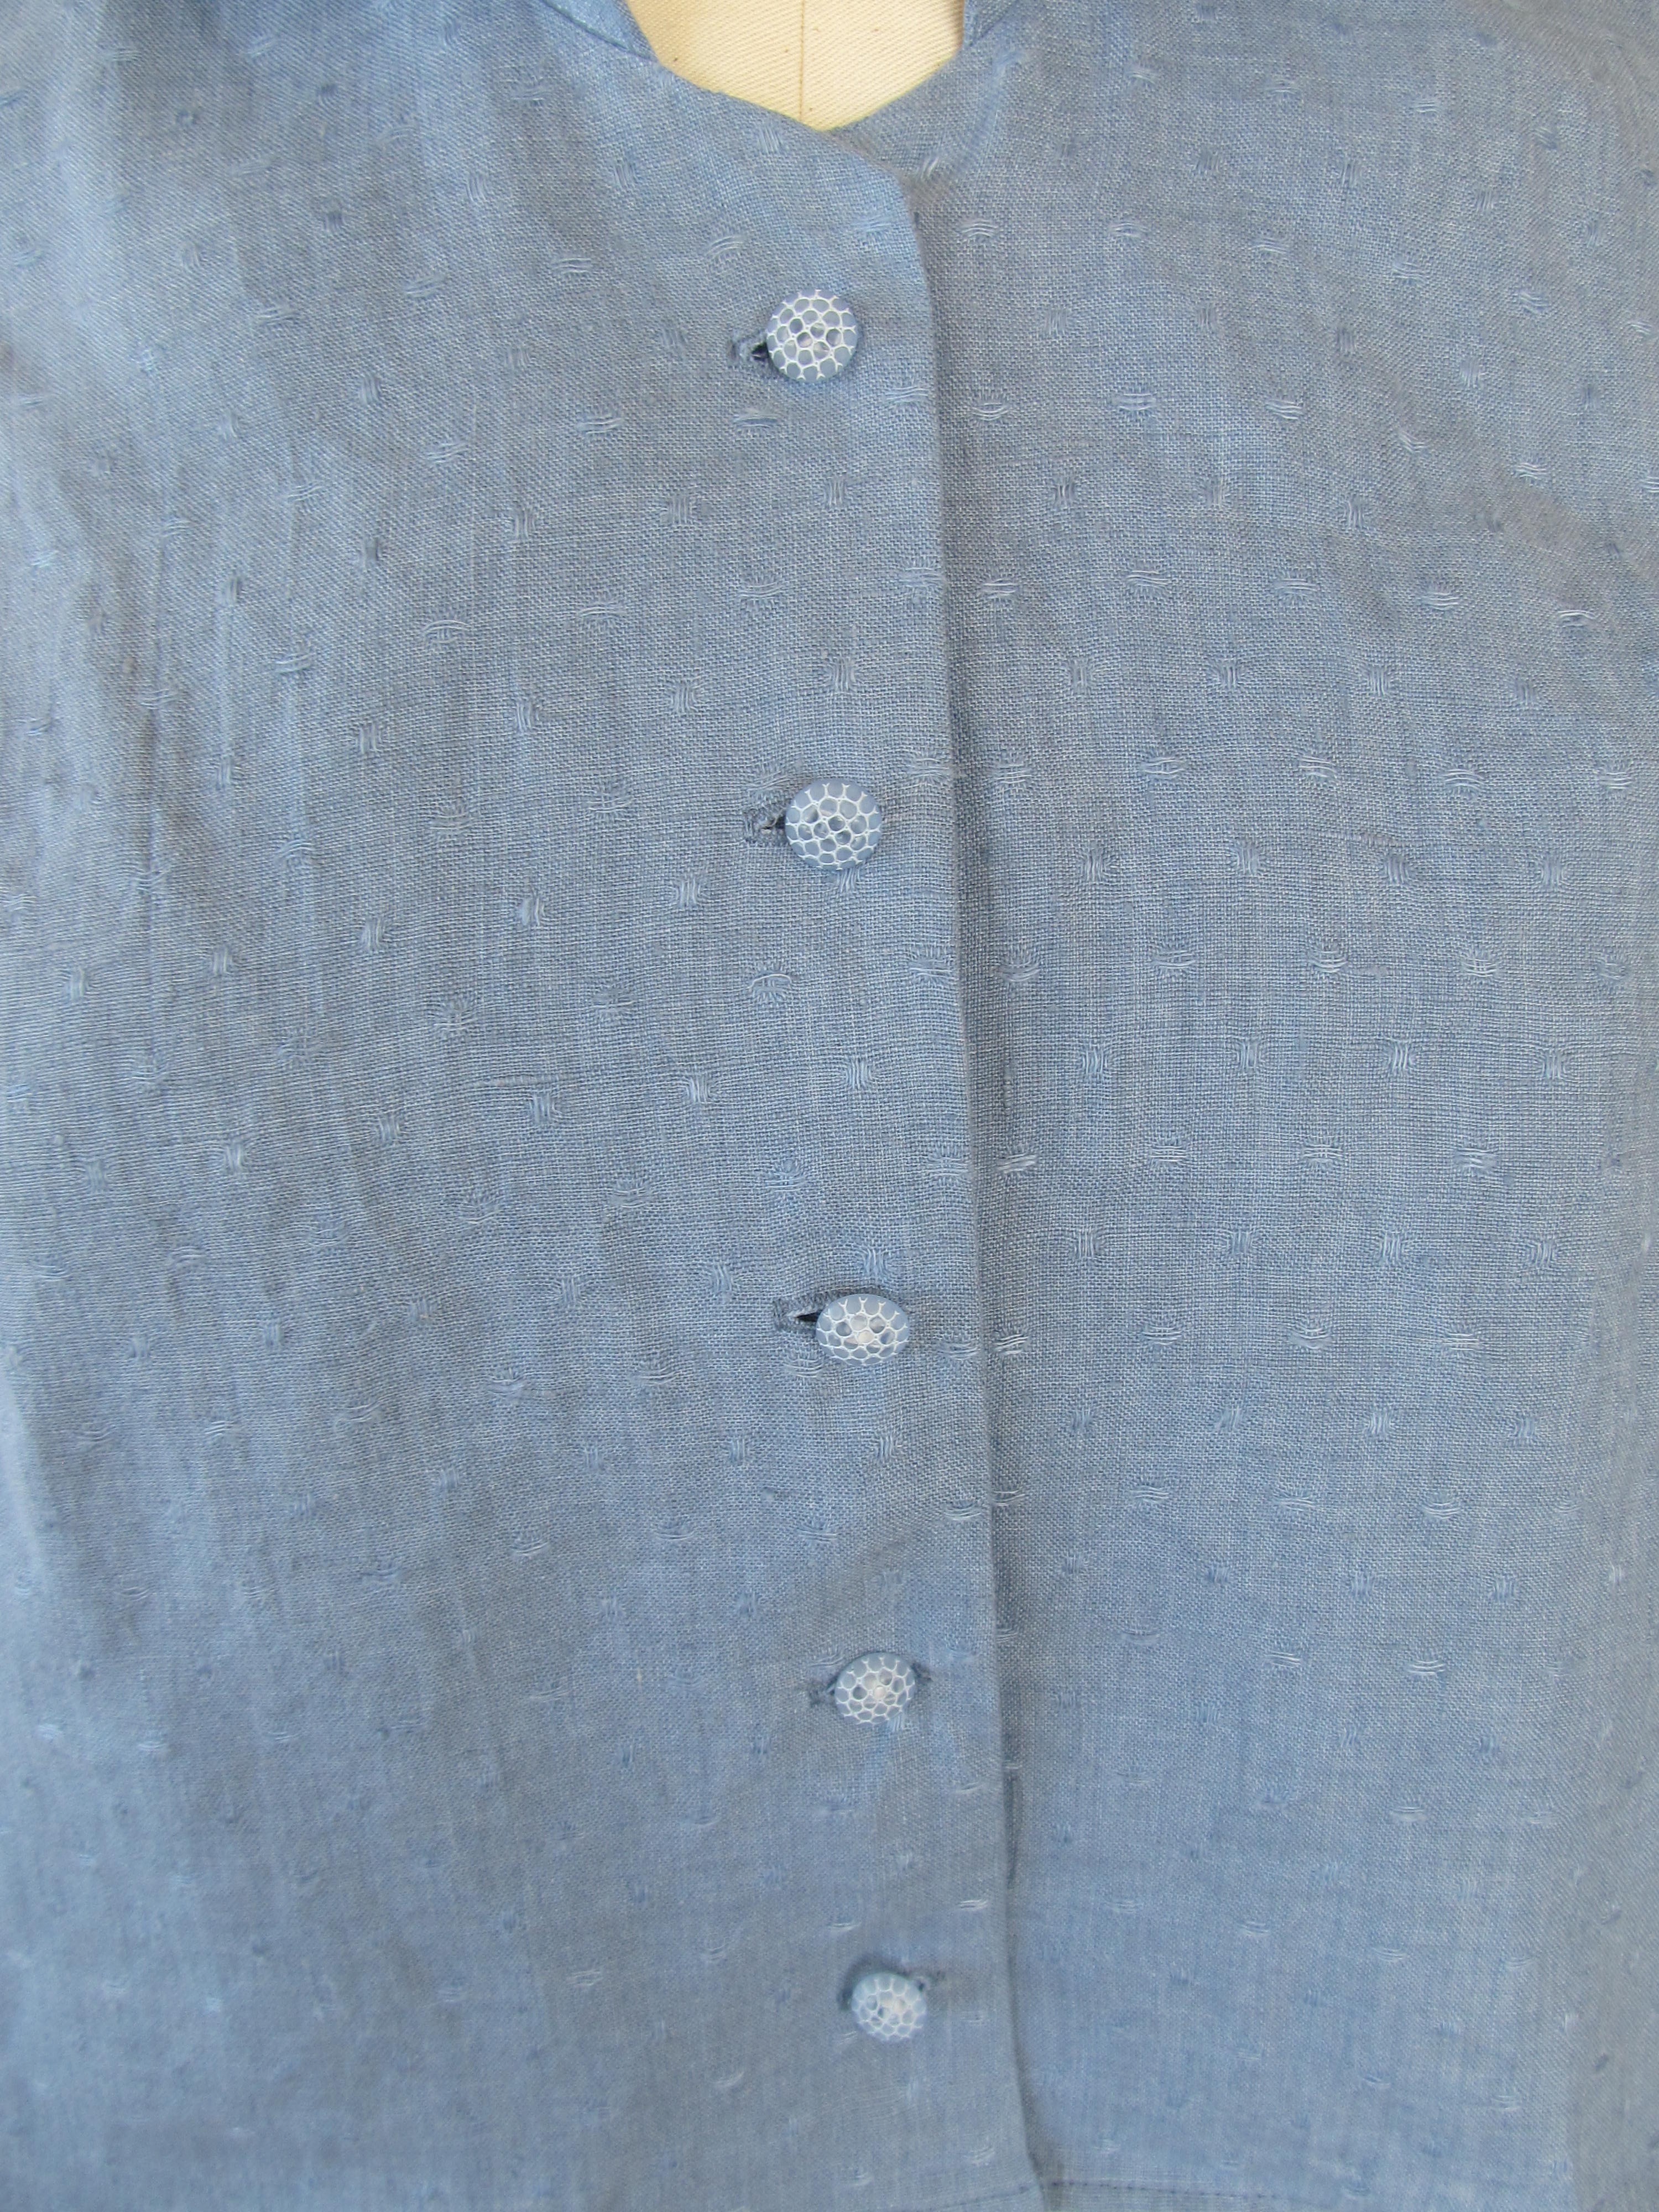
To finalize the design of the LBD, I assembled the muslin pieces that I had cut last fall before the workshop began. The body of the dress is derived from my sheath pattern, which has armscye princess seams. I wanted a curved Empire waist seam that dips lower in the back, but not so low that it reaches waist height and accentuates my most prominent feature. (My derrière draws quite enough attention without any help.) I wanted to use the 60’s-esque collar that I’ve worked with before, only I wanted it to sit higher in the front and extend a little farther out on my shoulders and then follow a dip in the neckline in back and trail off in points. In preparing the muslin, I made the front of the neckline what I thought it would end up being, cut the collar longer than I would need and only attached it from the front to the shoulders so that Sarah could drape it.
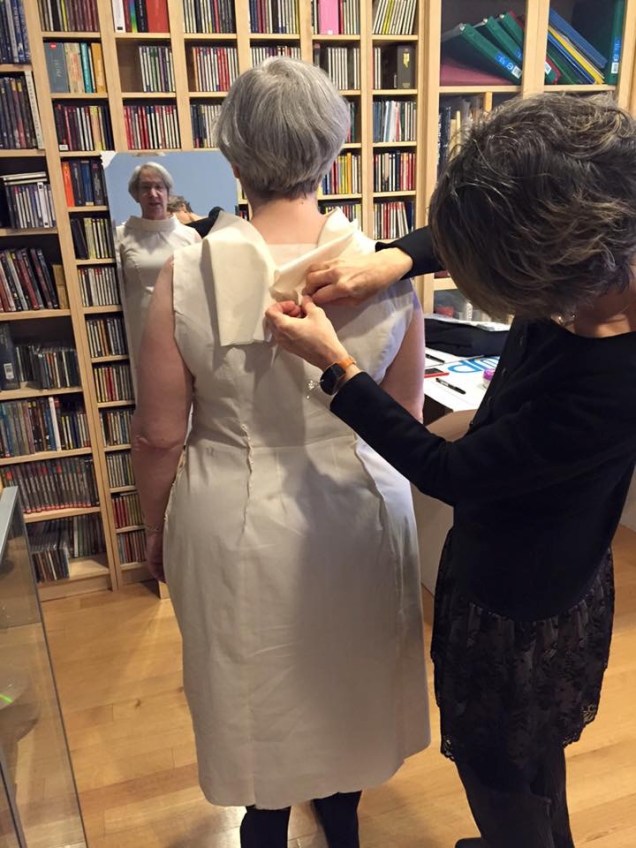
After some testing, we decided to make the front neckline a bit wider and Sarah worked her magic on the back.
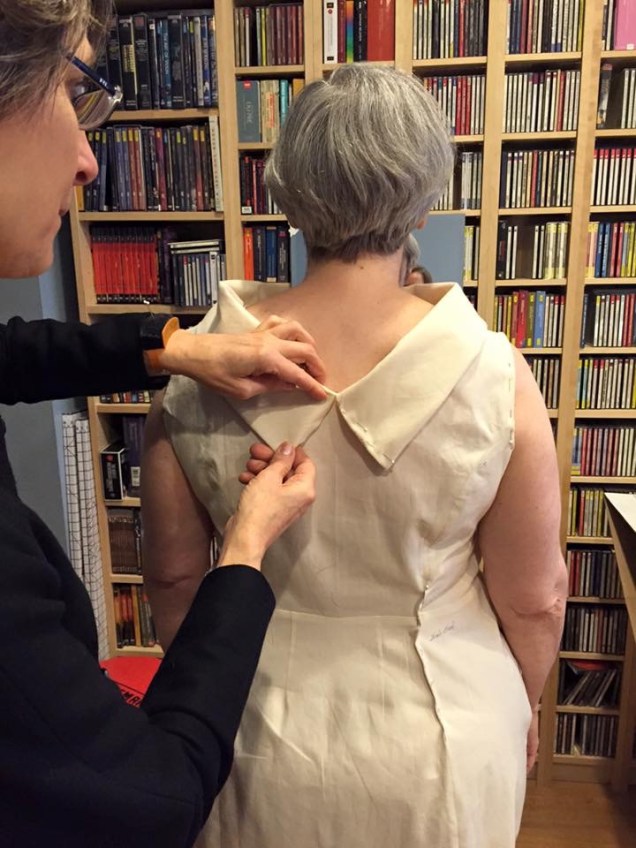
This is exactly as I had envisioned it!
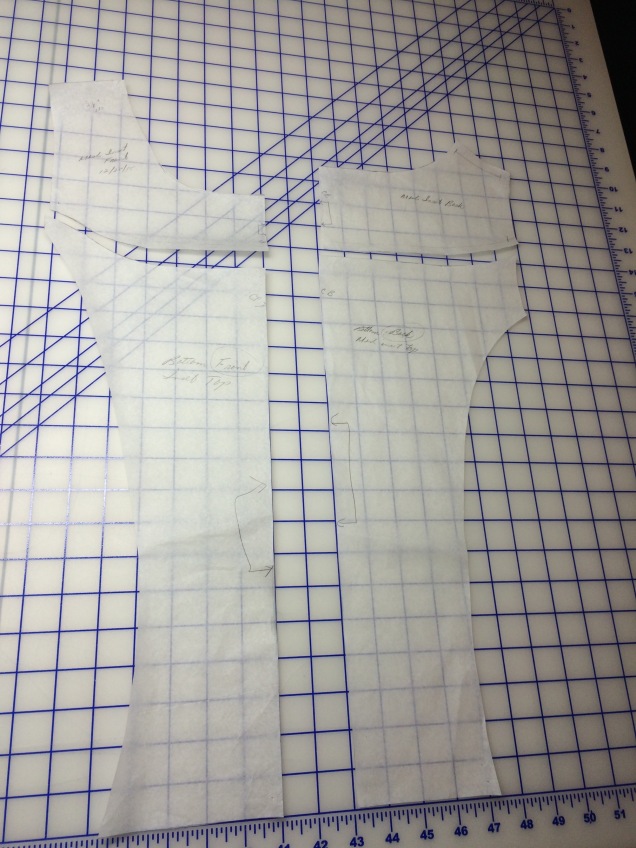
The next step was to transfer the adjustments to the pattern. This is an area where I still am prone to doubts and confusion. As the workshop progressed, I got more confident about drawing new lines with the Fashion Ruler that don’t pick up every single pin placement mark. (It’s only pencil! I have a lifetime supply of erasers!) I’m just so worried about making a mistake that will throw off the entire garment when I sew it. I got better at this as the workshop progressed and was able to draw lines where I thought they should go. This confidence came from knowing I could ask Sarah to check my work right away. Call it a crutch if you must. I prefer security blanket. In any event, the whole point of participating in these workshops is that we don’t have to guess and compound our errors until we end up with a mess.
Anyway, Sarah ended up doing much of the pattern work on the LBD and I did more on my own on the next project.

The final step was to test out the collar on a quick mock-up of the neckline on Day 2 of the workshop. It worked perfectly. I’m now ready to cut the fashion fabric!
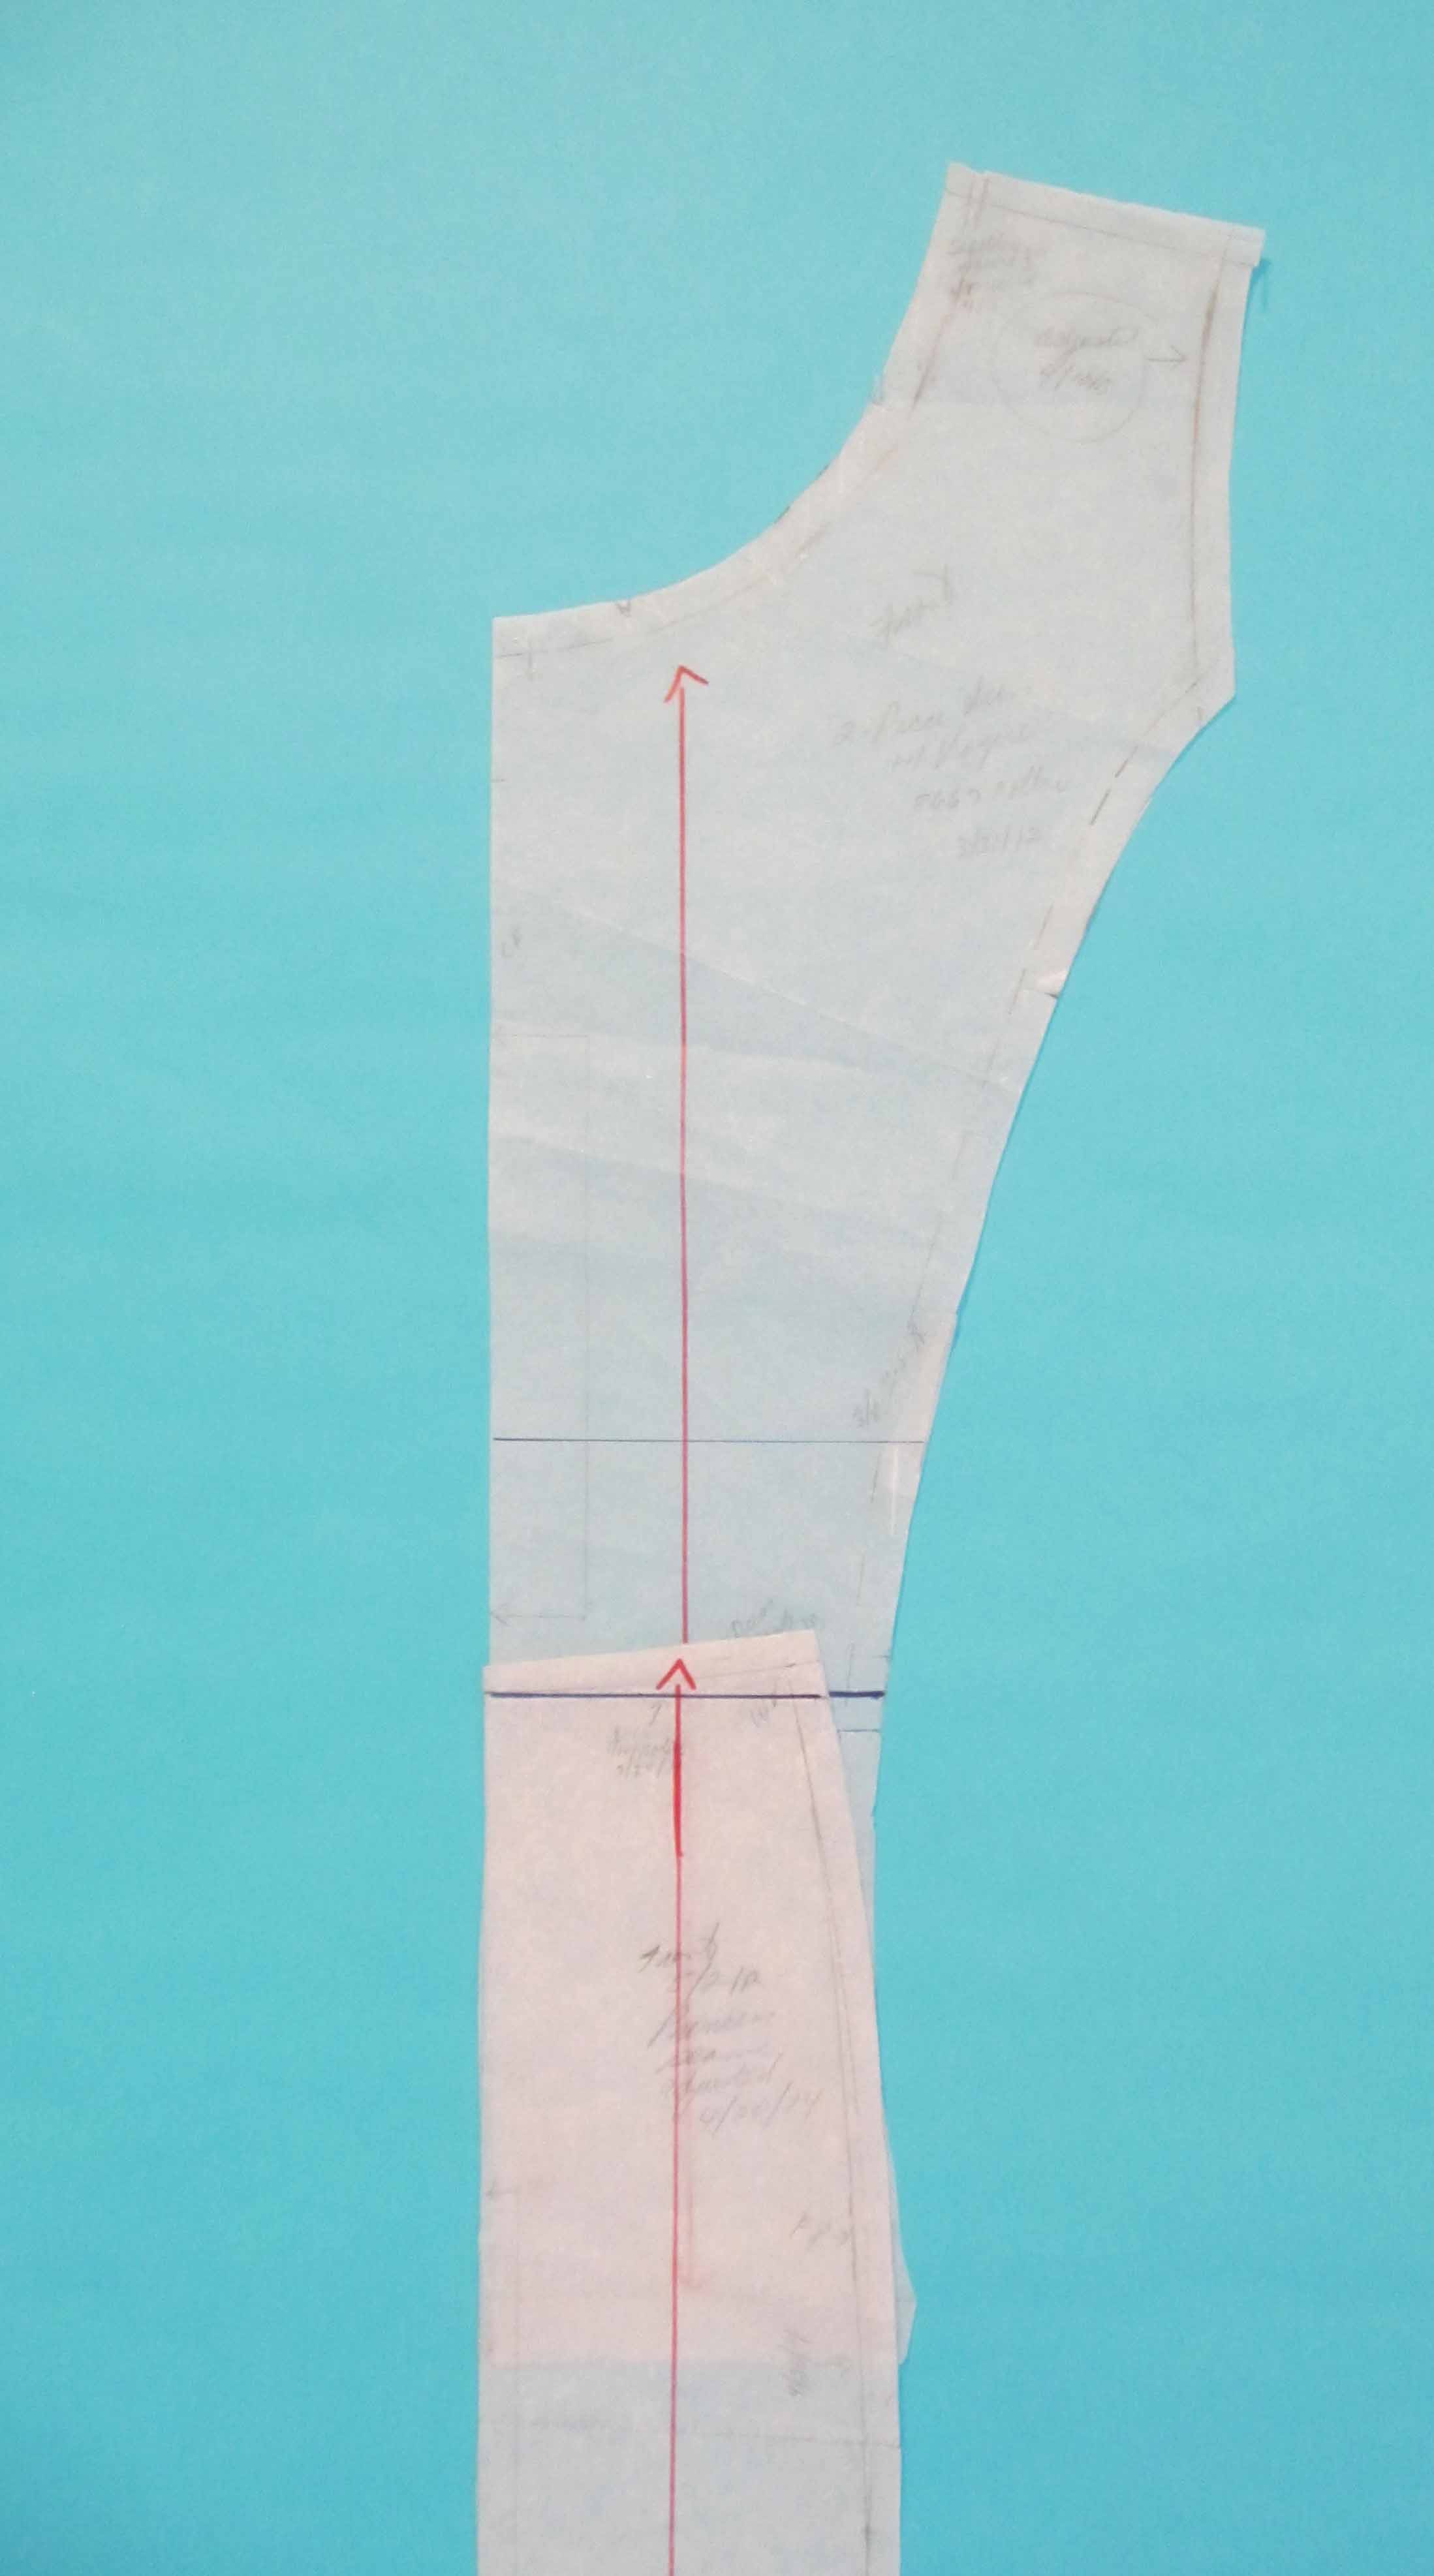
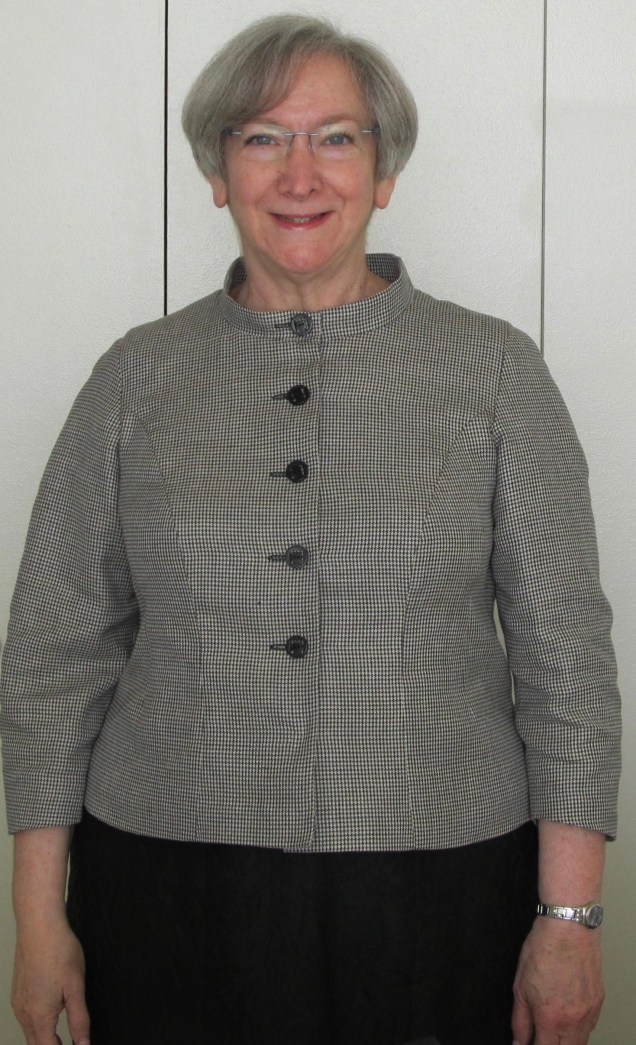
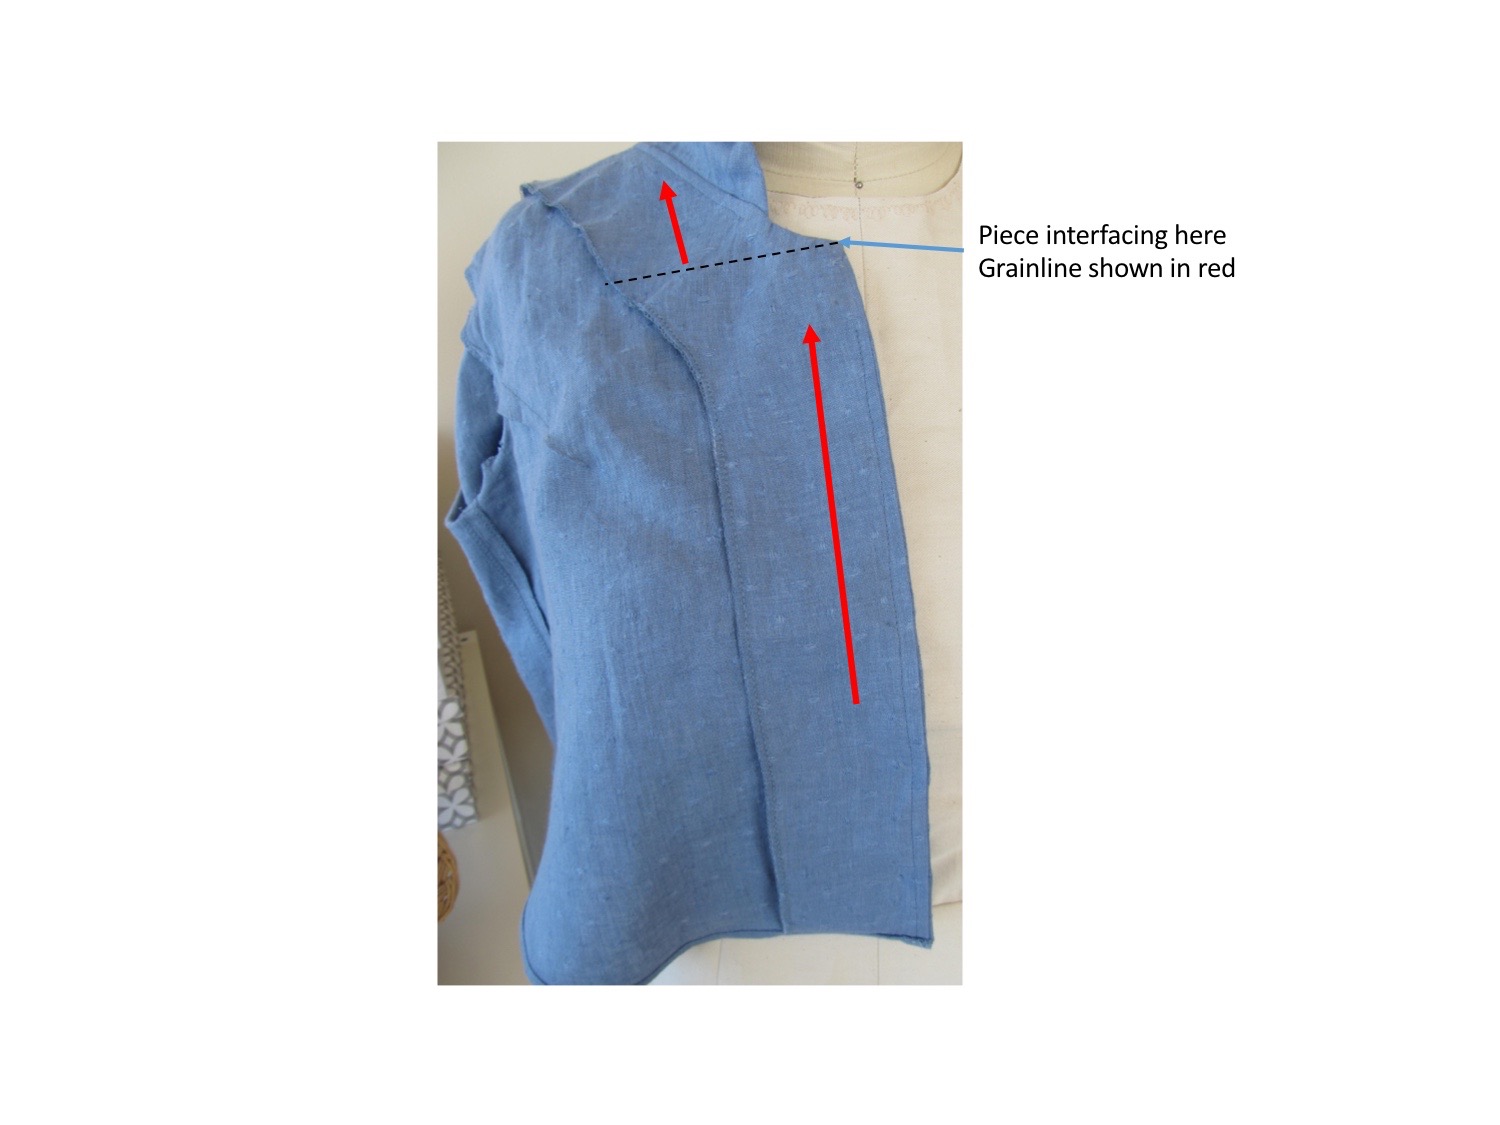
My next project was to address yet another issue that has cropped up with my two-piece sleeve pattern. When I attended Sarah’s workshop last November, I corrected my basic two-piece sleeve pattern so that it fit well and had a total of ¾” ease evenly divided between the front and back when it is set into my basic jacket pattern. However, I’ve been using this as my all-purpose sleeve pattern and when I walked my pattern pieces to make a two-piece dress last month I noticed that the sleeve pattern had too much ease and it was not evenly distributed front to back. Both garment patterns were derived from my basic fitting bodice pattern but there have been some adjustments along the way and now there are differences. When I made this discovery, I prepared muslin pieces for my fitted blouse pattern and my topper pattern and brought the lining pieces for my two-piece dress bodice, along with all three patterns. I also started the project of making a full set of pattern pieces for each of my garments, instead of reusing side panel pieces and sleeves for multiple garment patterns.
I tried to make a mock-up of the sleeve before the workshop by putting in one adjustment to the sleeve pattern to even out distribution of ease, but I did what I almost always do—I added to the piece that was supposed to be made smaller and subtracted from the piece that was supposed to be made larger. I’m amazed at how often I defy the odds in that annoying way. Sarah straightened me out and I made a new test sleeve.
I now have a two-piece sleeve pattern that works as it should for my fitted blouse pattern, my two-piece dress and my topper pattern. The topper pattern is going to be a building block for upcoming blouse projects.
That brought me to the end of my must-have list. Amazingly, I was able to make substantial progress on my extra credit.
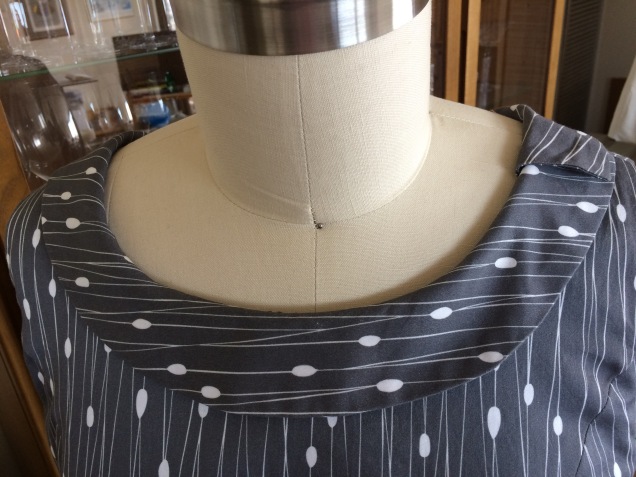
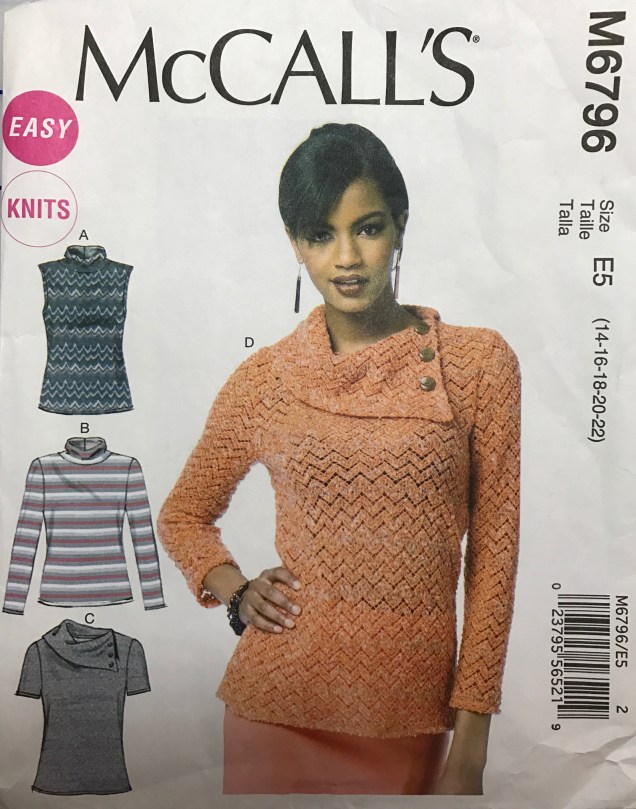
I consulted with Sarah about my plans for developing a “flowy” blouse pattern from my topper pattern for a lovely teal hammered silk and a gray and cream striped rayon that have been aging in my collection for quite some time.
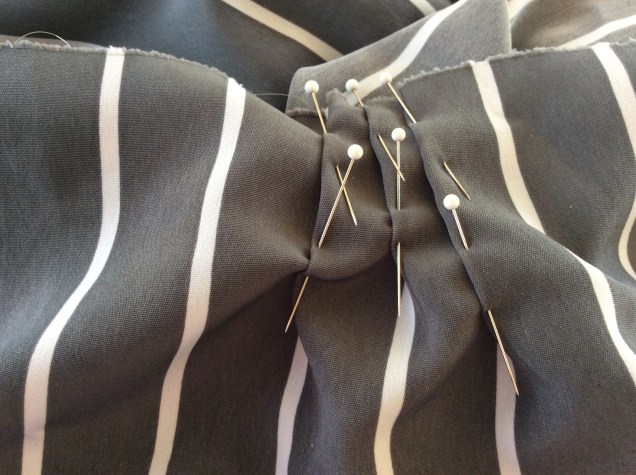
I can’t get the true color of the silk, but the picture is a close-up of its texture. I’ve been wanting to do that trick with the rayon that uses stitched-down tucks to hide the stripes at the shoulder, extending down just a bit. We decided I’d do that at the sleeve cap as well.
The blouse will use the front pleat from Vogue 1412 that I used in my shirtdress and have a shirt-tail hem or a curved hem with side vents.
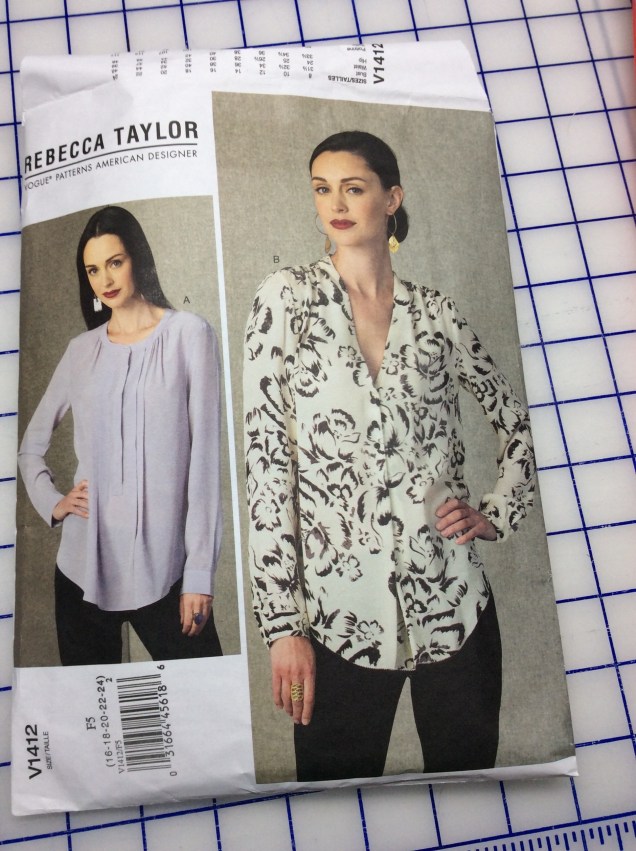
The striped version will have a variation on the neckline from View B of Vogue 1412 and the teal silk will have the shirtdress neckline and collar. For both, I wanted sleeves similar to the one in Vogue 1367, a scaled-back poet’s sleeve. 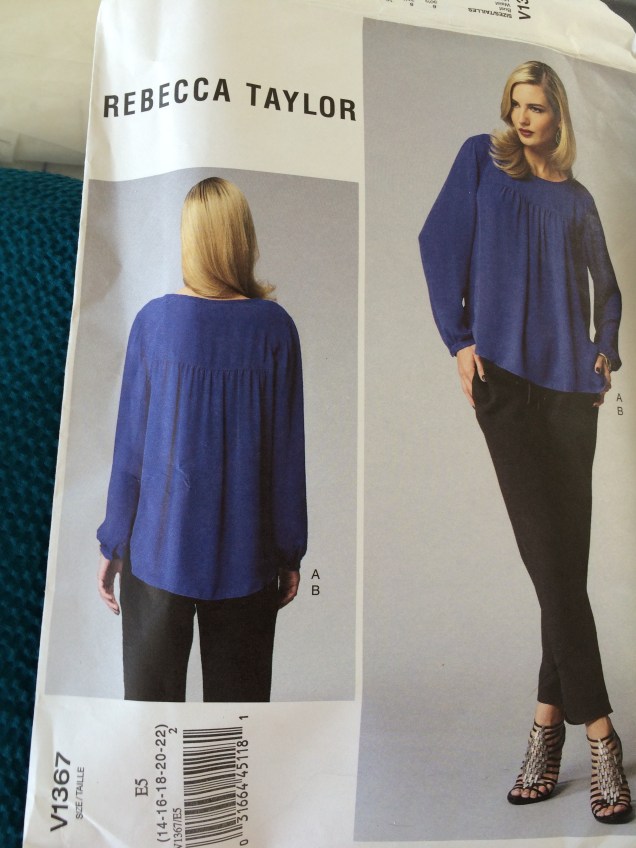
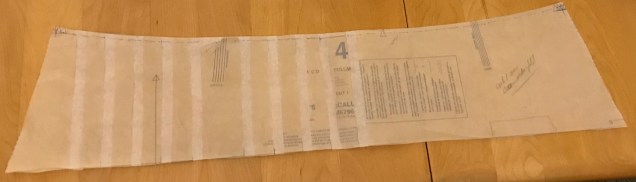
Development of the sleeve required me to merge the two-piece sleeve pattern together and make the necessary design changes. Sarah worked closely with me to get this done. I then mocked it up and Sarah worked on getting it into the topper armhole.

We decided on a series of tucks, which are going to be a lot of work but will achieve the effect I’m after. I now have a pattern for the sleeve and cuff and instructions for working with the tucks.
Sarah took this opportunity to give us a demo on her method for attaching a continuous sleeve placket using a bias strip of fabric.
With this checked off my list, I couldn’t believe there were still a couple of hours left in the workshop. I started on my second “extra credit” project, which is to draft a trumpet skirt. The shape will be similar to this picture, but without godets.

I got a little bit of the way into it, but realized I was tired and that would make me prone to even more mistakes than usual. Still, I have a process plan and Sarah answered my dumb questions about the pattern work so I can pick this up after my “gotta” sewing projects are done.
As always, the workshop time flew by and all too soon it was time to say good-bye to Sarah and get back to the real world where sewing and design have to share time with earning a living and volunteer commitments. I’m really amazed at how much I accomplished and I have renewed energy around my projects. All that, plus I got to spend time with a group of talented, dedicated home sewers who always inspire me and never fail to offer encouragement. Who could possibly ask for more?


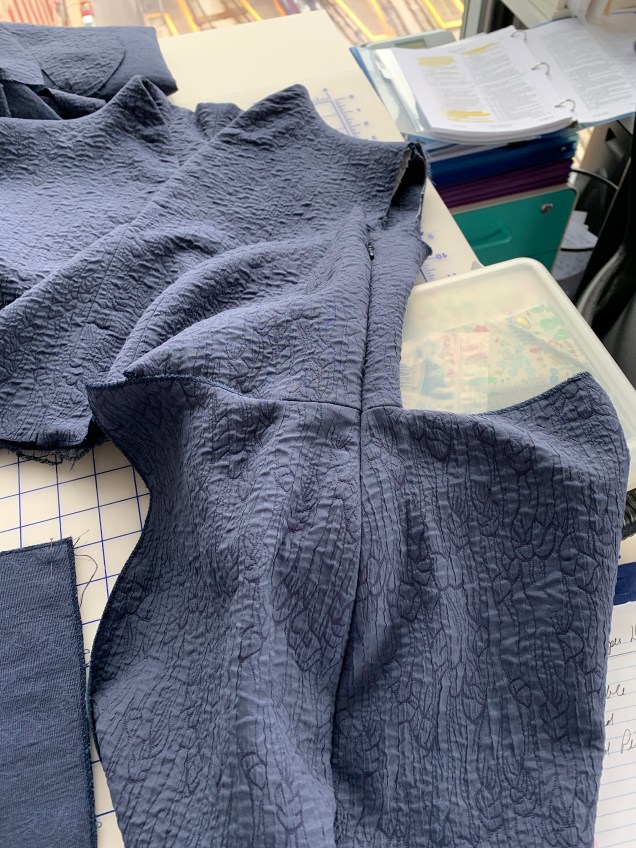


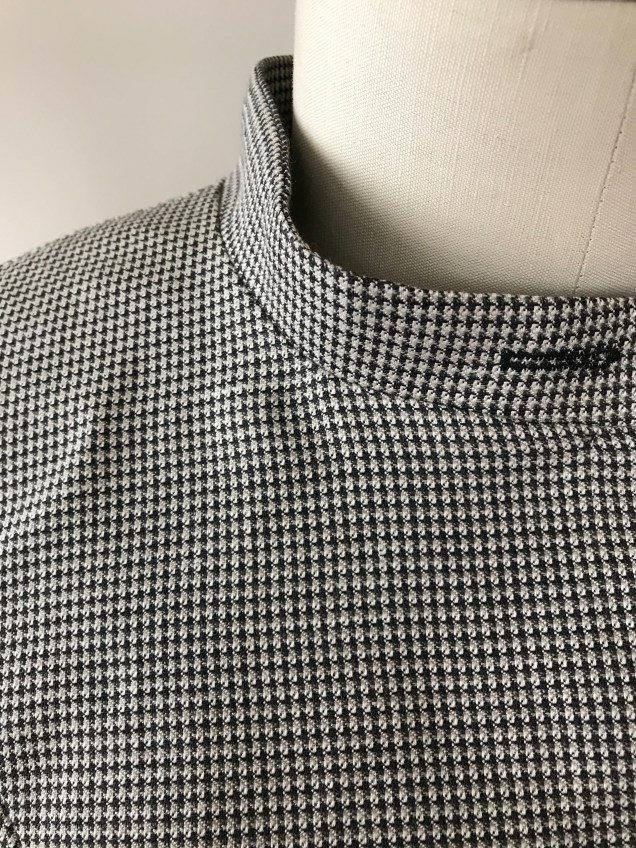


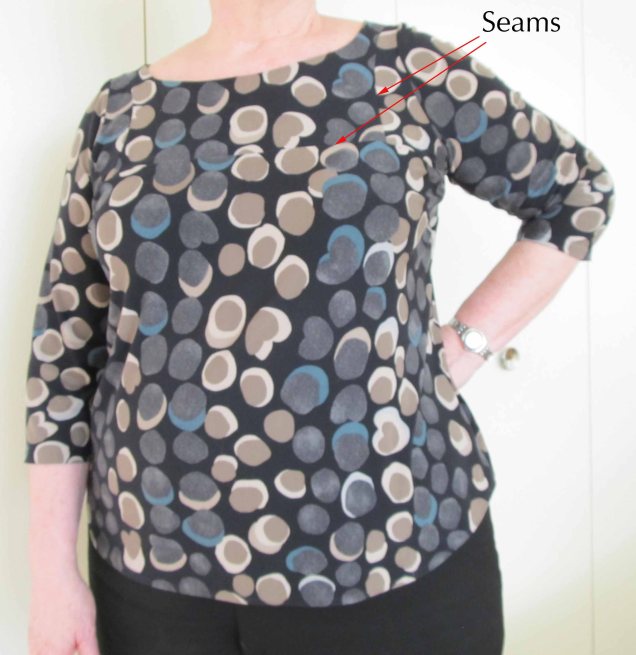


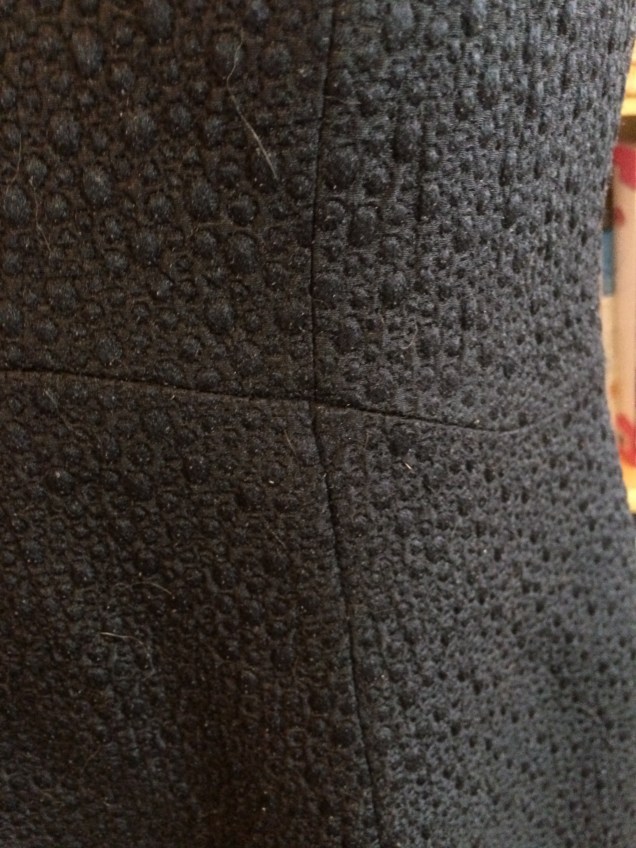
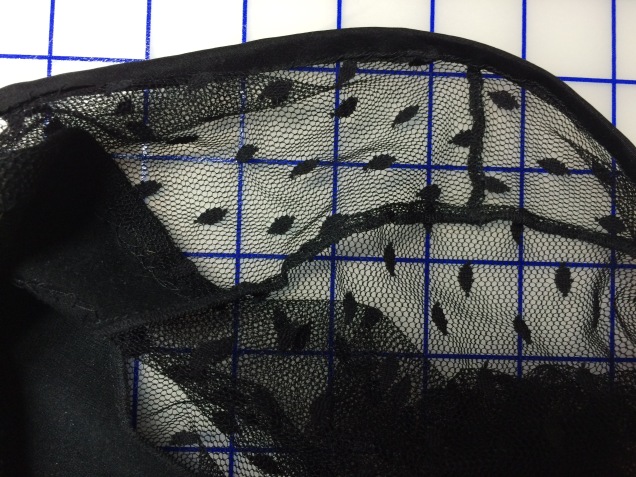
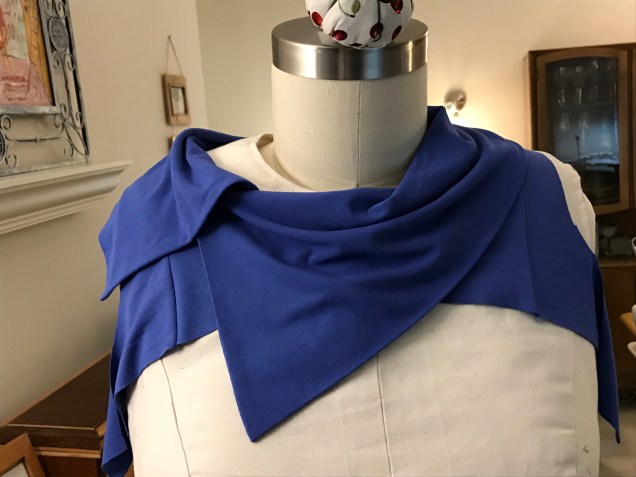
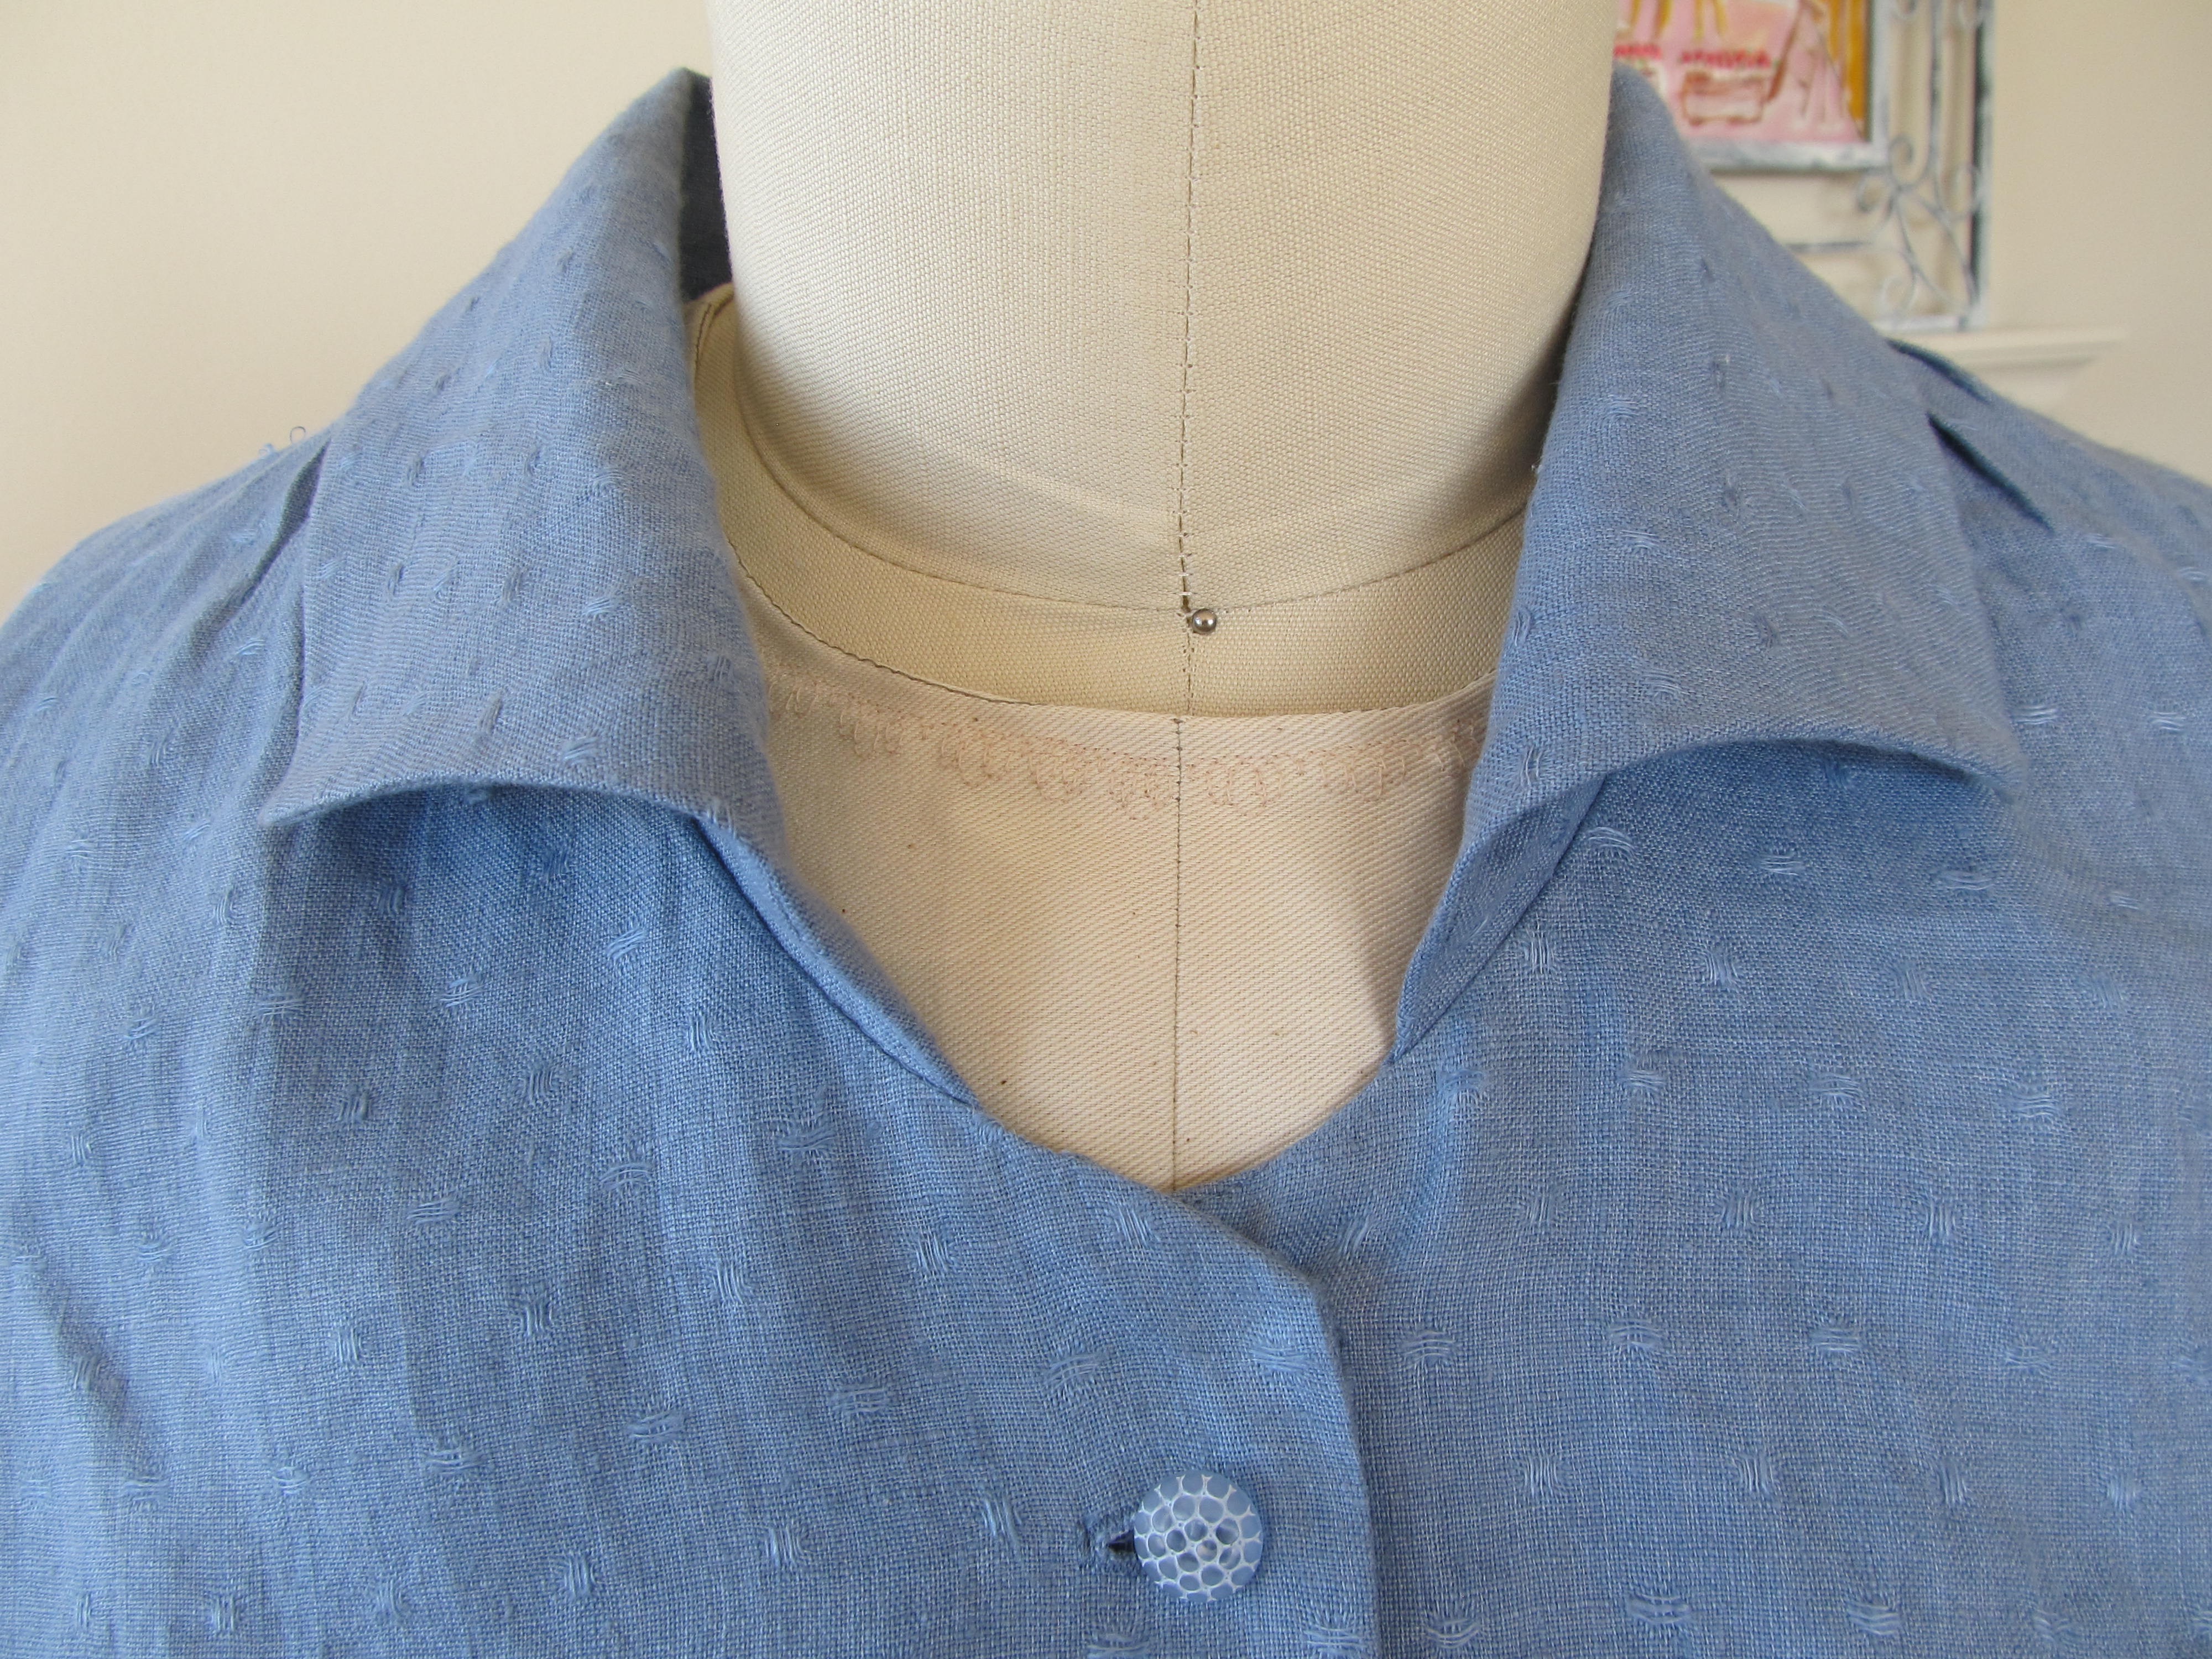
 It’s not marked in this picture, but the straight line on the left is Center Front, which is cut on the fold of the fabric. That “V” at the shoulder was the bit I had found intimidating. From a patternmaking point of view. it’s really no big deal. It’s what forms naturally when melding the two pieces together. Construction – especially on a serger – can be a little tricky.
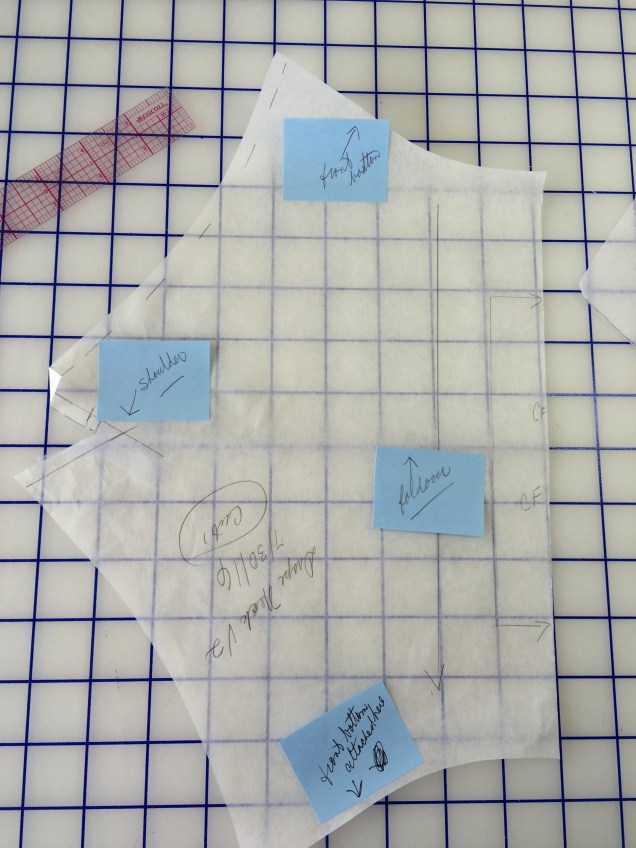


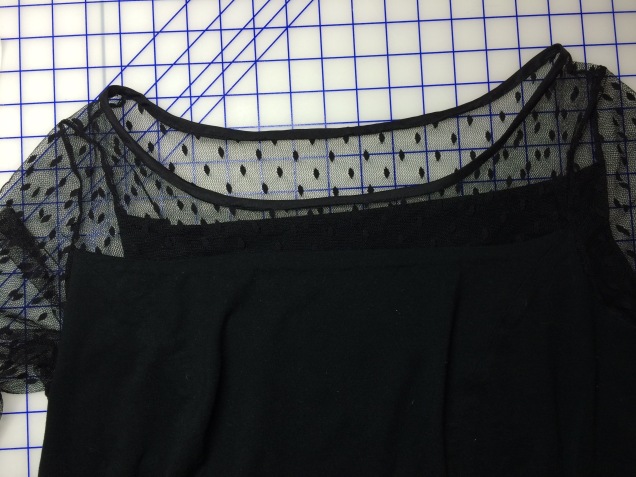
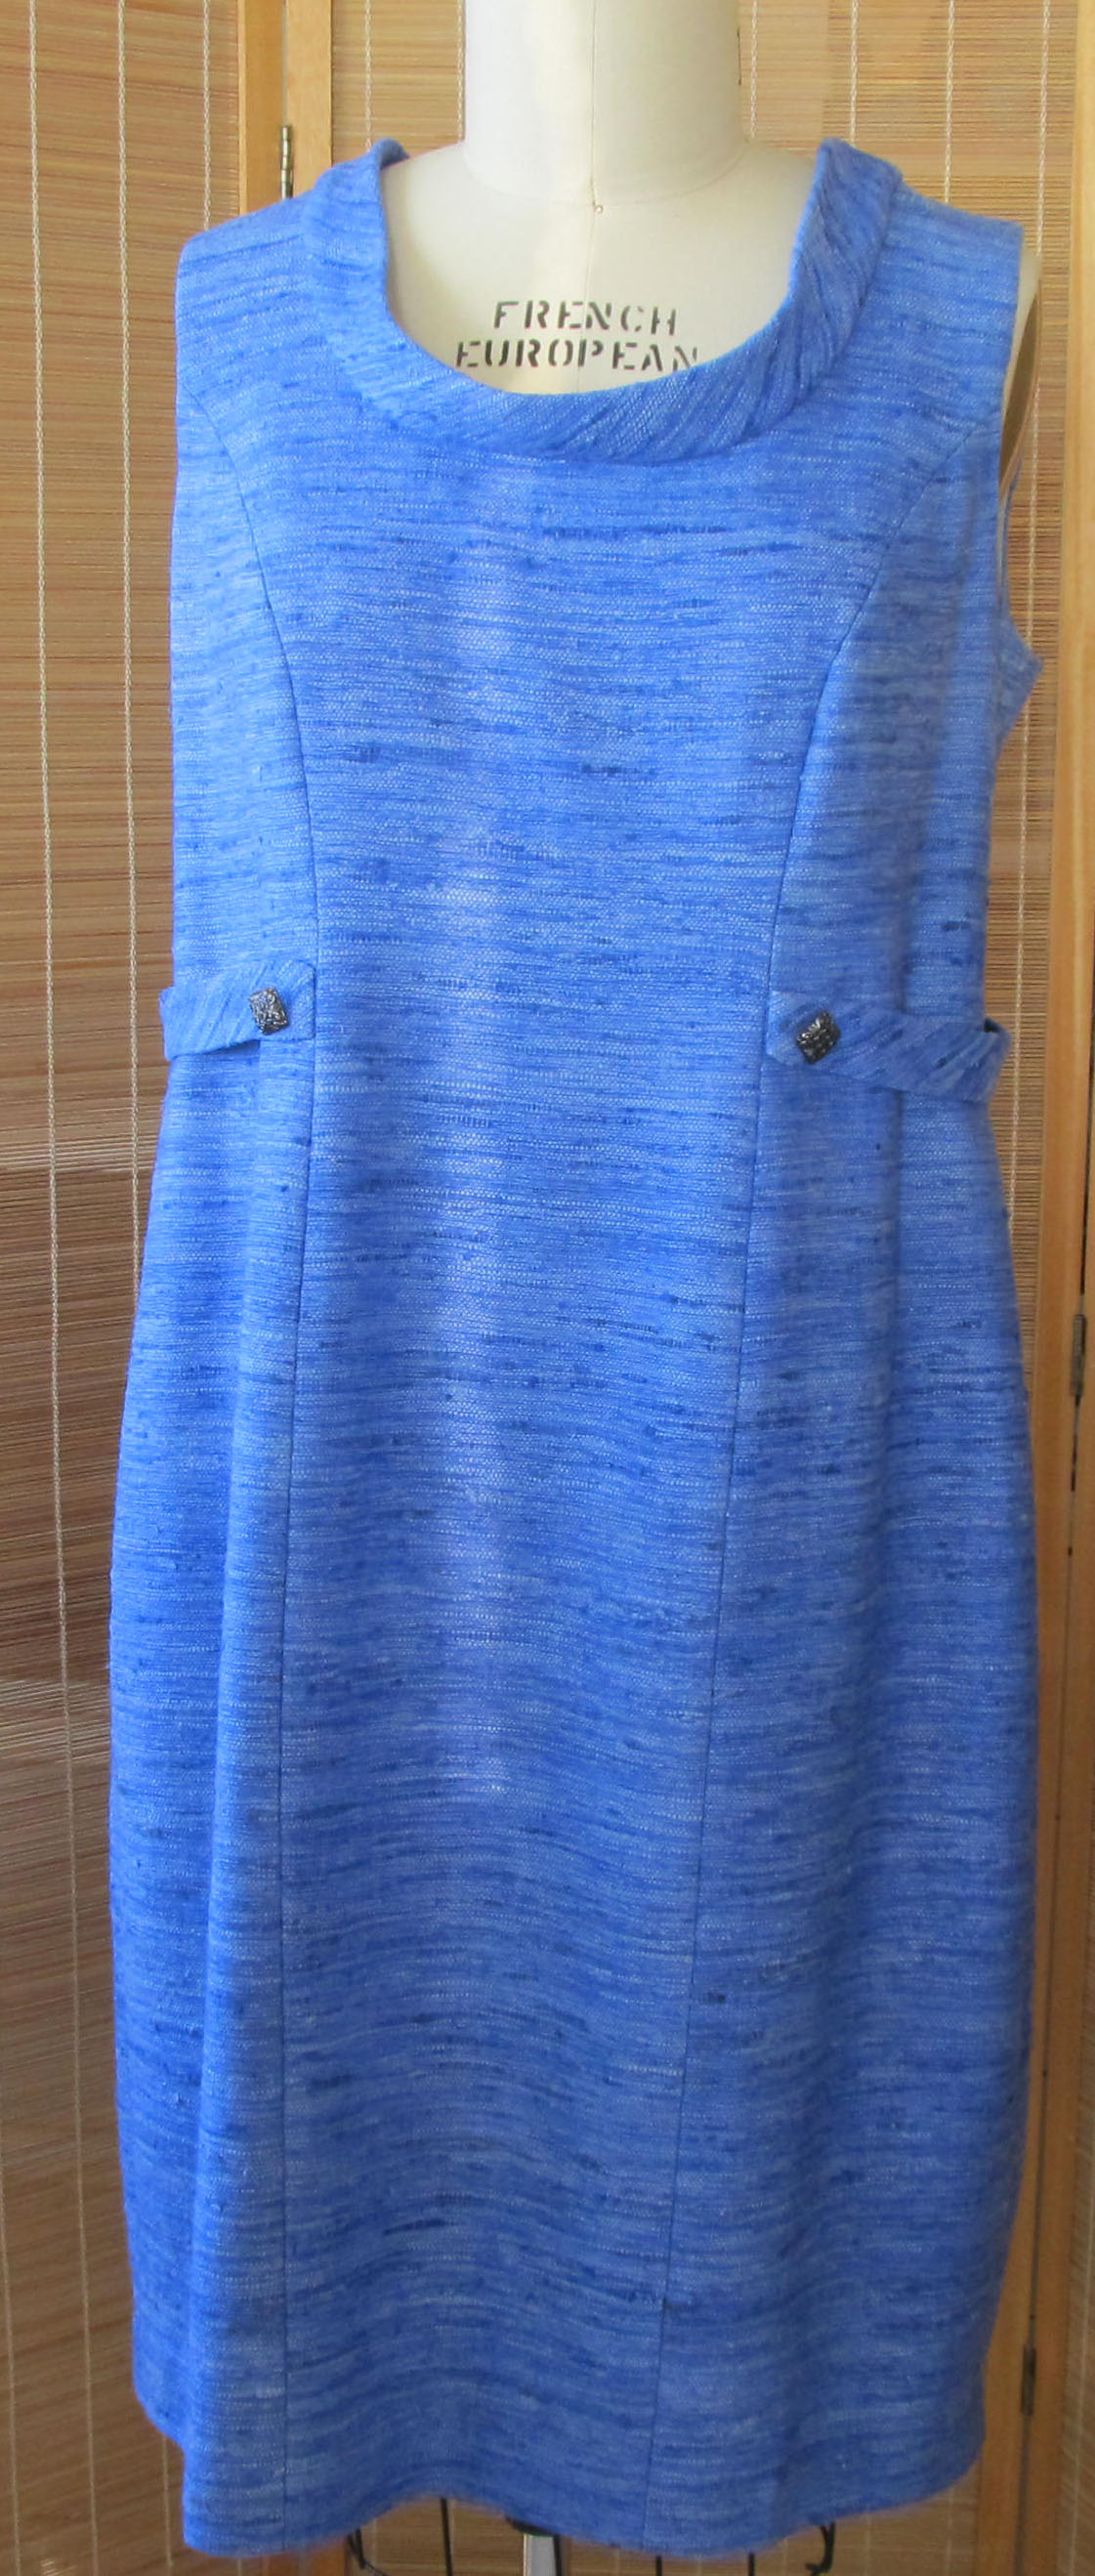
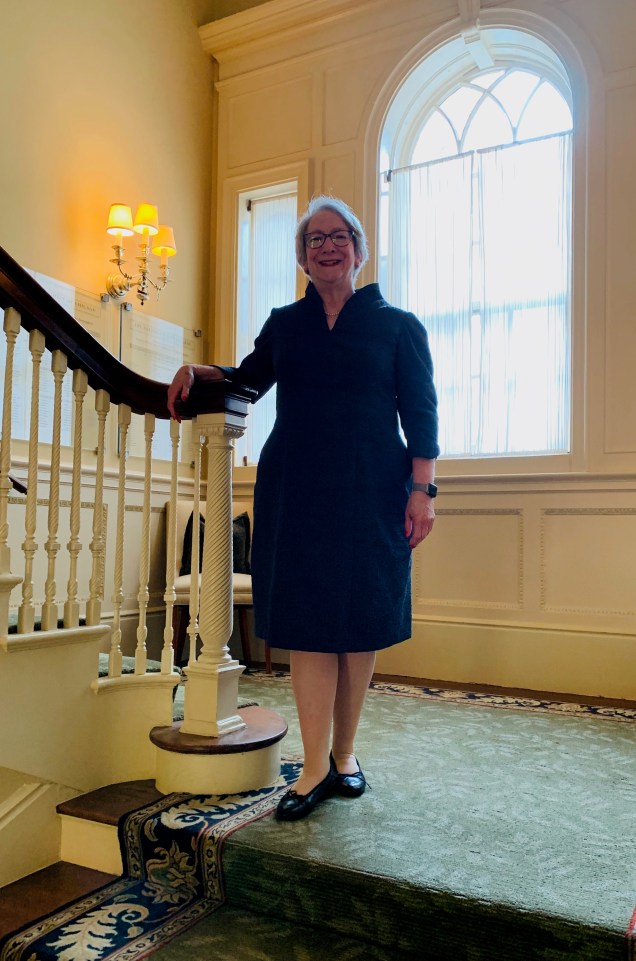
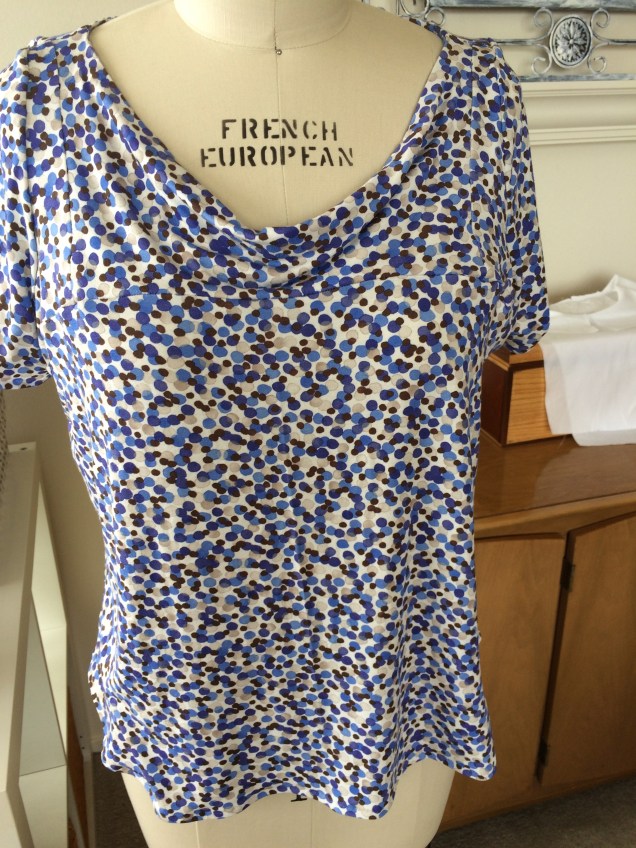
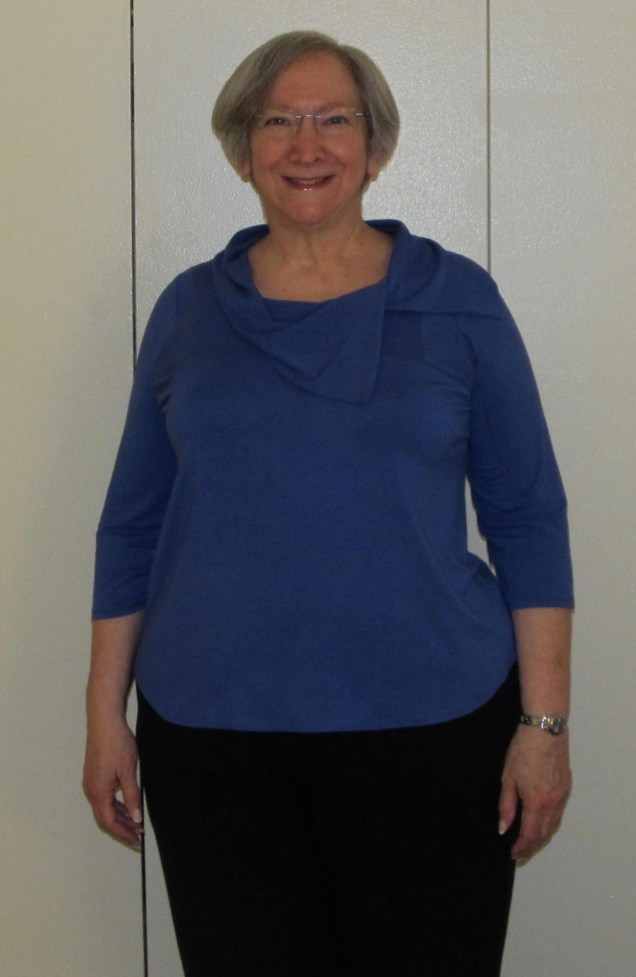
 After trying a mock-up with the scoop variation from the workshop, I decided the neckline had to be a little bit less scoopy. So I made a modified scoop neck pattern piece and adjusted the collar accordingly. I tried it out in this great rayon-Lycra knit from Sawyer Brook in a color they called Bluebonnet, but didn’t think it worked well. So, I made the top with the modified scoop neck but no collar.
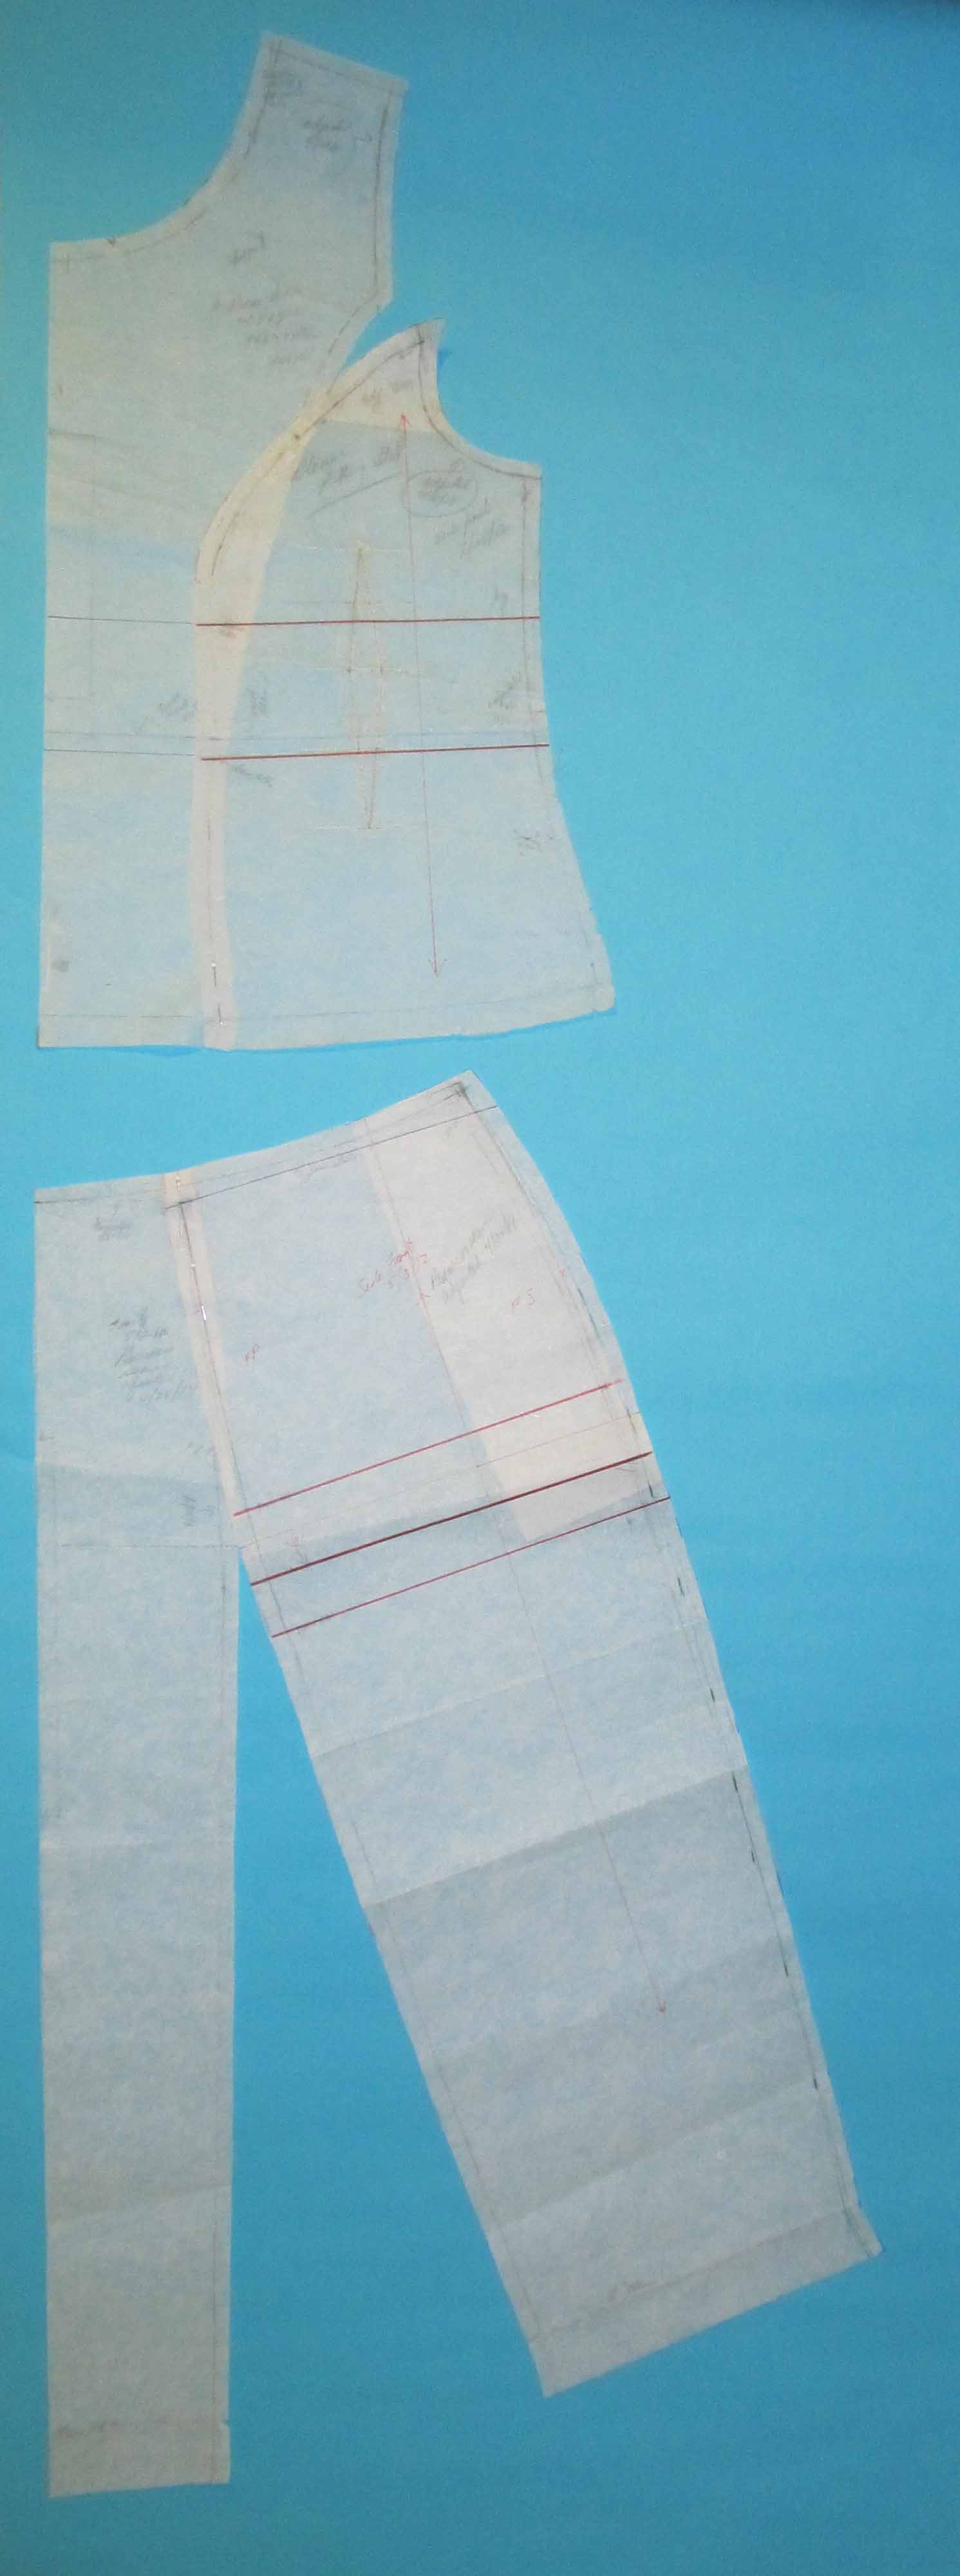
 I needed a dress for an evening wedding in New York this month and, for once, I started early. I brought a muslin, the fabric I wanted to use and the embellishment I was thinking of using to the You Choose Your Focus workshop