The No-Close Topper That Plays Well With Curves

Silk TopperYou may be wondering whether all of my sewing projects start out looking simple and end up being way more involved than I bargained for. A lot of them do, and those are the ones that teach me the most. My seemingly simple project to create a no-close topper to go over a knit tank or sleeveless shell is another example.

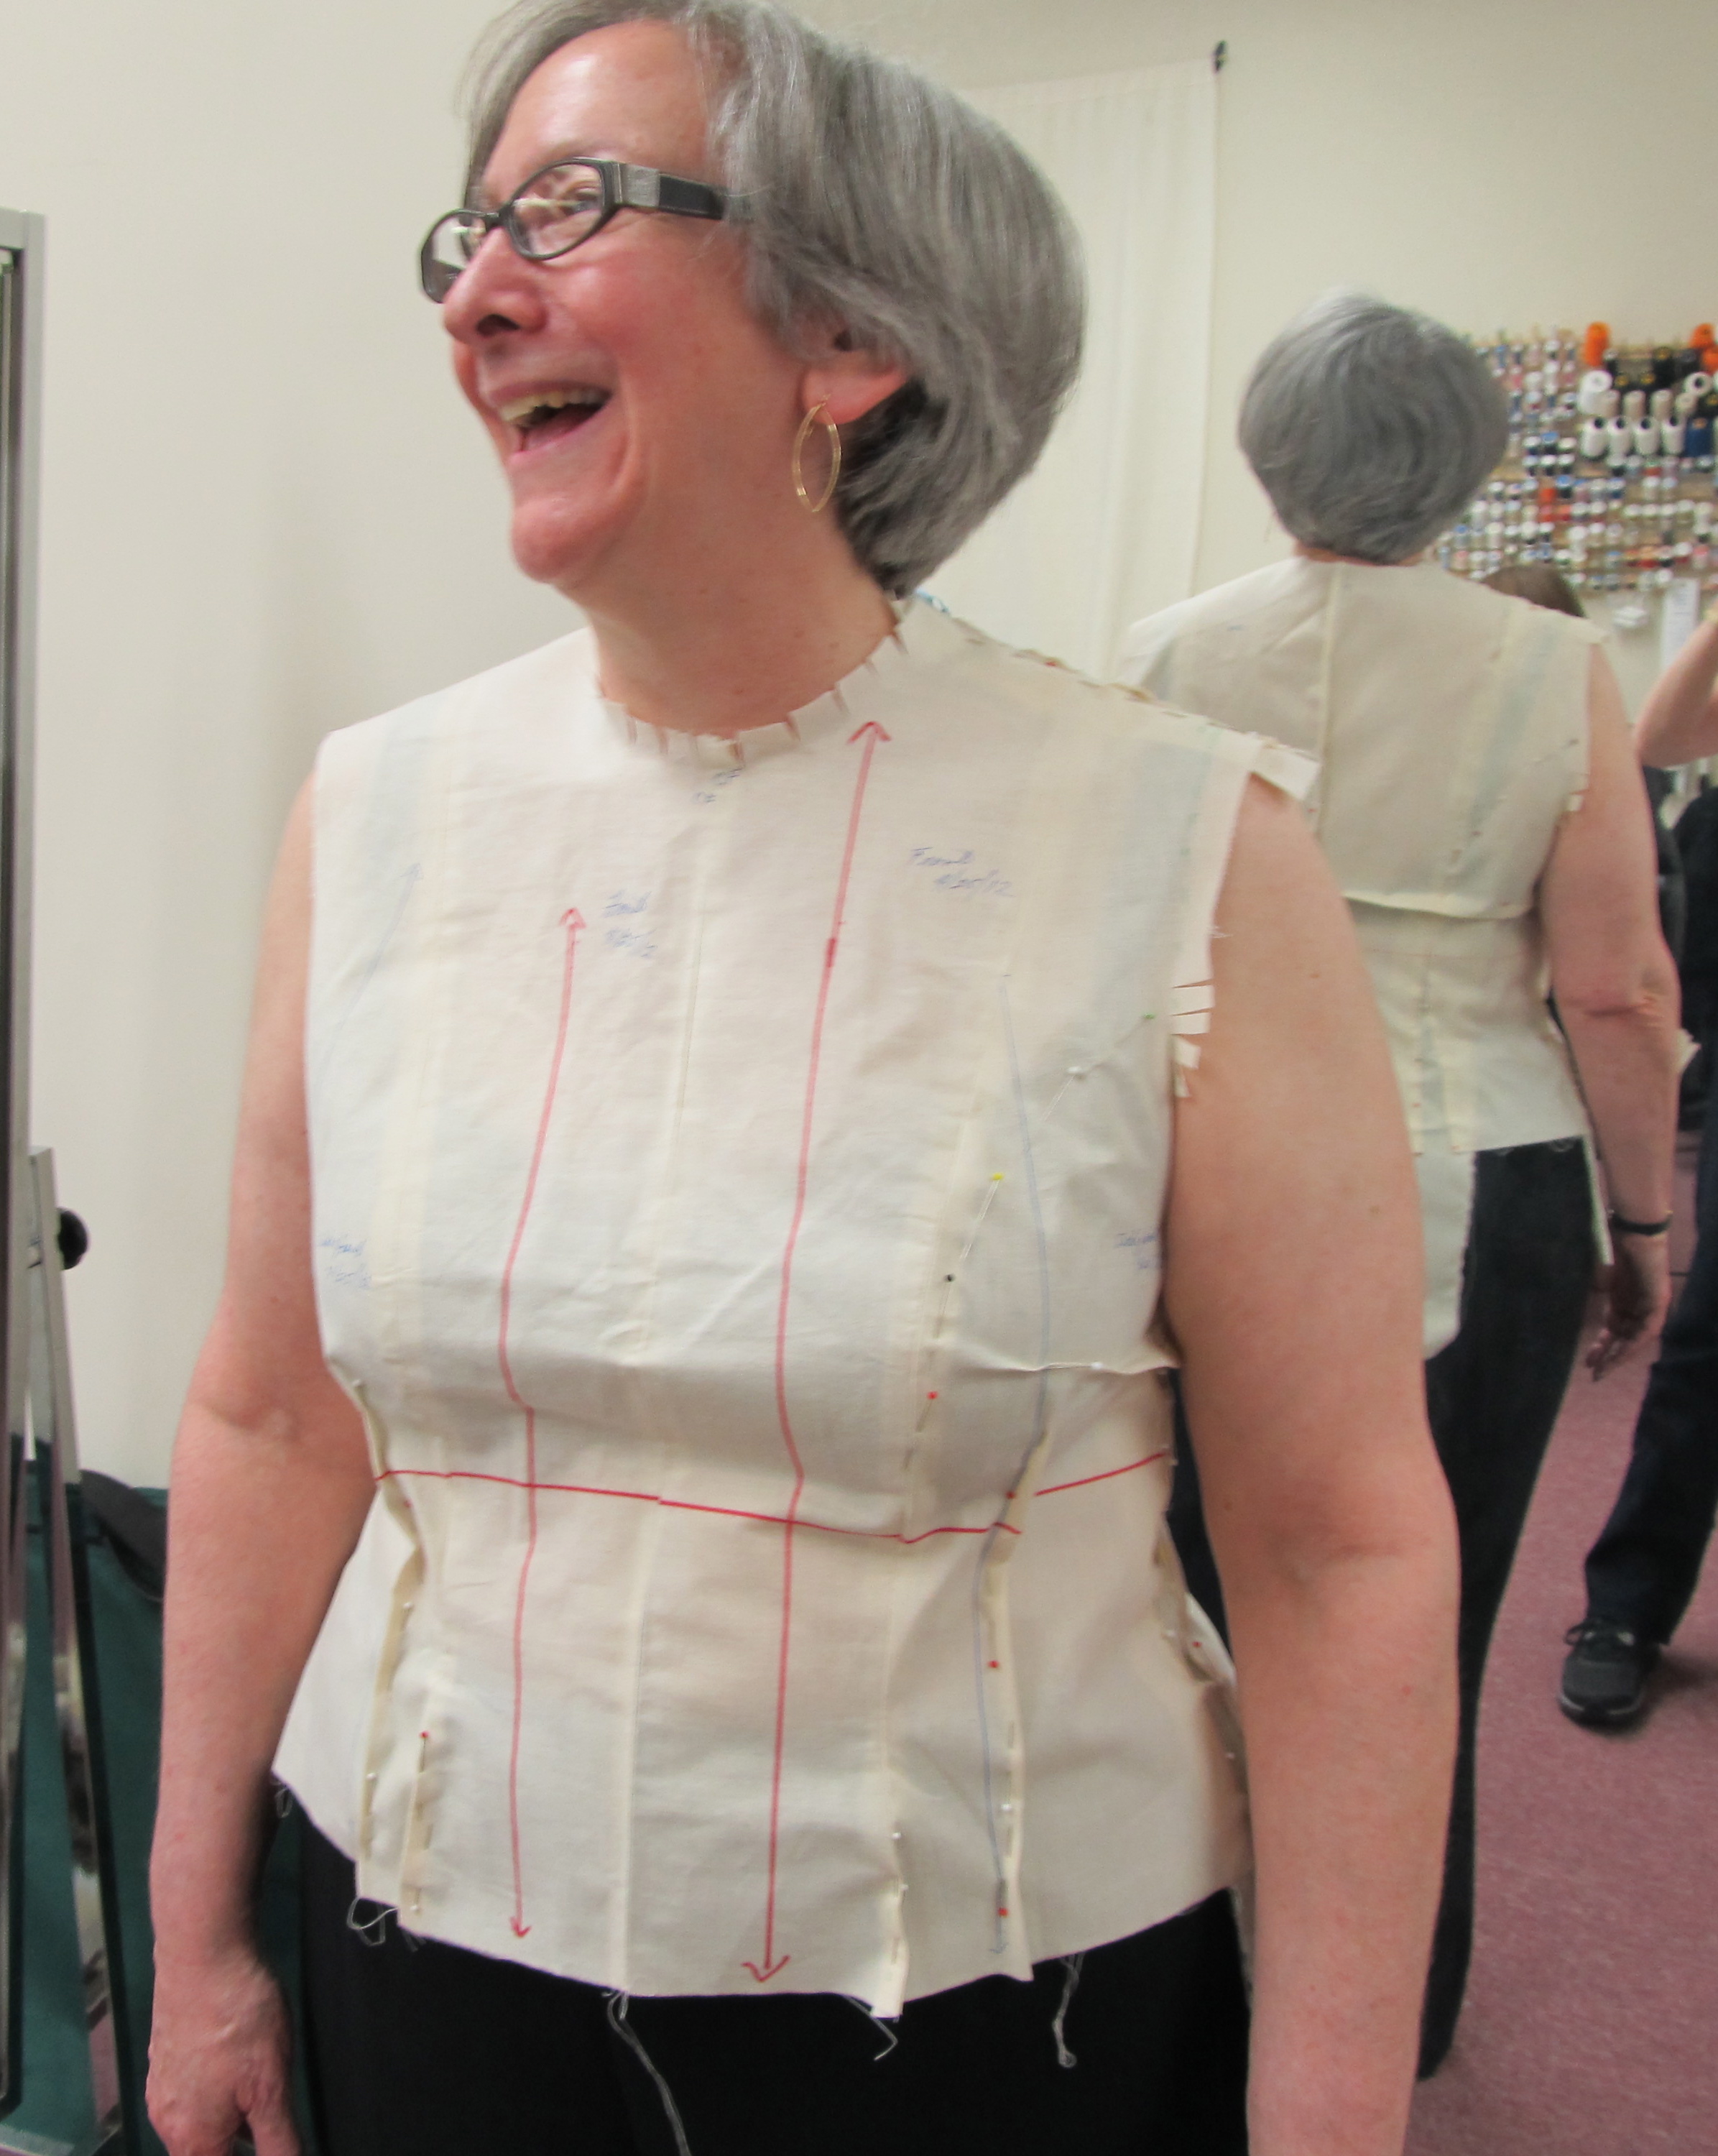
I started this project thinking I could take my basic bodice sloper, change the neckline, add seam allowances at center front, draft a front facing, set in my basic sloper sleeves and have a nice layering piece that isn’t a jacket. When I did that, I quickly discovered that, even though the garment would have fit just fine as a blouse with a closure, when left to its own devices the front automatically traveled outward. Not just a little, either. The two front pieces wanted to settle out near my arms. It hadn’t occurred to me that a pattern designed to accommodate my particular bust shape and size would resist staying put. So that’s why RTW makes these pieces so oversized, I said to myself. But if I want to wear oversized, shapeless clothes I don’t have to go to the trouble of sewing them.

At this point, I sewed my first attempt together at center front, called it a blouse and put this project on the list for my next video consultation with Sarah Veblen.

Silk Tulip Top

We discussed a number of solutions and I tried a few in a mock-up, but I still wasn’t getting the look I was after.

After more discussion, we came up with an approach that turned this into a redesign project. The idea was to convert my armscye princess bodice sloper pattern into a pattern that transferred the bust shaping to tucks at the shoulders. This involved dart rotation, a really educational patternmaking exercise.

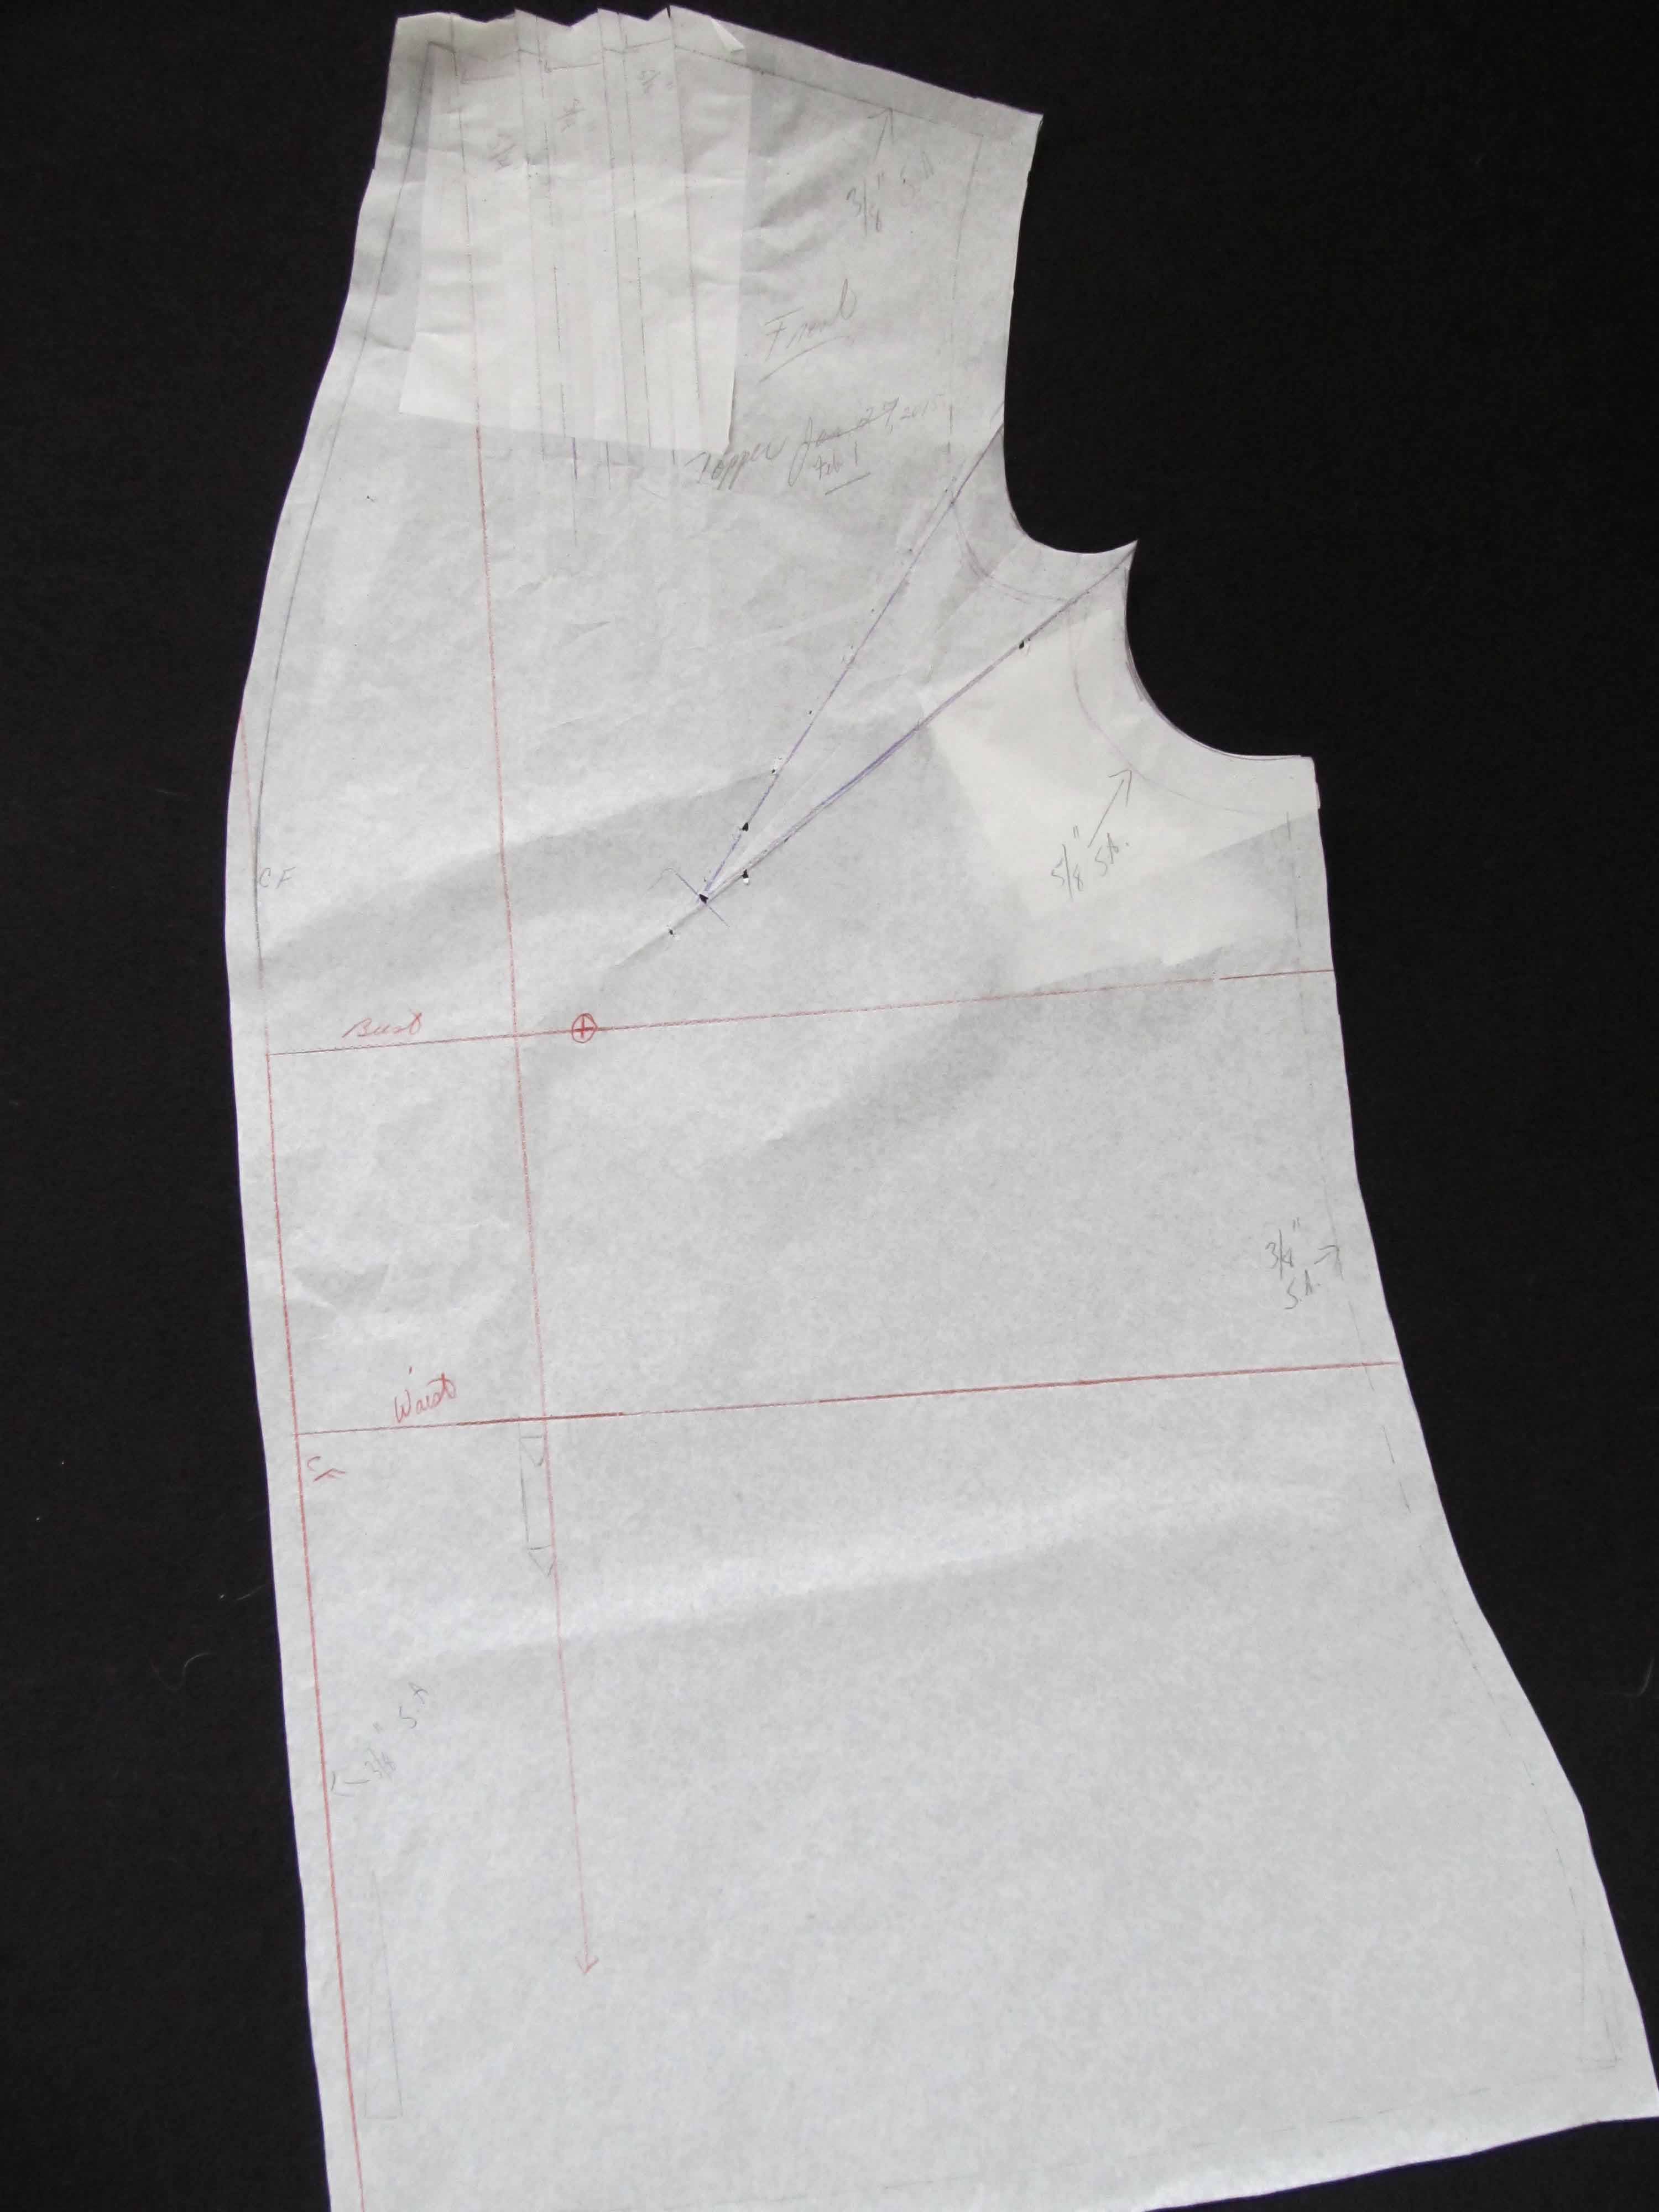
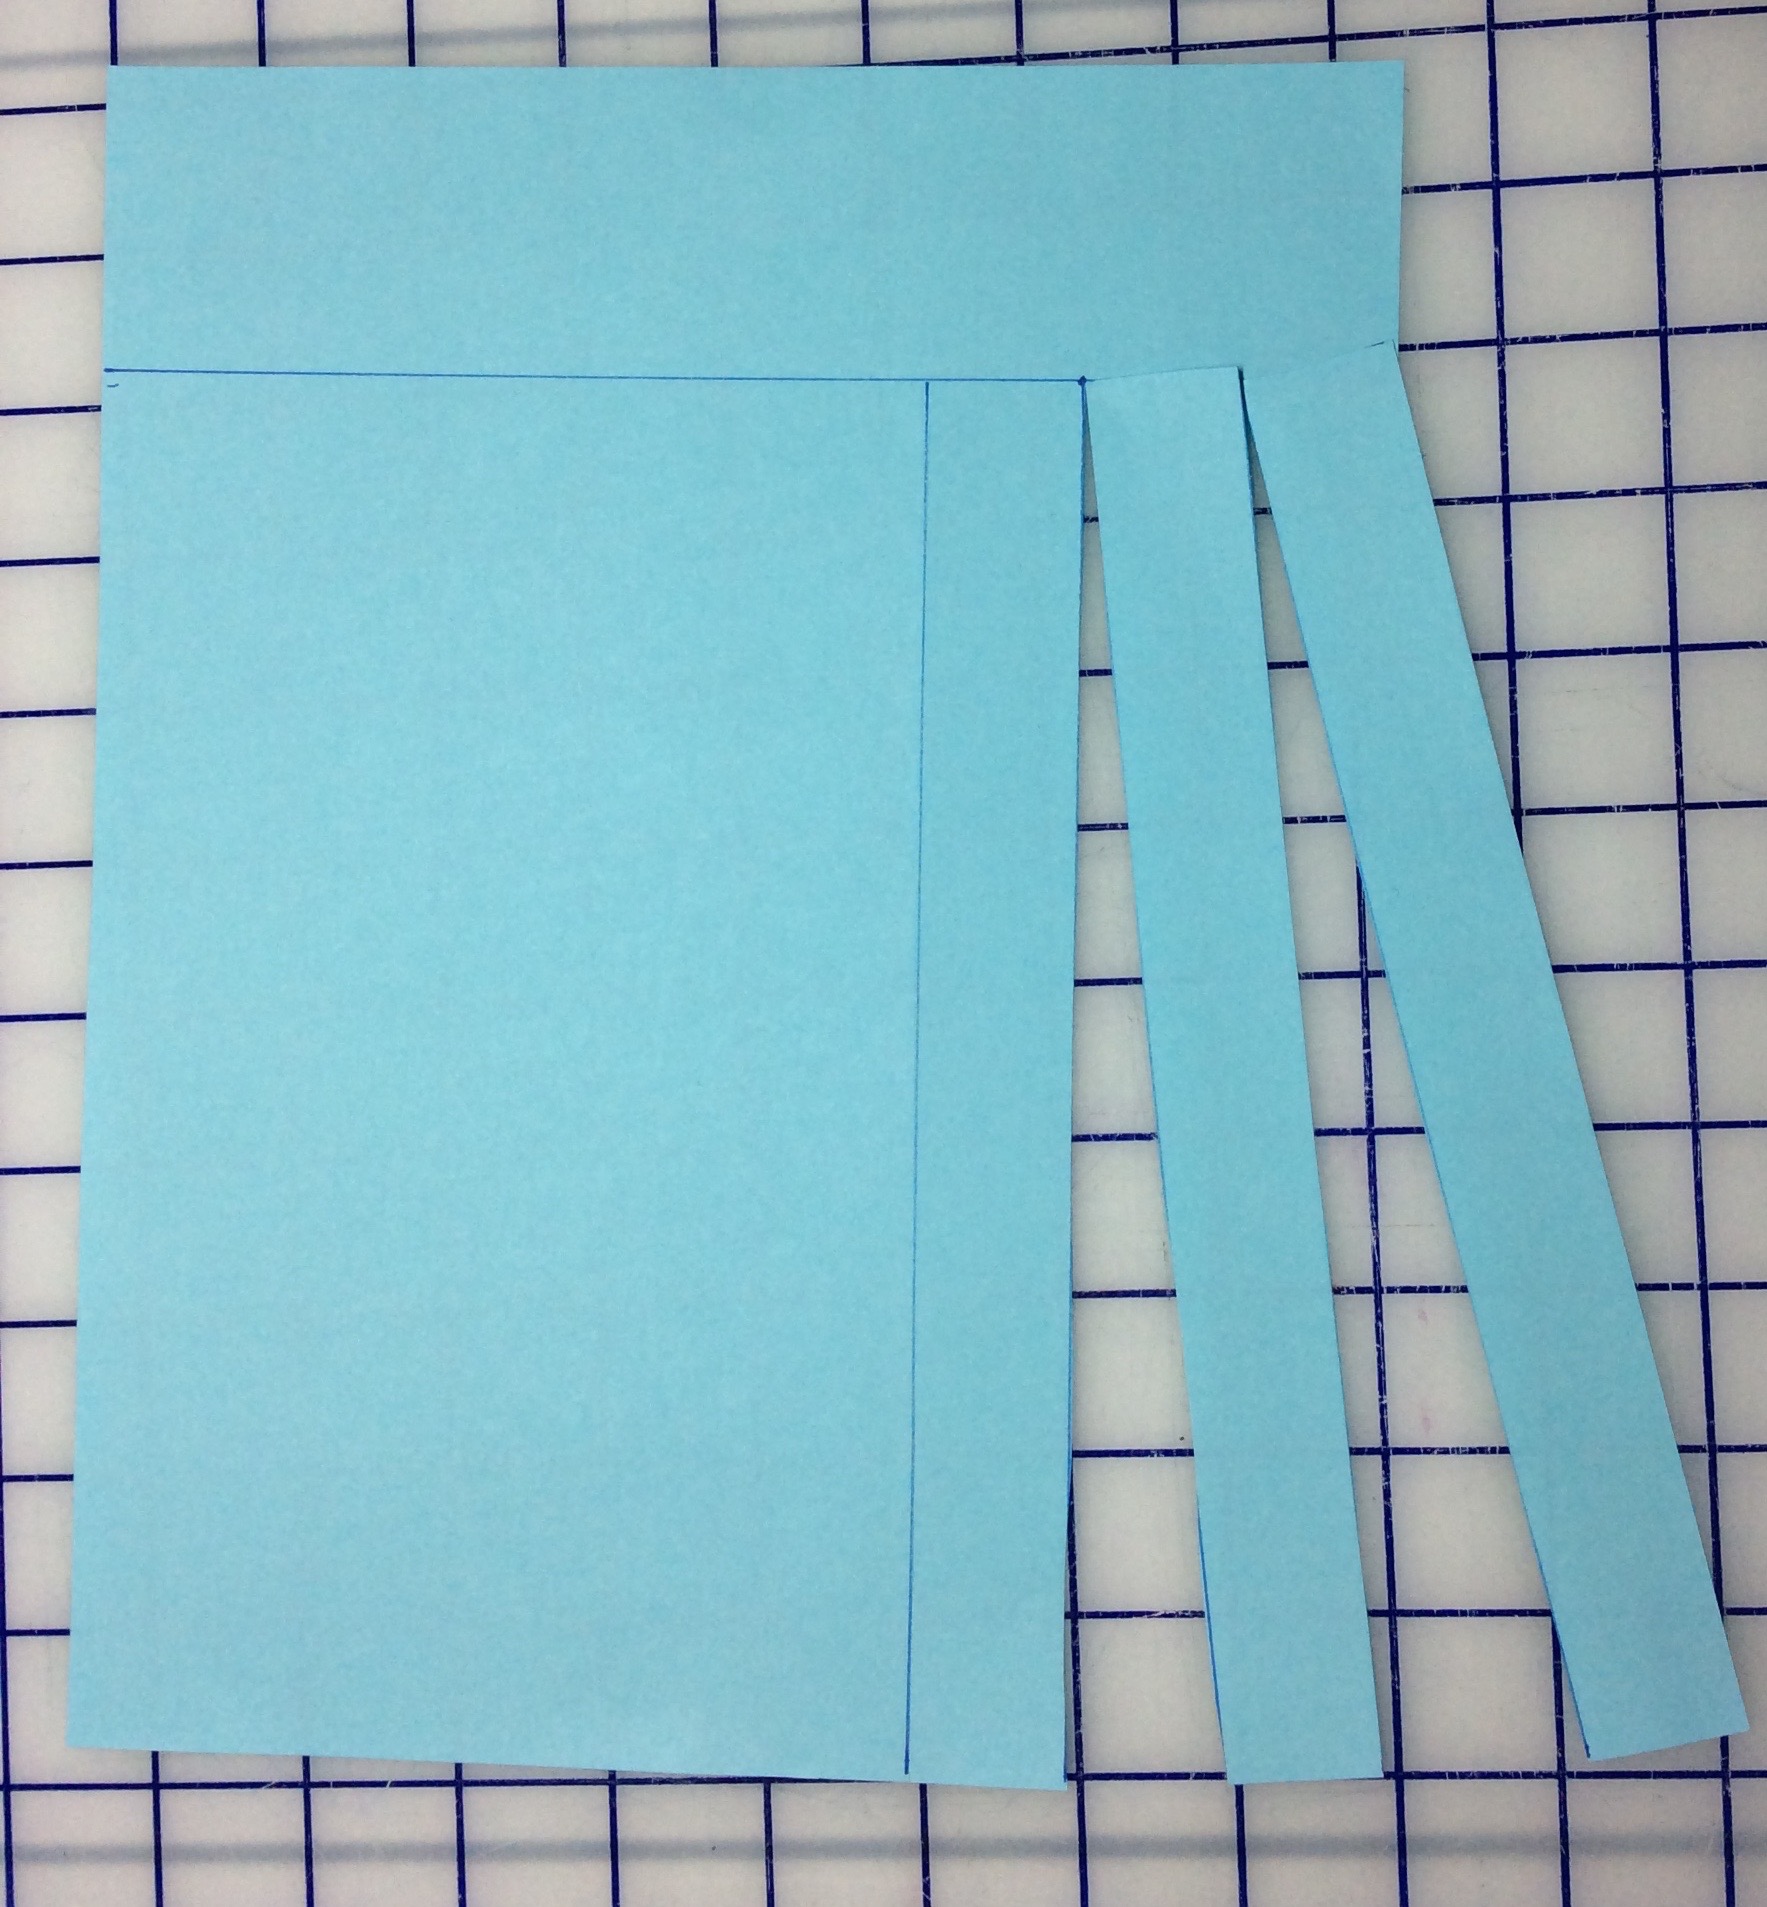
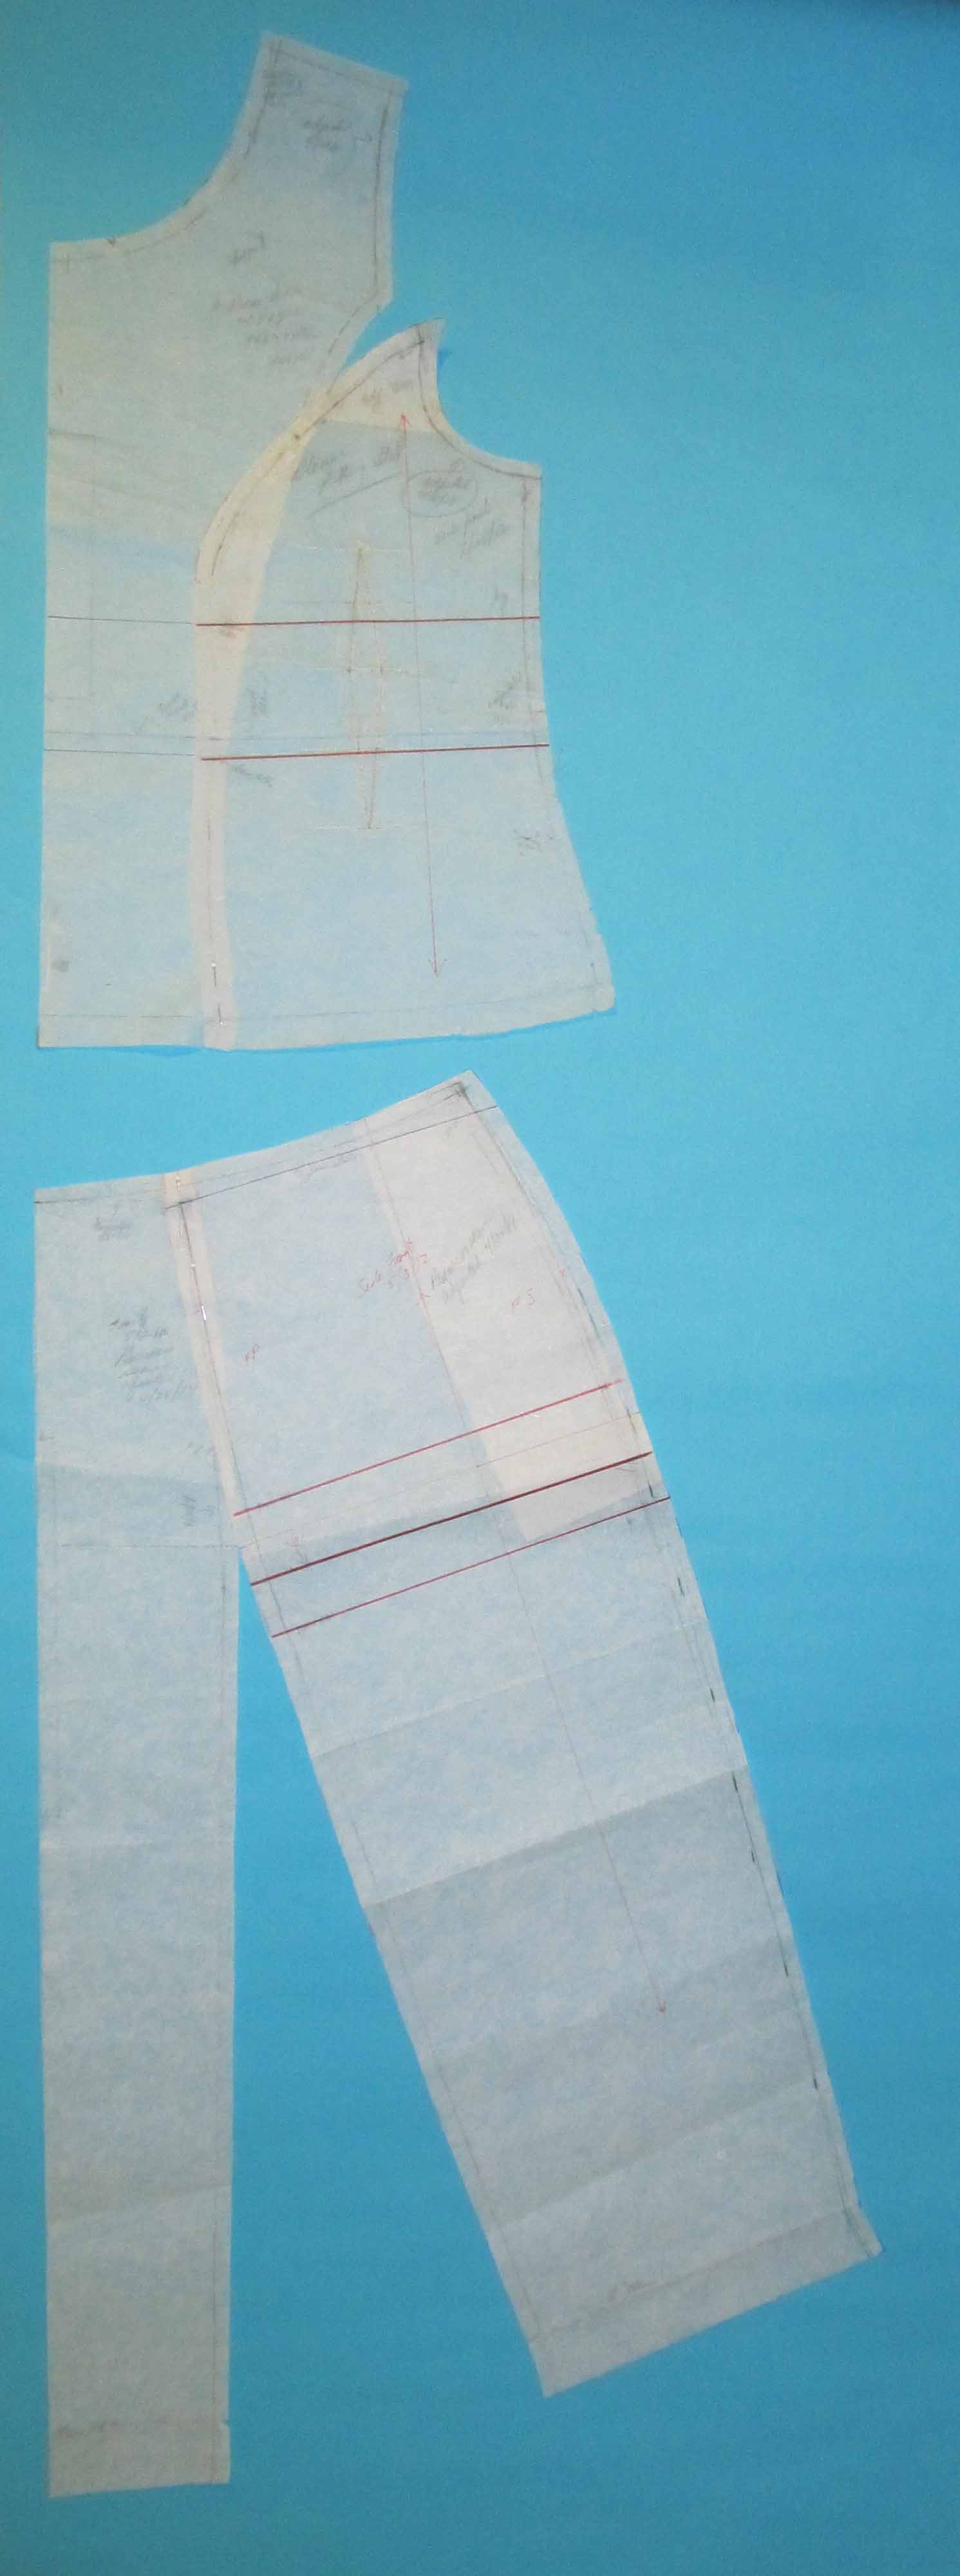
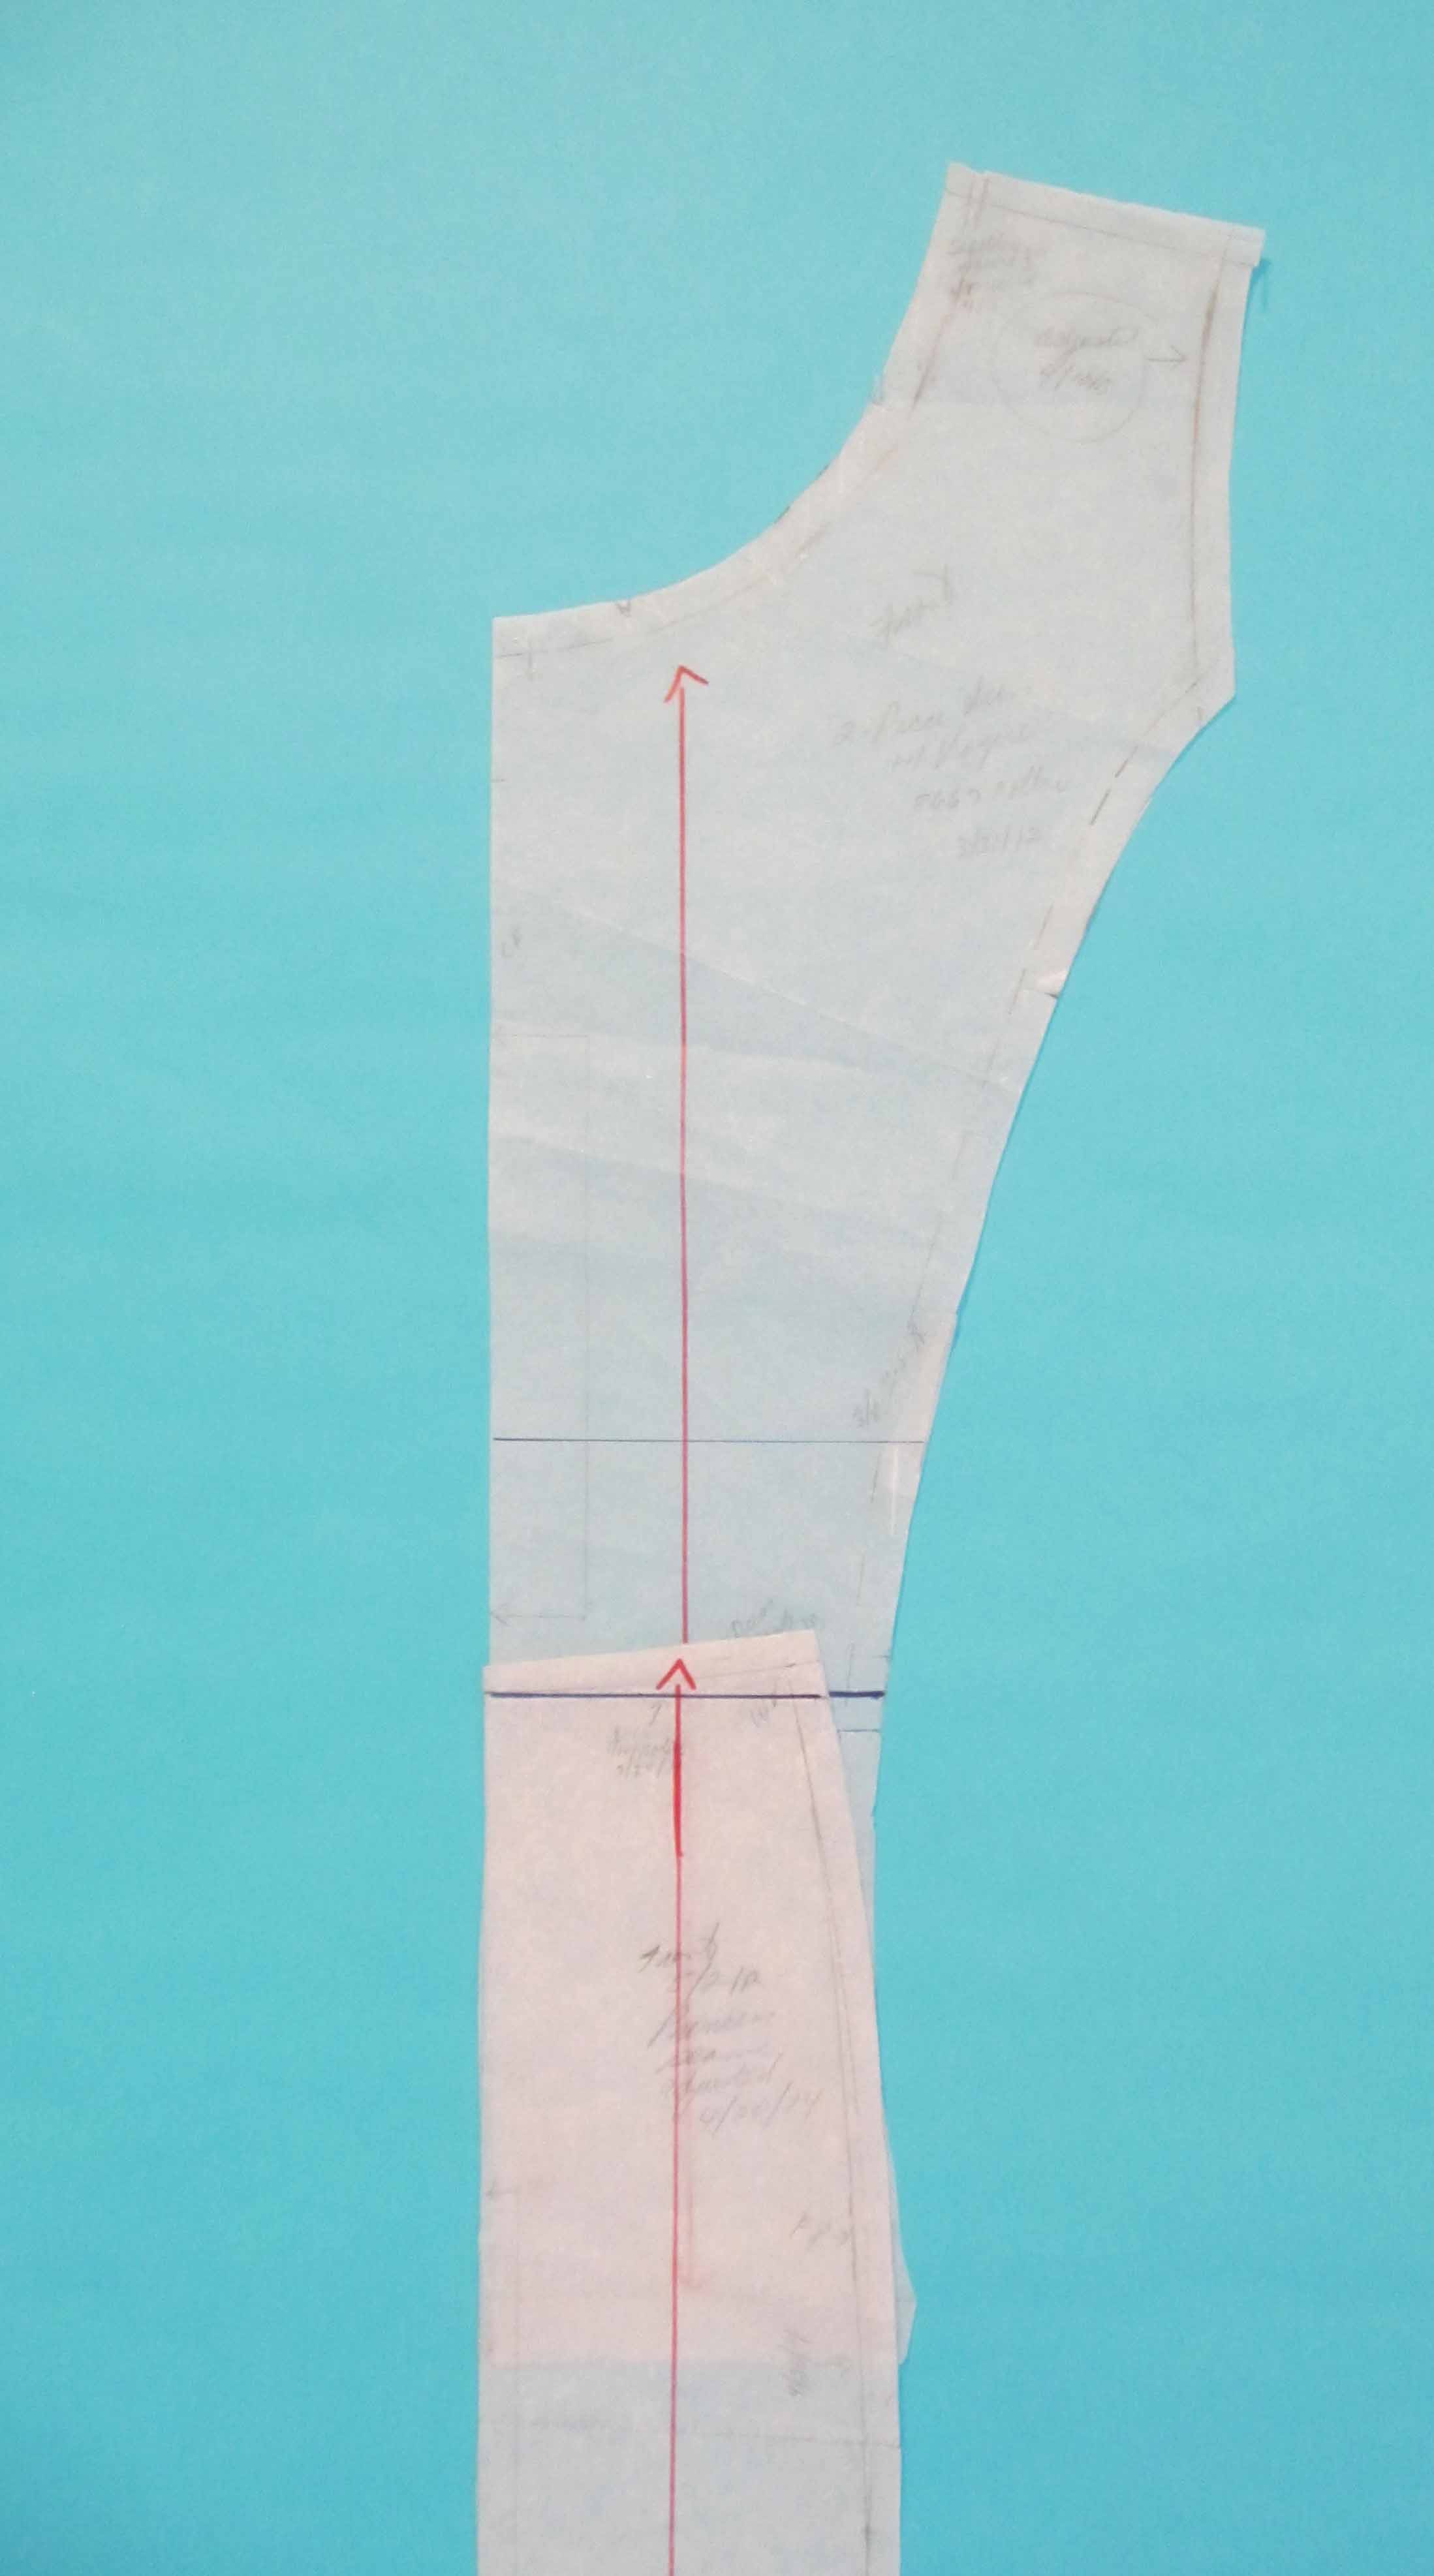
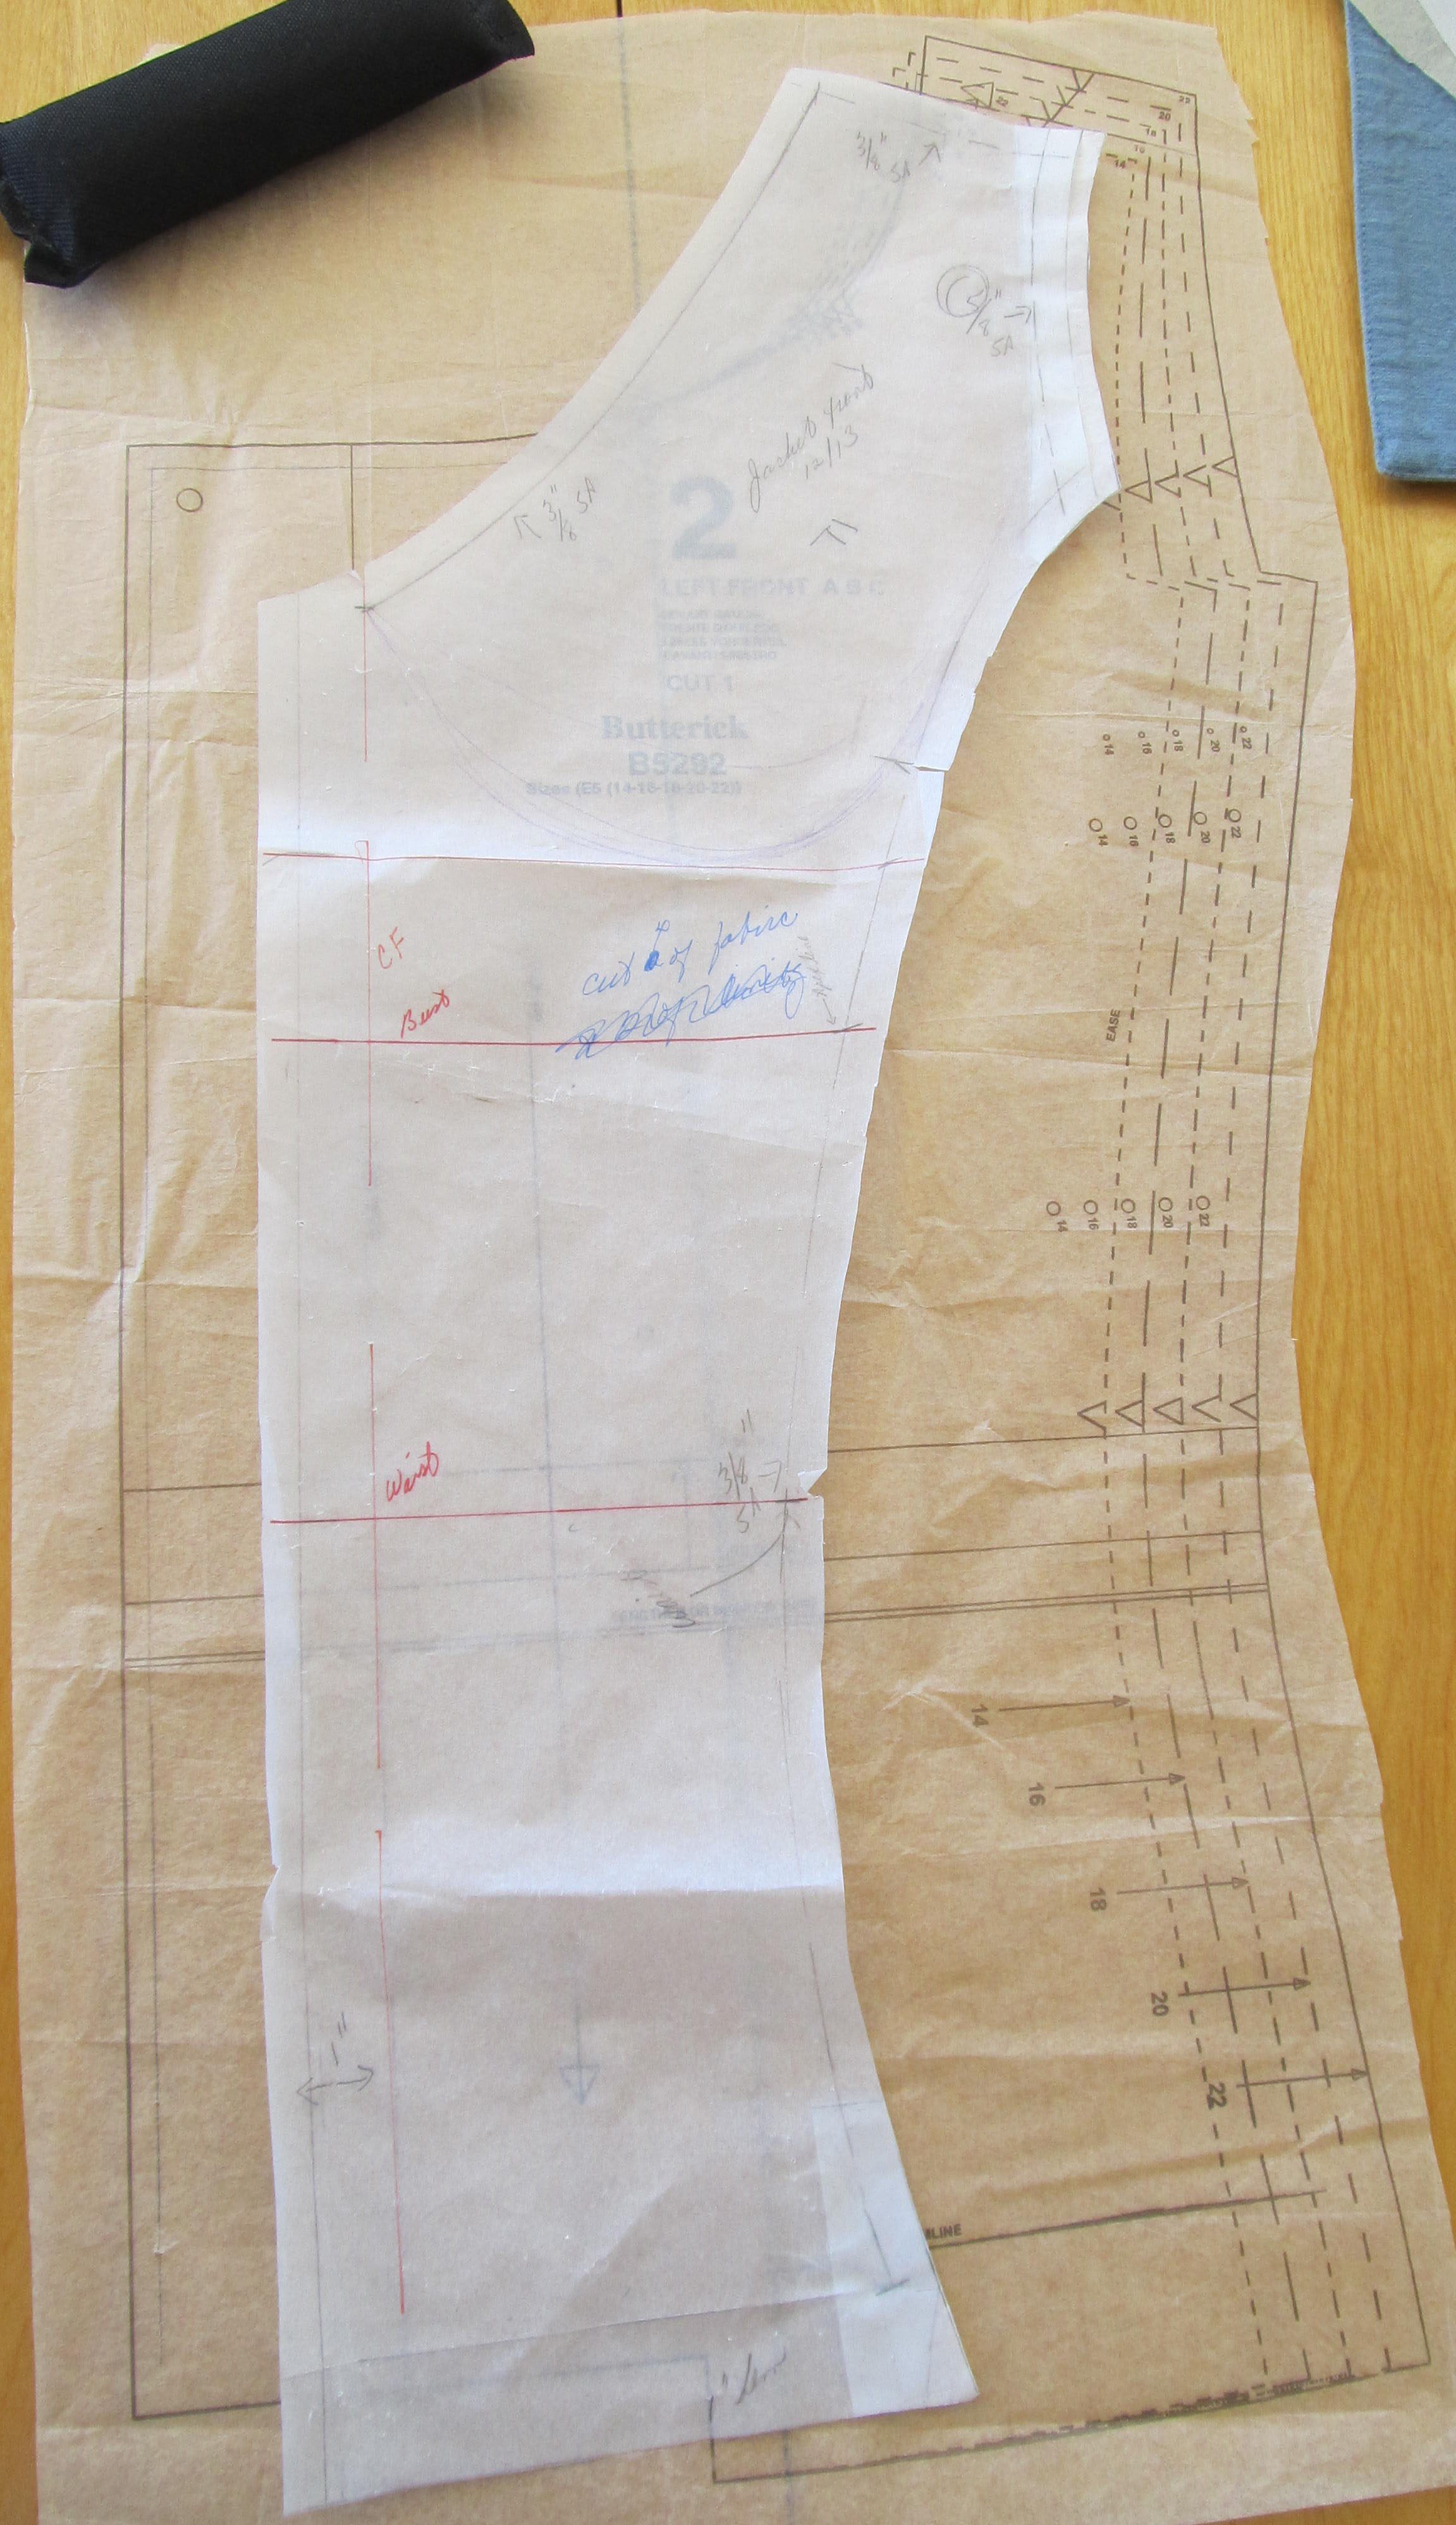
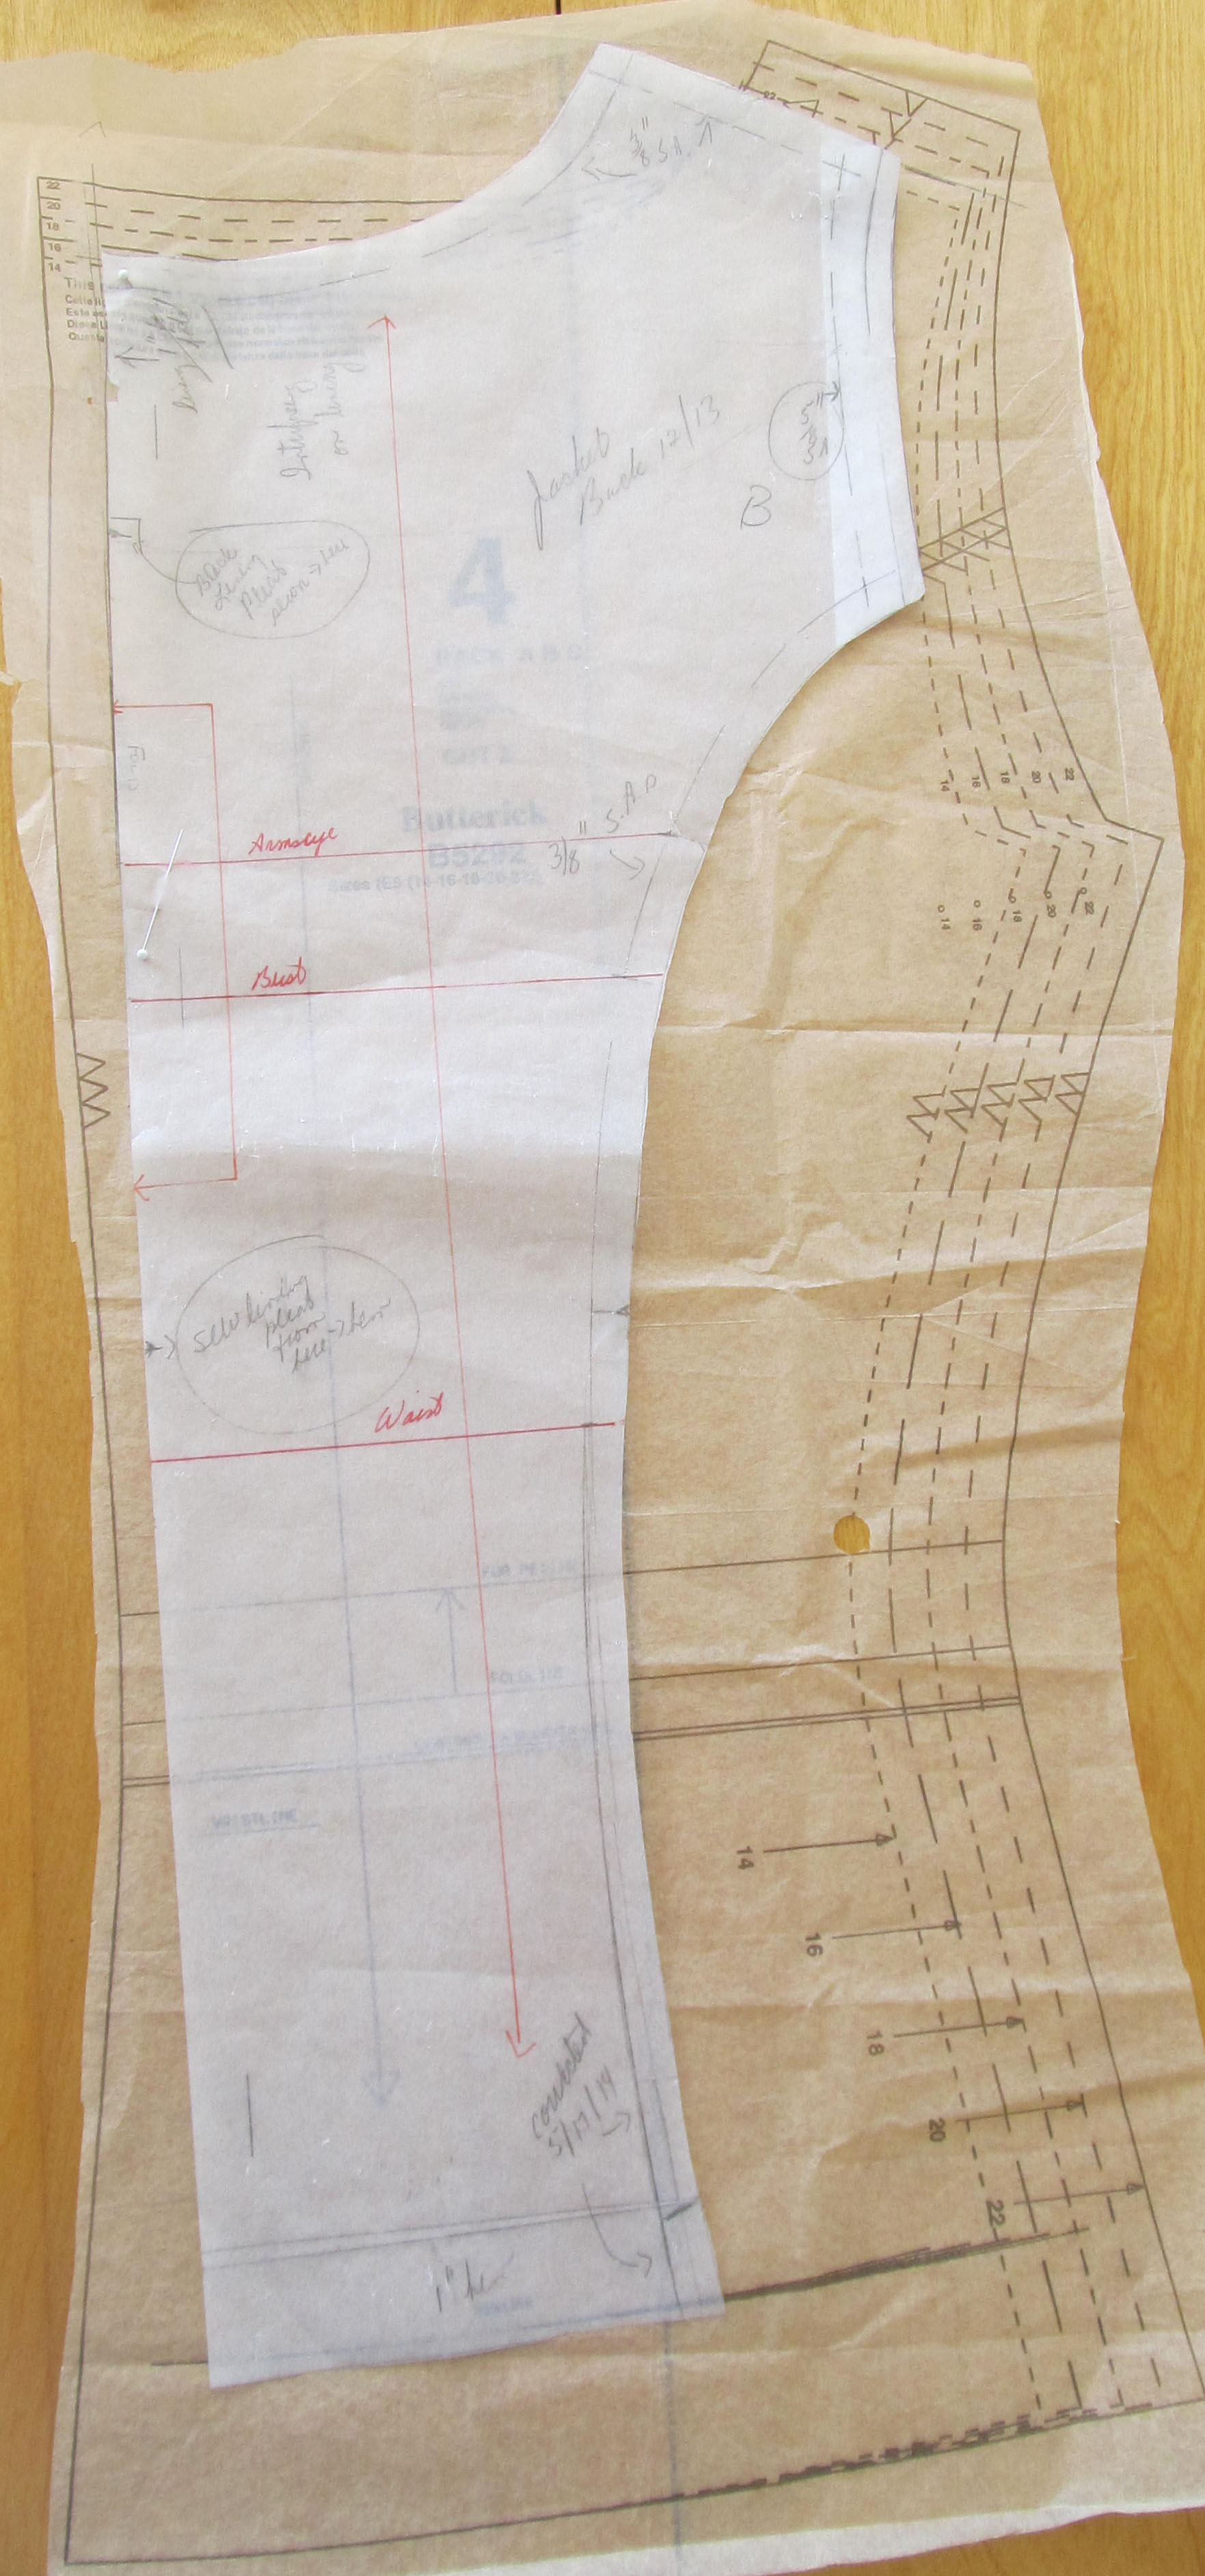
Patternmaking books tell you that you have to rotate darts (or in this case, princess seams, which are dart equivalents) at the apex. Turns out that’s one of those rules that can be broken. In my case, I needed more fullness at the apex than the princess seams give me, because I wanted the fabric to hang straight over the bust on its own. That meant the dart rotation had to take place below the apex. Here is what that looked like.

Front Convert PrincessAs you can see, the Apex is off to the right and the pivot point is about 1.5 inches below it.

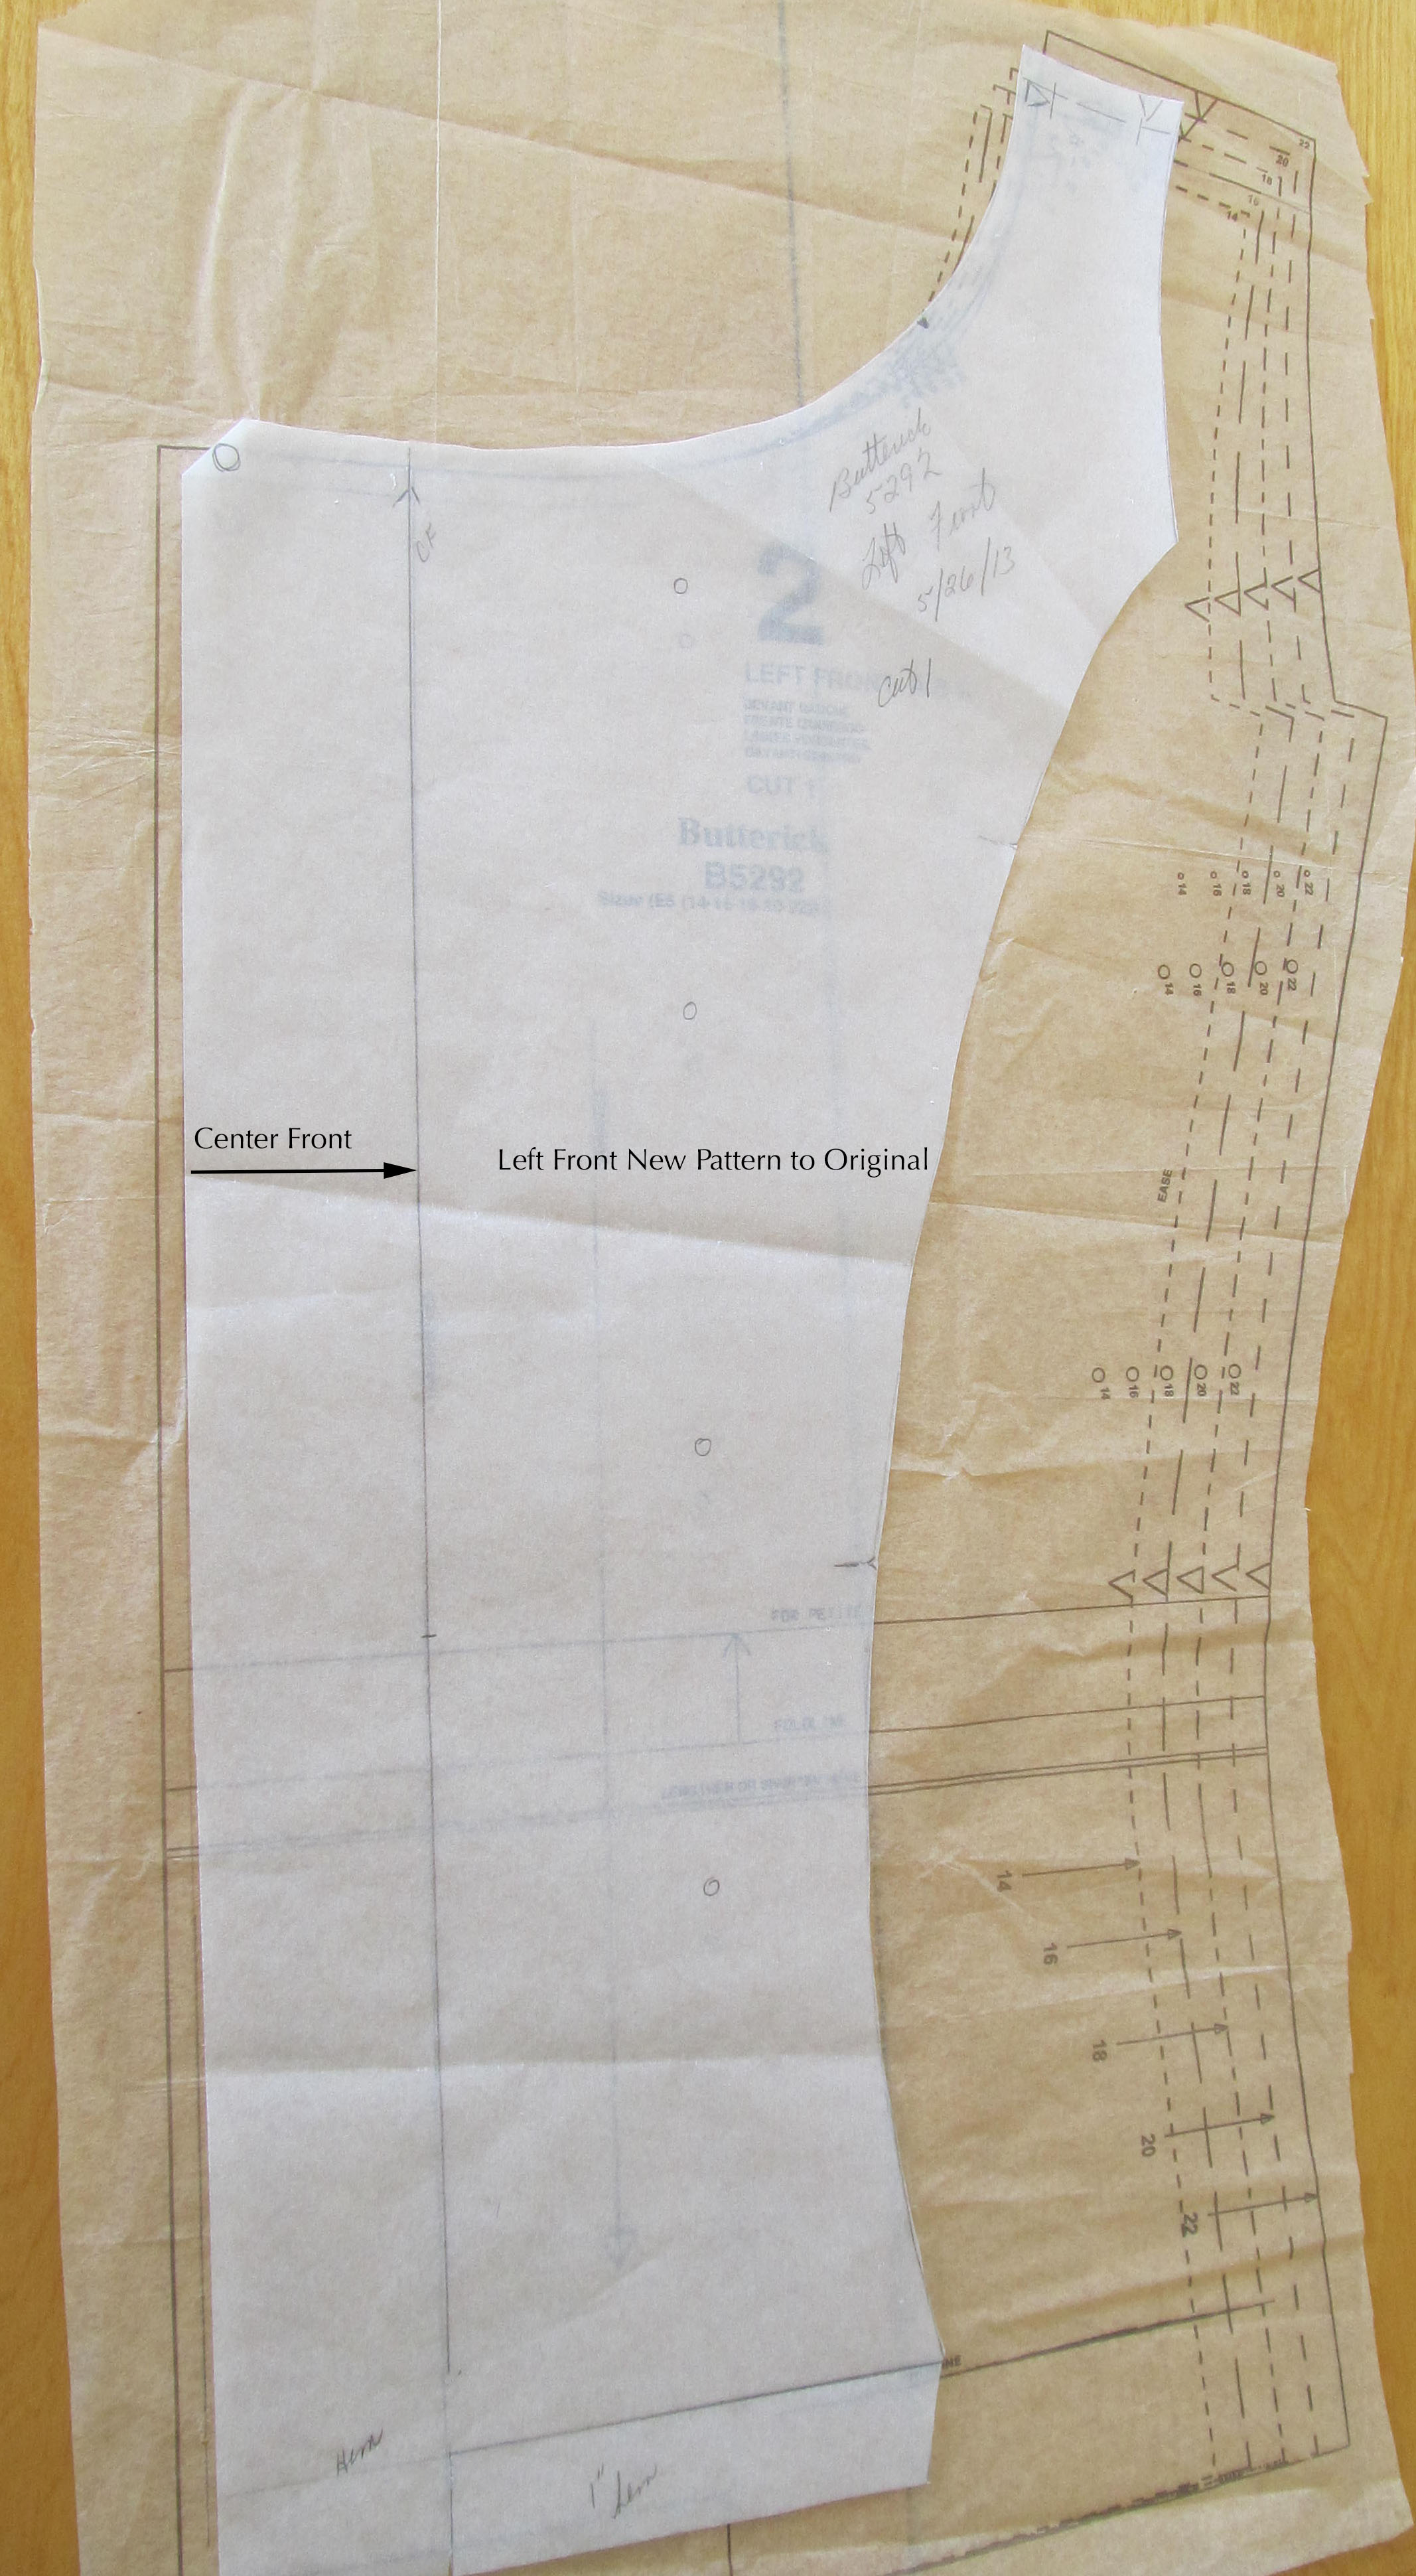
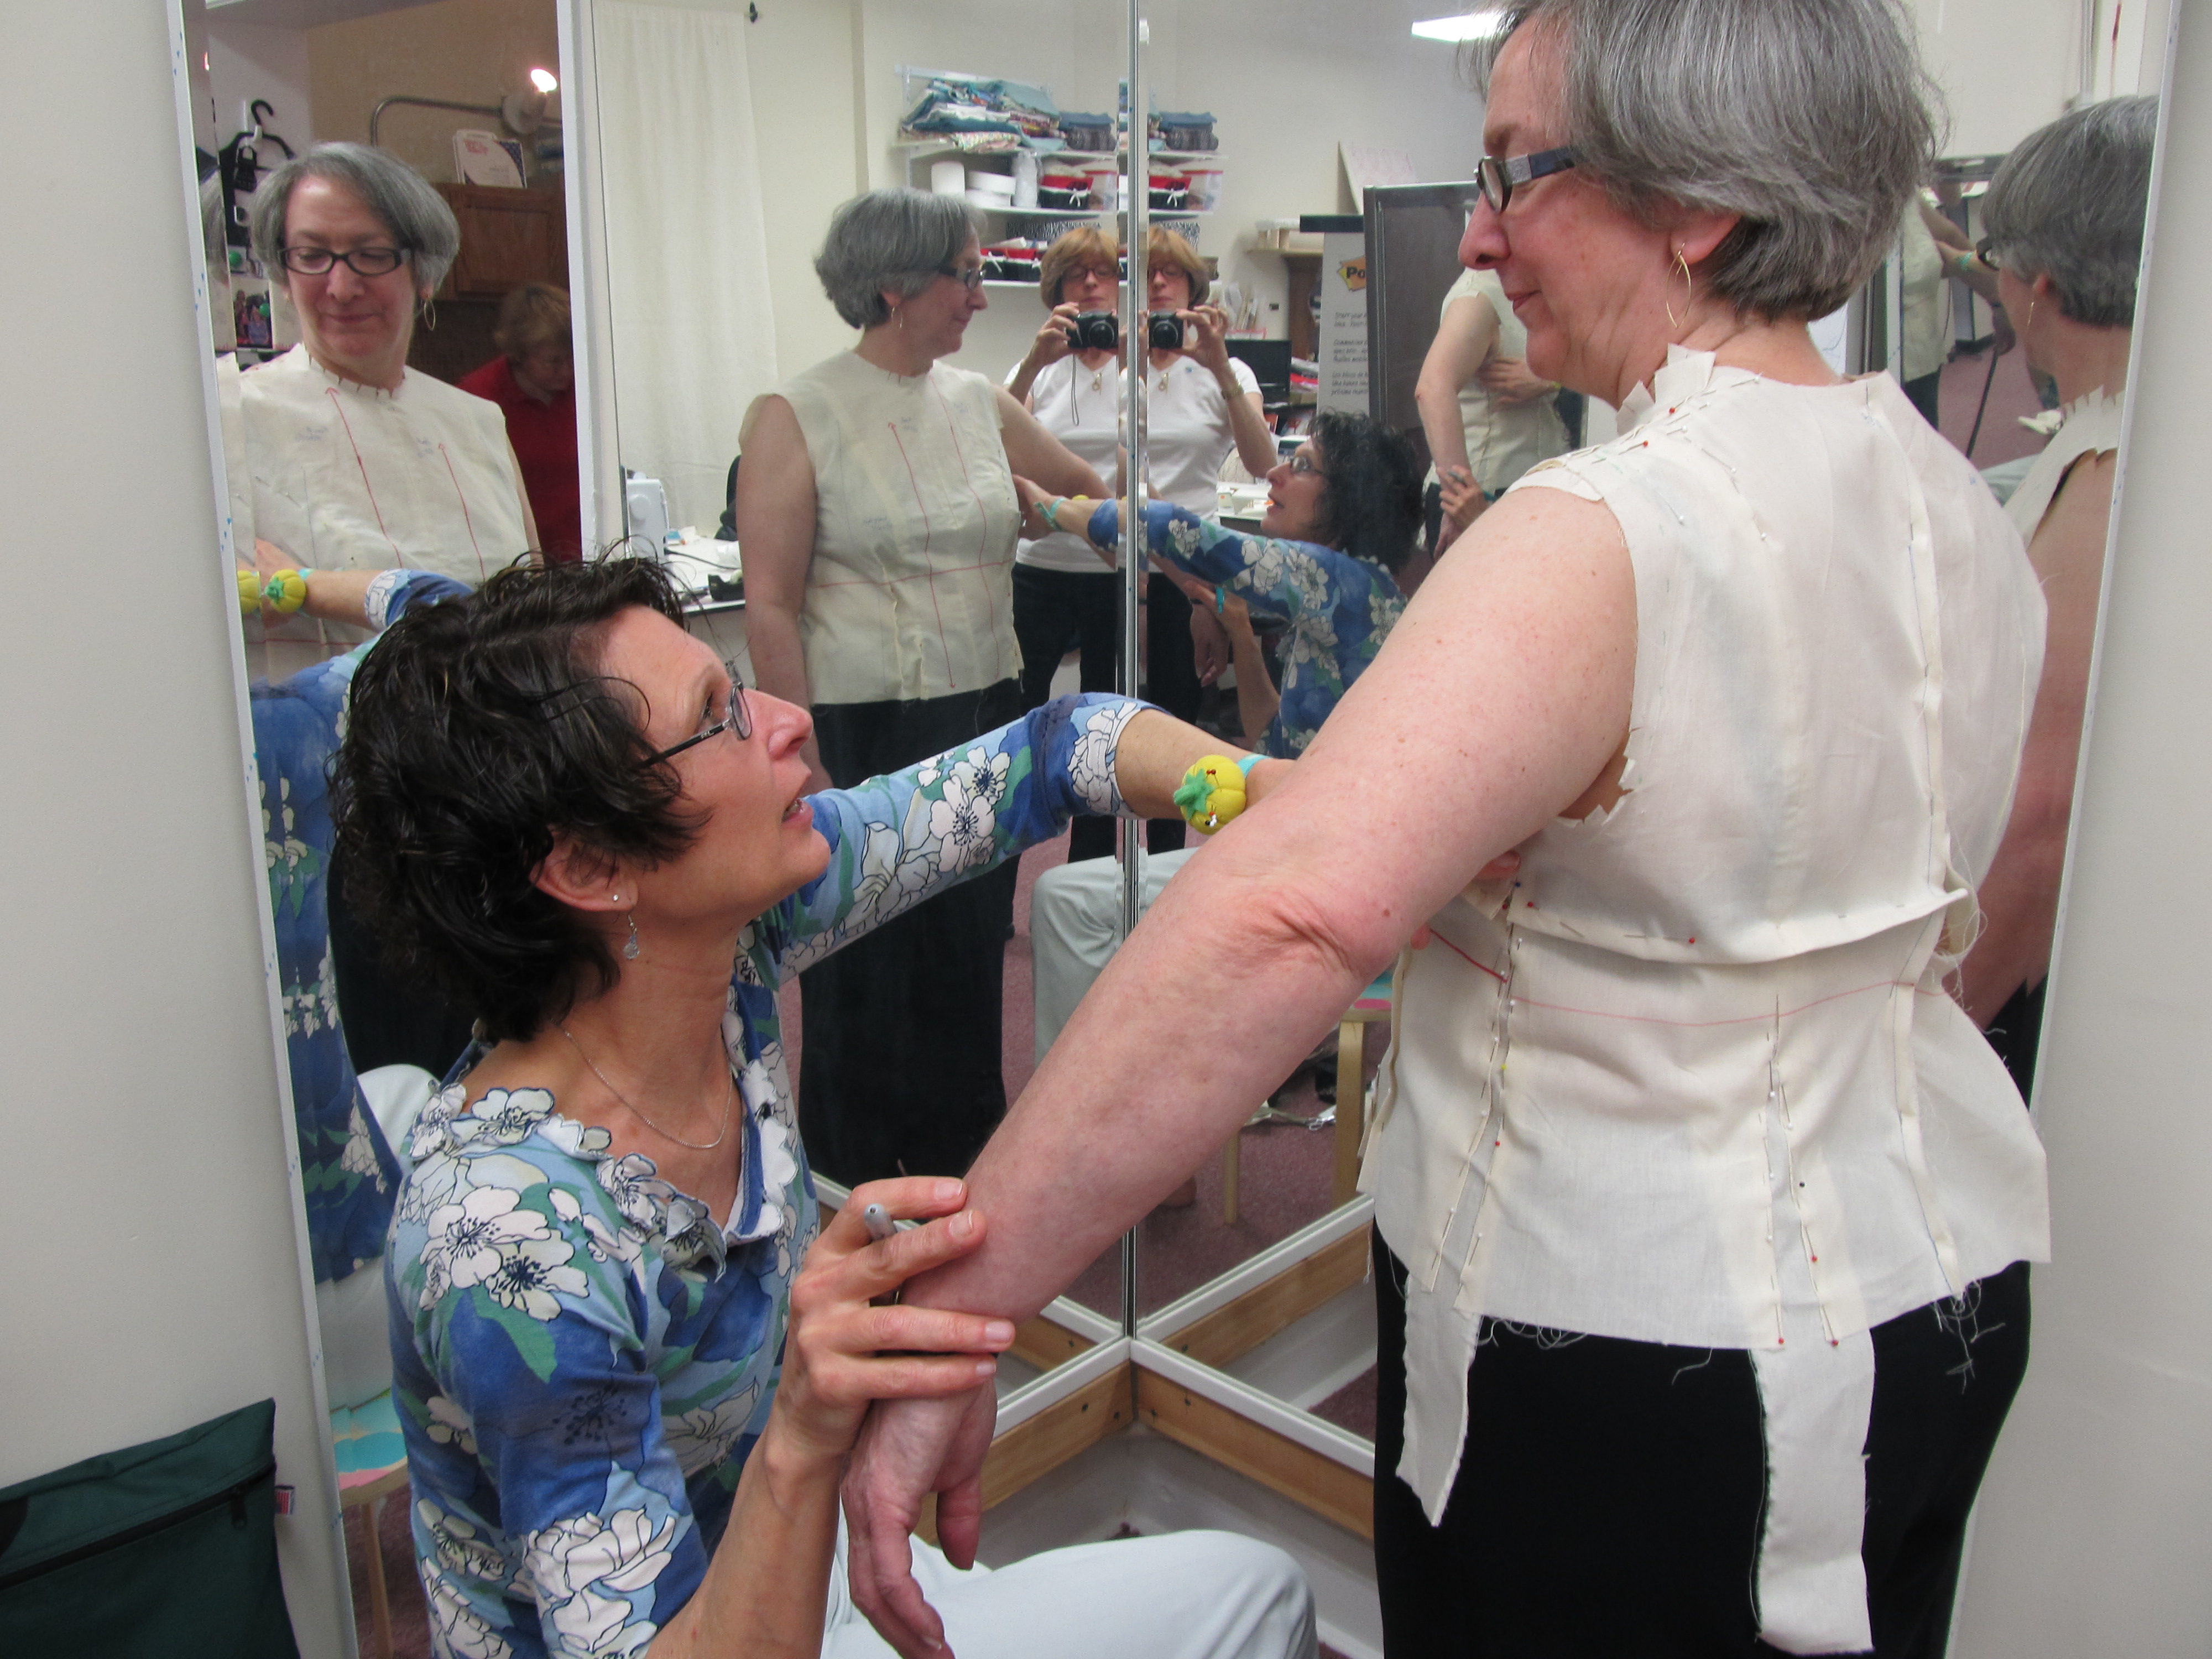
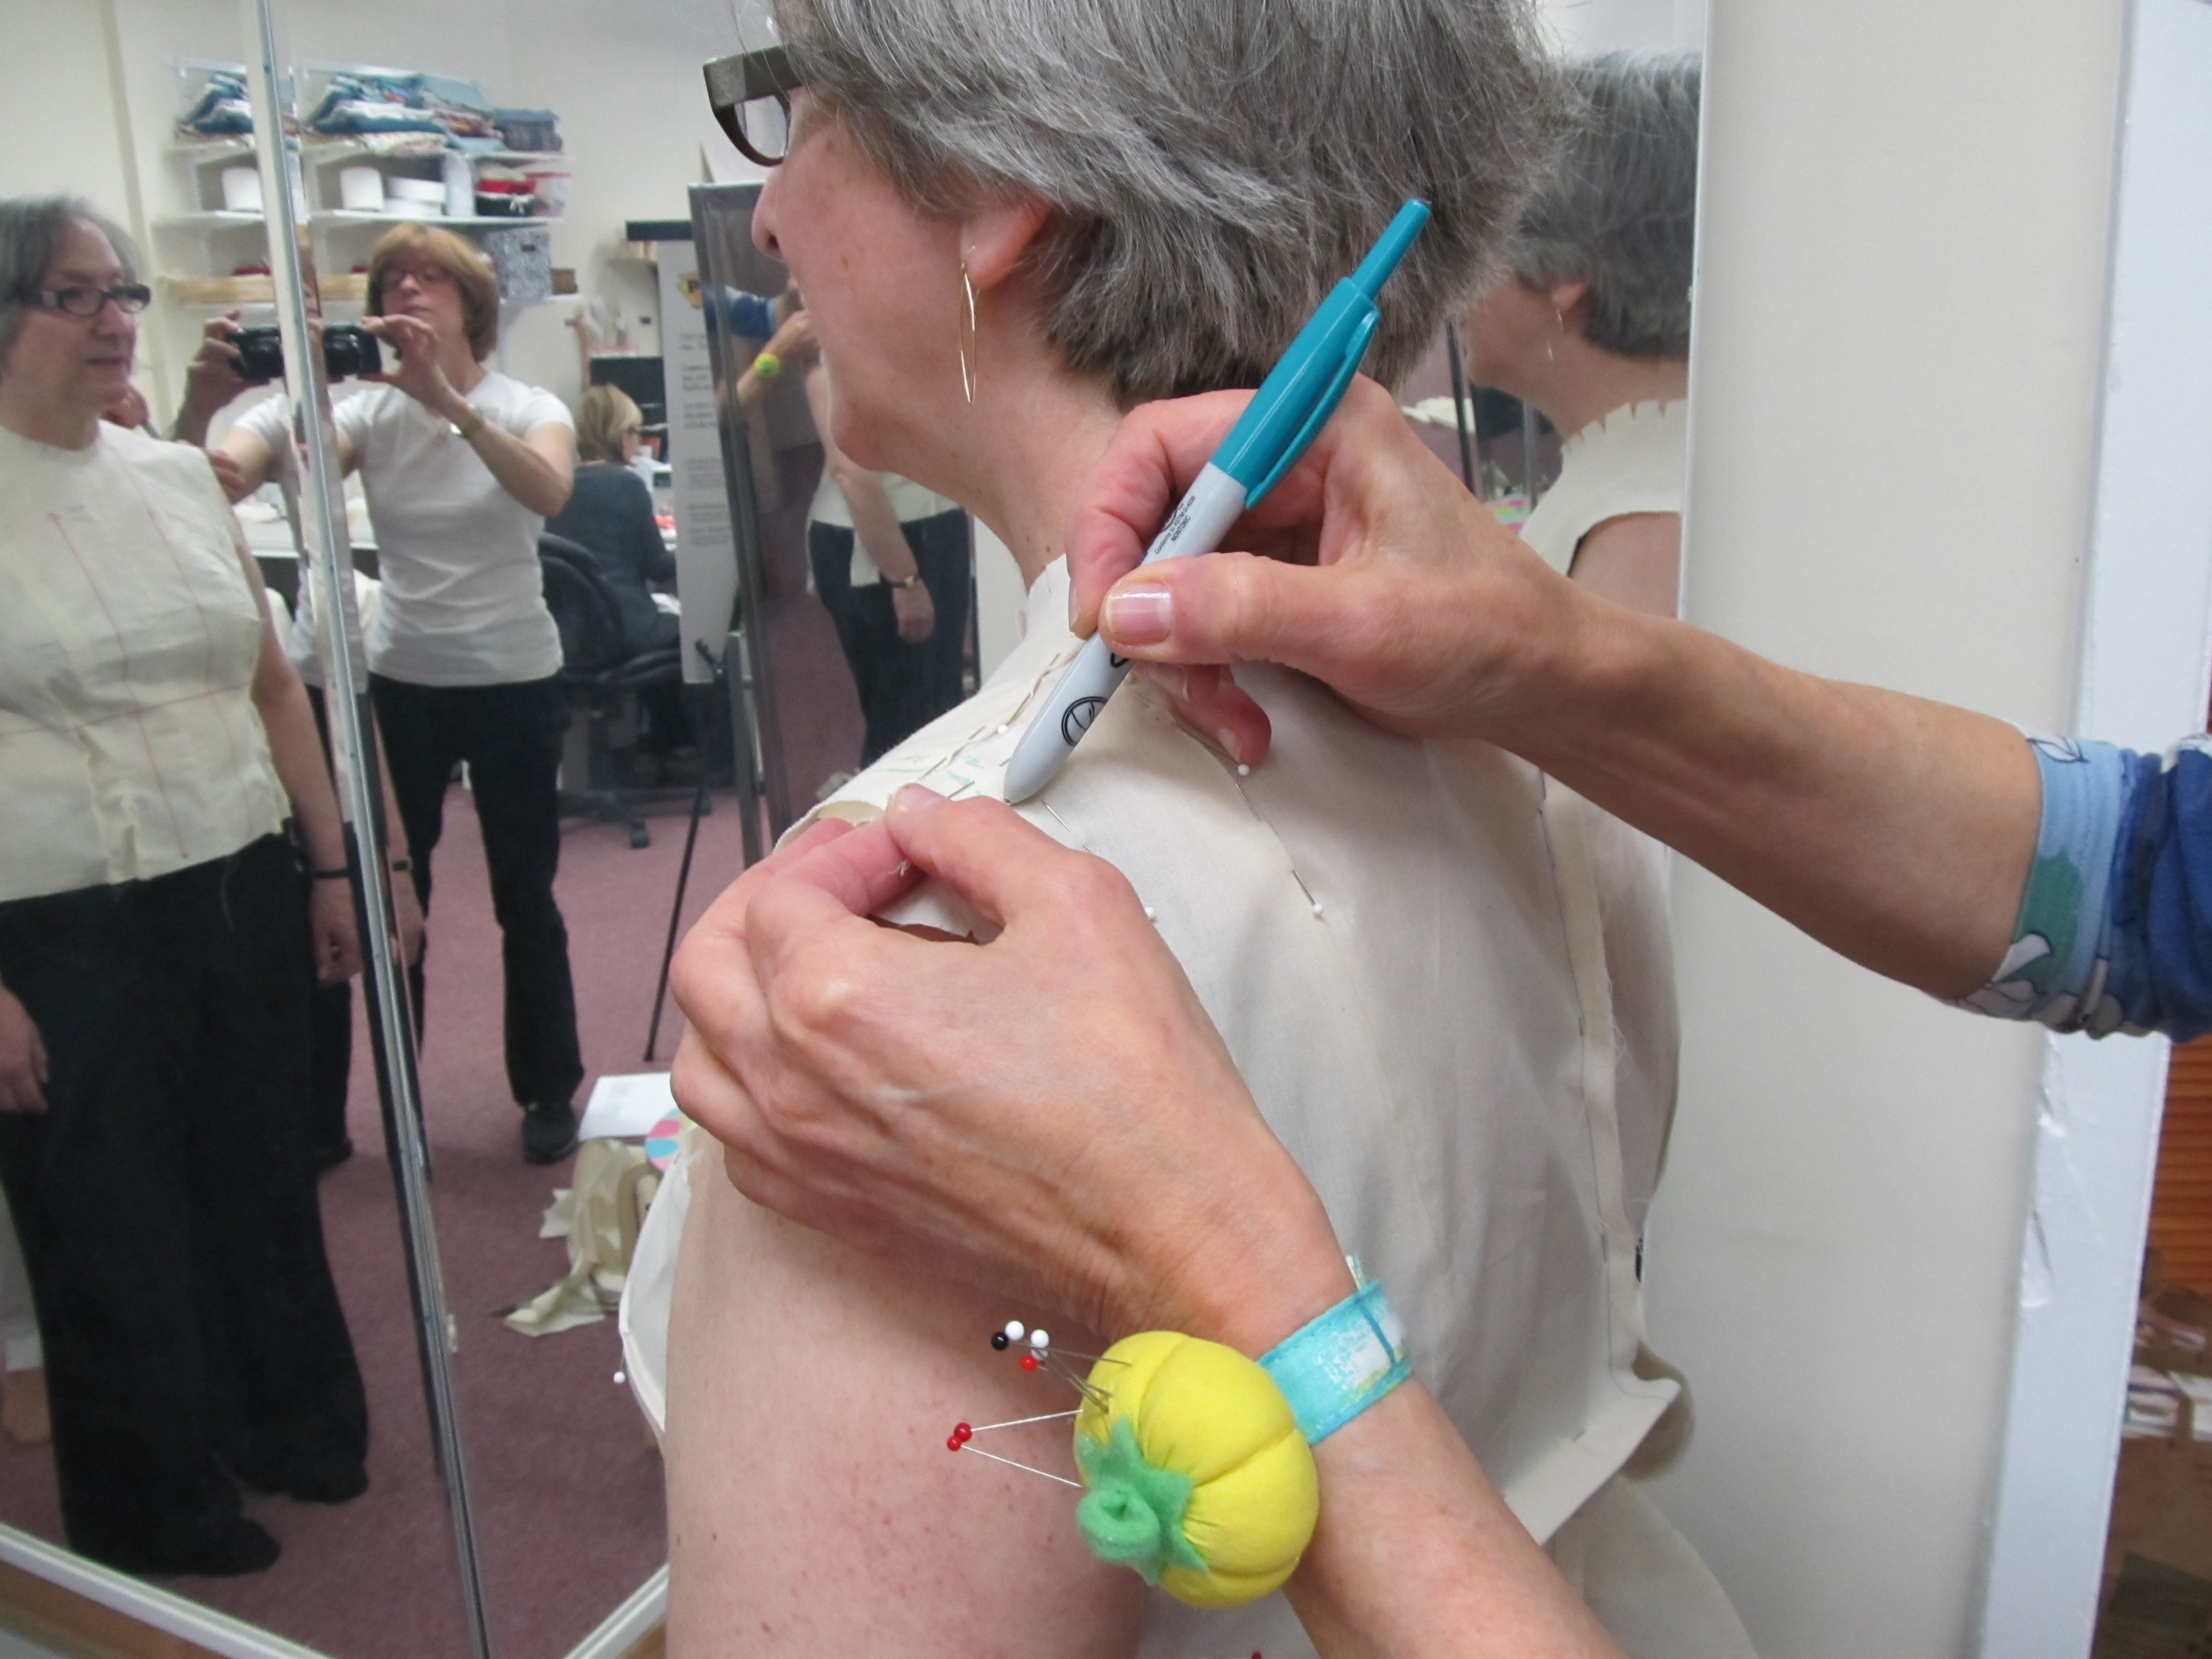
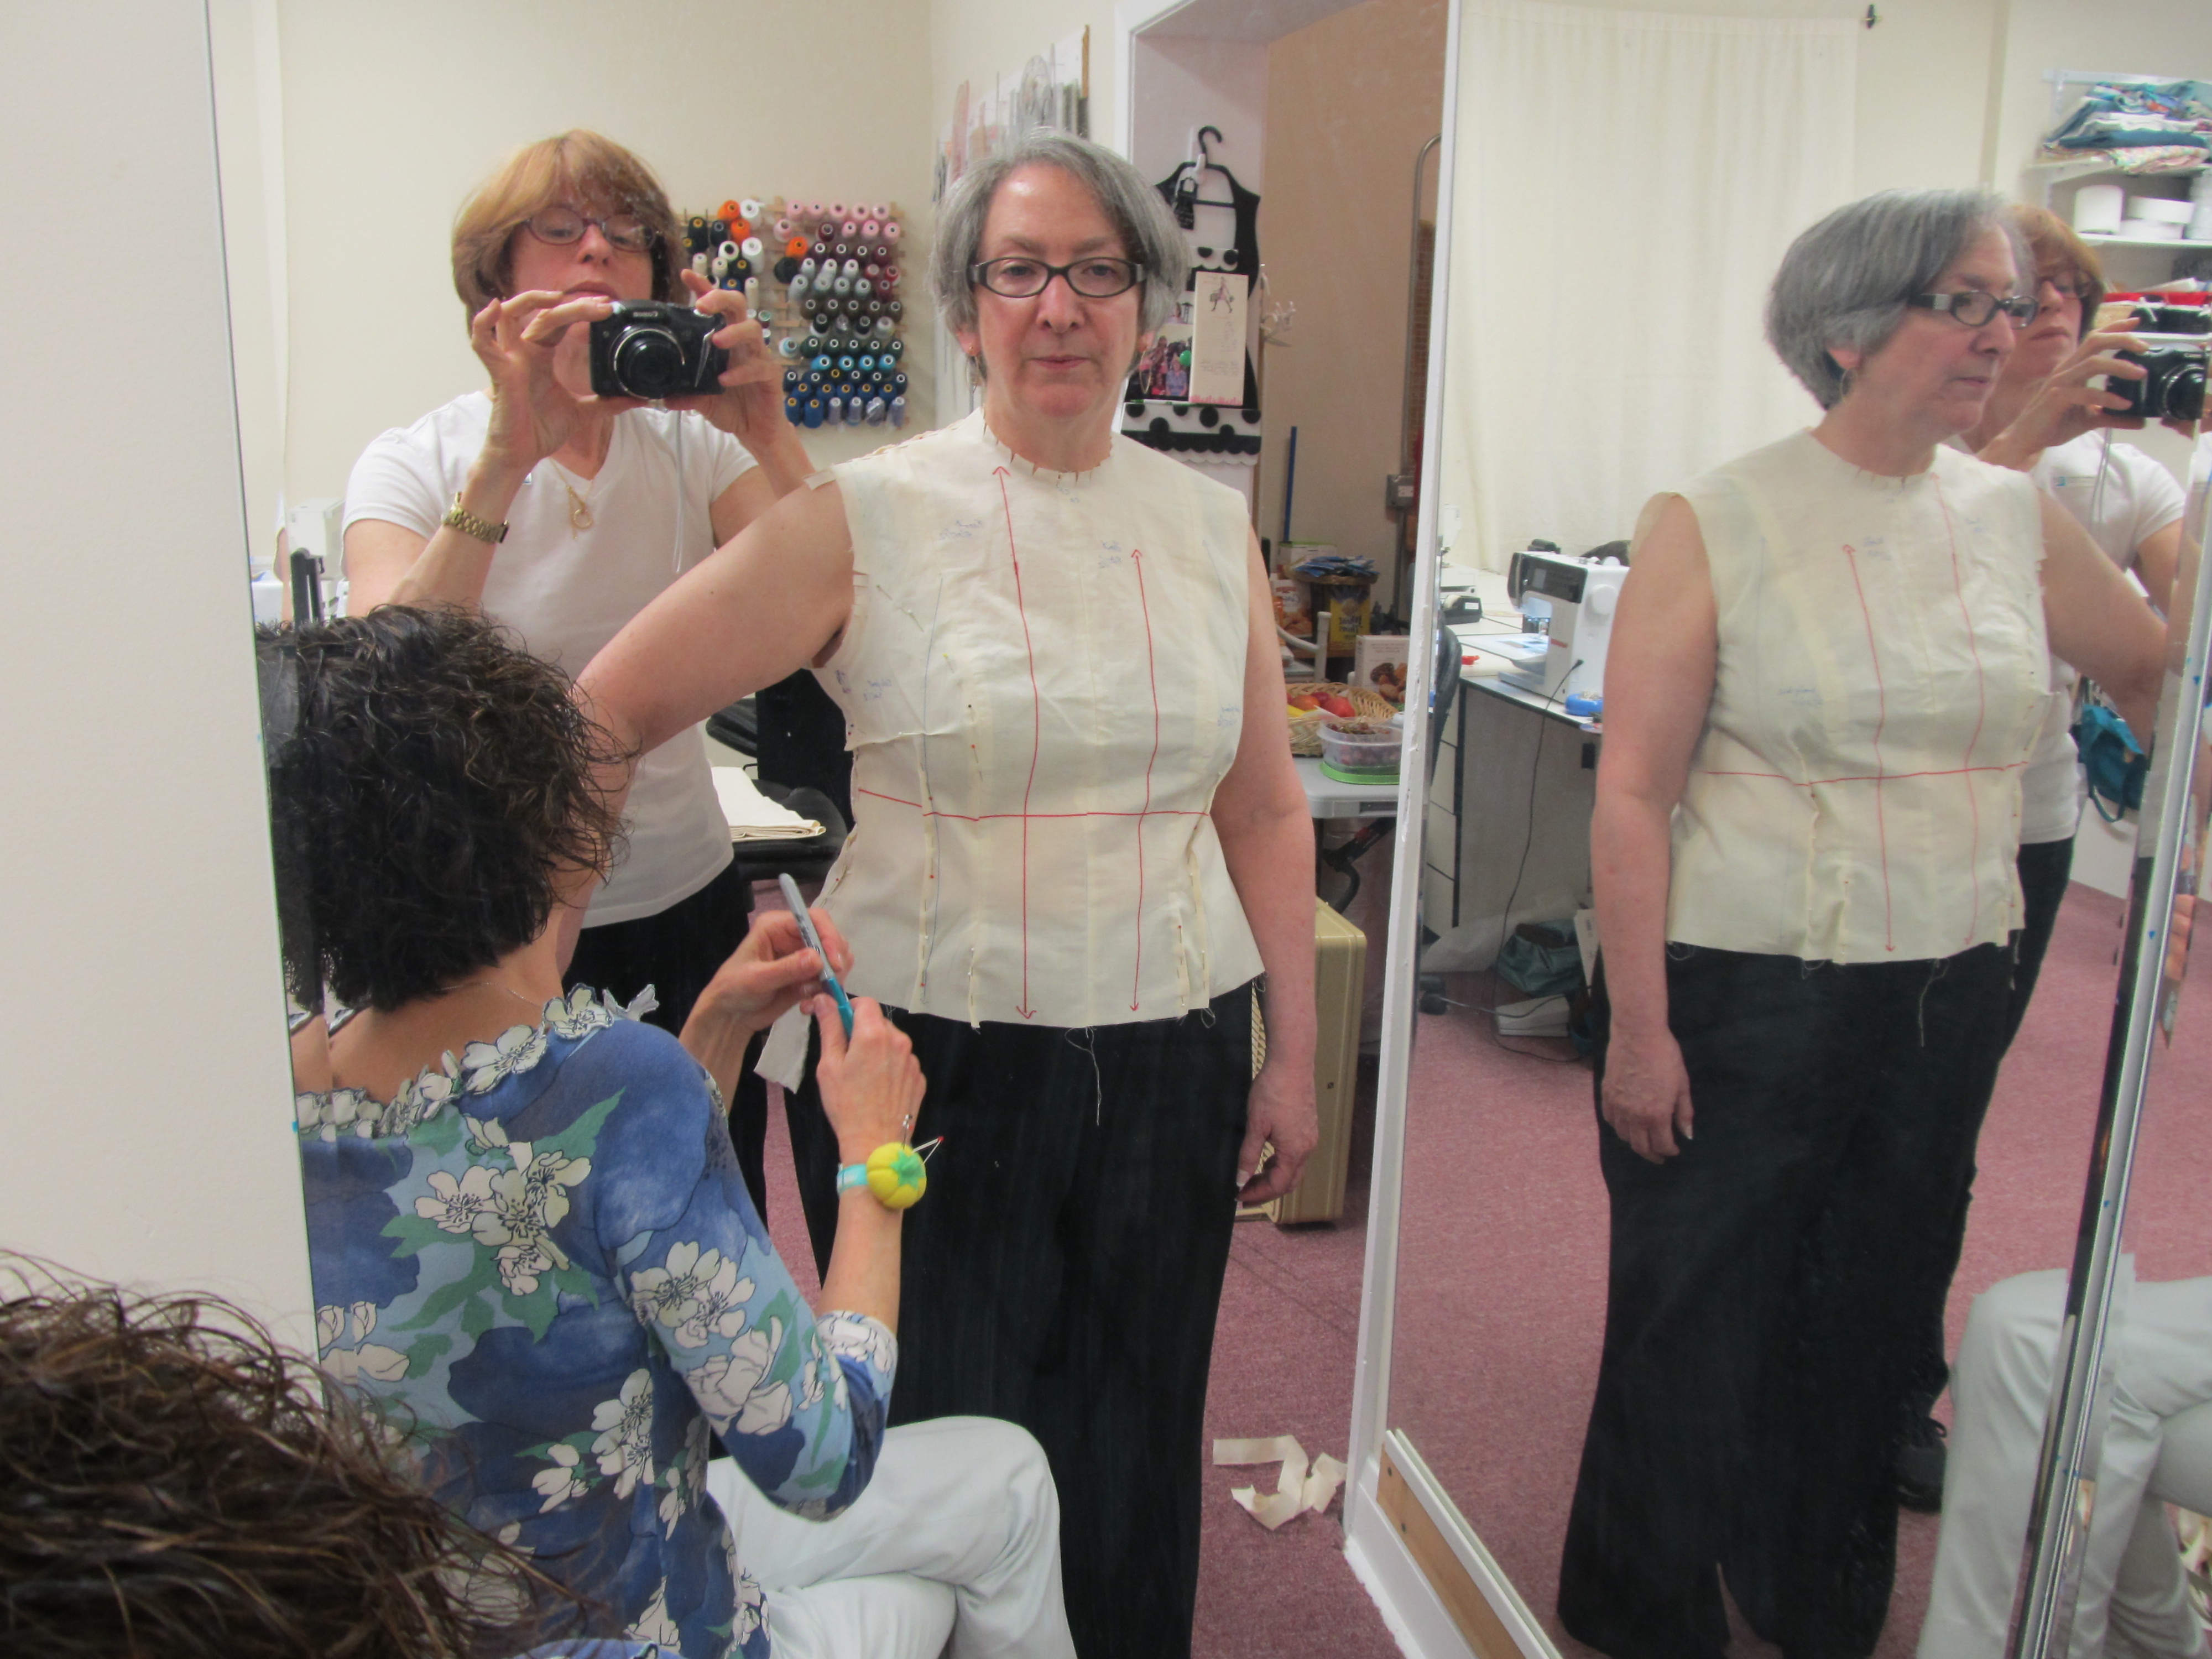
This picture also shows something that I found nerve wracking. I knew that moving away from princess seams was going to mean giving up the great curve-hugging fit I’d worked so hard to achieve with Sarah. I didn’t know whether I was going to like the final product, but this was a test and nothing ventured, nothing gained. The thing that set me back on my heels was the amount of distortion that took place in the shoulder seam. Seeing that dredged up all the missteps and wrong turns I’d taken when trying to make pattern adjustments. I had to remind myself that this was just an experiment and the worst thing that could happen would be I wouldn’t have this type of garment in my repertoire. So, I filled in all the gaps with paper, drew a line from the neck edge to the shoulder point and kept going.

Of course, the overlapping you see at the hem has to be added back in somewhere to provide the correct circumference. For my first muslin test, I put almost all of that into extra fabric at the shoulder that became pleat intake. The rest I added to the side seams.

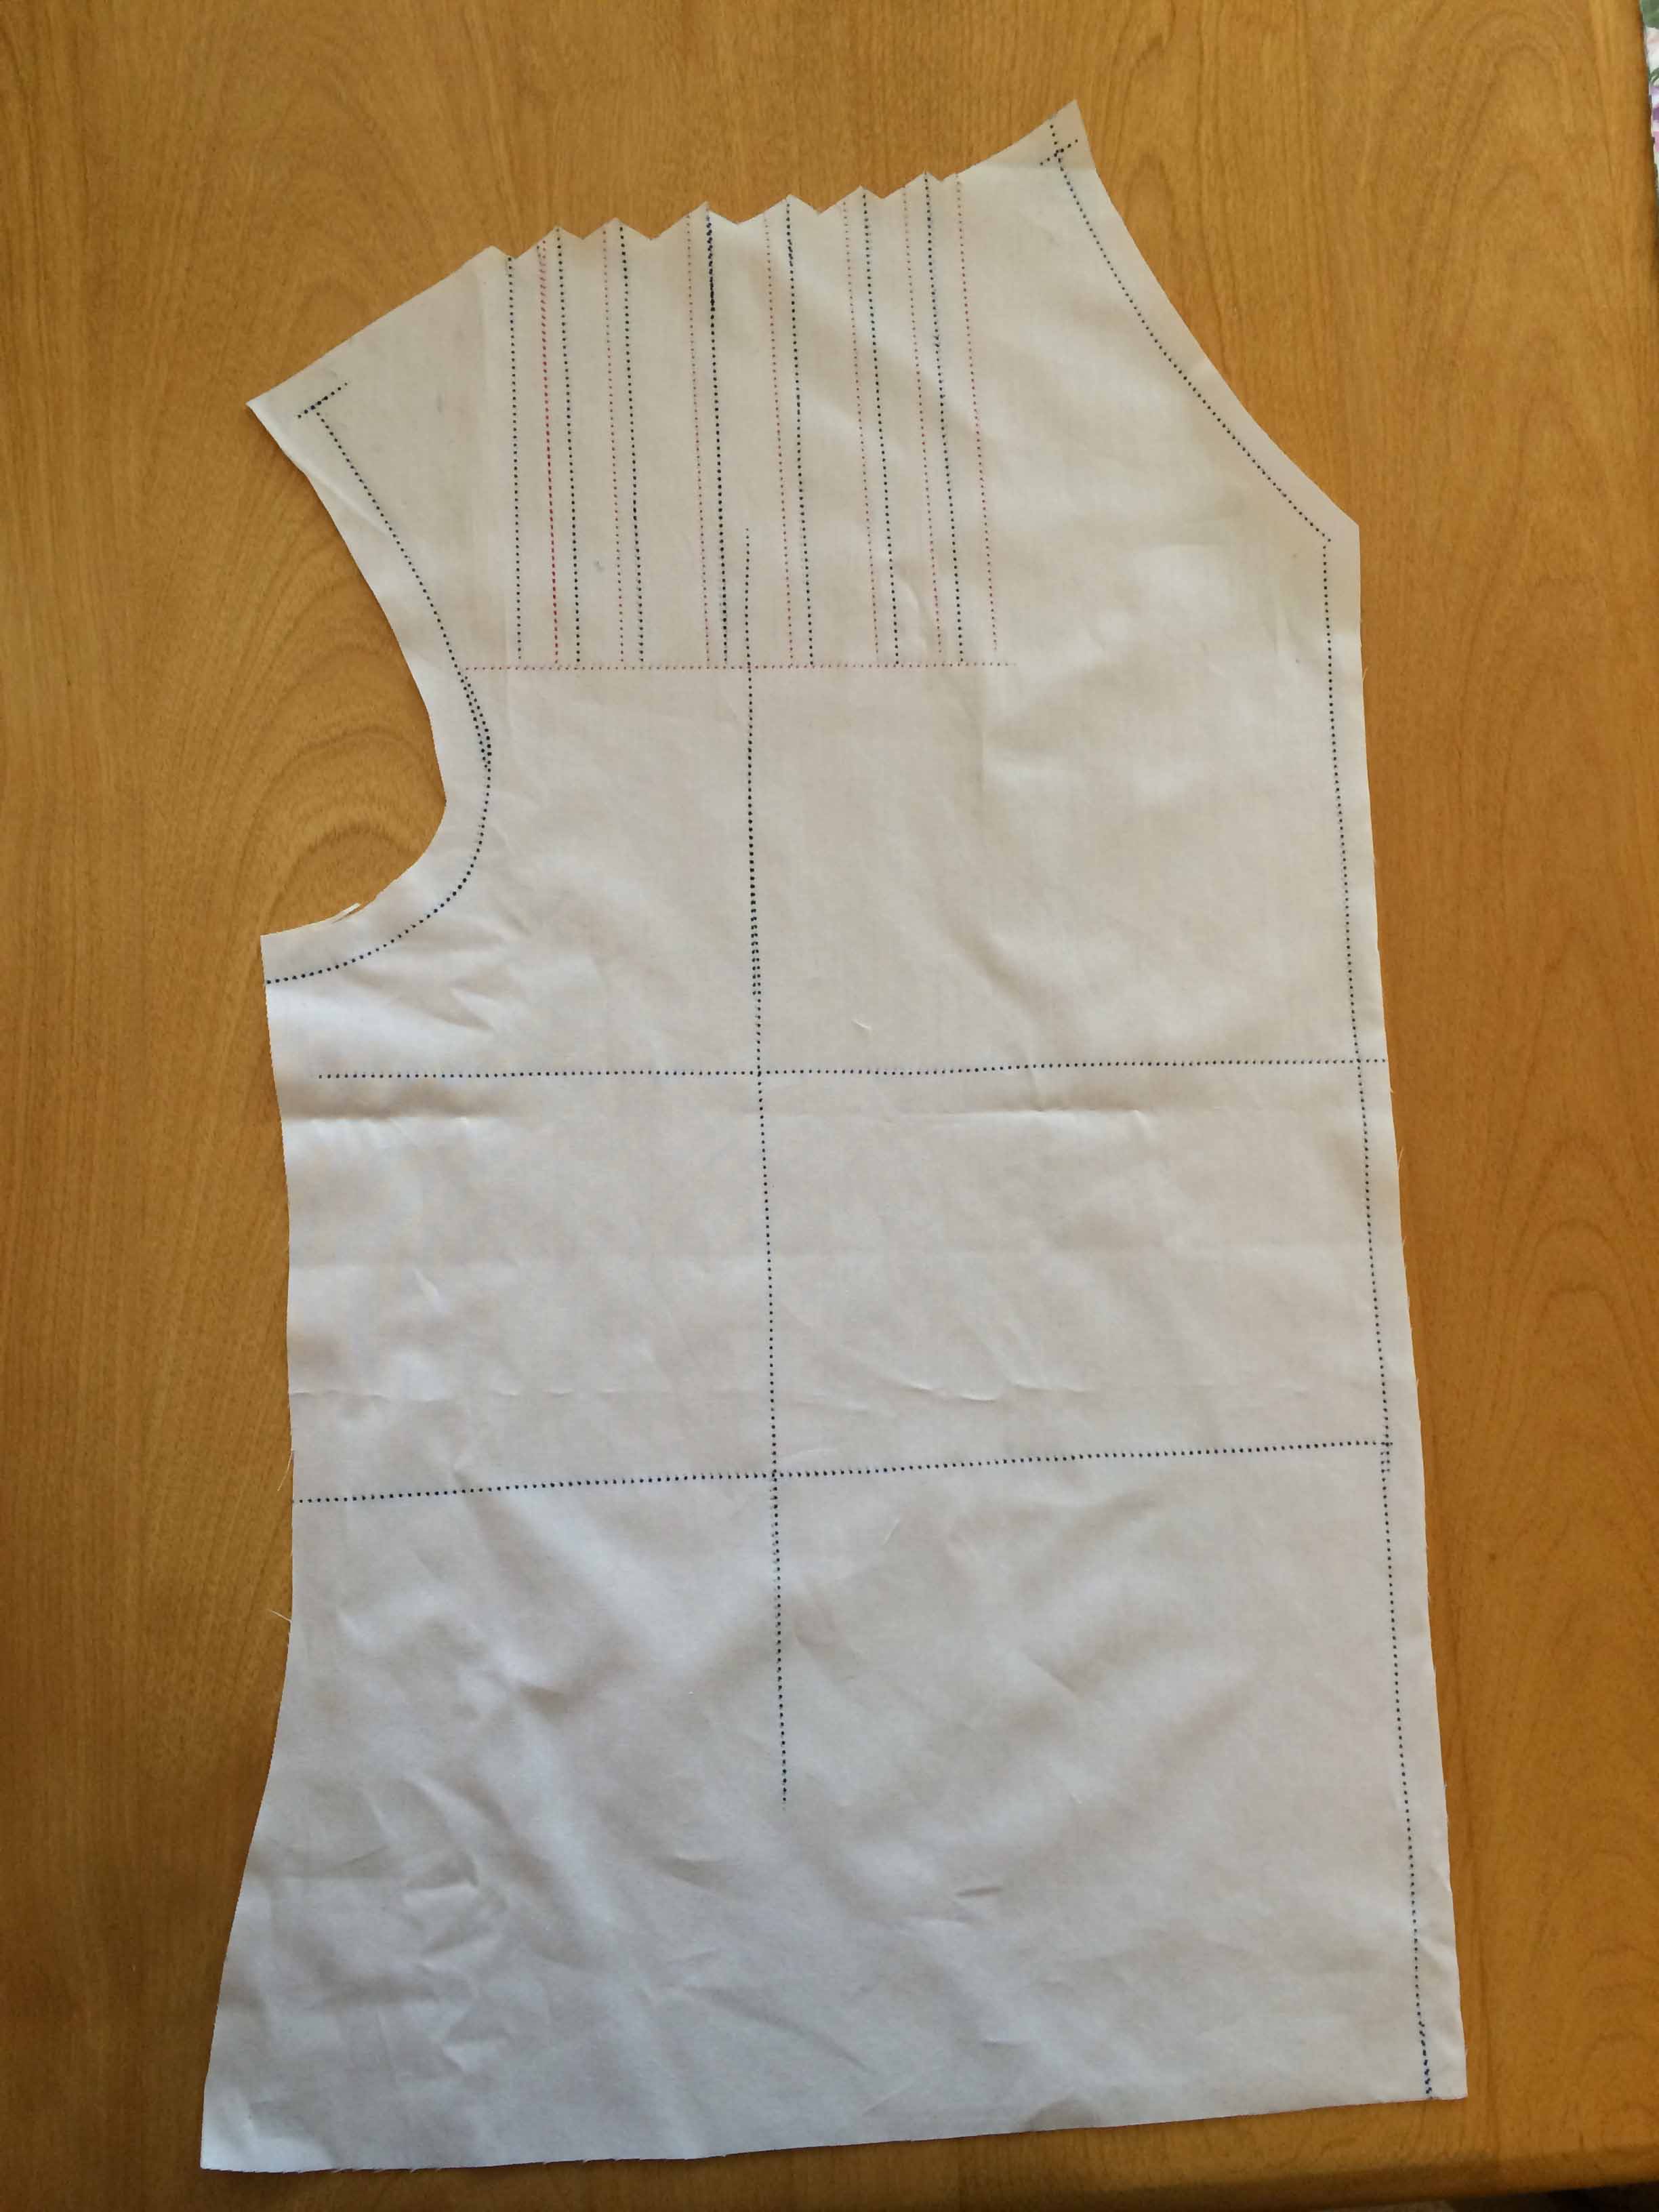
Here is one of the bodice pieces cut and marked in muslin.

All rotated to shoulder
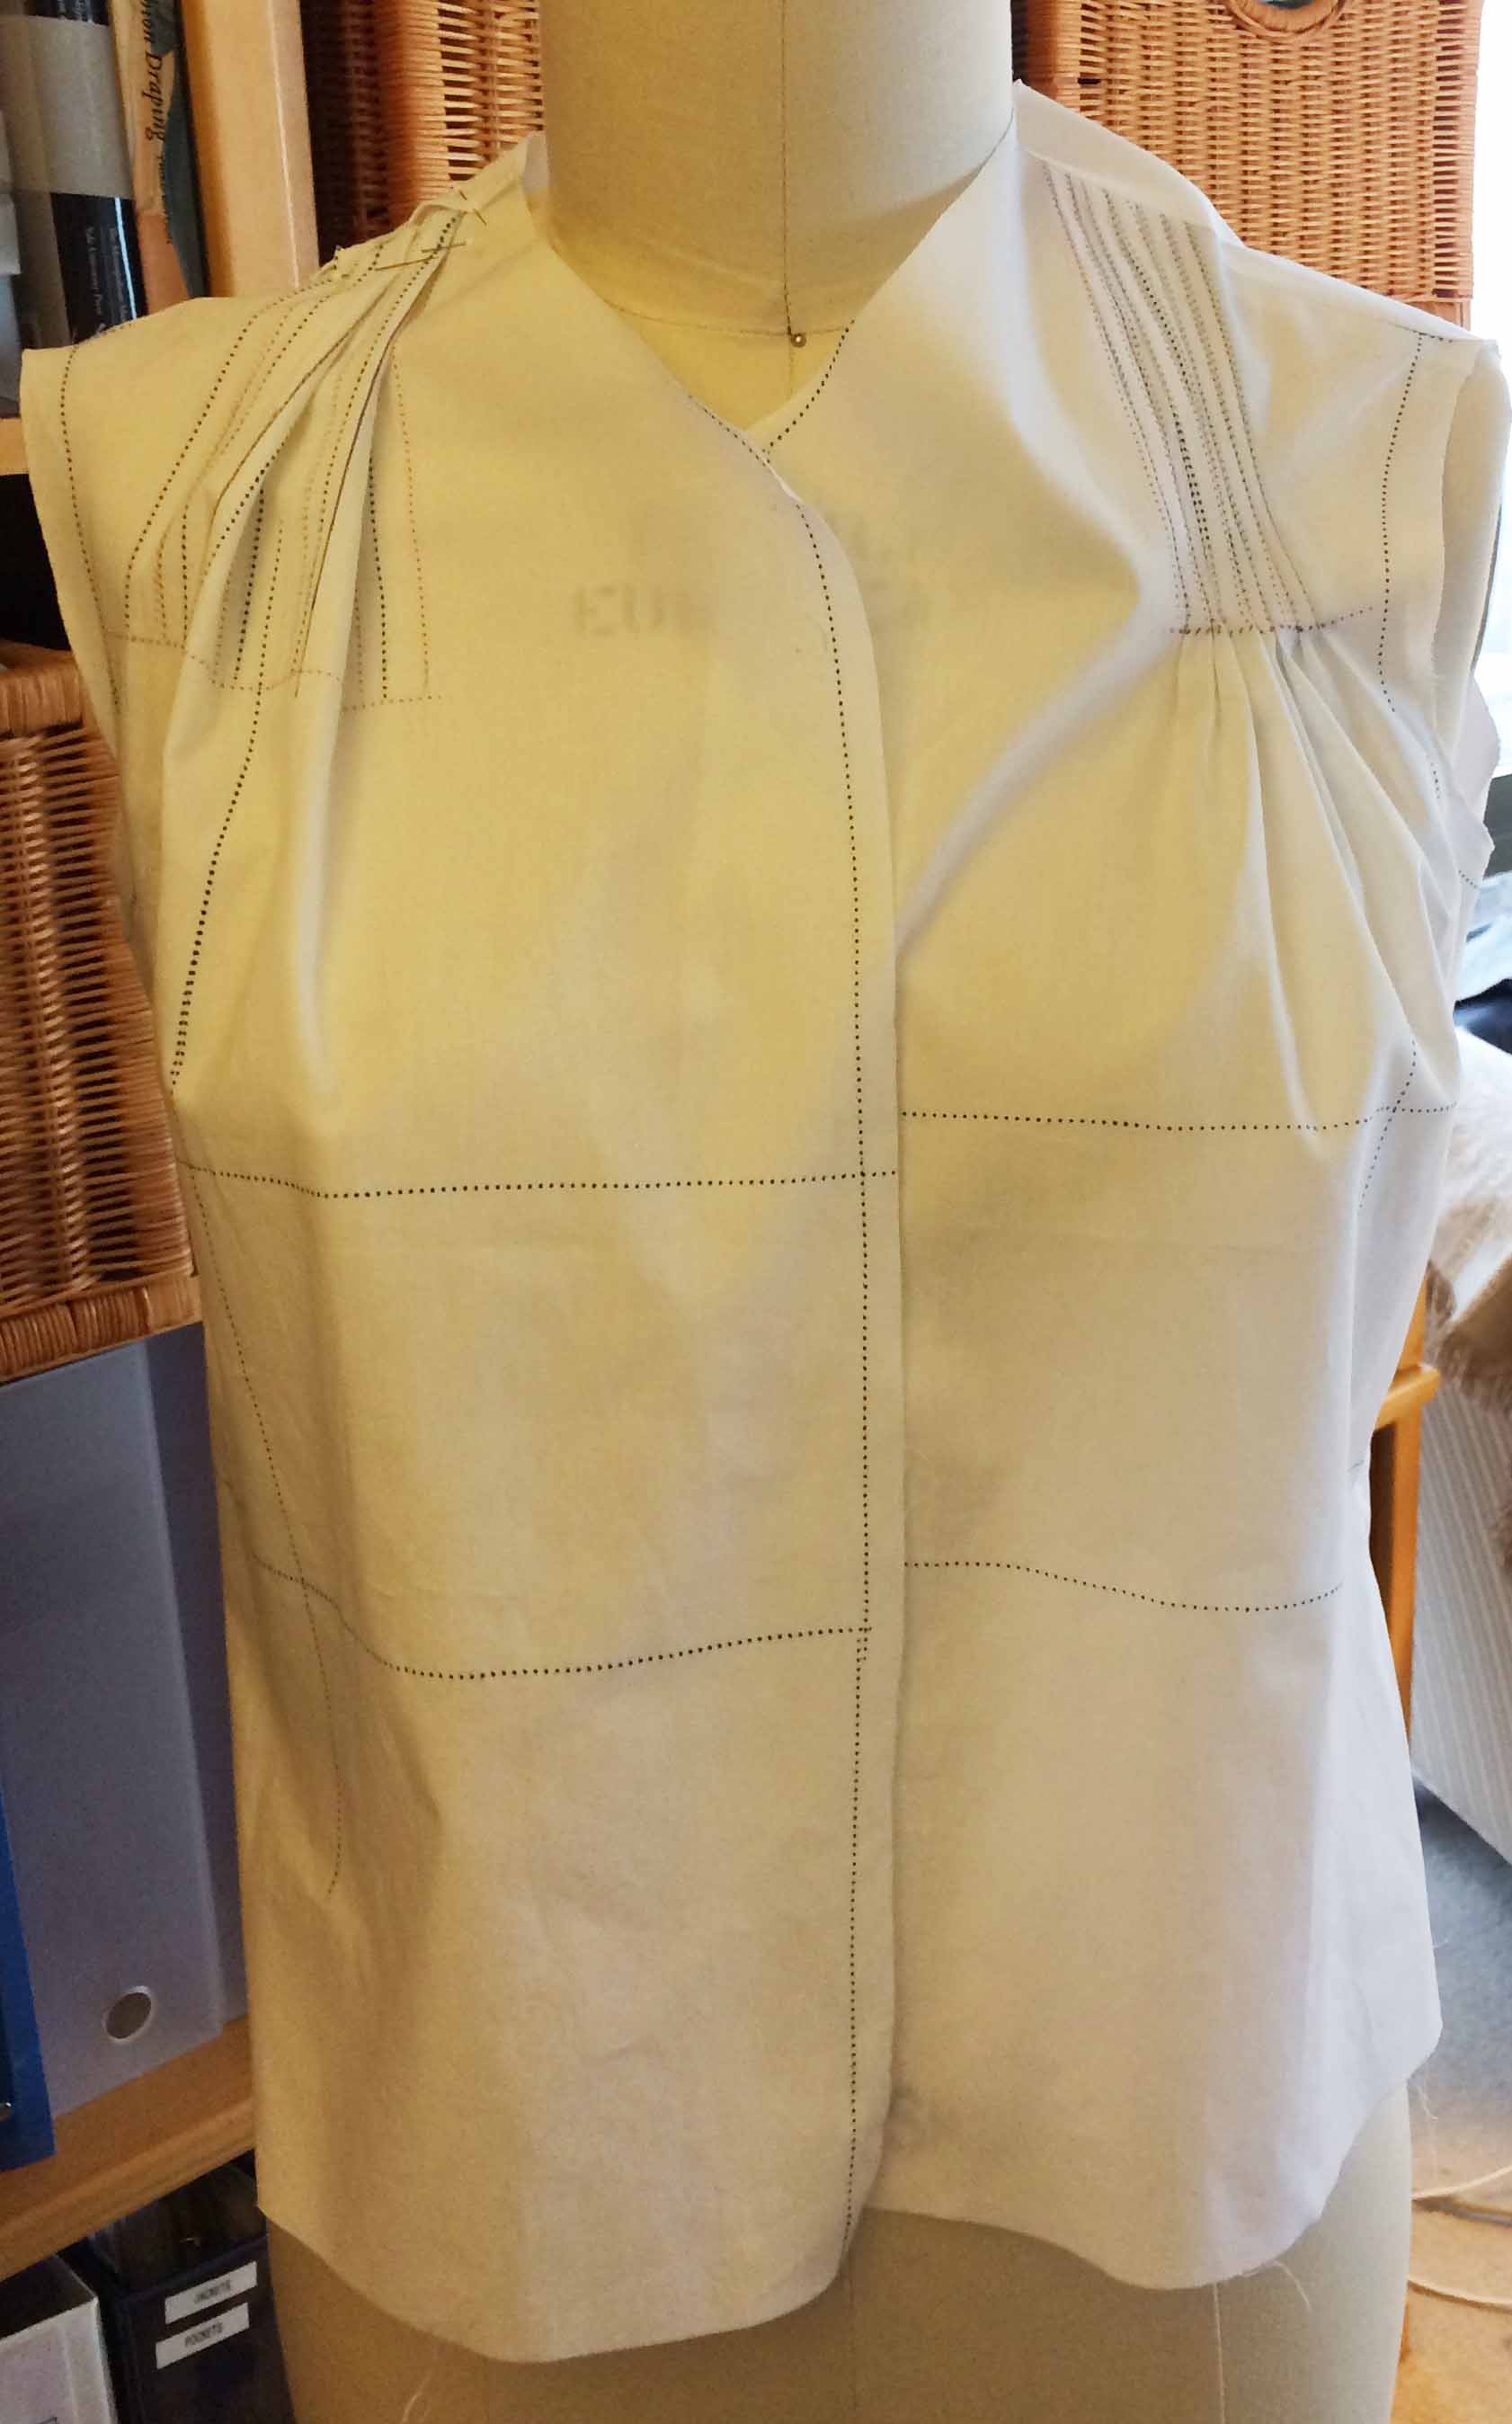
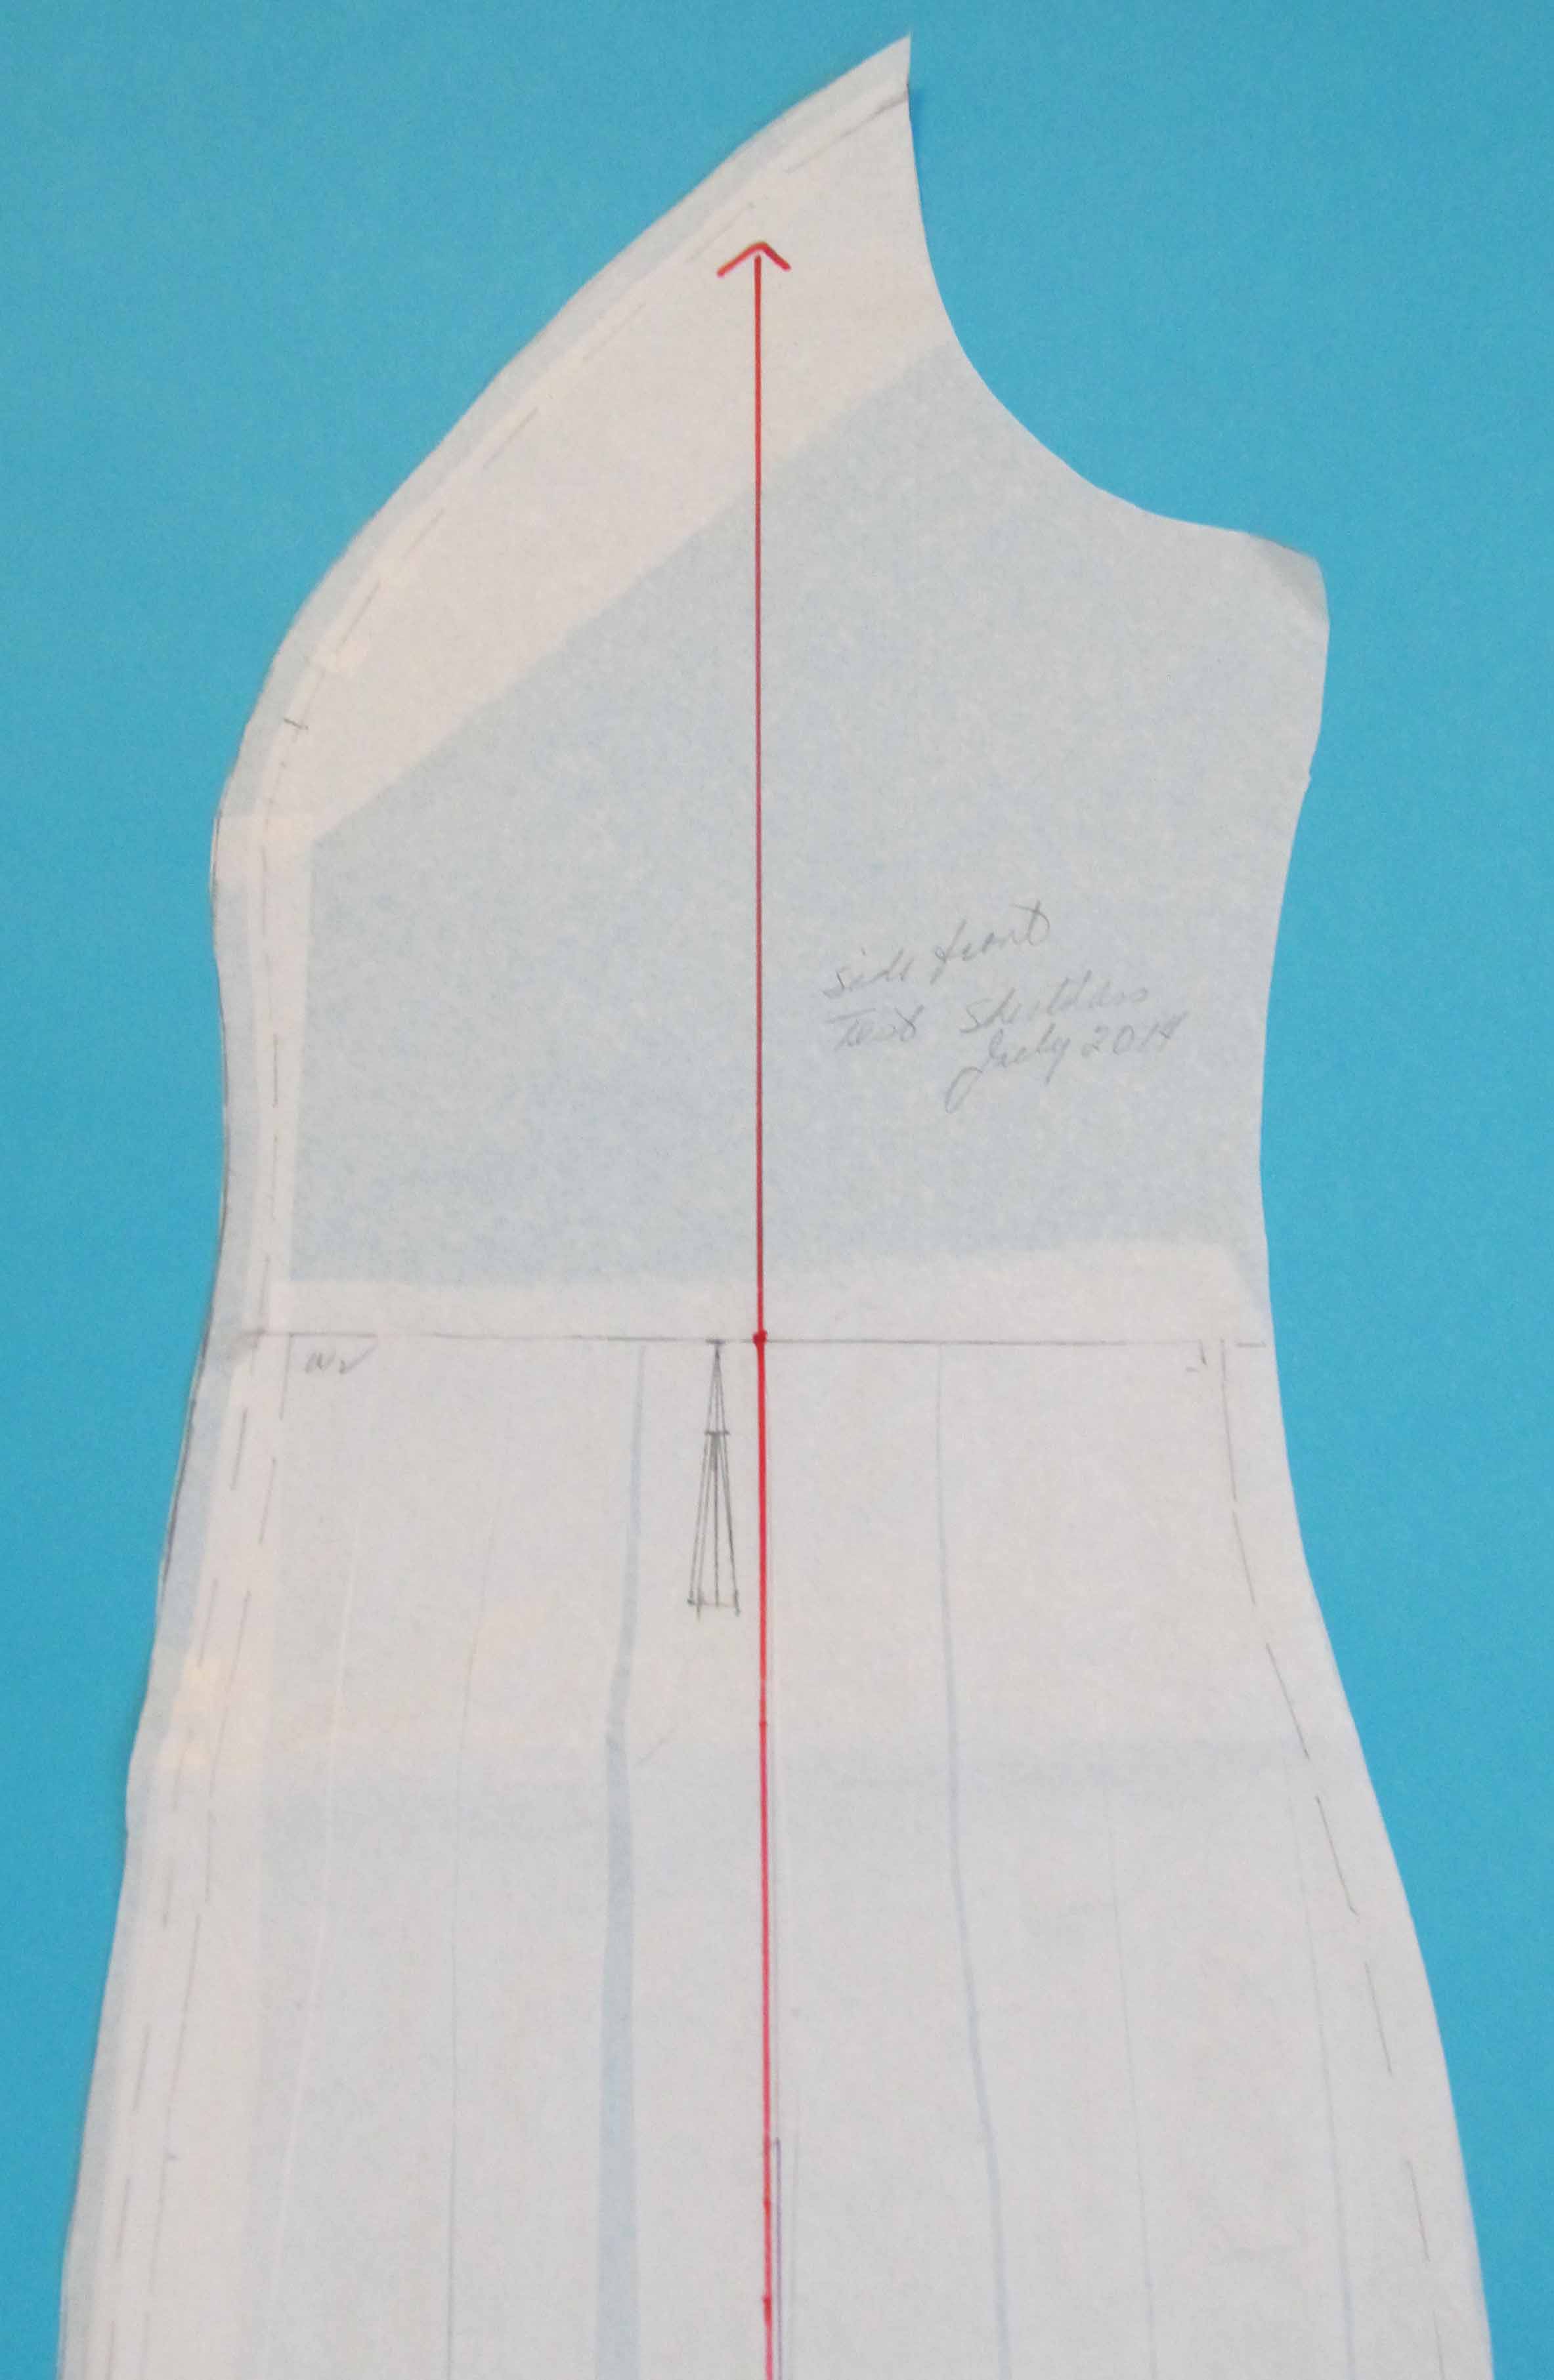
I was pretty sure I wanted pleats, as opposed to just tucks, at least for the woven version. One thing I had to work out was how far down I wanted them stitched. As I worked on this it also occurred to me that a variation with a yoke might be nice, but first I had to get the concept to work.

Skewed pleats and splayed
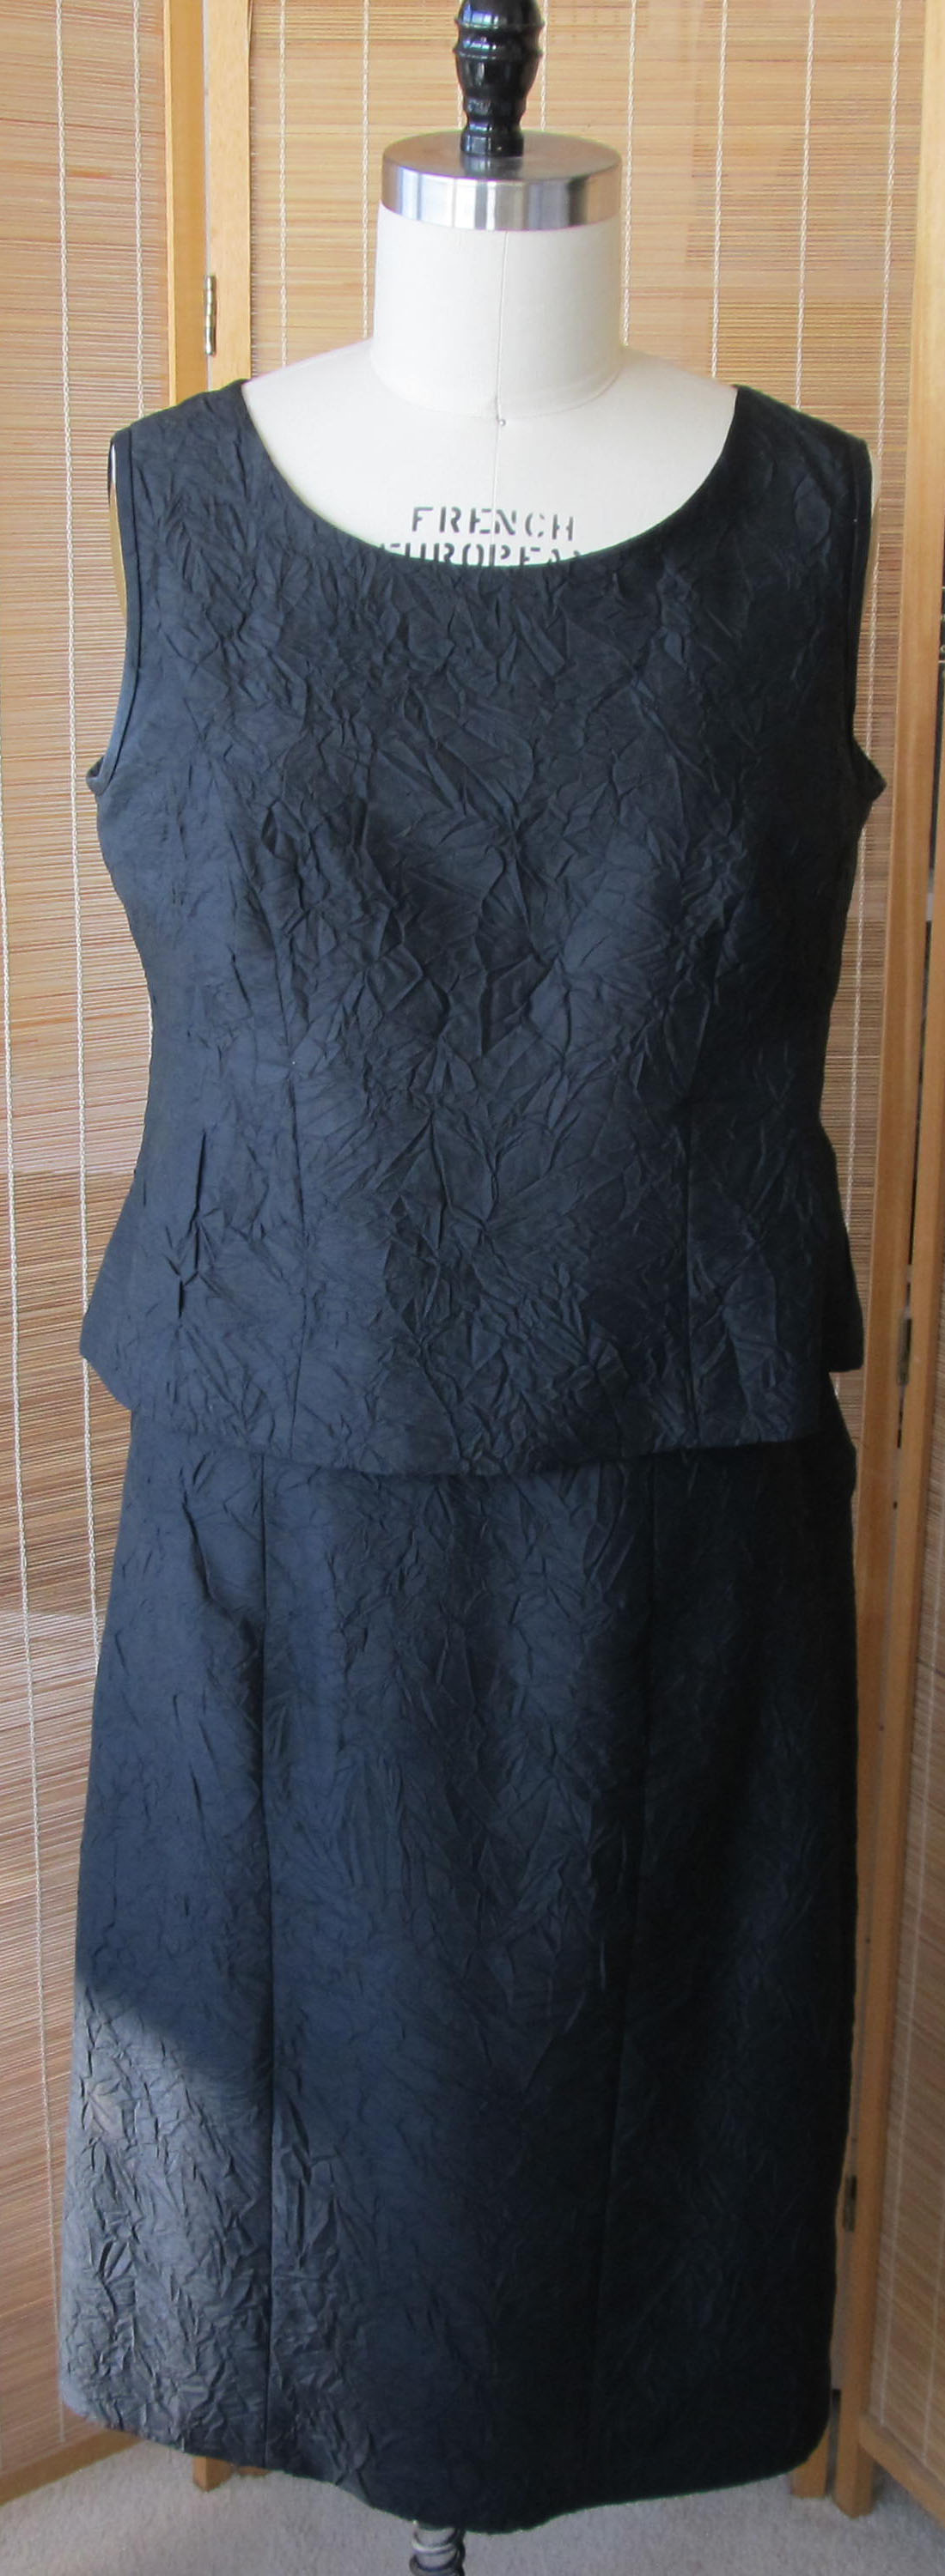
As you can see, the first test did not turn out well. Although the pleats were marked on grain, they pointed outward on the body.

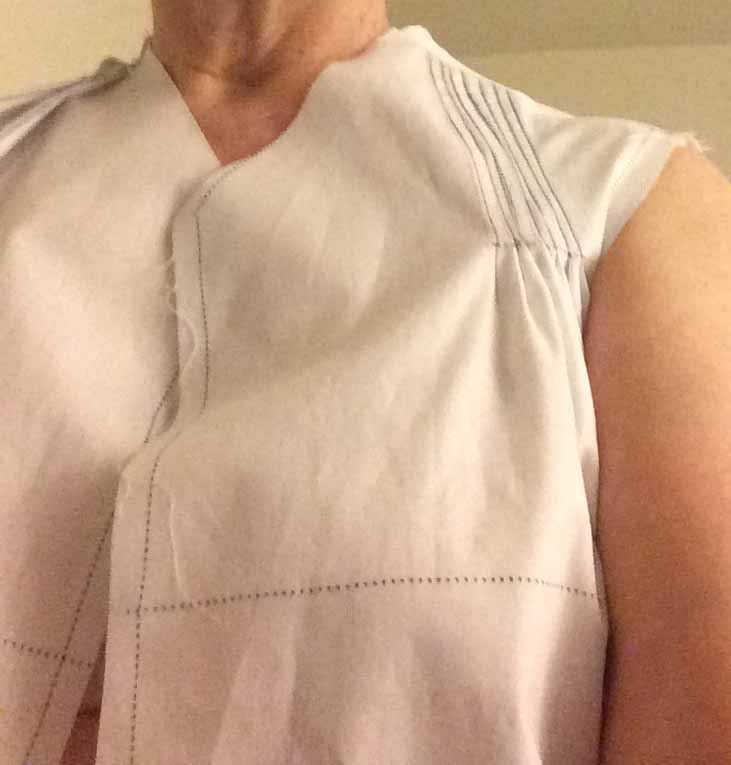
The next picture shows my experiments with tucks versus pleats stitched almost to the bust.

Muslin Test1_2
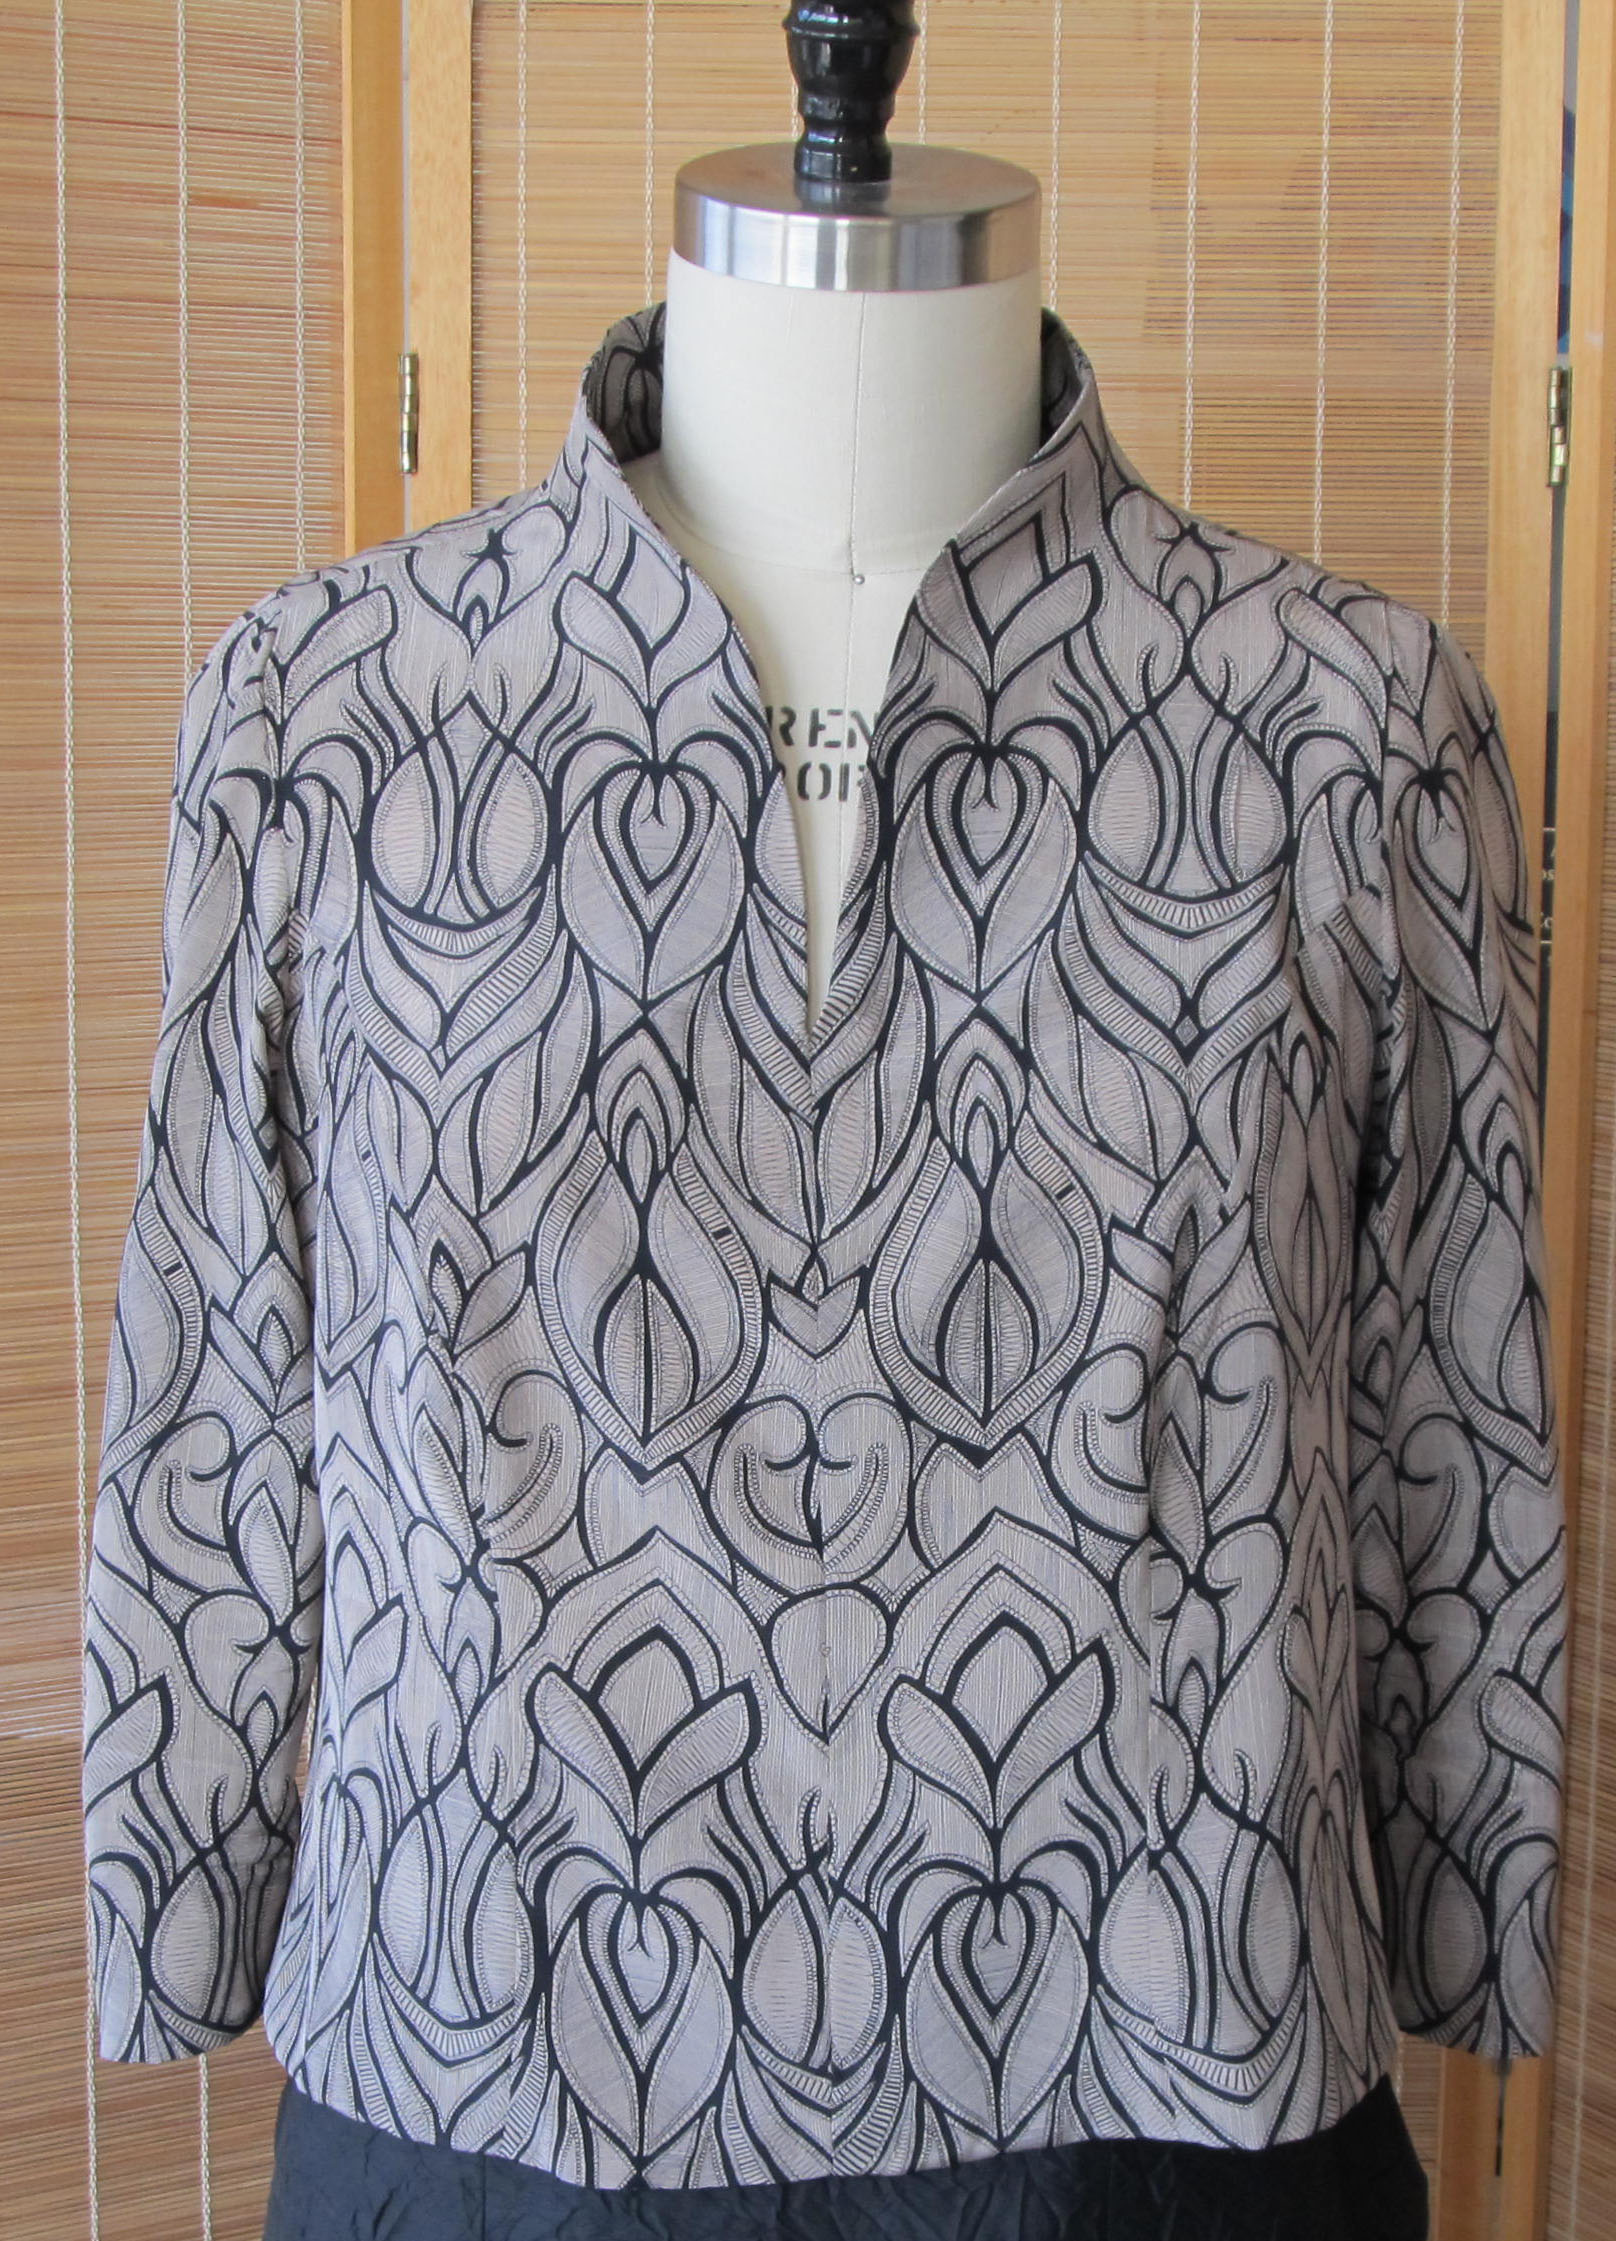
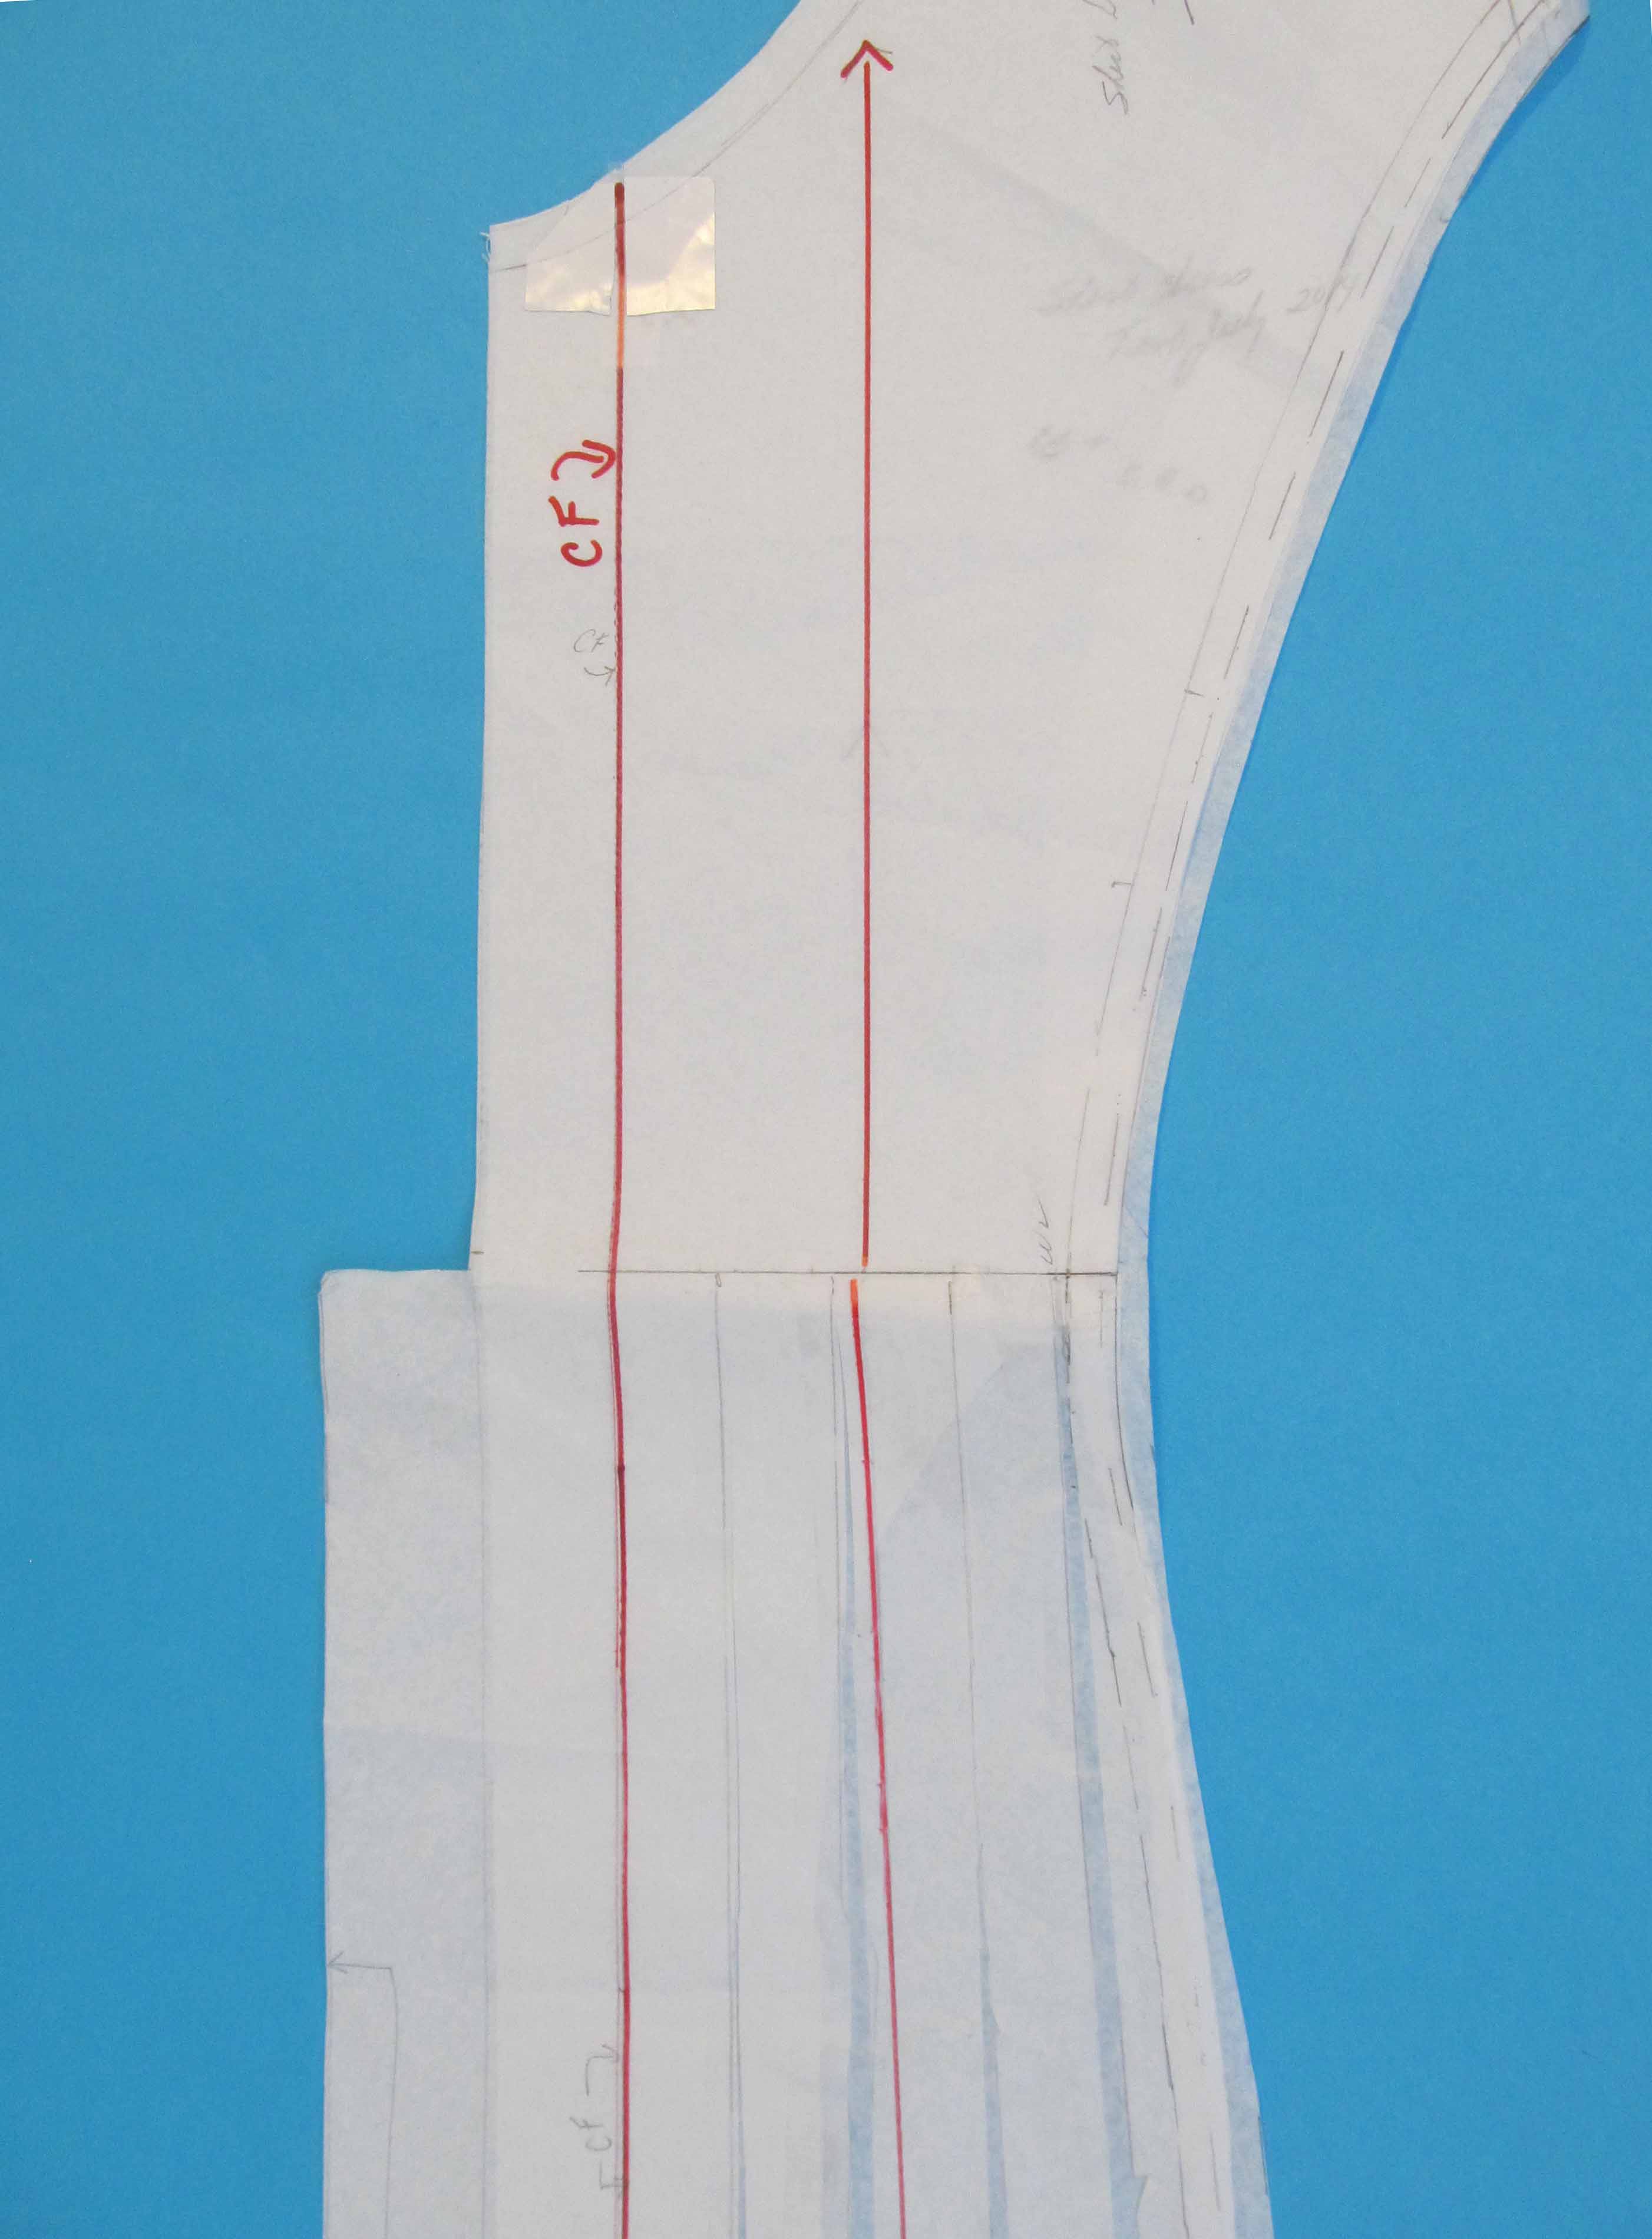
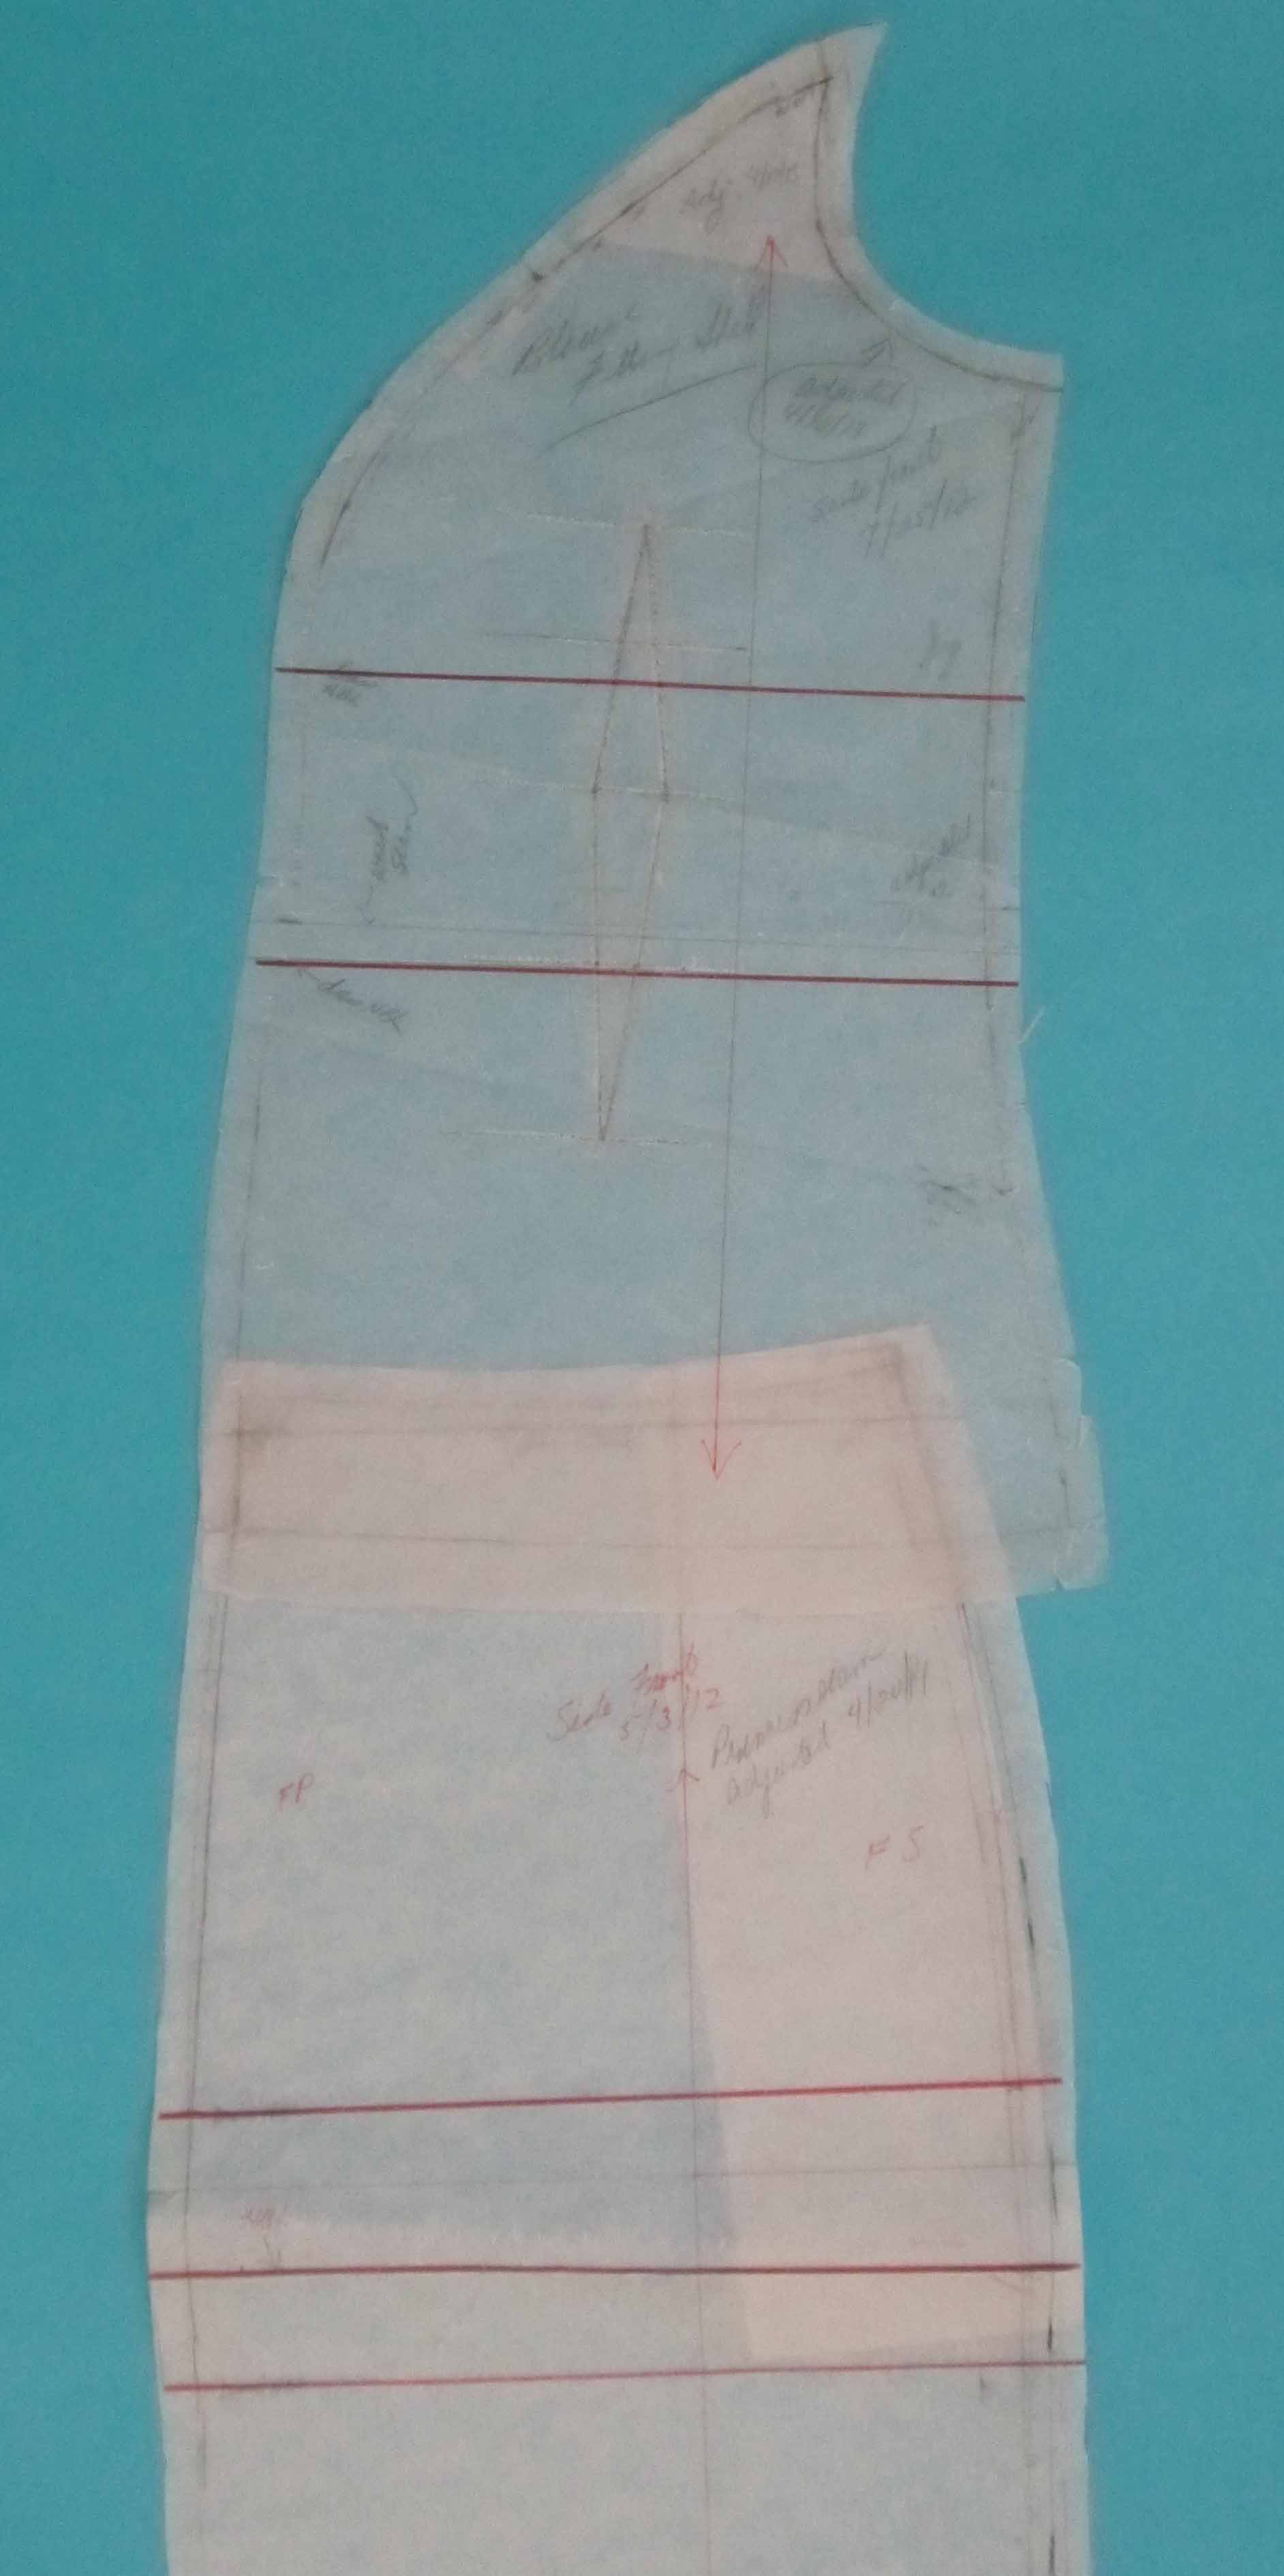
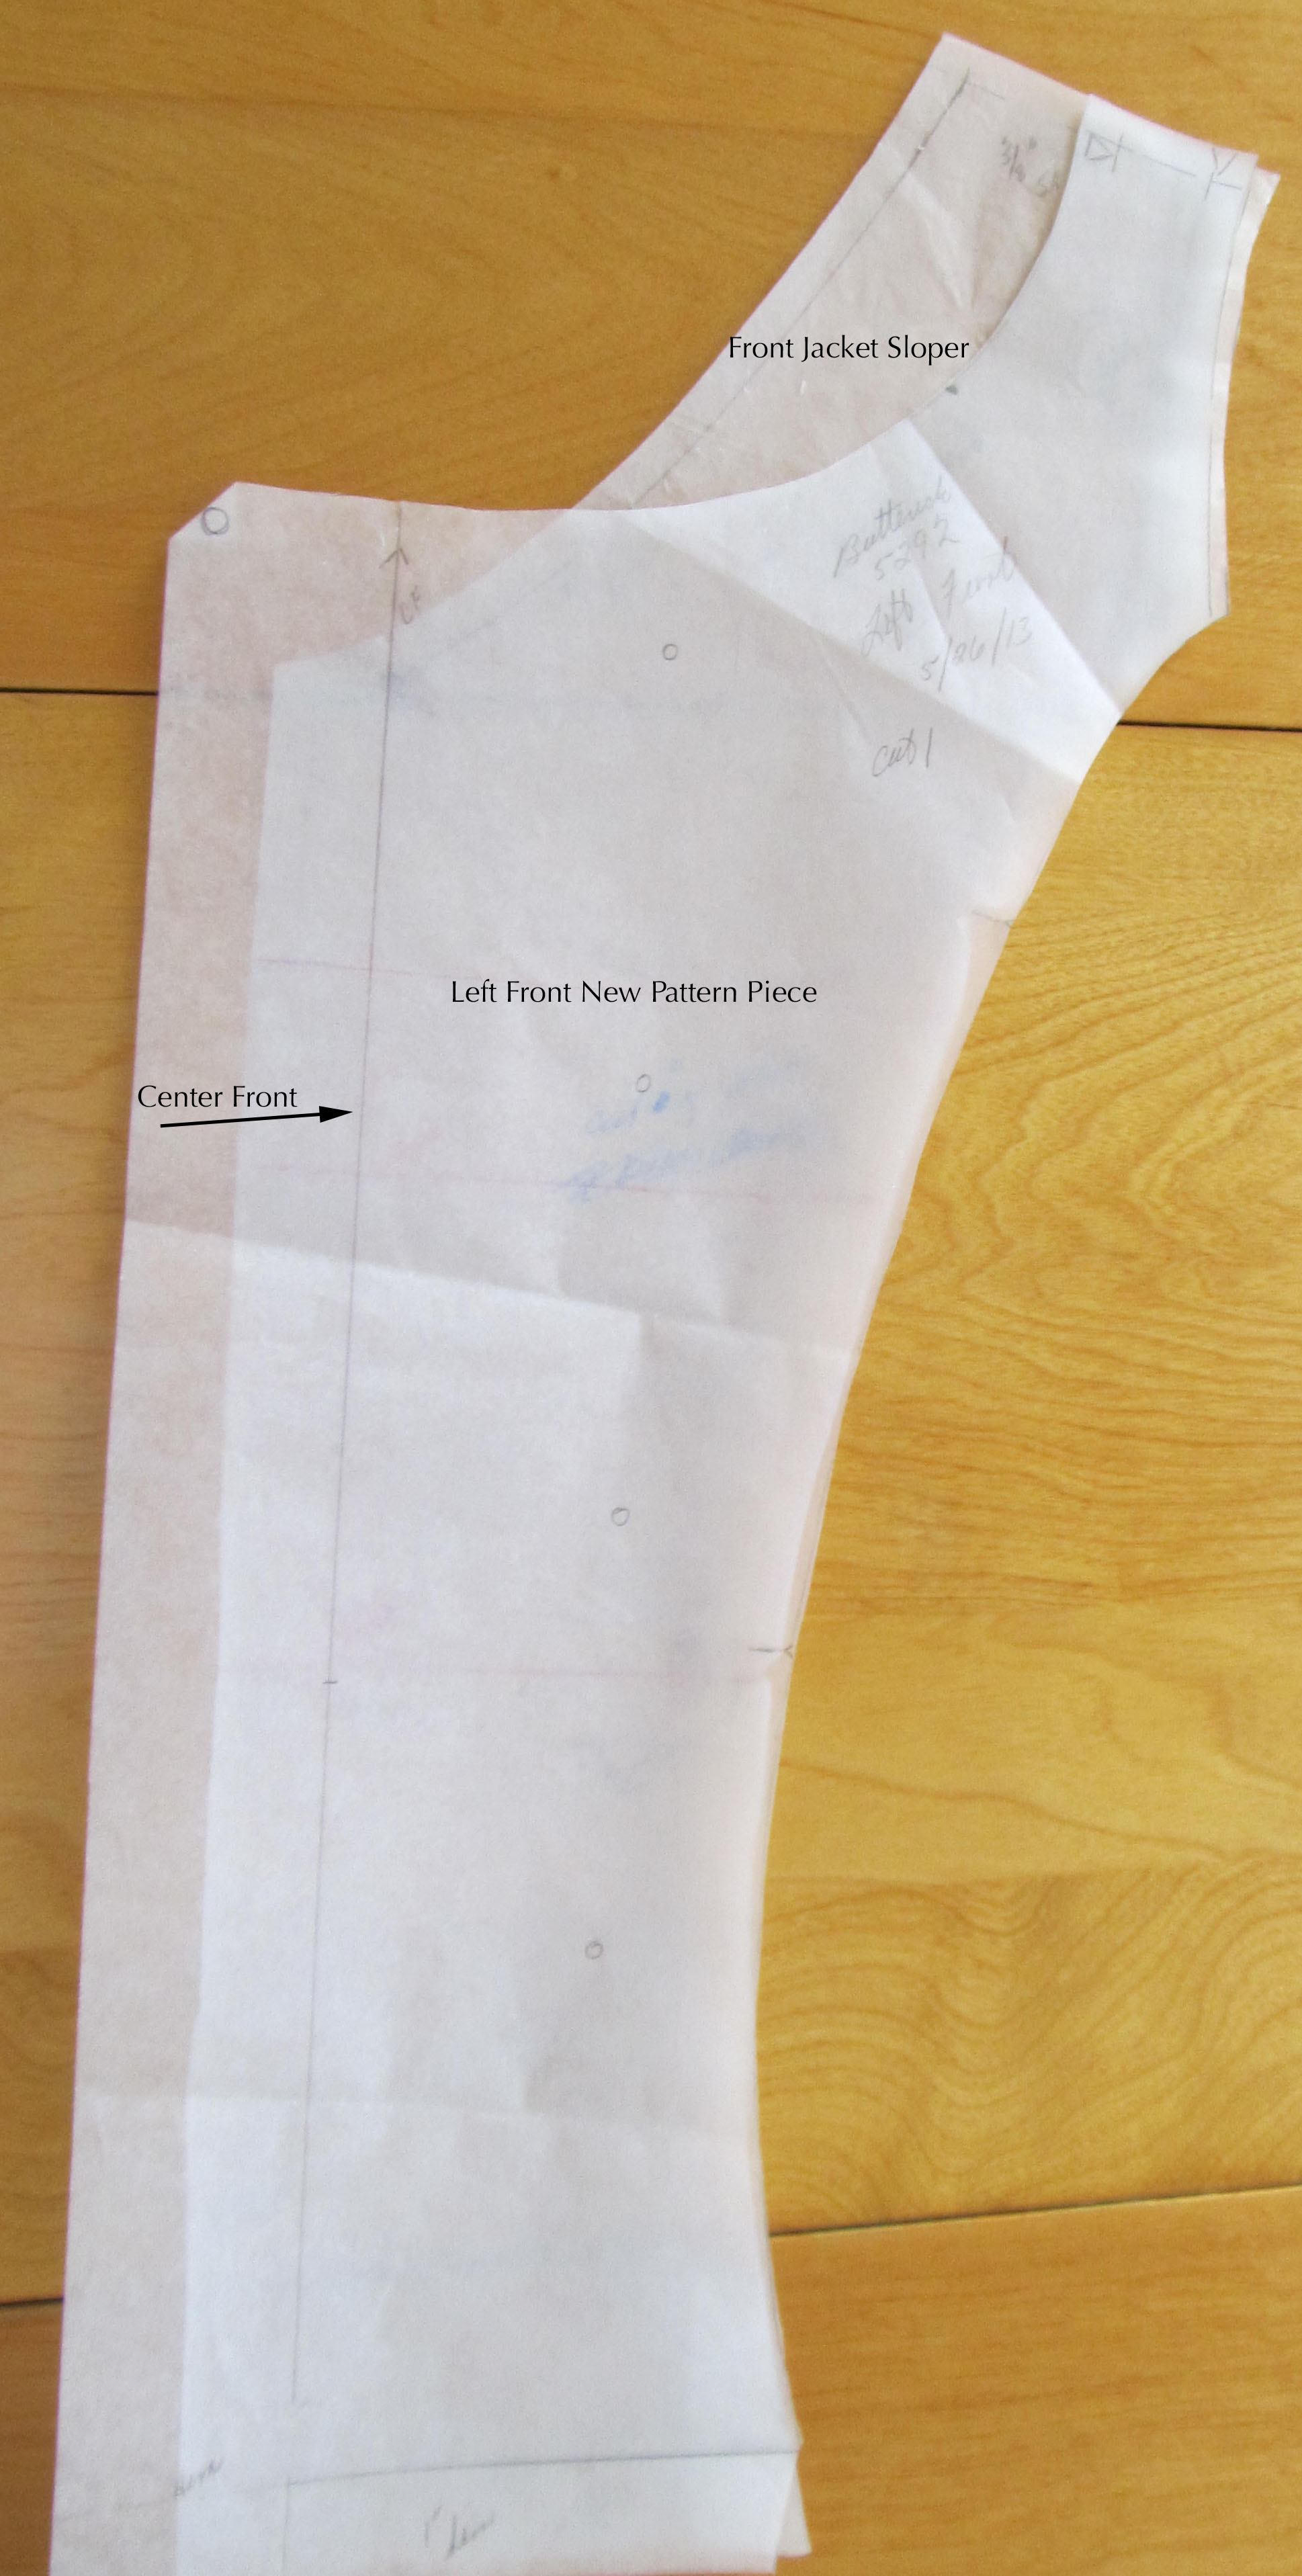
After trying it out in rayon to mimic the drapiness of the fabric I was planning to use, I still wasn’t happy. I ended up splitting the bust shaping between shoulder pleats and an armscye dart. Here is what that looks like on the pattern.

Front Final
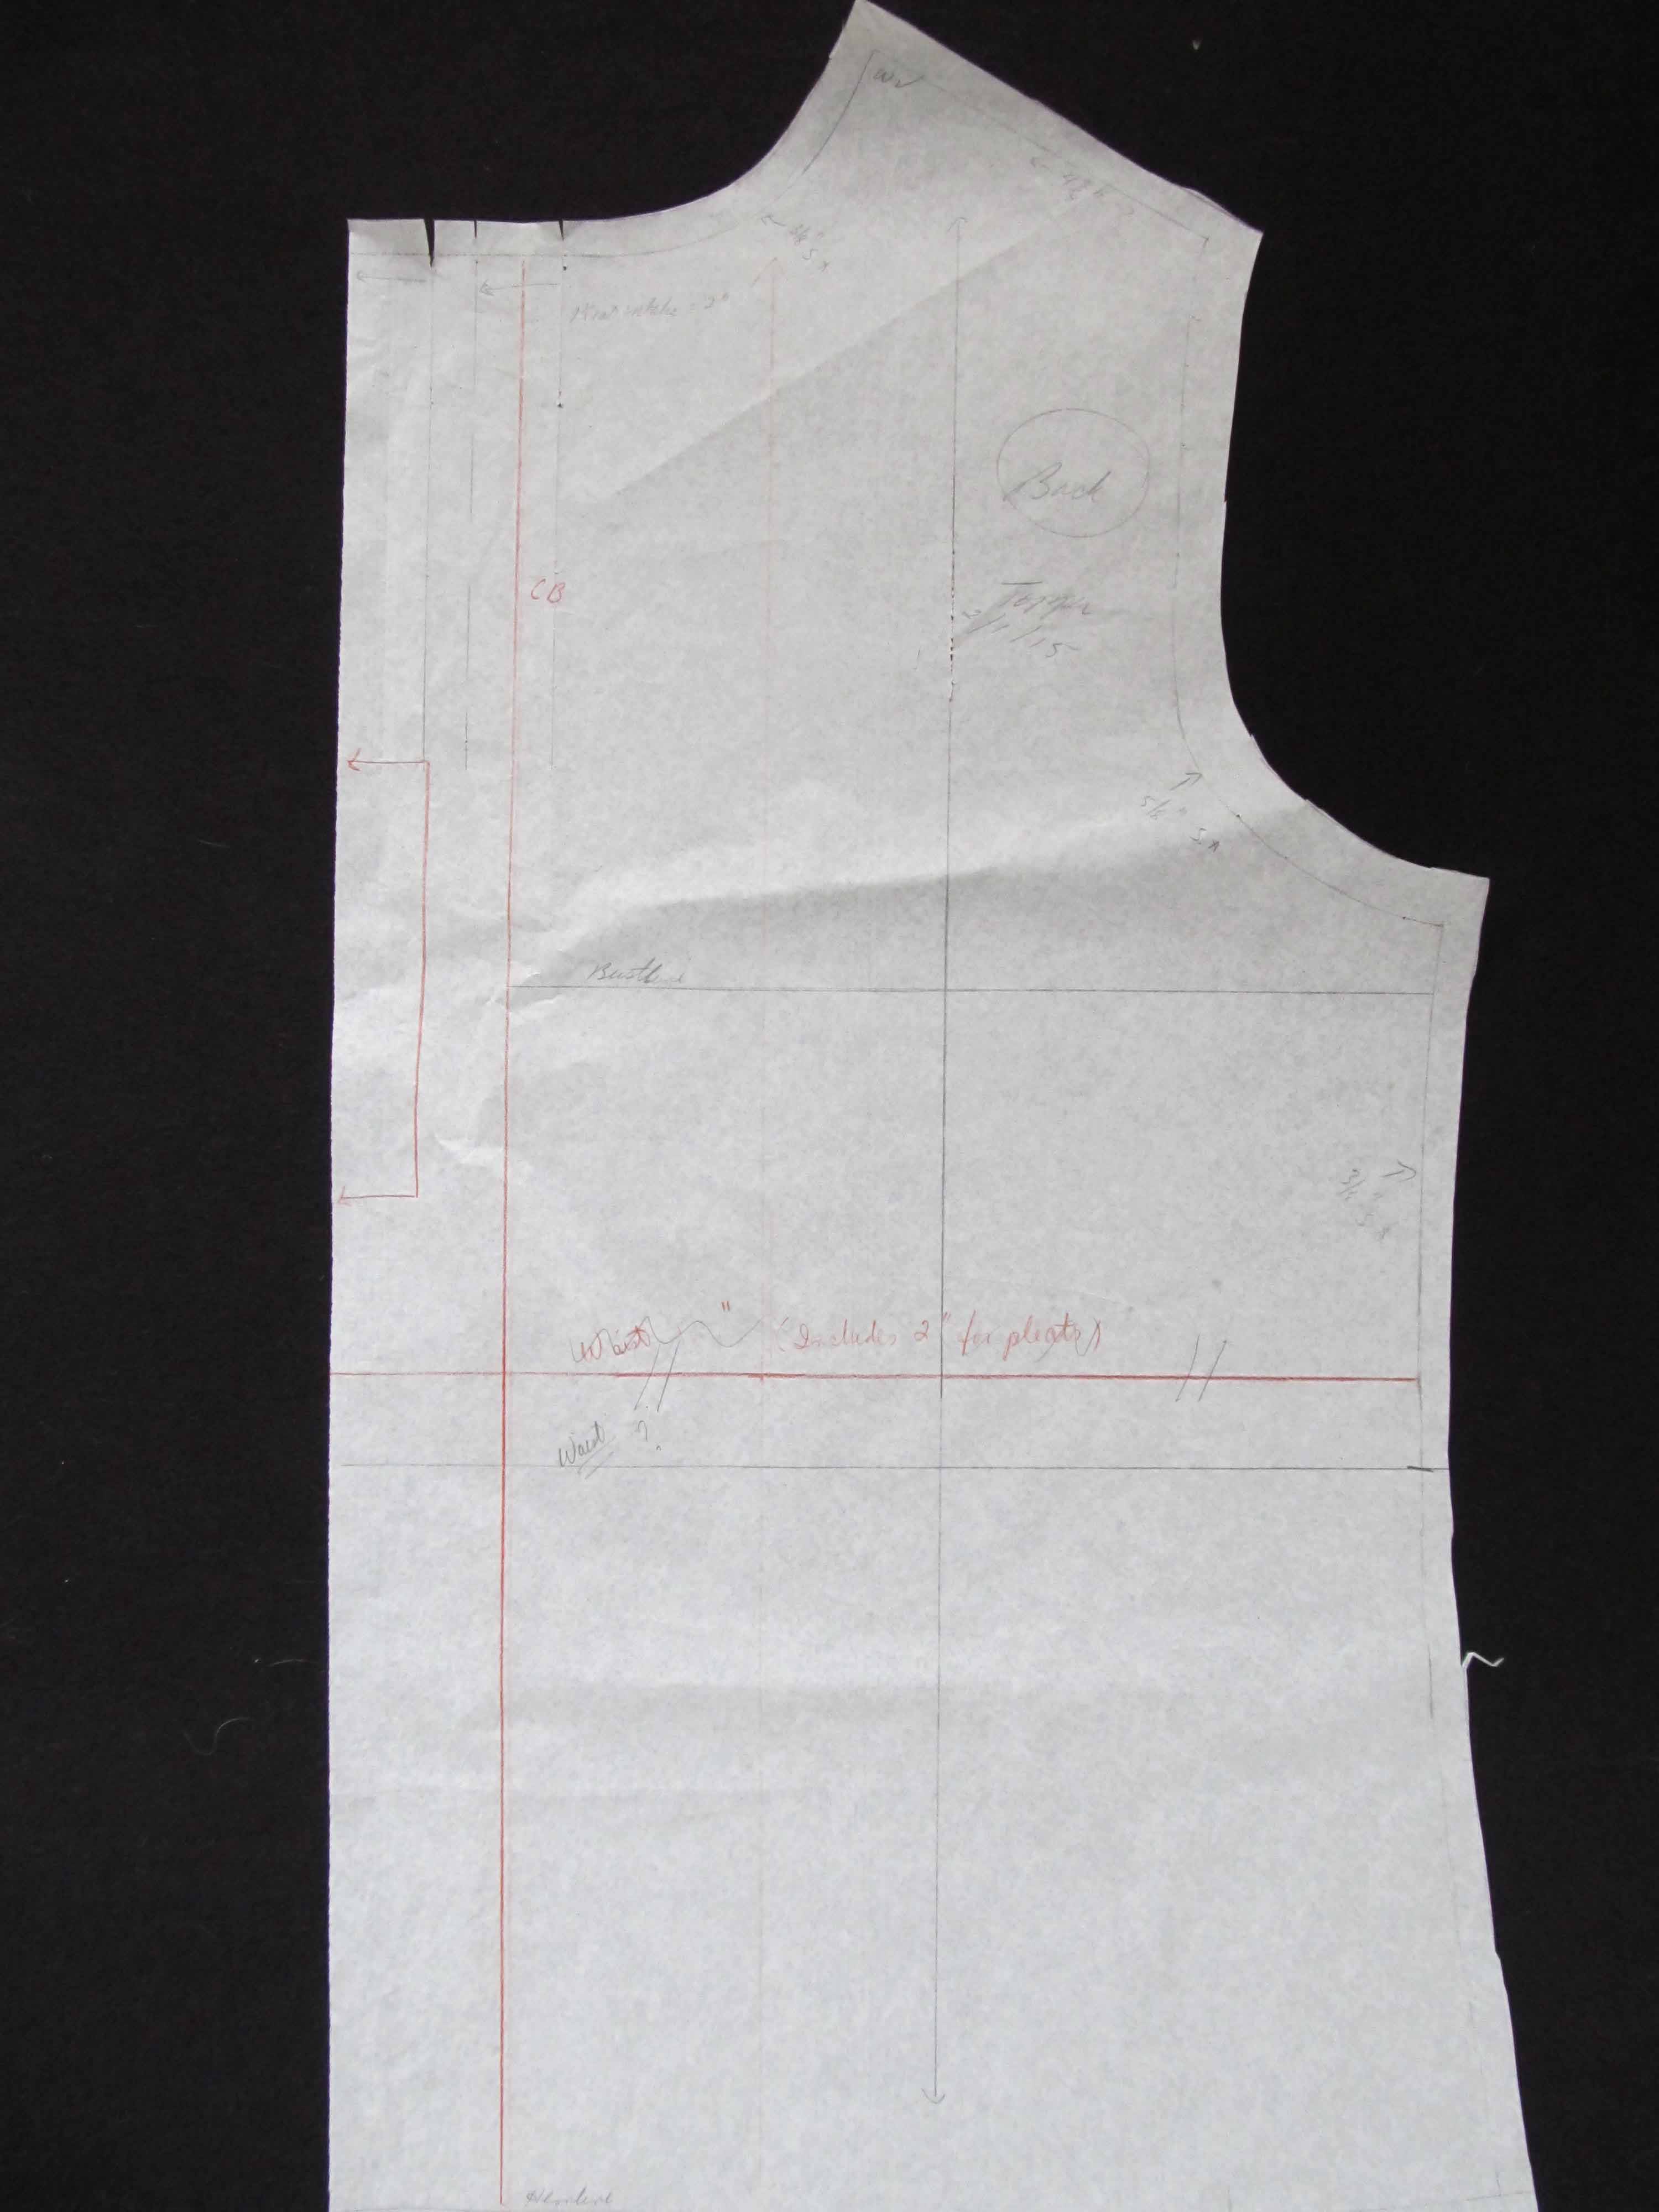
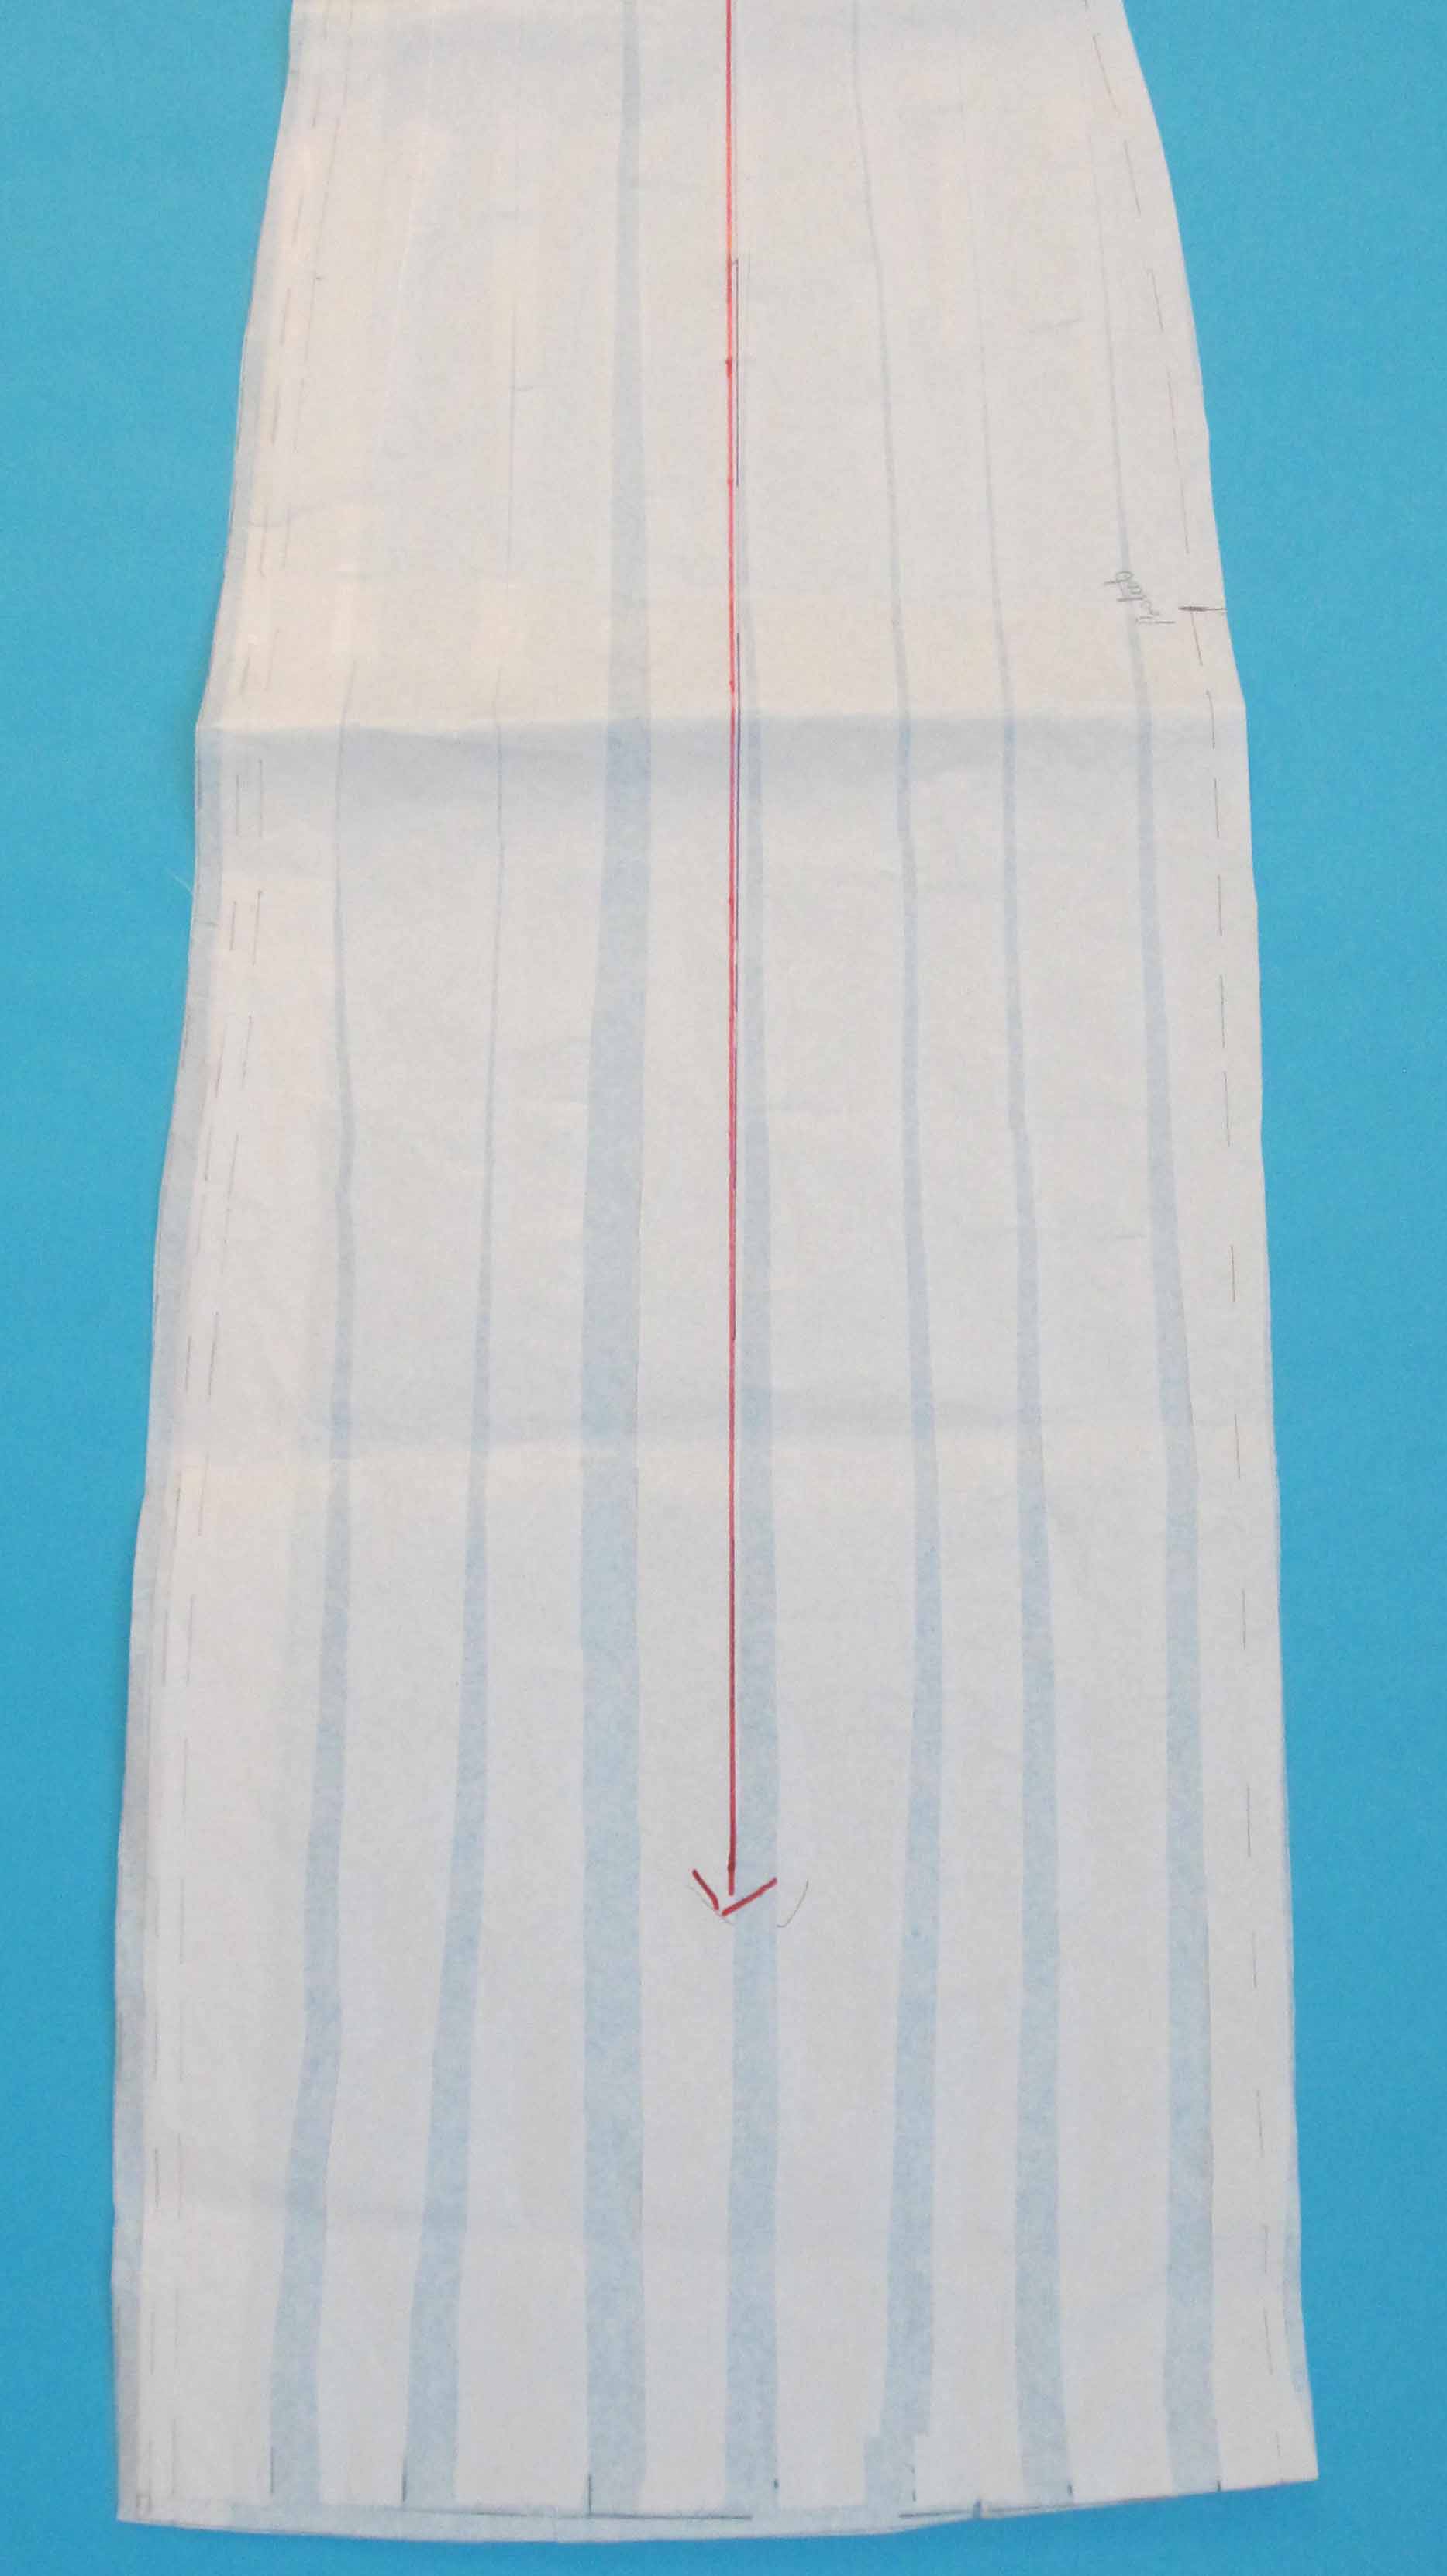
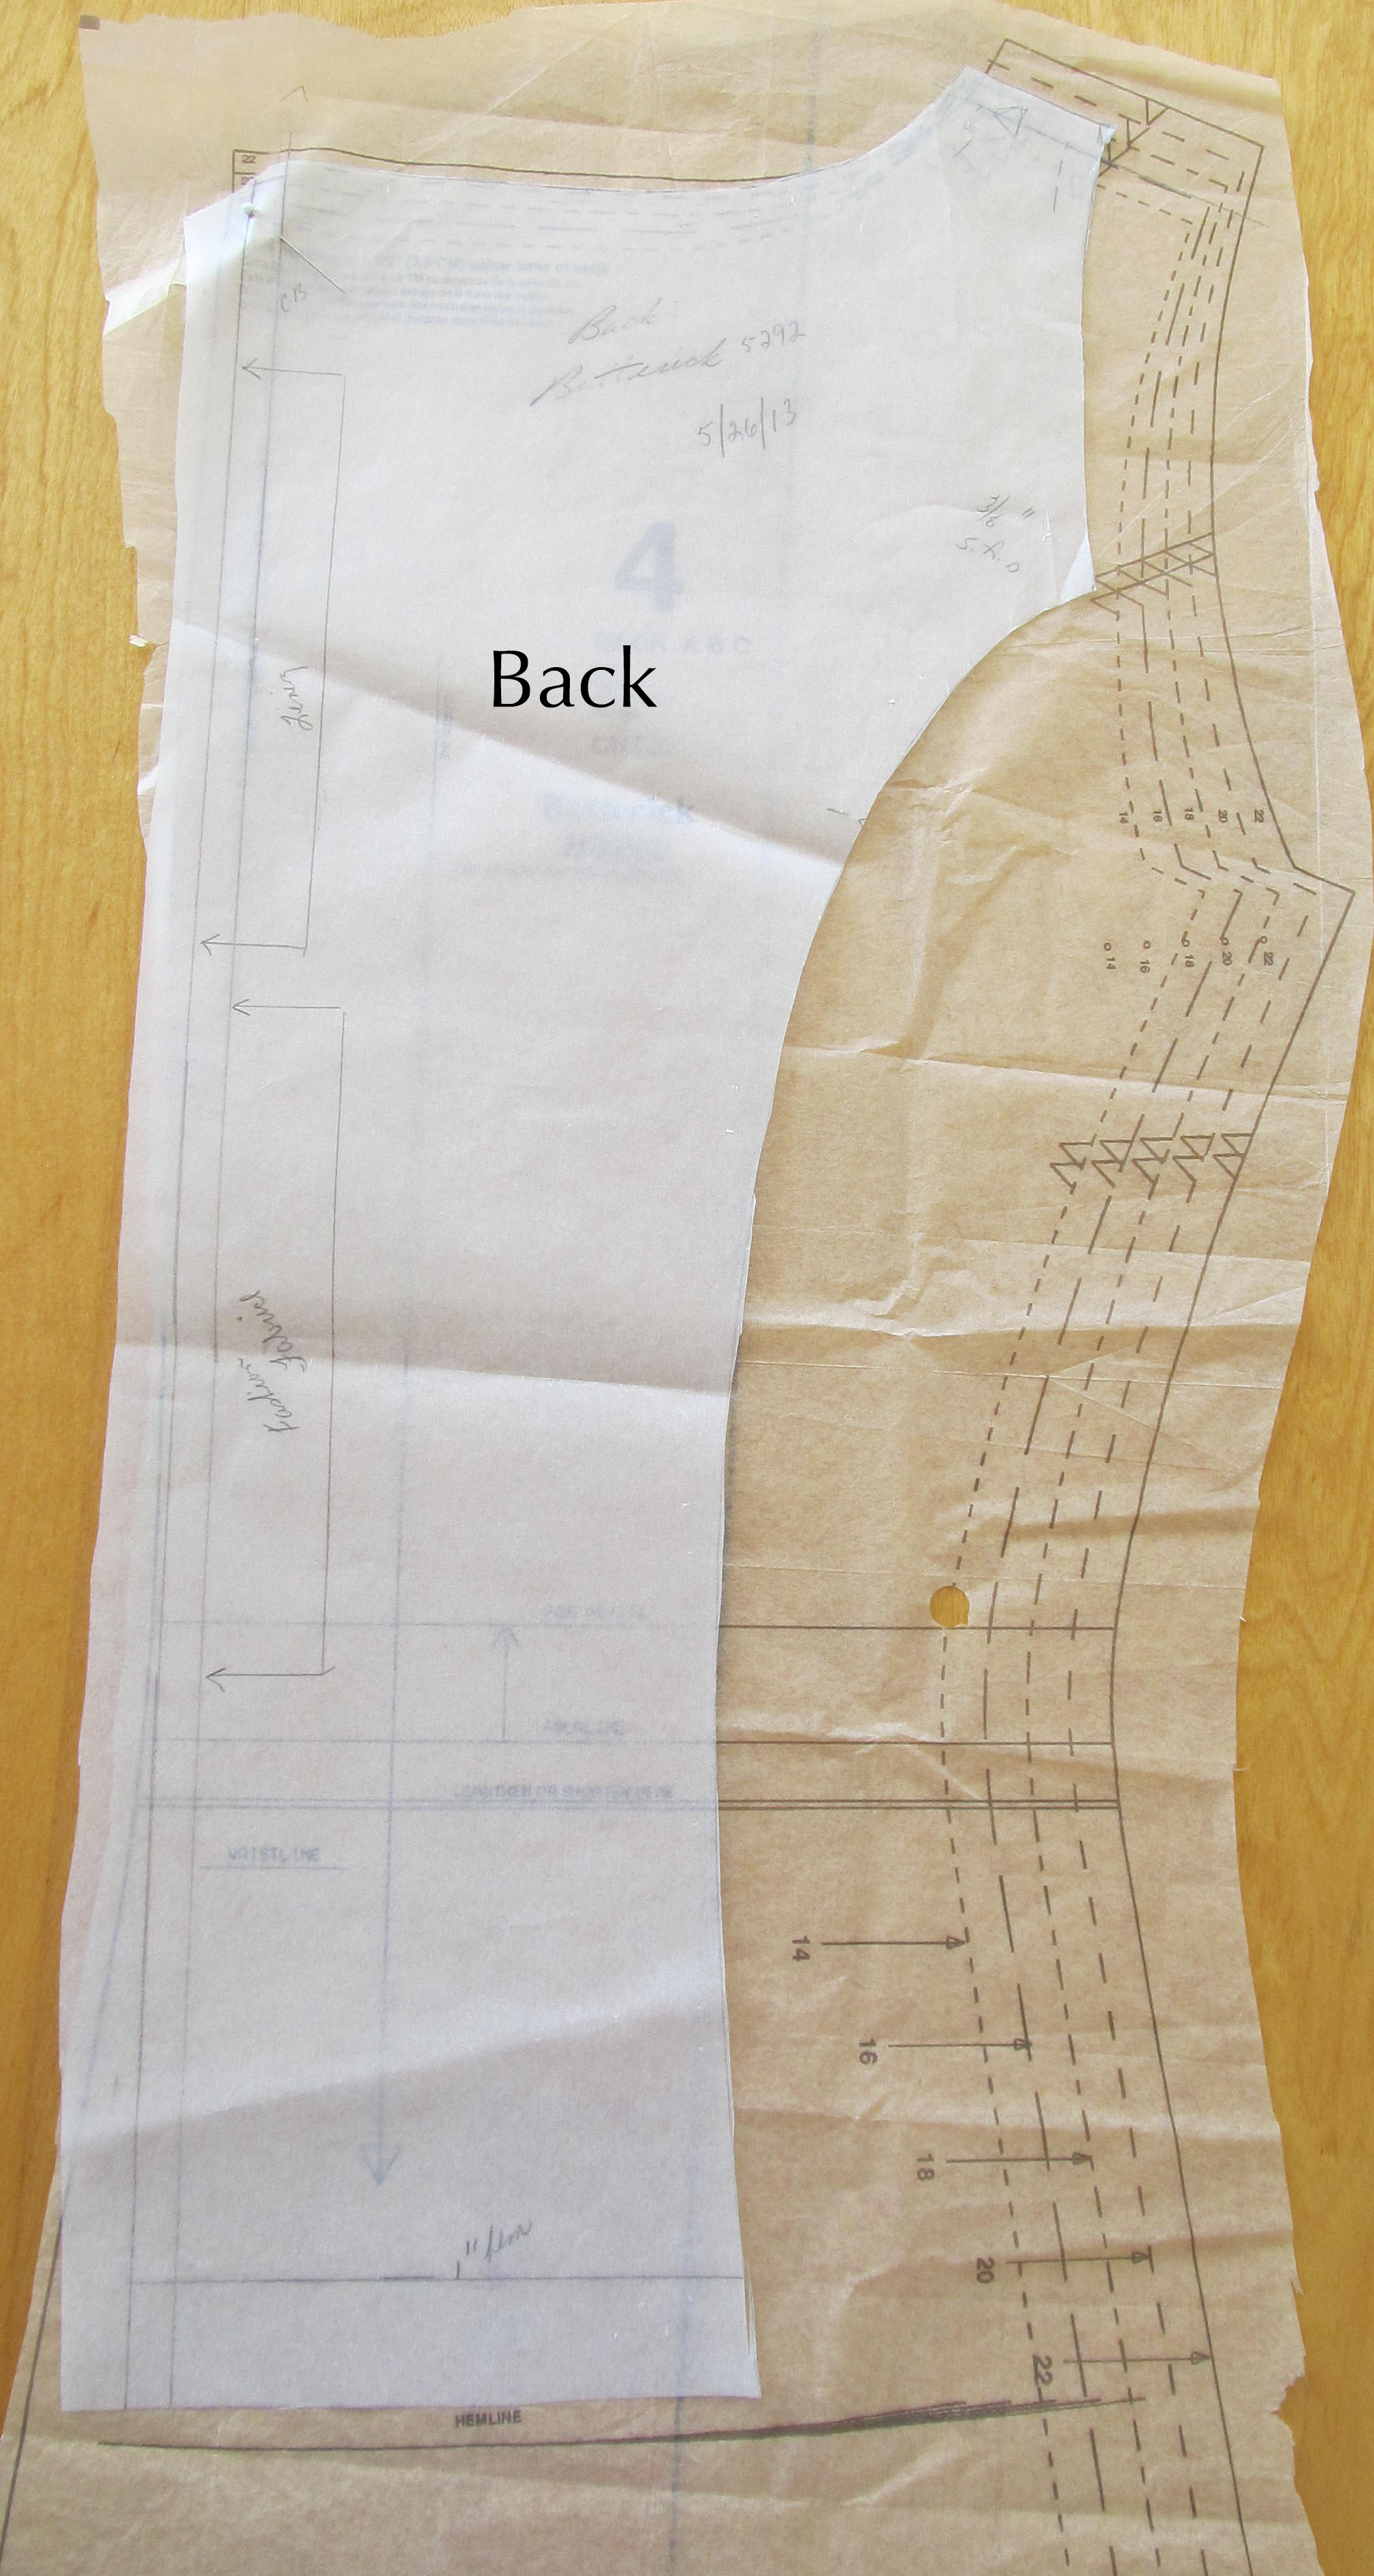
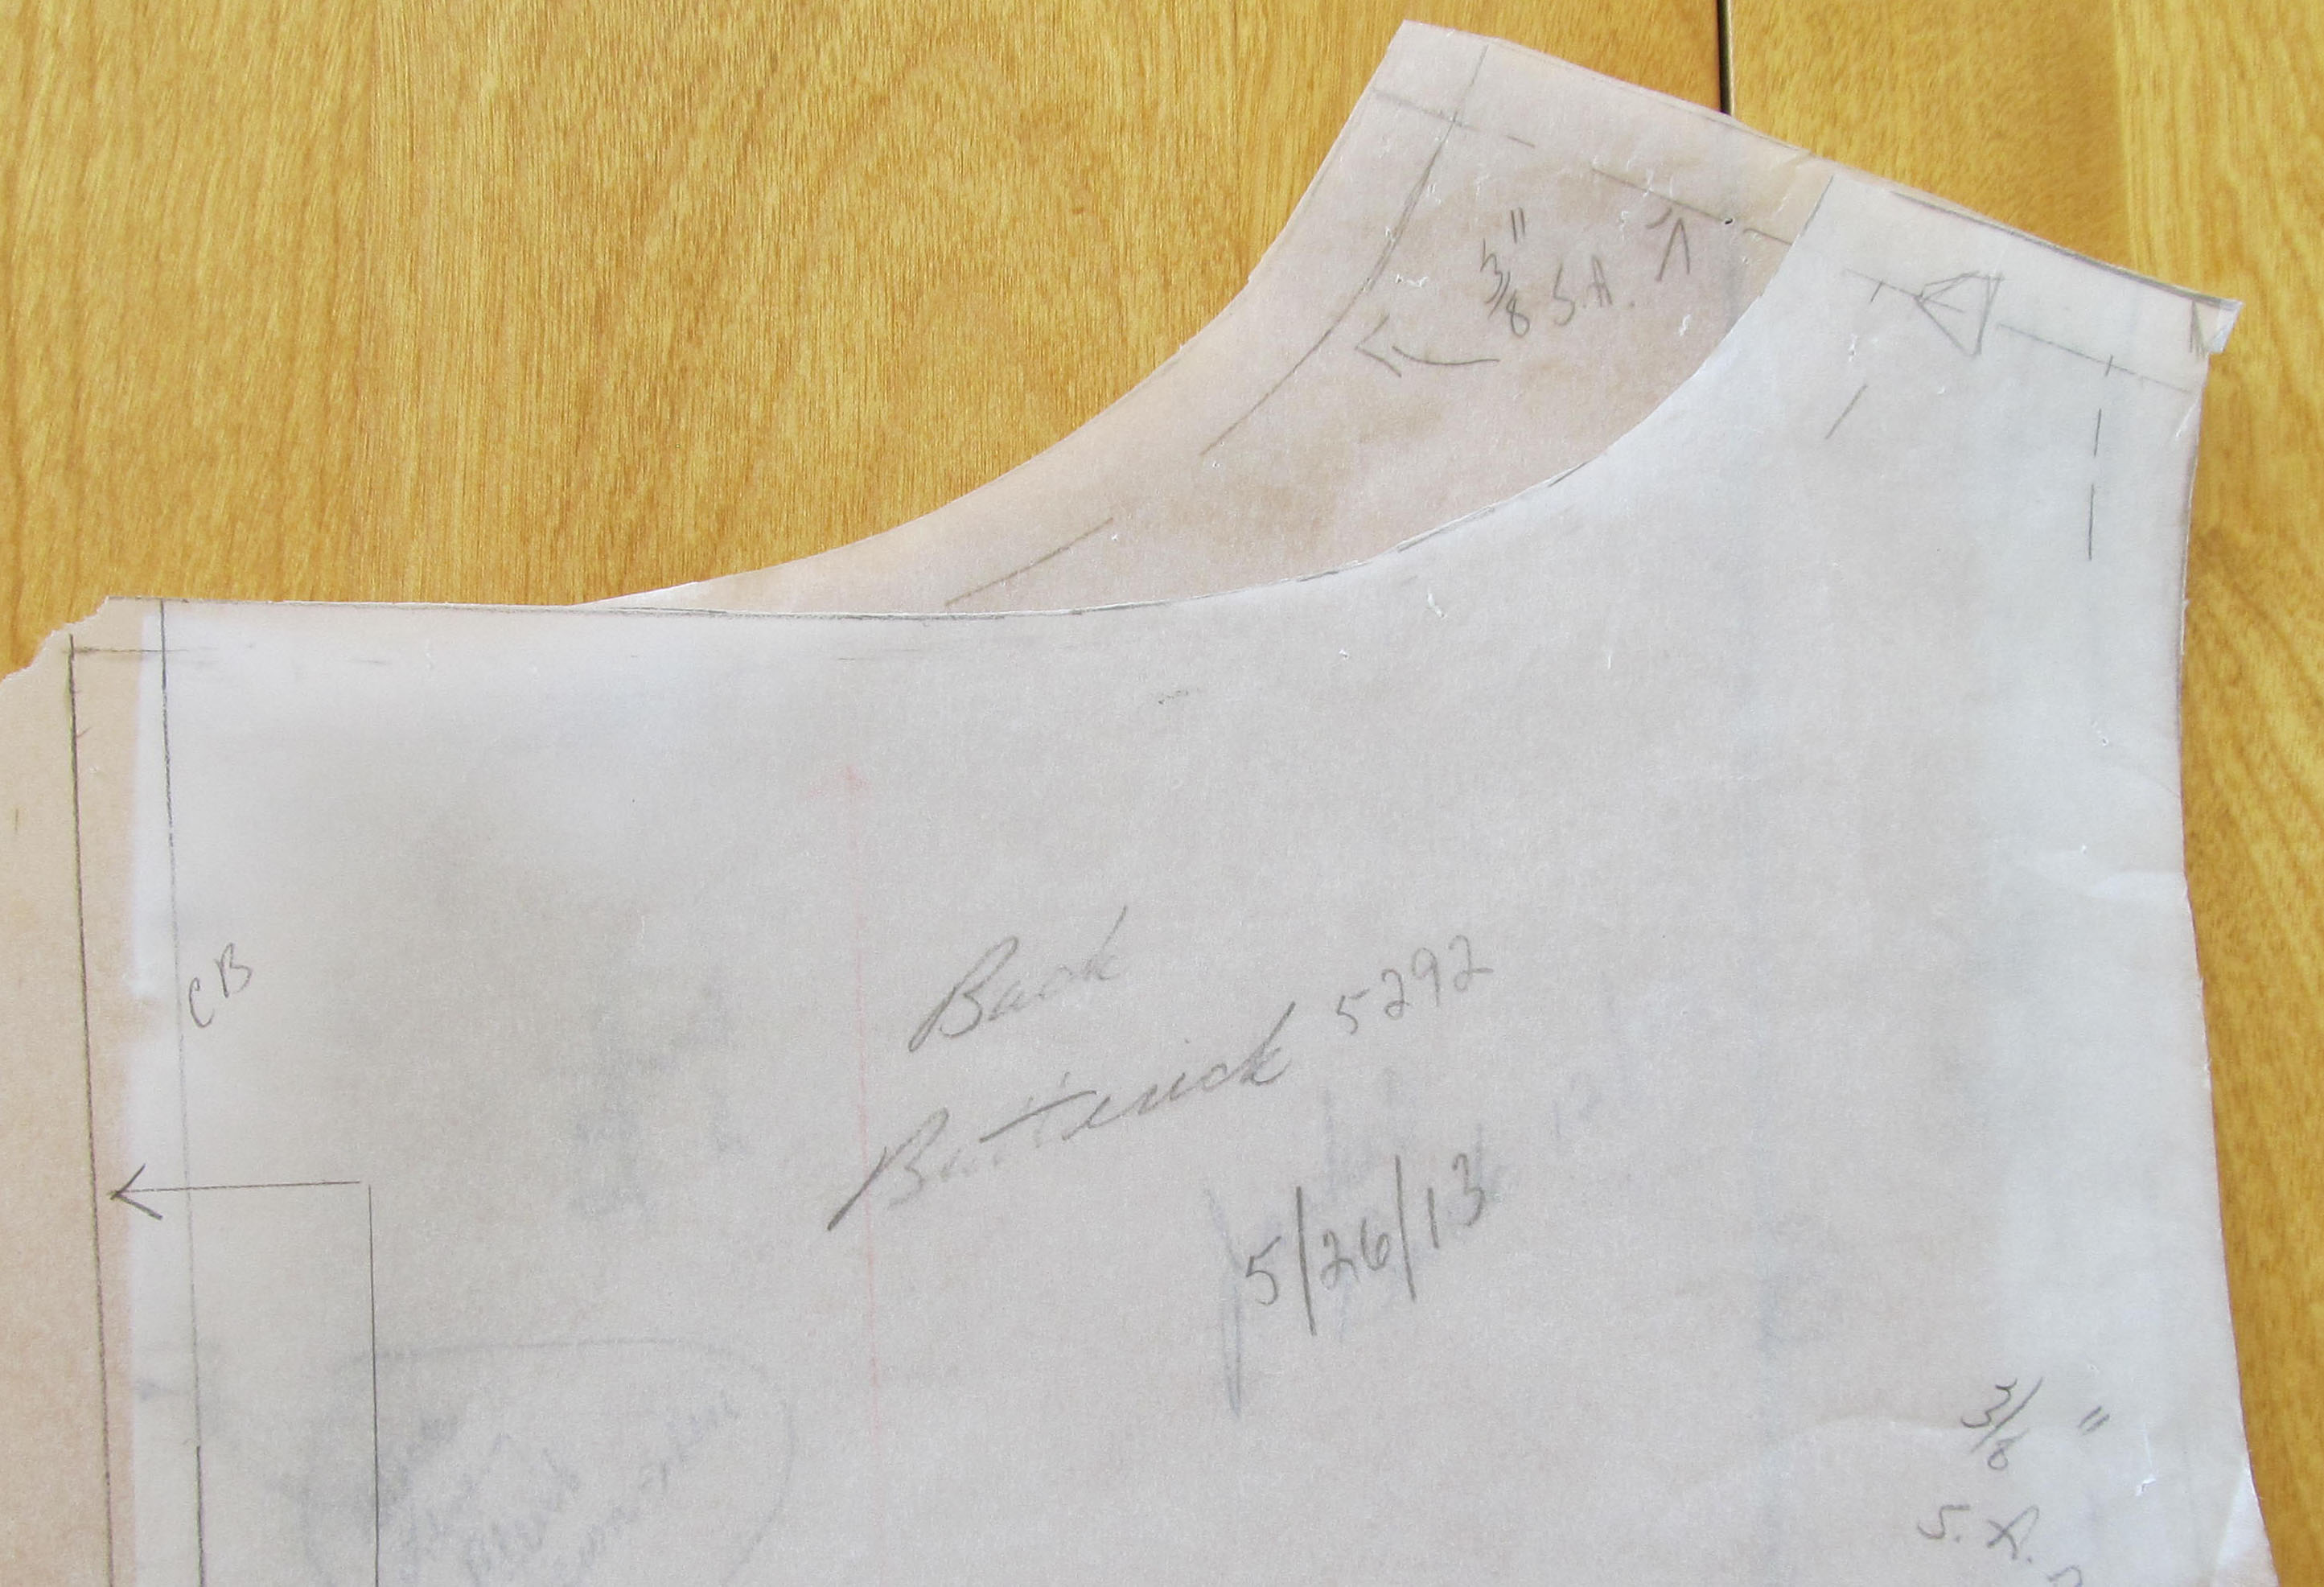
The back was a more straightforward conversion. Here is what it looked like in development.

Back Dev
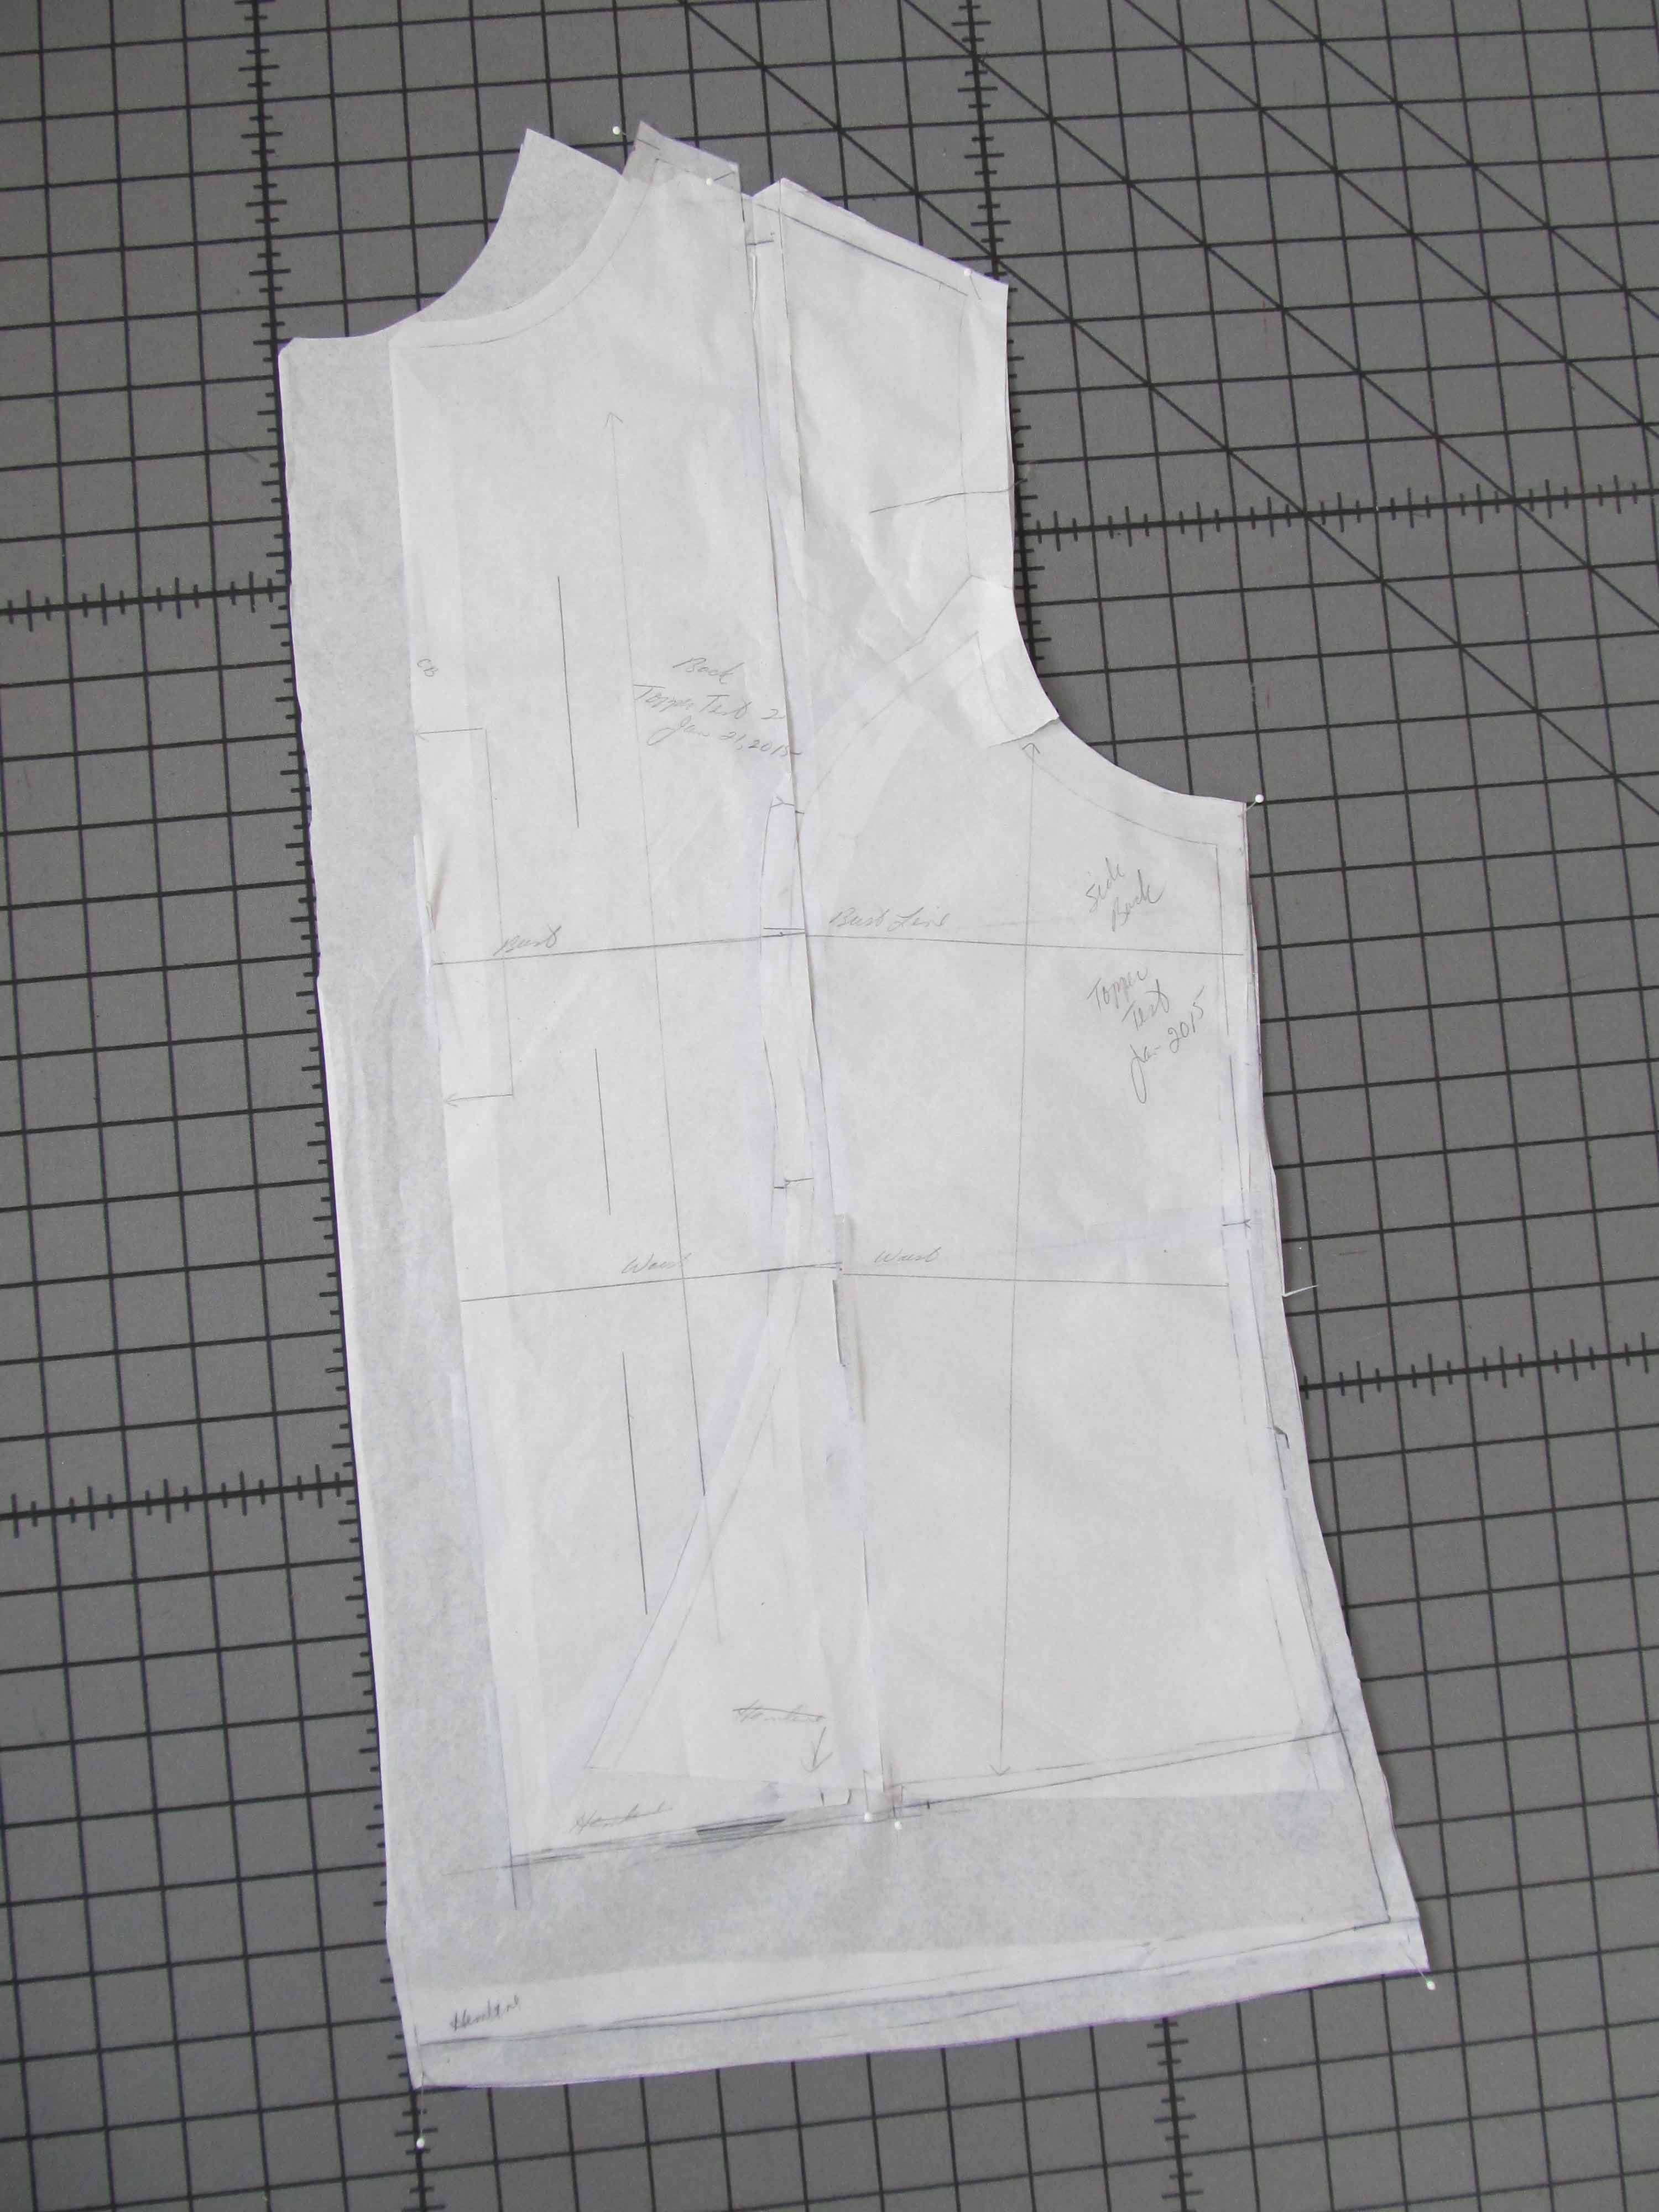
Here is the final pattern piece. All of the intake was rotated to pleats at center back. The center pleat is the deepest.

Back Final
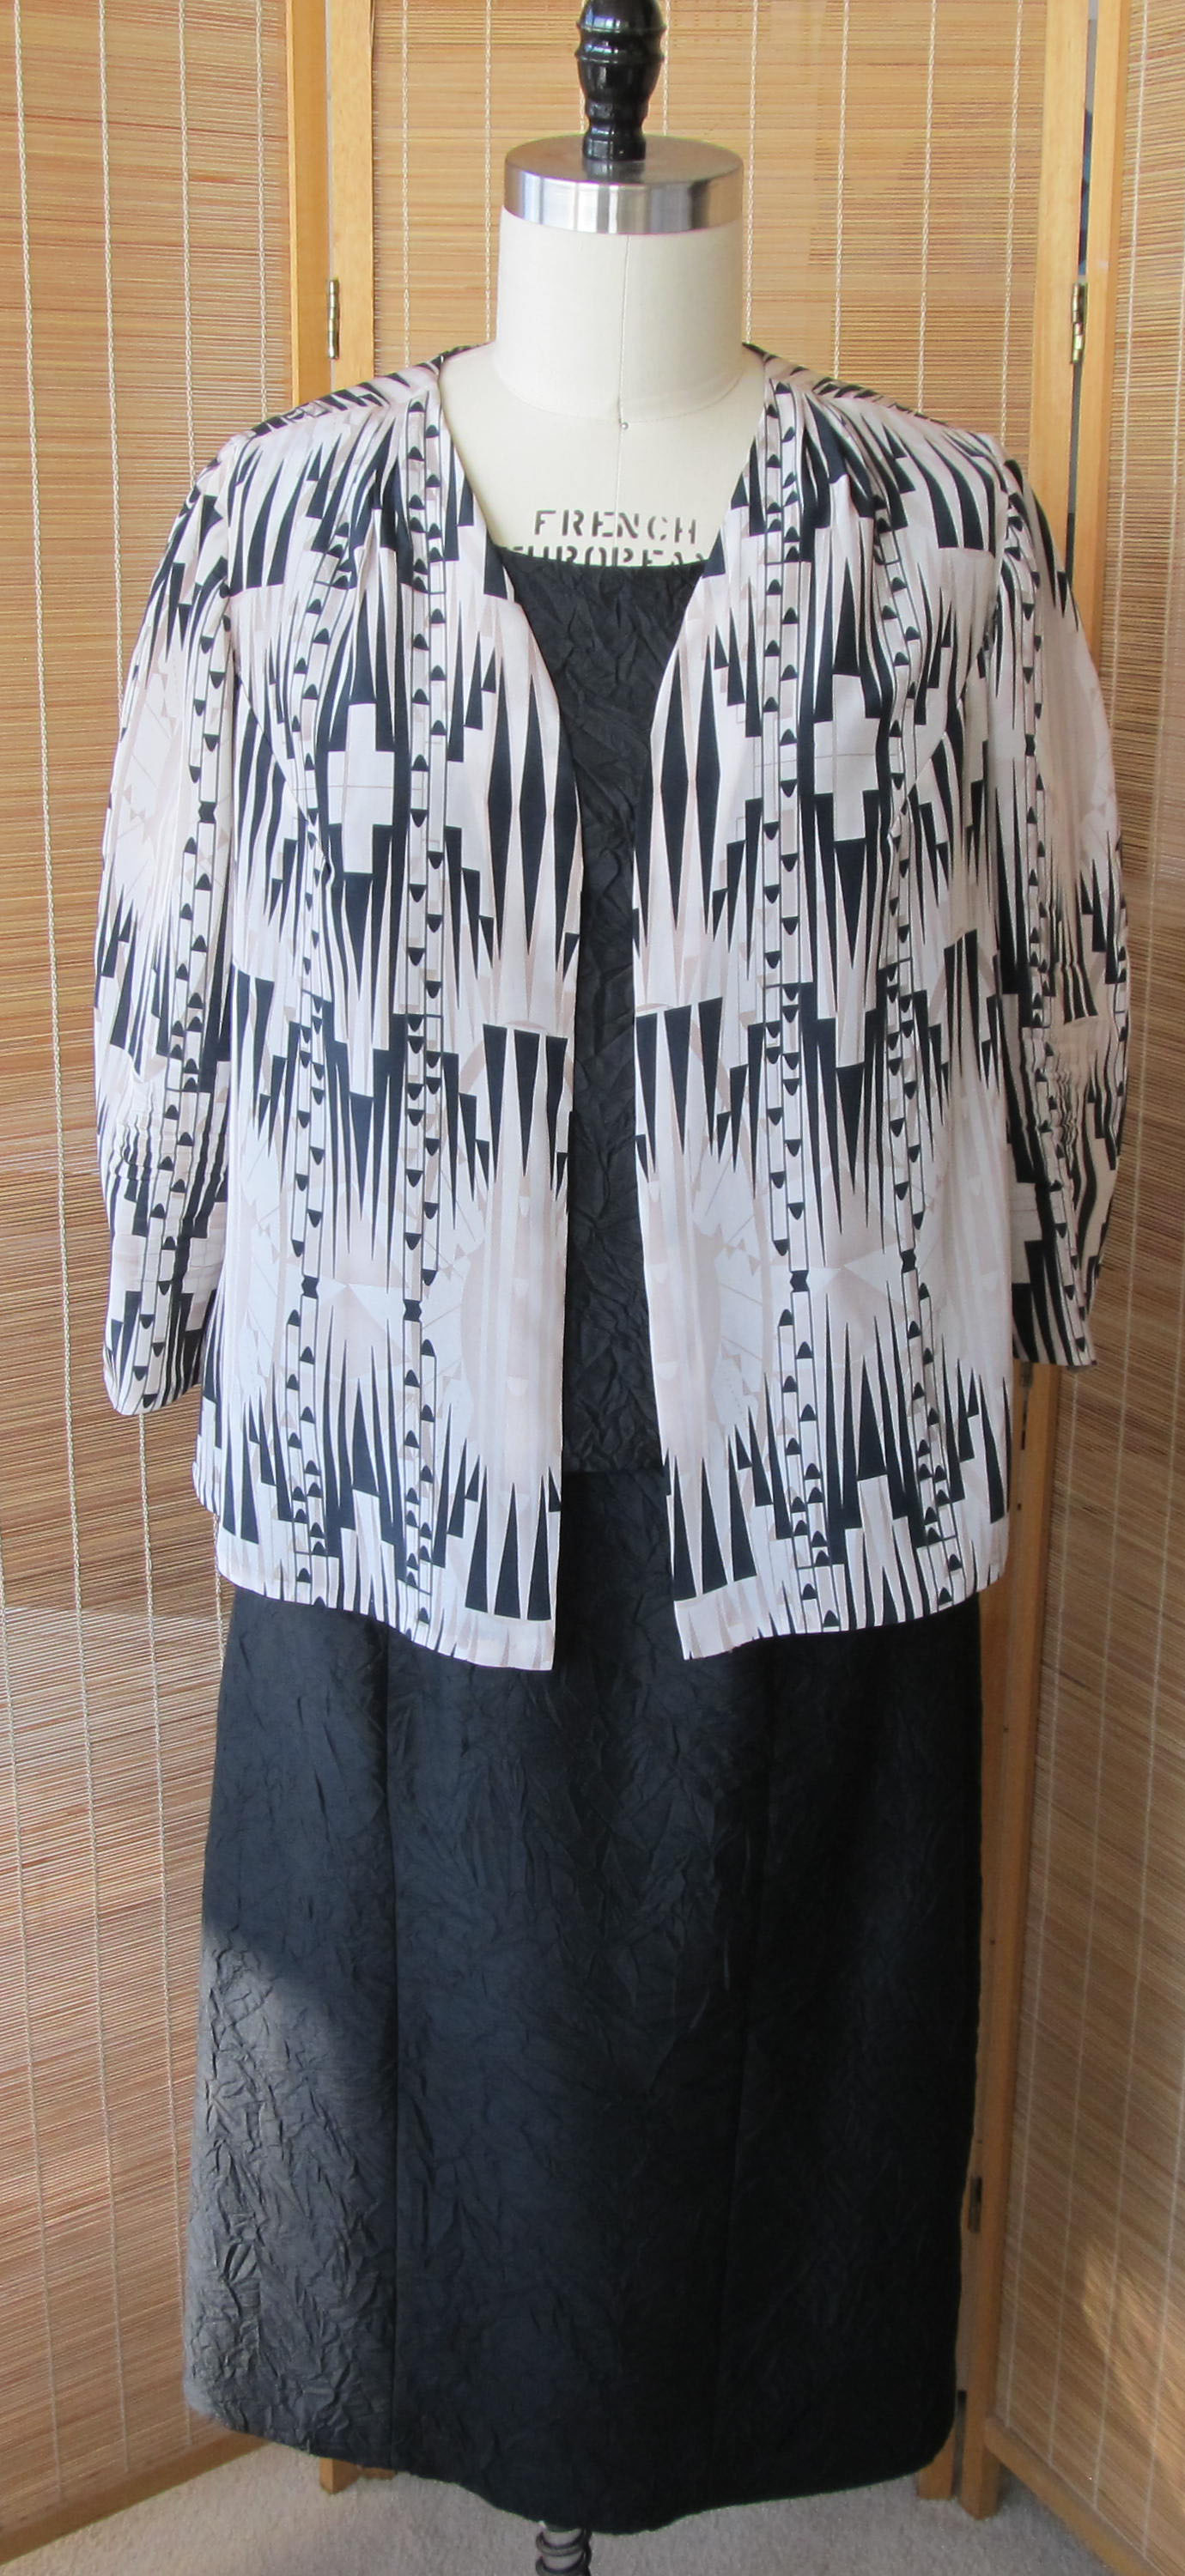
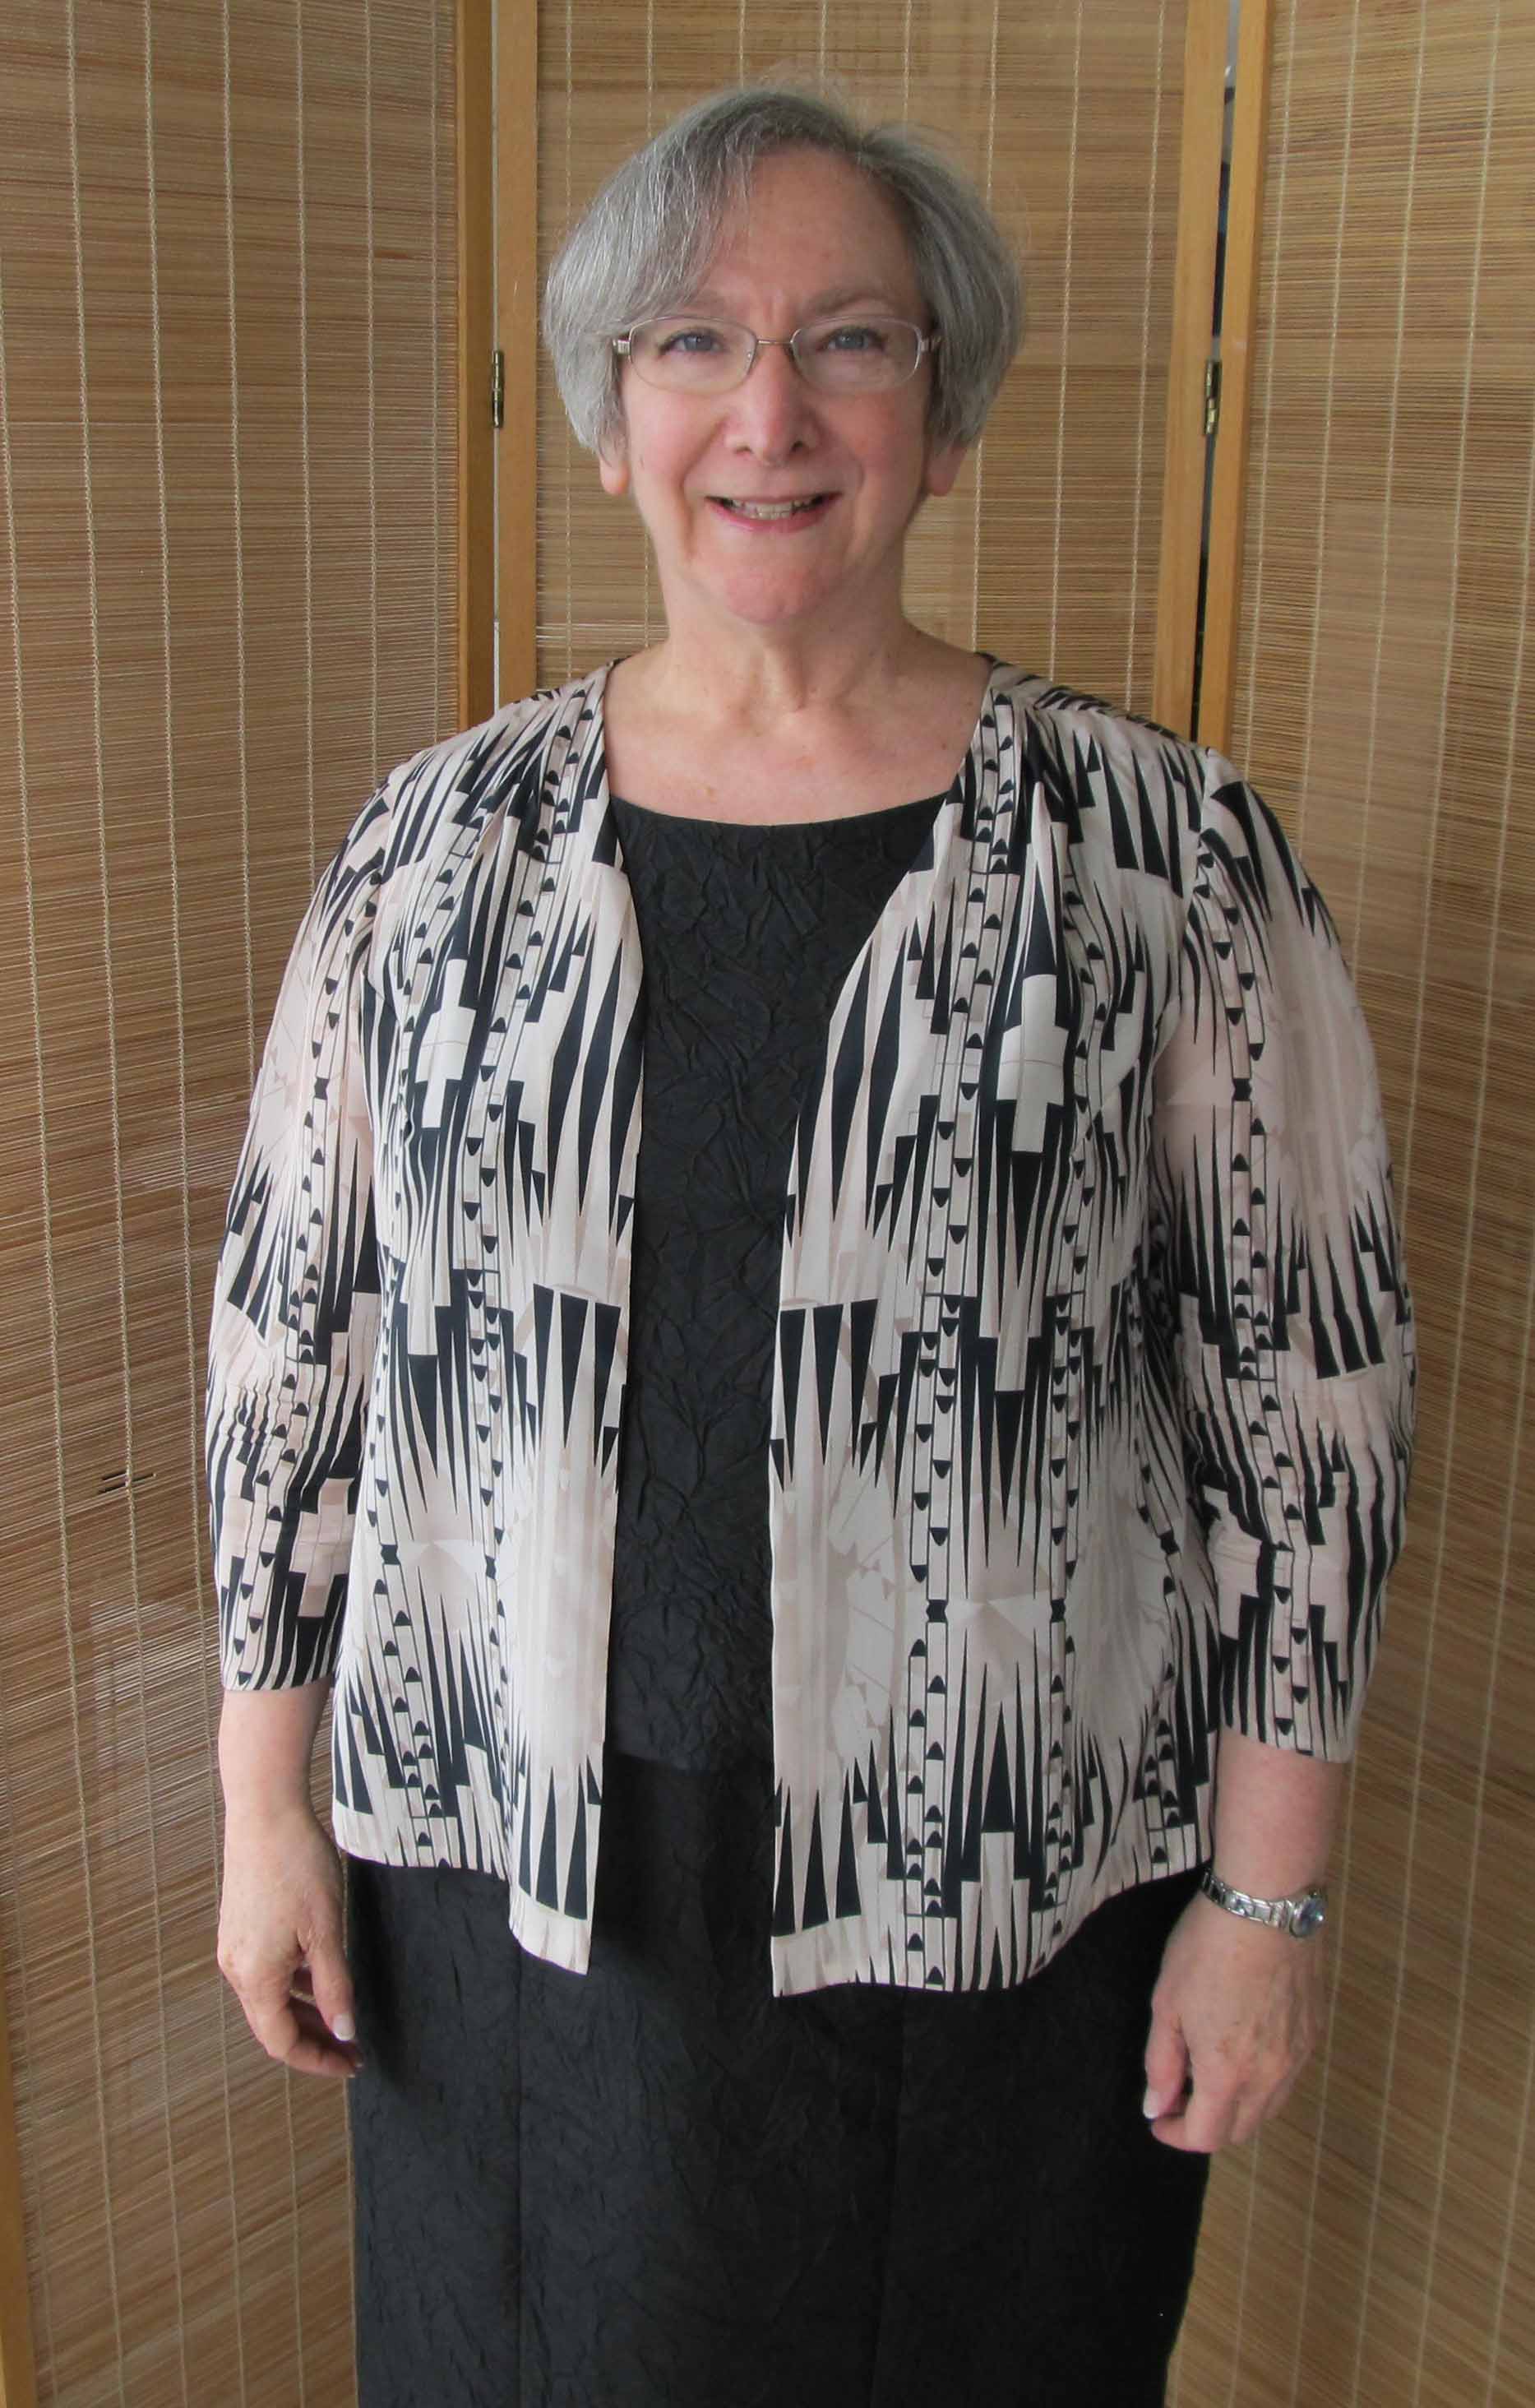
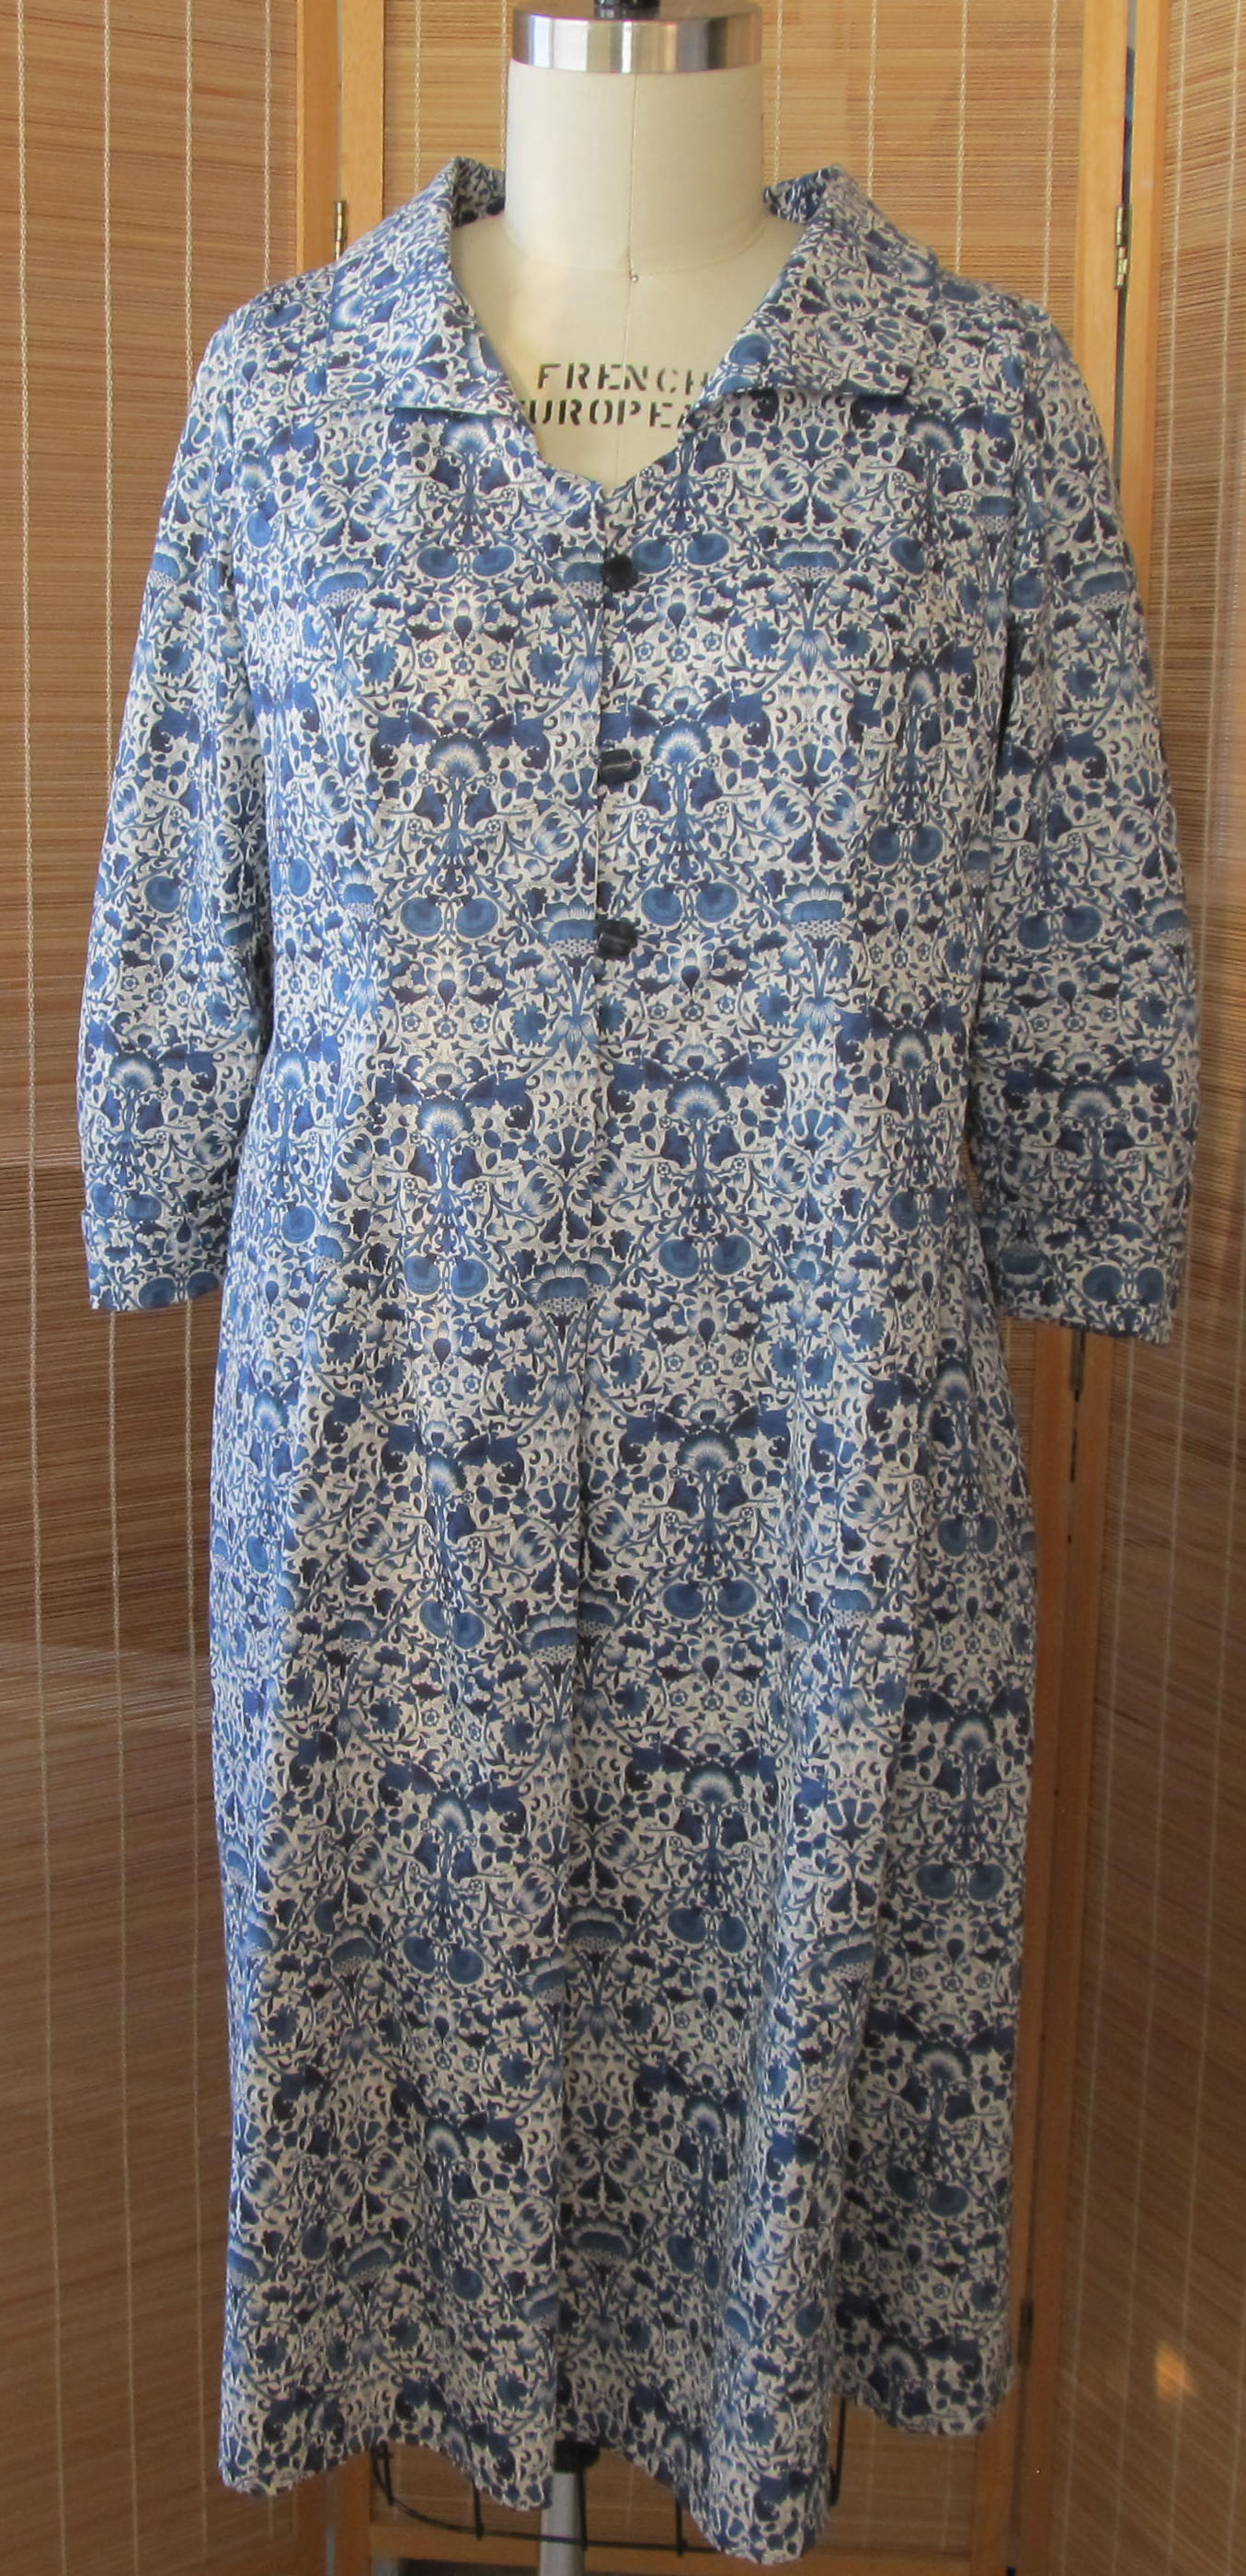
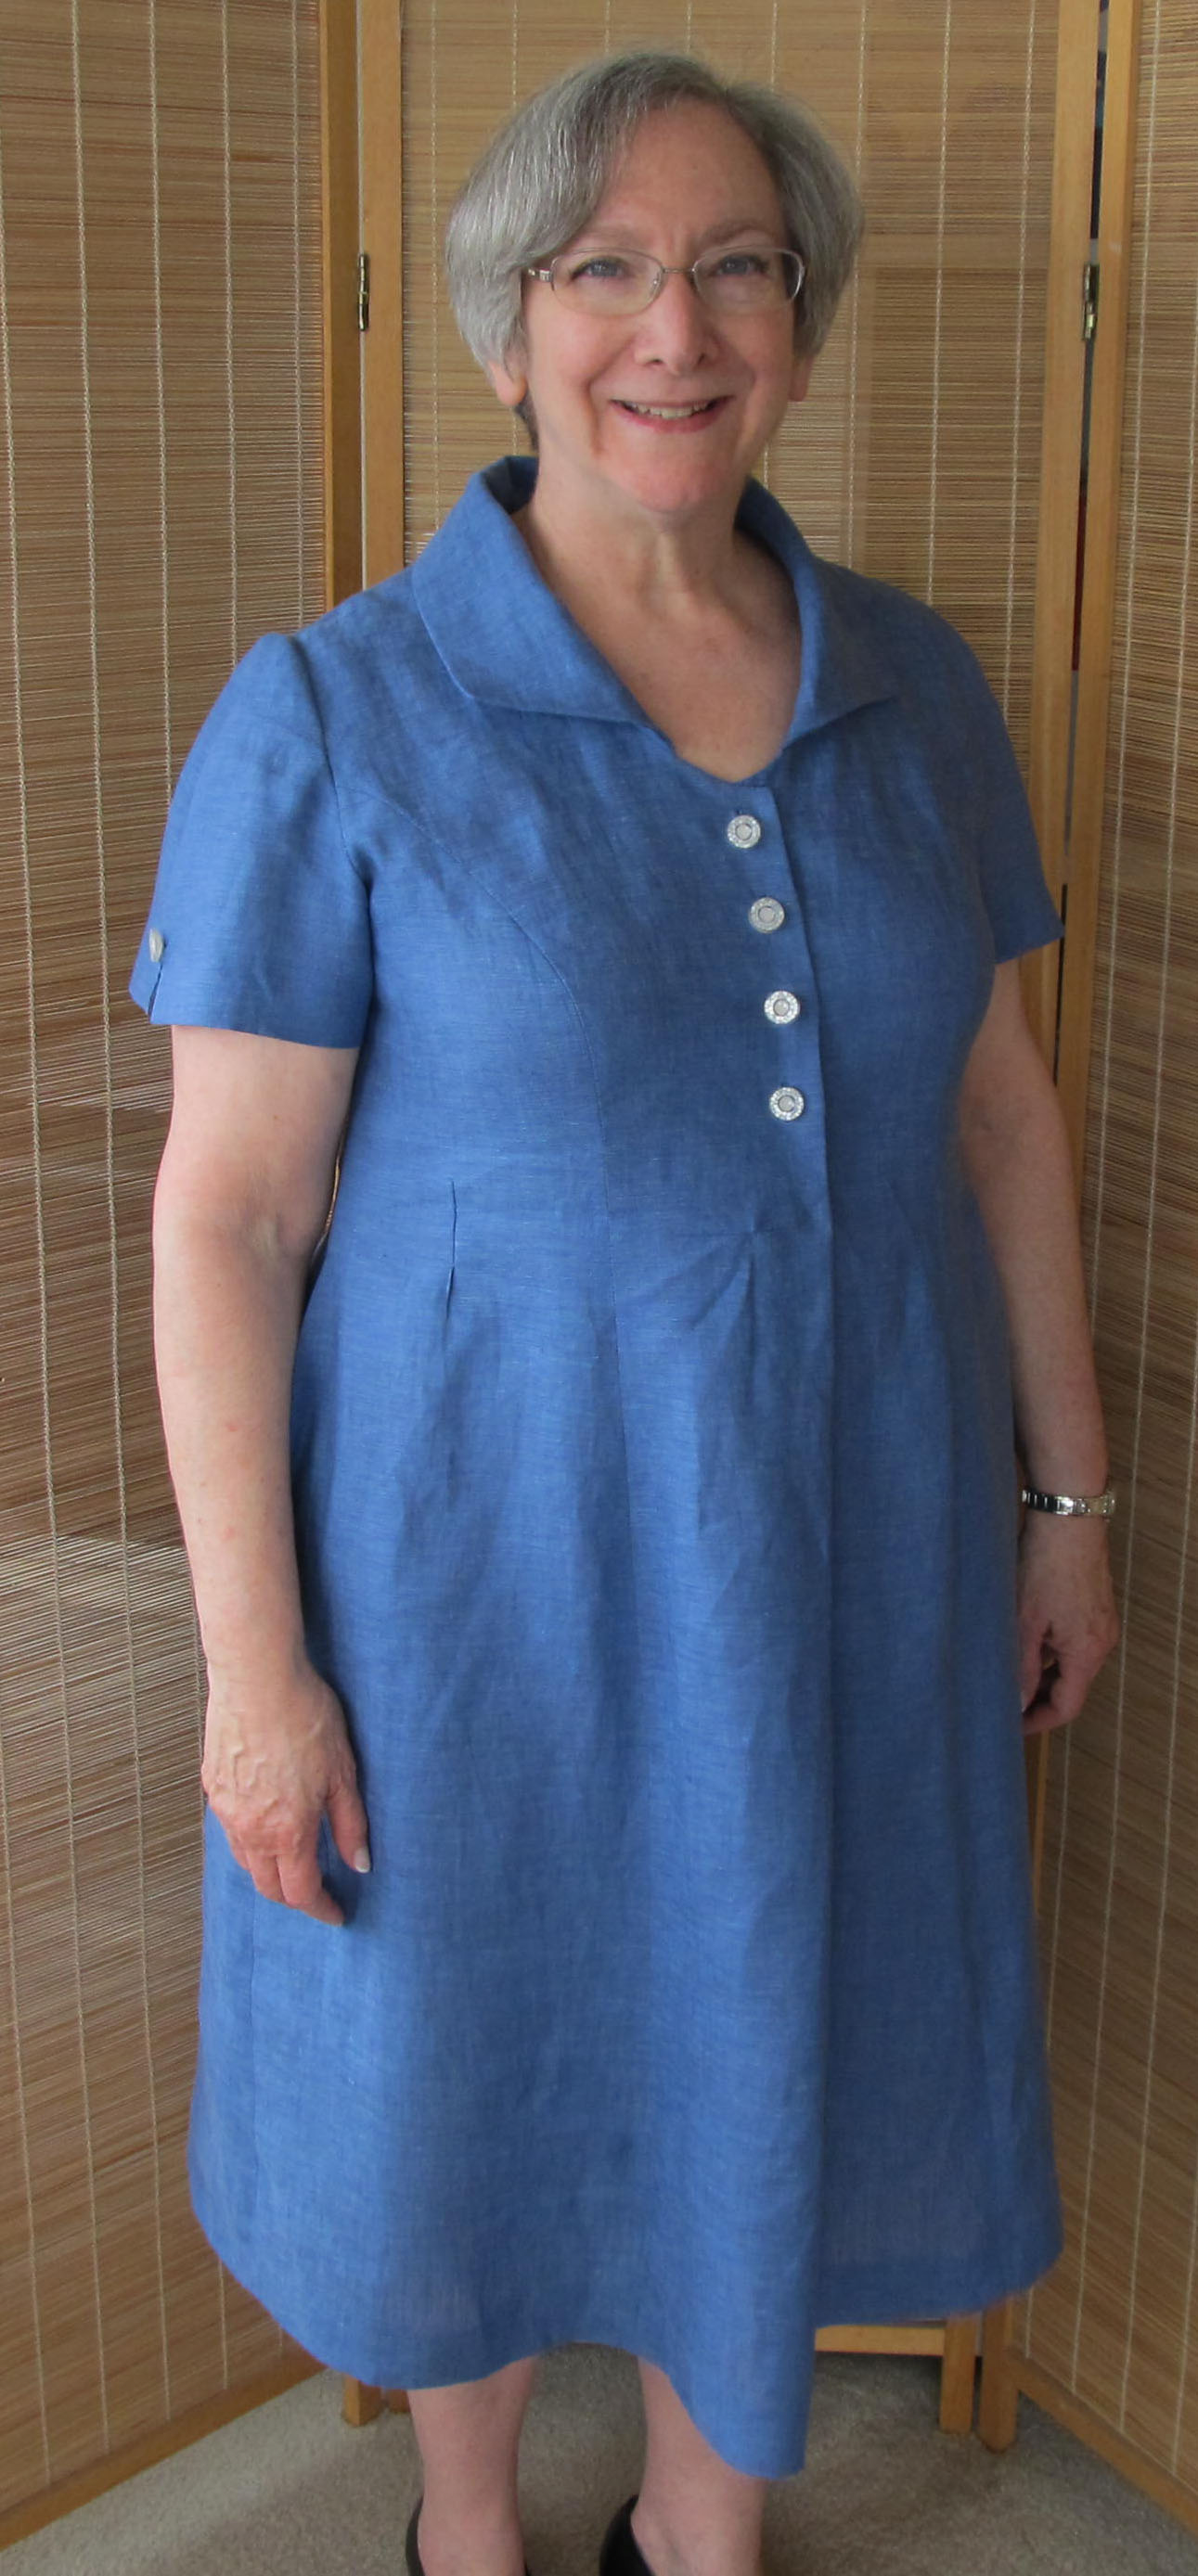
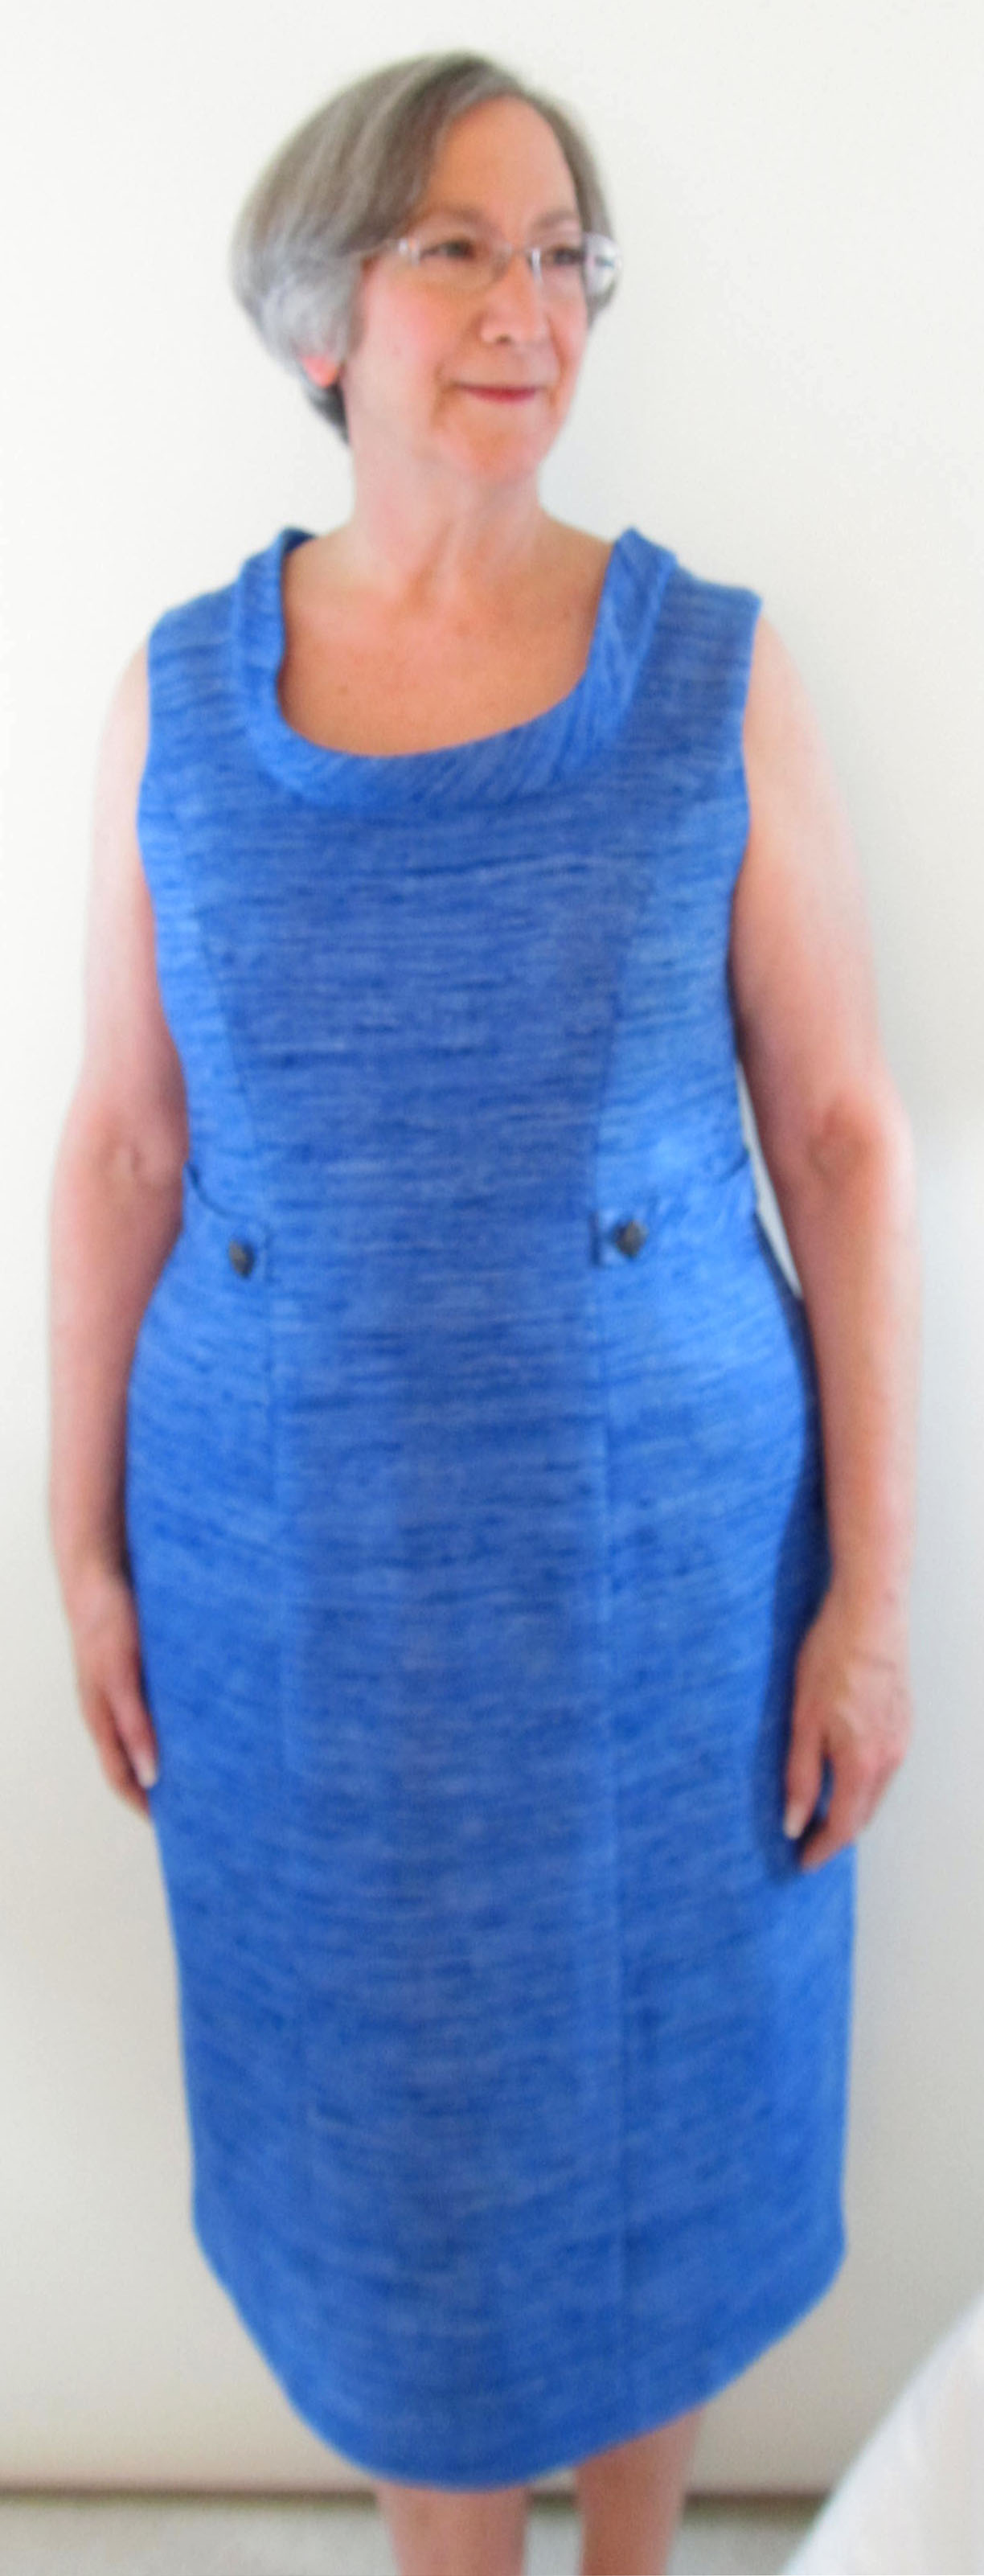
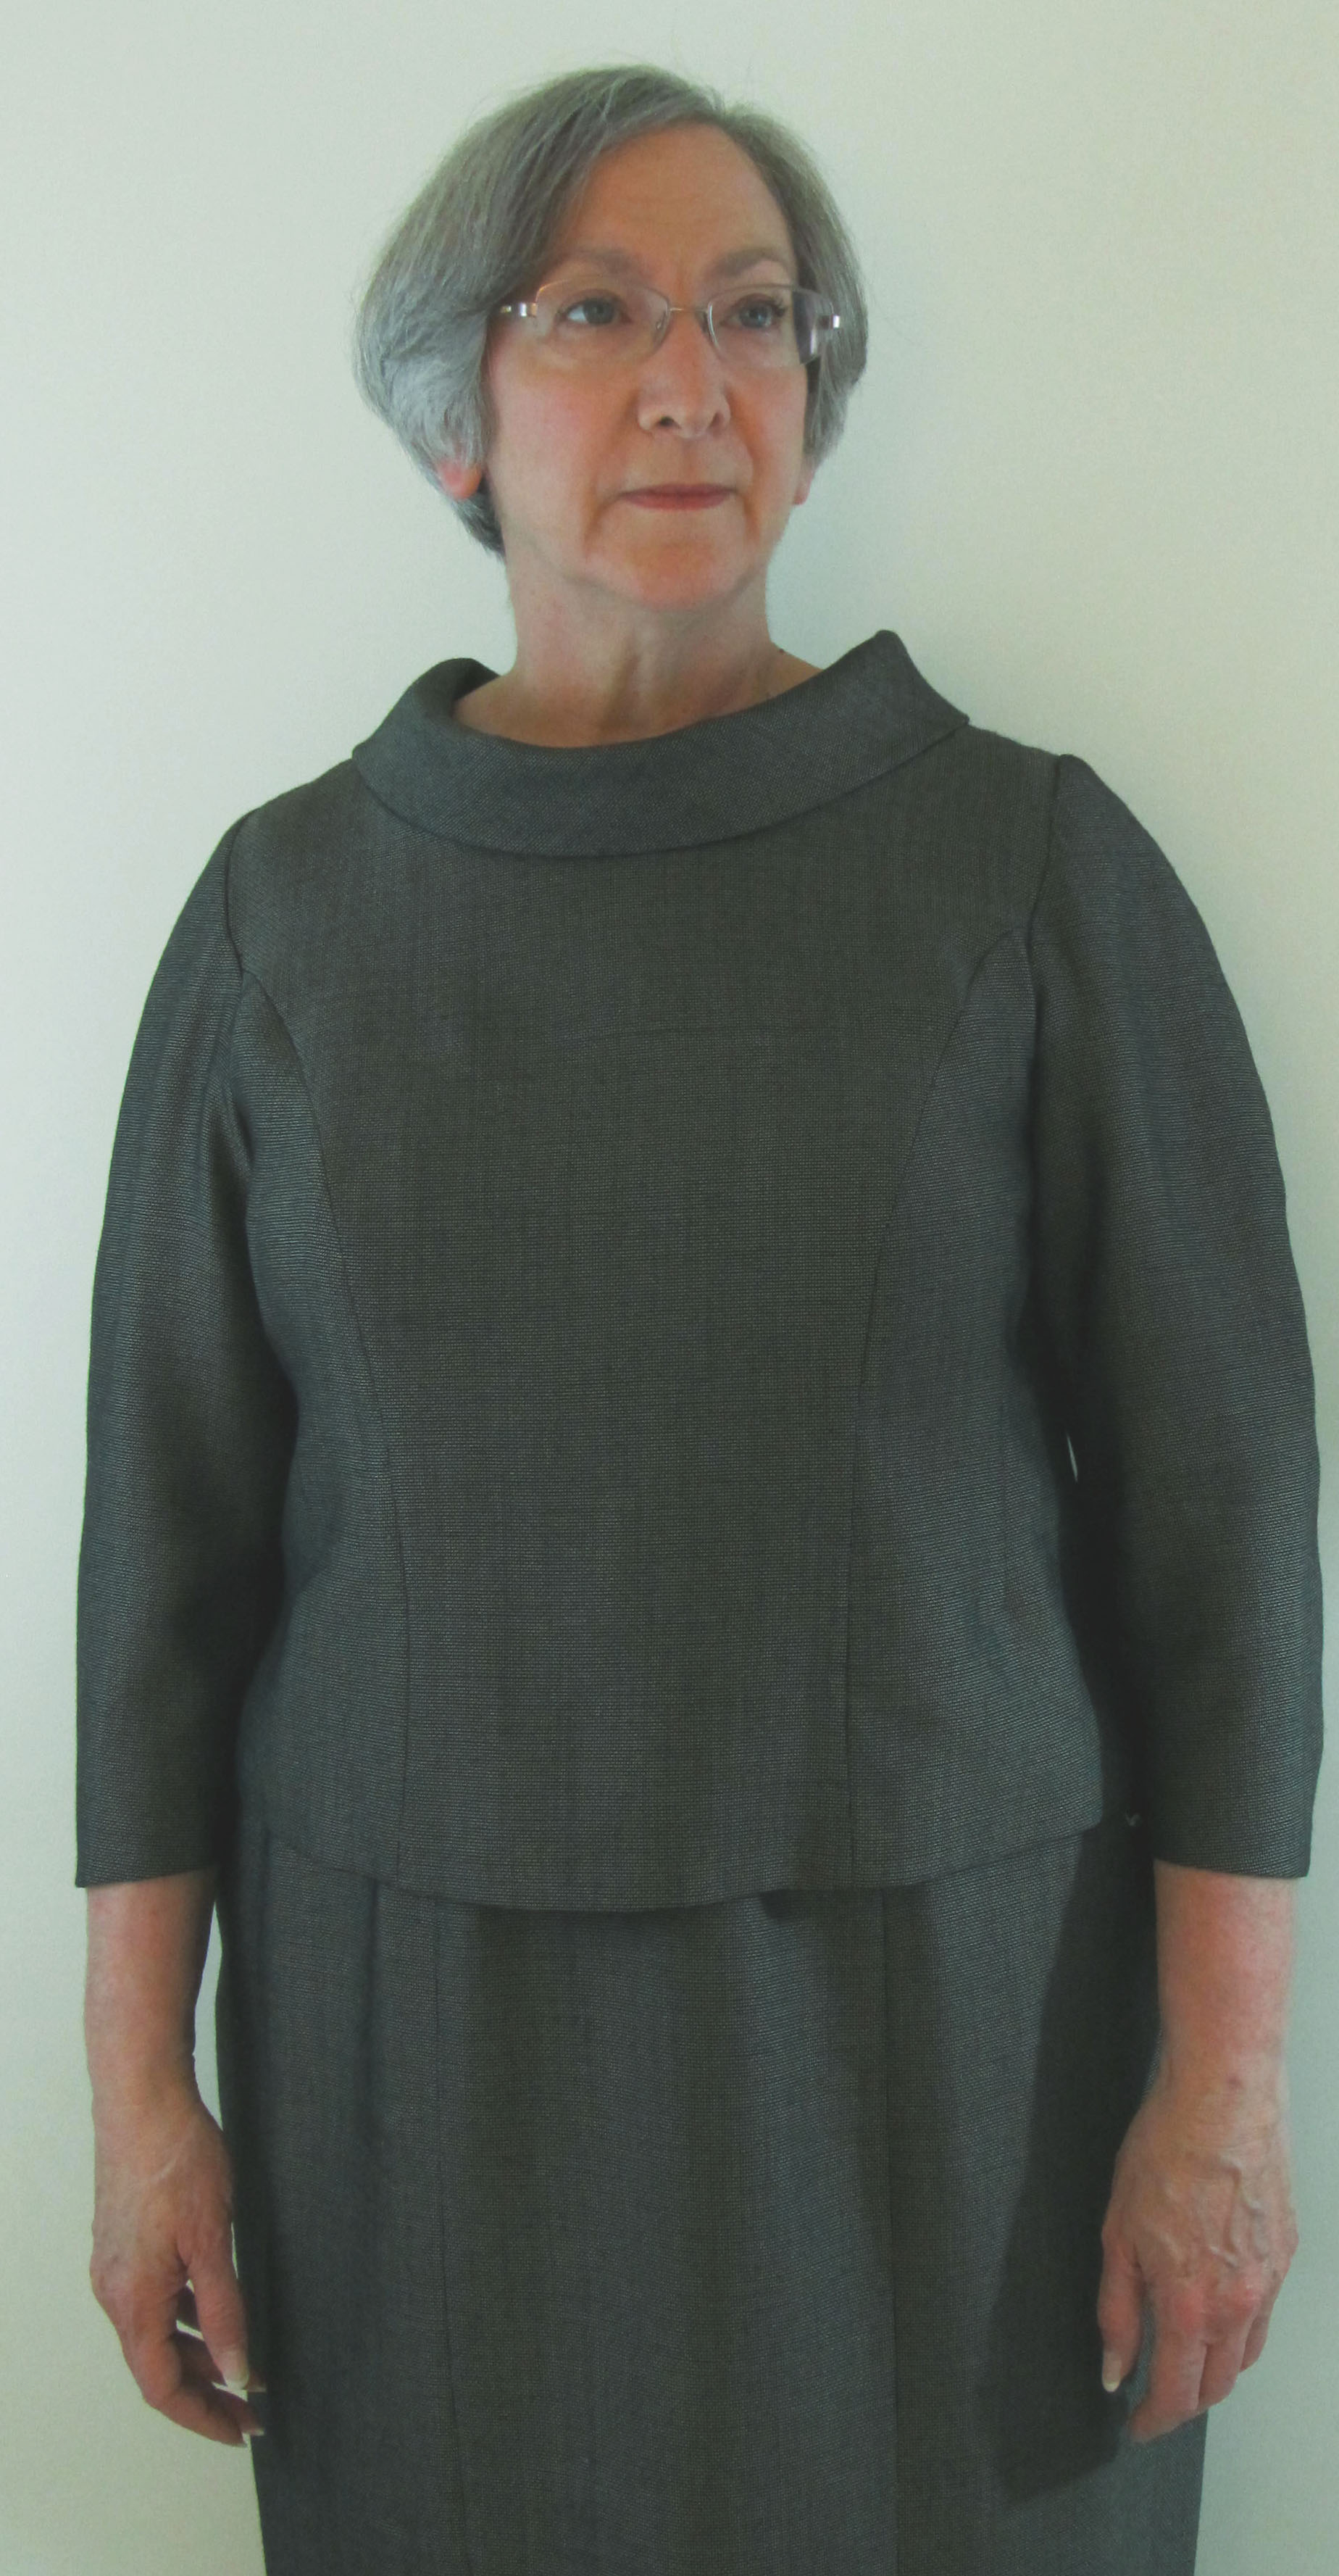
And here is the final product on me. The fabric is silk crepe de chine. I love the fabric and I like the topper. It’s completely boxy and oversized, but it isn’t as flattering as the fitted pieces with princess seams. Still, I’m glad I added this to my repertoire.

Topper Modeled

Rediscovering the Lost Art of Dress

IMG_0434Reading The Lost Art of Dress by Linda Przybyszewski opened my eyes to a great deal that I hadn’t known about how women and girls learned to dress appropriately in the past and how well-educated women carved out careers for themselves in home economics departments of leading universities in this country long before women entered male-dominated professions in large numbers.

One thing the book reminded me of is how comfortable shirtdresses can be to wear and how perfect they are to fill that gap between dressed up and casual. Professor Pski herself favors  this style and shirtdresses were a mainstay of my mother’s wardrobe as well as my own back when a dress was the most casual thing I could wear to the office on a weekday. And so I was inspired to develop a pattern for a shirtdress.

Of course, I had some specific requirements for this shirtdress. First, I never liked wearing dresses that have buttons all the way down the front, because there is always pulling and gapping when I sit in them. I also liked the idea of having release pleats to control the transition between the fitted bodice and a flared skirt.

Vogue 8970 pretty much fit what I had in mind in terms of the shape.

IMG_0136The blouse pattern Vogue 1412 provided the solution I was looking for to avoid having buttons all the way down the front.

IMG_0135This pattern has a few buttons on a placket and transitions to a pleat that extends to the hem. I opted for a facing rather than a placket, but incorporated the pleat.

The first order of business in developing the pattern was to get the shape of the skirt. I had a false start trying to trace the side seams of V8970, but quickly found that adapting that pattern to my armscye princess sloper either wouldn’t work or would be much more trouble than it had to be.

Going from the sheath pattern to the shape I wanted for the shirtdress was pretty simple. Yes, there was math involved, but just to the point of approximation.

The method consists of cutting the existing pattern into strips, from hemline to a horizontal balance line (HBL) that will be used as a pivot point. Each strip needs to be cut to, but not through, the point where one of the cut lines meets the HBL to form a hinge. Here is an example of how this works.

IMG_0138I decided how wide I wanted the dress to be at the hemline, subtracted the total circumference of my sheath pattern at the hem (not counting seam allowances), and divided that number by four. After rounding for convenience, I subtracted the width of each pattern piece at the hemline to arrive at how much I needed to add to each pattern piece. Then it was a question of cutting strips of equal width to the HBL, cutting the hinges, placing more pattern paper under the work and spreading the strips the same distance apart from one another at the hemline. I think I opted for ½-inch spreads to distribute the additions evenly throughout each pattern piece.

I left center back and center front alone and worked only to one side on those pieces, whereas the side front and side back had to have new graininess drawn after the process was completed. Then I taped it all down and arrived at pieces that look like this at the bottom.

SkirtSpreadHere is what the pattern looks like in the hinge area.

ShowHingeThe picture above also shows the extension for the center pleat, which is cut on the fold, and the extension for the opening where the buttons and buttonholes are placed.

I had a friend mark the placement and depth of the release pleats for me in the side front and side back panels. Here is how that looks on the pattern. Shirtd_SF_Top

I added in-seam pockets to the pattern and was good to go.

This was another project that I intended to complete in the summer of 2014 in linen. When I didn’t get to the sewing in time, I made the first version of the dress with 3/4 sleeves and turn-back cuffs out of a Liberty cotton lawn lined in white cotton batiste.

Liberty Shirtdress

I ran into some issues with buttonholes, so I opted for button loops. I drafted the collar pattern myself and, although I love wearing the dress I decided that next time I would raise the back neck and make corresponding adjustments to the collar. I did that in this linen version, which I finished in July and wore for the rest of the summer.

Linen ShirtdressYou can see the release pleat clearly in this solid fabric. As you can see, I overcame my buttonhole issues for this version. The buttons on both of these dresses are from Soutache.

I’m much happier with this neckline and the way the collar sits in the back. I definitely want to use the collar again, maybe in a blouse next time.

I have some cotton shirting I want to use for another version of this dress with a Mandarin collar. I also have some crinkle rayon that I think would look nice with a shawl collar. As you can see, this is becoming a staple in my wardrobe.

Connecting the Dots

Blue SheathOkay, time to take the two-piece dress pattern and convert it to a pattern for a sheath dress. No big deal, right? Well, not a really big deal but there were issues.

The first hurdle was to decide where the bodice pattern leaves off and the skirt pattern begins. Why wasn’t it just a matter of extending the bodice piece? Isn’t that how we’re told we can convert commercial blouse or shirt patterns into dress patterns? Yes, that is what we’re told, but it doesn’t work on me.

First, let’s take a look at the two-piece dress sloper, or master pattern.

2pc front

See how the bodice is nipped in a bit, but not as much as the waistband on the skirt, then flares out? If you continue that flare the silhouette wouldn’t be anything close to a sheath.

There’s another problem lurking here. I’m one of those women with a tilted waist. And, because of my shape—lots of tush, less of me at the waist—the center back seam is not the same length as the center front seam. You can get a sense of that tilt from this picture, which also approximates the way the two pieces overlap as worn.

SideSeamOverlapHere’s where working with horizontal balance lines that Sarah Veblen teaches us to use comes to the rescue. When developing a pattern from one that has been fitted using Sarah’s method, there are two things you know for sure. The hem will be parallel to the floor, making hemming a breeze, and the horizontal balance line or lines (HBLs) used in the fitting process will also be parallel to the floor/perpendicular to center front and center back. HBLs are drawn somewhere below the bust on blouses and jackets and in the hip area on skirts and pants. That means I was able to use everything above the HBL in the bodice and everything below the HBL in the skirt for my sheath dress mock-up. The mystery was what the pattern needed to look like in between those HBLs.

You may be wondering why all the angst about something I’m going to mock up in muslin and can fine tune anyway. For one thing, I was still reeling from all the trial and error that had gone into getting a good fit before I started working with Sarah. A big chunk of that time was spent trying to make a sheath dress, and that includes a workshop in which everyone was close to finishing a dress at the end of the weekend and I was still getting a muslin repinned that never made it to a completed garment. In other words, this project had even more baggage than usual associated with it.

In consultation with Sarah, I chose a point on the bodice and a point on the skirt to attach the two pieces. I drew a line perpendicular to center front at that point and walked the adjoining seams (front princess, side seam, back princess) until the line was extended all the way through each of the two garment patterns.

Here is the connecting line on the skirt side front. This picture also gives you a clear view of how much tilt there is to my waist.

Skirt Join

Here is how I ended up connecting the bodice and skirt front pieces.

Connected

Once I mocked up the dress in muslin, I used a fit appointment with Sarah for fine-tuning. We added more shaping to the princess and side seams and everything looked good to go. After transferring the markings to the pattern, I proceeded to make up the dress in a fabulous variegated silk from Emma One Sock. I even used nail polish to make the pull on a black invisible zipper to blend in with the fabric.

ZipperPullBefore attaching the lining, I tried on the dress and absolutely hated what I saw in the mirror. There was nothing wrong with the fit, but it was definitely not flattering.

Before tackling this project, I had asked a couple of teachers, including Sarah, whether a sheath was not the right silhouette for me. That’s why I had opted for the two-piece dress in the first place. Having the skirt hugging the waist underneath the bodice and the bodice skimming over the area between the bottom of the rib cage and high hip seems much more pleasing to me than what I think of as the sack-of-potatoes look when that area is covered by a continuous layer of fabric. But I was told not to give up on a sheath and so I had invested even more time and money and I was feeling as if it was all wasted.

I put the dress on my dress form and walked away from it. Later, I wondered whether adding a collar would help by diverting attention away from the problem area. I played around with some extra fabric, cutting it on the bias and draping it along the neckline on the dress form. It certainly gave the dress a different look, but I just didn’t know. I went on to work on other projects while the dress stared back at me from the dress form.

The next time I saw Sarah, I put the dress on to show her and while she would never in a million years use a term like “sack of potatoes,” she understood why I was unhappy with the dress. Her solution was to add a design element as an “interruption” in the area I was unhappy about. I was skeptical, but it actually worked.

ButtonTab TabBackIt’s just a self-fabric partial belt or tab that sits next to the front princess seam on each side with a decorative button from Soutache, my favorite ribbon and trim store which is right here in Chicago.  The belt crosses the side seam and disappears into the back princess seam on each side. It’s subtle, but I think it’s effective. At least it got me to finish the dress.

Sarah thought I should also add the collar, which surprised me. But that’s what I ended up doing. Here is the result.

Wendy Blue Sheath Sep 2014I’ve worn this dress several times and I feel great in it. I’m planning another one with a different neckline and collar.

Frankenpatterns – Cute Name, Wrong Vibe

Frankenpatterns is a word that some sewists are using to describe projects they make by combining elements of two or more patterns. I have some issues with the term. First, this isn’t anything new. I know there are some experienced sewists who never deviate from a pattern, but many of us have been pulling details from one pattern and grafting them onto another without thinking we were doing anything out of the ordinary. A case in point is this two-piece dress that  I made by combining my sloper, or basic fit, bodice pattern and the neckline and collar from Vogue Pattern 8667. V8667, Misses'/Misses' Petite  Dress

IMG_0003FYI, the collar is just a rectangle cut on the bias. The pattern doesn’t say to interface it but I always interface my collars and I think it helped with this one.

I also used the same neckline for a black silk two-piece dress with no sleeves and no collar. Black 2 pc dress

The other problem I have with Frankenpatterns is the name itself. When patterns are combined well, I don’t think the results are monstrous at all. As an example, here is the first jacket I made from my sloper.

Asymmetric JacketThe pattern I used is out of print, Butterick B5292.

untitled This was my first attempt to apply my sloper to a pattern in a way that required more than just a bit of tweaking. I have to say that when I first placed the sloper pieces on the main pattern pieces, I was intimidated.

Here is what one of the front pattern pieces looks like with my jacket sloper on it.

Sloper Front to Original 2Here is the back.

Back Sloper to OriginalI made this jacket before I made the basic jacket pattern you see here so the contrast was even greater at the time. I also didn’t have a full set of helpful landmarks on my bodice sloper at the time. All I had marked was Center Front and Center Back, which I knew I had to line up with the corresponding landmarks on the commercial pattern. Since then, I’ve added a bustline and waistline on every piece by marking them on the front and then walking the adjoining seams to get them to connect at the same level all the way around. Had I done that to my sloper at the time and made corresponding markings on the commercial pattern, I might have felt more confident.

Because this is an asymmetric jacket, there was a lot to be added beyond Center Front. I used my own side front and side back pieces and my own sleeve pattern, so I didn’t have to worry about any of the differences on the other side of Center Front.

I don’t have a tapered back seam in my bodice or jacket patterns, but the commercial pattern does. I wanted to lay out the back piece on the fold, so I lined it up with the marked Center Back and ignored the tapering in the pattern. So, I was able to ignore everything that was going on on either side of Center Back. I just needed to use Center Back as a point of reference.

As you can see, my sloper is quite a bit shorter than the pattern. I’m average height (5’5″ and a bit). Pattern grading increases both horizontally and vertically. If only that were true with changes in people.

Basically, the only things I needed to figure out were the distance between the shoulder point and a line extending up from Center Front on the front piece and the corresponding distance from Center Back on the back piece. Then I needed to draw in my shoulder seams at my correct angle and stop where I needed to stop in order to come out with a neck seam that was the same length and shape as the neck seam on the commercial pattern. I also needed to make sure that the shoulder seam is the same length in the front as it is in the back.

Here is how my drafted pattern looks overlaid on the commercial pattern.

Front New to originalBack new to Original2I was a little concerned about how short the shoulder seams are, but I wasn’t feeling confident enough to change the neckline and create accurate corresponding changes to the collar stand. When I was sewing the jacket I thought that was a dumb decision because my bra straps might make unscheduled appearances. The next time I make this jacket, I’ll bring in the neckline just a bit and make the corresponding change to the collar stand.

If the seamlines in these pictures look narrow to you, it’s because I like to use 3/8″ instead of 5/8″ seamlines. Only recently I’ve switched back to 5/8″ for sleeves and armscyes because of the method I use for setting sleeves. Yes, it does seem my sewing gets unnecessarily complicated sometimes, but I really do have reasons for these choices. The other odd marking you see on the back pattern piece is the extra Center Back foldline. This is actually a shortcut so that I can use one pattern piece for both the fashion fabric and the lining and still get that pleat in the center back of the lining.

Here is what my pattern for this jacket looks like when compared to the jacket sloper.

Left Front Sloper to NewBack New to Sloper Detail

And here is the finished product on my dress form.

Blue Asymmetric JacketThe fabric is a silk suiting that was lovely to work with and is a delight to wear. But, the jacket could have used more structure. I lined it to the edge in a silk charmeuse print, but with the hidden snaps leaving impressions on the fabric, a front facing would have been a better choice. Still, I love wearing it. And I don’t think it bears any resemblance to a monster.

Sarah Veblen, Fit Goddess

IMG_1082 I’m happy to take credit for introducing Chicago area sewists to Sarah Veblen, whom I like to call The Fit Goddess. I did that by organizing two back-to-back fit workshops that Sarah taught for the Chicago Chapter of ASG in April 2012.

Sarah began the workshop with a half-day session in which she lectured about her methods and gave us exercises to familiarize us with using a Design Ruler (some people call it a French curve, but that’s actually a different set of rulers). We need this skill to draw new seamlines with smooth curves once we transfer her pinned alterations to our paper patterns. After that first afternoon, there were two groups who had two full days of workshop each. A few of us were there for the entire time.

IMG_1069Before the workshop, Sarah sent all participants detailed instructions about how to prepare their muslins. Sarah had a list of suggested patterns to use and was happy to consult with participants about their pattern choices. I wanted to make a basic fitting pattern in two separate pieces. I had in my head an image of two-piece dresses from the Sixties that I thought might work well on me. But, I wanted it to have princess lines because I thought that would be more flattering. From an online skirt class with Sarah, I had learned that I need princess seams in both the bodice and the skirt so that there is plenty of three-dimensional space in all the critical areas.

IMG_1063There was time for everyone to get four fittings in the course of two days. Once Sarah pinned changes to the muslin, the participant marked where the pins were, took the muslin apart and transferred the changes to the paper pattern. The next step was to walk the adjoining seams to make sure that they were all the same length and adjust as needed. We also learned how to true our darts. These steps make a huge difference when sewing the final garment and they are essential to making the next muslin that is an accurate reflection of the new pattern.

Things were going very smoothly for everyone else. I got bogged down. Part of the problem was that I was the organizer of the workshop as well as a participant. There’s also my talkative nature that doesn’t serve me well when I should be concentrating on tasks that my brain isn’t naturally wired to perform.

As if that weren’t enough, inspiration struck mid-way through the process. I had prepared a shoulder princess muslin. It occurred to me that if an advantage of princess lines is that they divide the body visually, it stands to reason that a shoulder princess would emphasize the difference between my narrow shoulders and wide hips. I asked whether an armscye princess would be a better choice for me and Sarah agreed. That gave both of us additional work to do.

IMG_1071So, there I was, the world’s slowest sewist taking on additional work and trying to take care of other people at the same time. There were several times during the workshop when my brain refused to process the visual information in front of me. That’s when I learned just how patient and understanding Sarah is. It also was one of many times I was reminded that I’ve made some pretty fabulous friends in the sewing community here in Chicago.

Wendy Two Piece 60sWith a lot of help, I came out of the workshop with basic sloper patterns for a two-piece dress or blouse or jacket and skirt. More importantly, I emerged feeling confident I could make clothes that don’t look frumpy.

There was some fine-tuning that followed in online consultations and follow-up fitting sessions with Sarah. And I did more work with Sarah to get a dress pattern and – the ultimate challenge – pants. But that first workshop was the turning point for me. I had been through enough trial and error to know that other methods don’t work for me. This one does.

In the next post, we’ll start looking at garments I’ve made using the slopers as a starting point and how they are constructed.


Fit Odyssey

canstockphoto4015708At first, it sounded straightforward. Not difficult at all. All I had to do was measure my body at prescribed points, compare those measurements to a pattern for a basic sloper, do the math and adjust the pattern to reflect my own measurements. Simple, right? Hardly.

The first problem, of course, is where to measure. Where is the shoulder point, anyway? Is that exactly at the waist? Should the hip measurement be here, or a little lower? Is the tape measure straight?

Okay. So I got a set of measurements. Several sets of measurements. At different times. In different classes. Using different books.

Starting with vertical adjustments, I lowered the bust point (is anyone other than a 14 year-old as “perky” as a commercial pattern?), shortened the waist and raised the hemline. I followed the advice to use a pattern size based on high bust so the shoulder length would be right (more or less). But the shoulder length wasn’t correct. Later I found out that the shoulder angle wasn’t correct either.

Moving on to circumferences was when things got really dicey. Teachers and books instruct us to slash the pattern open and spread it to fit, then fill in the gap with paper. The problem with doing that when you are shaped like a pear is that the side seams become so distorted that the original shape of the design is lost. So I tried to create a curve that allowed the side seams to follow their original direction using the seam-only method and ended up with ugly “wings” or flaps of fabric.

What about making the transition at the armscye? Tried that, which meant spending hours trying to make corresponding changes in the sleeve. Just about every time I corrected a problem with a pattern adjustment, two or three other problems seemed to crop up. I was going in circles.

To make matters worse, this process brought all my body issues front and center. Comparing my measurements to the “ideal” I saw in the patterns made me berate myself for every pound I had gained since I was in my twenties. I even had an instructor point to me in a workshop as an example of an “irregular figure”.

At one point I thought draping might be the answer and I made a dress form that was supposed to be an exact duplicate of my body. It turned out that the dress form and I were not really twins. I still don’t know what went wrong there. What about tissue fitting, you might ask. Tried that, too.

There were many times that I asked myself why I was spending so much time and money on something that was making me so miserable, but I was too stubborn to admit defeat. So, I persevered and joked that I was an artist who worked exclusively in muslin. The only garments I finished were knits and the occasional loose-fitting woven. I even managed to make some pleated trousers that looked pretty good until you got up close and saw that the side seams weren’t straight. I was sure there was an answer out there. I just had to find it.

Yes, there is a happy ending to this story. In 2009, I signed up for a class on PatternReview.com called “All About Set-In Sleeves and Armholes” taught by Sarah Veblen. Once I started reading Sarah’s class materials, I knew I had found a teacher I wanted to work with. I went to her web site, read about her workshops, learned that she is an expert in fit and decided I had to not only take more of her classes but share her with my ASG group.

The first time we talked on the phone I learned that Sarah was working on her book, The Complete Photo Guide to Perfect Fitting. Using the words “complete” and “perfect” means this book makes some pretty big promises, but Sarah delivers on those promises.

The foundation of Sarah’s method is draping. She has her students make up a muslin with regular seam allowances. Like other teachers, Sarah will “read the wrinkles” in the muslin, but where she differs is that she also uses a grid to help identify areas that require changes and to indicate when the problems have been resolved. The grid is formed by marking the center front and center back as well as one or more perpendicular lines called horizontal balance lines, or HBLs.

After Sarah pins the changes, she has you transfer the markings back to the paper pattern, following the rules of flat patternmaking so that the pattern is accurate and reusable. There is a learning curve, which she patiently guides you through.

Not only does working with Sarah give me the result I had been striving to achieve, but Sarah’s approach frees me from comparing the contours of my body with the dimensions of a pattern. Once I’ve made all the changes, I make a fresh pattern and that becomes the standard, not some set of measurements that represent an average of some unknown number of women who look nothing like me.

IMG_1081

In the next post, I’ll tell you about my first workshop with Sarah and how working with her has transformed me from the disappointed would-be garment sewist stuck working exclusively in muslin to the happy camper who is cranking out garments that flatter my curves.