It Started With The Collar

You know how one detail can make an outfit? My latest completed project isn’t something that required great leaps from what I’ve done before. It started with a collar I saw on a red dress worn by a minor character in an episode of Father Brown Murder Mysteries. I love the 1950s fashions in that show and I often rewind to take a picture or sketch something one of the characters is wearing.

fullsizeoutput_1ad3.jpeg

I filed this image in my inspiration album and forgot about it until one day last spring when I was looking through my fabric collection for something else entirely and I came across this fabulous wool and linen blend that I had bought from A Fabric Place in Baltimore. The next thing that occurred to me is that I could make this as a two-piece dress, using my master patterns for bodice and skirt. Suddenly, I could see myself in this dress at court, at a luncheon, at anything that calls for business dress.

fullsizeoutput_17b8


I found the absolutely perfect buttons in my button collection, but I only had the size that was right for the sleeves. I was really bummed, but the buttons were a recent purchase from my favorite source, Soutache Buttons & Trims here in Chicago, so I emailed the proprietor, Maili Powell, a picture of the buttons and asked whether she still had the larger ones. “How many do you need? I’ll set them said for you” was the prompt response. Yay! I mean, are these buttons not meant for this fabric?

iNTXHAfUR4CXHqequ8H3GQ

In thinking about the collar, I realized I could work from the collar on my Spoonflower dress pattern and use the neckline for that dress so there would be little or no futzing around to get the collar and neckline to work with one another. The collar I ended up with is narrower than the inspiration one, but I think it works.

bYtXh1vSTYqTOwf82iy8dA

The Spoonflower dress collar is a Peter Pan collar that overlaps and is shifted about a quarter turn around the body so the overlap happens at the shoulder.

IMG_1856

Sarah Veblen walked me through the process of converting that collar pattern so I didn’t have to redraft the pattern from scratch.

I started out by tracing the Spoonflower collar pattern and marking Center Front, Center Back and the shoulder seams. Once it was cut out, I joined the ends, eliminating the overlap and underlap. Because the collar is drafted to have a slight lift (stand), it won’t lay flat when connected.

AO7UXk%mSXS9ulidXT2rmQ

The next step was to cut the pattern where the overlap would happen and add the underlap and overlap. Then it was on to the dress form to refine the shape of the overlap and get that curve-into-a-point bit to look proportional and achieve the effect I was going for.

Once it looked right to me in paper on the dress form, I cleaned up the pattern, added seam allowances and was ready to cut it in fashion fabric. Whenever I make anything asymmetrical, I have to go to great lengths to make sure the finished product is going to be placed on the side I intended for it to end up on. Layer on top of that the fact that I tend to get lost when doing collars because they are sewn wrong side/undercollar to the right side of the bodice and I end up rechecking what I’m doing several times before fusing the interfacing.

I’ve started a notebook with machine settings and presser feet that I use for different tasks on my new machine. I had been experimenting with different approaches for understitching, and for this project the third presser foot I tried was the skinny zipper foot. Instead of sewing with the needle off to the side the way you do when you insert a zipper, I sewed with the needle in the center hole. Because my seam allowances are ⅜” it worked out very well.

Once I got the collar attached, it occurred to me that it might be nice to have turned-back cuffs that echo the collar shape. So, I traced the turned-back cuff pattern from my shirtdress and to achieve the curved pointy detail I took a wild guess and made a photocopy of the overlap portion of the collar reduced to 70%. I had expected to need to try different percentages, but that guess was spot on.

fullsizeoutput_18cc

My intention had been to try something new with the skirt, but I ran into an obstacle and so the skirt variation had to be put on hold. The skirt ended up being another pencil skirt from my master pattern. Both pieces are lined in China silk.

I absolutely love wearing this dress.


The Bias Challenge

For this year’s ASG Chicago Chapter fashion show, my neighborhood group, Sew Chicago, challenged ourselves to create a garment that has at least 50% of the visible area sewn on the bias.

Show Your Bias
Four members of Sew Chicago met the challenge to “Show Your Bias” on the runway

Before embarking on this challenge, my experience with bias had been limited to bias bindings for necklines and armholes and using a single bias panel in the Decades of Style Stardust Skirt.   So, of course I did a ton of research on the subject and shared what I had learned with the Sew Chicago Neighborhood Group.

My plan for the challenge project had been simple, or so I thought. I copied my master skirt pattern, which is for a slightly pegged pencil skirt with princess seams. I used the slash and spread method to swing out the seams at the side, side front and side back, kept the center back seam as it was in the original and added a center front seam. I then converted the grainline on each piece to bias.

I decided to test first with a wearable muslin, which turned out to be a very good call. I was planning to make the skirt in rayon challis so I tested in a less expensive rayon challis I had bought on sale. The skirt sewed like a dream and I was very excited about having a wearable muslin I actually wanted to wear. When I tried on the skirt I really liked the way it looked and moved. I then put the skirt on my dress form so the bias could relax overnight. When I put the skirt on to show Sarah Veblen in a mentoring session I discovered that the seams had developed waves just below the waistband and those wavy seams made the fabric in between pooch out. Sarah had me try various methods to address the problem, but it just got worse and later showed up at center back. I didn’t keep any of the pictures because I was so fed up with the whole project.

In thinking through what had happened, I came to the conclusion that the problem was showing up in the curved sections of the seams. My master pattern follows my curves and I had preserved those curves in the bias pattern, whereas most bias skirt patterns only have side seams and they tend to be straight. The message I thought the fabric might be sending me was “I like to curve when I’m on the bias, but I want to do it on my own terms, not in a way that’s dictated by a pattern.” It’s not any different from the messages my cat gives me, which is that whatever she does, she wants it to be her idea, not mine. I know I overthink everything, but this made sense to me. Cats and bias are both pretty finicky.

Having identified what I thought might be the problem, the next thought that popped into my head was a possible solution. The dress I had developed for the Sew Chicago Spoonflower Fabric Challenge has a fitted bodice, a curved Empire seam and a skirt portion with a relaxed fit. What if I took those skirt pattern pieces, eliminated all of the curves from the vertical seamlines and flared out the pieces straight from where they attach to the Empire seam?

I could cut the bodice on straight of grain and, for some extra insurance, place a zipper at center back but stop it at the Empire seam so there would be no zipper in any part of a bias seam. Sarah thought this might work, so that’s what I did.

I ordered 5 yards of rayon challis from Stone Mountain & Daughter so I would have plenty to work with for the bias pieces. As it turned out, I have 1¾ yards left over.

The print made me glad I’m not prone to vertigo!

img_1413

Construction went smoothly and the method I used for setting the invisible zipper was so easy I worried that I had done something wrong. One fun thing I was able to do in constructing this dress was use the method of attaching the all-in-one facing that makes me feel like I’m doing a magic trick. I’ve gone through the details of the other cool method for attaching an all-in-one facing entirely by machine, which involves sewing in a tunnel. The method I used for this dress can only be used if you have an opening at center front or center back. I had planned to use a center back zipper for the bodice of this dress, so this was my chance to use the method in something other than a half-scale sample.

This has to be done before that center back (or center front) seam and side seams have been sewn.

IMG_1415

After the bodice and the facing pieces are connected at the shoulders and the shoulder seams are pressed open, you attach the facing at the neck, press as sewn, clip the curves press the seam open and then turn the facing to the inside of the bodice and press the seam, favoring it so the seam is visible only from the inside of the bodice. The next step is to understitch, which goes very easily because the garment is still flat. I have a new machine and I found that using the stitch in the ditch foot with the needle position moved away from the seam worked very well.

IMG_1419

The next step is to sew the armscye seams, following the same steps used for the neck seam. The only difference is that the understitching cannot be done all the way to the shoulder unless you do the tunnel stitching, but on this dress I got pretty close. The thing is, as long as you cut your facing pattern pieces ¼” shy of the fashion fabric pieces at the shoulder on the armscye side and taper out to the original bodice pattern piece about mid-way down, the seam will naturally roll toward the facing in the area that’s difficult to reach for understitching so you are okay.

IMG_1425

Now we’ve come to the fun part. Other sewists have included videos in their tutorials and you might want to watch them if this sounds confusing. What I’ve found is that it sounds a lot more complicated than it actually is. Just follow the steps and once you’ve done it, you will be able to use the technique from memory.

What you want to do is reach into the space between the fashion fabric and the facing from the side that doesn’t have an opening with two fingers extending past the shoulder seam. In the case of this dress, I reached from the front toward the back.

You then use your other hand to pass one half of the back of the bodice and facing unit to those waiting fingers. Then you simply pull the fabric through until it is right side out.

Repeat on the other side and you’re done.

IMG_1436

After construction was completed, I put the dress on Dottie (my dress form), marveled at the way the skirt seems to be in motion even when it’s perfectly still and hoped there would be none of those unpleasant surprises I encountered with the skirt.

IMG_1440

When disaster didn’t strike after three days on Dottie (two would have been sufficient), I tried on the dress and the only issue that needed to be dealt with was the hem. The back was considerably shorter than the front. At first I thought this was due to the bias, but in taking the pictures of the pattern pieces I see it was a mistake in patternmaking. I don’t understand how that happened when I walked all the seamlines, but it did. With help from my dear friend Stephanie King I was able to sort out the hem length and finish the dress in time for the runway show.

One issue I noticed is some crumpling above the princess seams in the front. I thought it was a pressing issue, but pressing didn’t resolve it. And it’s not a question of posture.

IMG_1601

I sent a picture and asked Sarah Veblen about it in a mentoring session. She thinks the bodice is too snug around the apex, at least for a fabric with the qualities of this rayon challis. That would explain why I haven’t encountered this problem when using my master pattern with more stable fabrics. I think this theory is probably correct. It doesn’t help that I’ve regained the weight I’ve lost repeatedly and regained again over the past couple of years. I’ll work on tweaking the fit before I try a version of this dress again.

Overall, I think this was a successful experiment. I’m happy that I found a solution to my bias problem in time to join in on the group challenge and I’m very happy that I have this dress.

A Jacket to Give a Dress a Second Look

IMG_0006

In a mentoring session with Sarah Veblen last month, we talked about a planned business trip to Brazil. I know the weather will be quite warm, but I need to look polished every day that I’m there. I simply don’t have enough warm weather clothes that fit the bill. One of the suggestions Sarah made was to make a white cotton jacket to wear over the dress I had made for the Spoonflower fabric challenge last summer.  It just so happened that I had two different white piqués in my collection as well as some gray buttons with a white stripe that blend well with the print of the dress.

img_0557-1

All I  needed was some white Ambiance lining and I’d could get started, or so I thought.

The plan was to use the bodice pattern pieces for the Spoonflower dress to make the body of the jacket, with an adjustment at the shoulder to make room for a pair of very thin shoulder pads called “Angel Wings.” The sleeves could be made from either my master jacket pattern or my master blouse pattern, whichever worked. Both are two-piece sleeves. However, I discovered that I no longer had all the pattern pieces for the Spoonflower dress. I started the dress to enter in the October 2015 ASG Chicago Chapter fashion show, but when I couldn’t finish it in time it remained unfinished until last summer. In the interim, I used the pattern as the starting point for my Little Black Dress that I wore in last spring’s Haute Couture Club of Chicago fashion show and to a wedding last June. I didn’t expect to like the Spoonflower dress as much as I do and so I didn’t think I’d want to make another dress from the pattern. So, instead of copying all the pattern pieces to make the modifications for the LBD, I made the changes on the existing pattern pieces. I’ve since decided that I do want to make new versions of the original dress again and I really regretted not taking the few extra minutes to copy all the pattern pieces when we were developing the LBD. That’s a mistake I won’t make again.

So, my first task was to reconstruct the original Spoonflower dress pattern, then copy the bodice pattern pieces adding an extra inch beyond the modified Empire seam of the dress. Because that seam is so curved, I needed to make a faced hem, which required new pattern pieces and interfacing.

I kept everything else very simple. The neckline is the same as the neckline of the dress so that it sits under the dress collar and the top button is hidden. I lined it to the edge and just made interfacing pattern pieces to interface the lining where facings might otherwise have gone, including at center front to support the buttons and buttonholes.

Of the two cuts of piqué that I had in my collection, the traditional birdseye weaves is a bright white and the less traditional one is a softer white. That’s the one that goes better with the dress. In looking at the weave, which looks like a honeycomb, I decided I wanted the elongated pattern to go in a vertical direction in the garment, even though that is the cross-grain.

IMG_0672
In this picture of a sample buttonhole you can see the fabric’s directional honeycomb weave

I also decided that the fabric needed to be cut in a single layer to achieve some degree of consistency at the hemline of the adjacent pieces. That meant making a full pattern for the back piece and remembering to cut mirror images of the front, side and sleeve pieces. I ended up labeling each piece “left front”, “right front”, etc. I didn’t want to leave any room for error.

After doing the pattern work and cutting, I wanted to get sewing, so I put off cutting the lining . This turned out to be helpful, because when the jacket was constructed and I needed to attach the shoulder pads, I went ahead and did all the hand sewing that had to be done on the fashion fabric. That cut down on the amount of hand sewing I had to do at the end and made it less daunting.

After trying on the jacket and determining button placement, it was time to test the  buttonholes. The buttonholes themselves were fine, but I was having trouble getting them placed exactly where they needed to be. With white fabric I didn’t want to take a chance on using a Frixion pen or even a chalk pencil and pin marking was hard to see. So I decided to try cutting painter’s tape to a width that matched the space from the finished edge of the jacket to exactly where I need to sink the needle at the start of the buttonhole.

I marked the horizontal lines in pen and attached the tape to the sample I was working with. I found I could sink the needle in so that it just brushed the edge of the tape and lined up exactly with the pen marking. I’m definitely going to use this technique again.

The other breakthrough in this project was that the lining jump hems didn’t trip me up. I serge finished and pressed under the cut edges, attached them to the serge finished edges of the fashion fabric hems (for the sleeves) and hem facings (for the body), hand stitched them in place and lightly steamed the lining. Done!

IMG_0009

Sarah Veblen’s You Choose Your Focus Workshop

Last weekend I took another quantum leap in developing my sewing and personal design skills. As always, Sarah Veblen was at the heart of this experience.

Sarah was here in Chicago to teach a workshop she calls “Choose Your Focus.” Instead of having a predetermined topic such as fitting or jacket fit and construction, this workshop provides an opportunity for each participant to work one-on-one with Sarah with whatever project or projects are at the top of that person’s wish list. It is basically private instruction in a group setting. This is the second Choose Your Focus Workshop I’ve attended and it definitely won’t be my last.

All levels of skill are welcome in these workshops and Sarah is more than capable of meeting each participant’s particular needs. Everyone’s experience in these workshops is unique. Steph has shared her perspective on her blog, 10 Sewing Machines & A Serger, and she also generously allowed me to use her workshop pictures in this post. I always start out with the intention to document with pictures, but often don’t follow through.

The first morning, the group gathers and each participant discusses what she hopes to accomplish in the workshop. Often we’ve emailed Sarah in advance to give her an idea of what we will be bringing, but this is everyone’s opportunity to crystallize their thinking and Sarah’s opportunity to formulate an idea of workflow and how she can most effectively help the participants reach their goals. Some topics come up that will best be handled with a demo, which the entire group will benefit from watching. This exchange also allows other participants to learn from the other projects that are being worked on.

IMG_0168

I arrived with a list of projects in order of priority that I placed into two categories: “required” (a/k/a “gottas”) and “extra credit.” The workshop was three days long, but I only had 2½ days because of a volunteer commitment. Factor into that my lack of speed in all things sewing and patternmaking and I knew that I needed wiggle room in my list of goals.

At the top of my “gotta” list was finalizing the design, pattern, fabric, embellishment and construction methods for a Little Black Dress to wear to a wedding in June and, I hope, model in the Haute Couture Club of Chicago fashion show that I’m co-chairing in April. I had chosen a lovely matlesse that I bought at A Fabric Place outside Baltimore (known as Michael’s Fabrics online) when I had worked with Sarah at her home studio a while back. I had questions about whether I should make the collar out of a different fabric and whether I should go with my original plan to add a few black faceted beads or use the fabulous embellishment piece made of beads and covered buttons that I bought at Soutache quite some time ago with no idea what I would do with it.

IMG_0667

The verdict was to use it on this dress and Sarah demonstrated to the group how I should handle it. The collar will be made of the same fabric as the rest of the dress. I also asked about underlining—yes, with silk organza—and confirmed that I will be using China silk lining.

I also had questions about fabric choice, closure placement and design details for the dress I’m making to wear to the luncheon portion of the upcoming fashion show and to a bridal shower I’m co-hosting the following week. (It’s going to be a ridiculously busy spring). Those questions were answered and I was able to check that item off my list.

To finalize the design of the LBD, I assembled the muslin pieces that I had cut last fall before the workshop began. The body of the dress is derived from my sheath pattern, which has armscye princess seams. I wanted a curved Empire waist seam that dips lower in the back, but not so low that it reaches waist height and accentuates my most prominent feature. (My derrière draws quite enough attention without any help.) I wanted to use the 60’s-esque collar that I’ve worked with before, only I wanted it to sit higher in the front and extend a little farther out on my shoulders and then follow a dip in the neckline in back and trail off in points. In preparing the muslin, I made the front of the neckline what I thought it would end up being, cut the collar longer than I would need and only attached it from the front to the shoulders so that Sarah could drape it.

IMG_0164

After some testing, we decided to make the front neckline a bit wider and Sarah worked her magic on the back.

IMG_0163

This is exactly as I had envisioned it!

The next step was to transfer the adjustments to the pattern. This is an area where I still am prone to doubts and confusion. As the workshop progressed, I got more confident about drawing new lines with the Fashion Ruler that don’t pick up every single pin placement mark. (It’s only pencil! I have a lifetime supply of erasers!) I’m just so worried about making a mistake that will throw off the entire garment when I sew it. I got better at this as the workshop progressed and was able to draw lines where I thought they should go. This confidence came from knowing I could ask Sarah to check my work right away. Call it a crutch if you must. I prefer security blanket. In any event, the whole point of participating in these workshops is that we don’t have to guess and compound our errors until we end up with a mess.

Anyway, Sarah ended up doing much of the pattern work on the LBD and I did more on my own on the next project.

IMG_0166

The final step was to test out the collar on a quick mock-up of the neckline on Day 2 of the workshop. It worked perfectly. I’m now ready to cut the fashion fabric!

My next project was to address yet another issue that has cropped up with my two-piece sleeve pattern. When I attended Sarah’s workshop last November, I corrected my basic two-piece sleeve pattern so that it fit well and had a total of ¾” ease evenly divided between the front and back when it is set into my basic jacket pattern. However, I’ve been using this as my all-purpose sleeve pattern and when I walked my pattern pieces to make a two-piece dress last month I noticed that the sleeve pattern had too much ease and it was not evenly distributed front to back. Both garment patterns were derived from my basic fitting bodice pattern but there have been some adjustments along the way and now there are differences. When I made this discovery, I prepared muslin pieces for my fitted blouse pattern and my topper pattern and brought the lining pieces for my two-piece dress bodice, along with all three patterns. I also started the project of making a full set of pattern pieces for each of my garments, instead of reusing side panel pieces and sleeves for multiple garment patterns.

I tried to make a mock-up of the sleeve before the workshop by putting in one adjustment to the sleeve pattern to even out distribution of ease, but I did what I almost always do—I added to the piece that was supposed to be made smaller and subtracted from the piece that was supposed to be made larger. I’m amazed at how often I defy the odds in that annoying way. Sarah straightened me out and I made a new test sleeve.

IMG_0161

I now have a two-piece sleeve pattern that works as it should for my fitted blouse pattern, my two-piece dress and my topper pattern. The topper pattern is going to be a building block for upcoming blouse projects.

That brought me to the end of my must-have list. Amazingly, I was able to make substantial progress on my extra credit.

I consulted with Sarah about my plans for developing a “flowy” blouse pattern from my topper pattern for a lovely teal hammered silk and a gray and cream striped rayon that have been aging in my collection for quite some time.

I can’t get the true color of the silk, but the picture is a close-up of its texture. I’ve been wanting to do that trick with the rayon that uses stitched-down tucks to hide the stripes at the shoulder, extending down just a bit. We decided I’d do that at the sleeve cap as well.

IMG_0169

The blouse will use the front pleat from Vogue 1412 that I used in my shirtdress and have a shirt-tail hem or a curved hem with side vents.

IMG_0135

The striped version will have a variation on the neckline from View B of Vogue 1412 and the teal silk will have the shirtdress neckline and collar. For both, I wanted sleeves similar to the one in Vogue 1367, a scaled-back poet’s sleeve. IMG_0673

Development of the sleeve required me to merge the two-piece sleeve pattern together and make the necessary design changes. Sarah worked closely with me to get this done. I then mocked it up and Sarah worked on getting it into the topper armhole.

IMG_0162

We decided on a series of tucks, which are going to be a lot of work but will achieve the effect I’m after. I now have a pattern for the sleeve and cuff and instructions for working with the tucks.

Sarah took this opportunity to give us a demo on her method for attaching a continuous sleeve placket using a bias strip of fabric.

With this checked off my list, I couldn’t believe there were still a couple of hours left in the workshop. I started on my second “extra credit” project, which is to draft a trumpet skirt. The shape will be similar to this picture, but without godets.

IMG_0672

I got a little bit of the way into it, but realized I was tired and that would make me prone to even more mistakes than usual. Still, I have a process plan and Sarah answered my dumb questions about the pattern work so I can pick this up after my “gotta” sewing projects are done.

As always, the workshop time flew by and all too soon it was time to say good-bye to Sarah and get back to the real world where sewing and design have to share time with earning a living and volunteer commitments. I’m really amazed at how much I accomplished and I have renewed energy around my projects. All that, plus I got to spend time with a group of talented, dedicated home sewers who always inspire me and never fail to offer encouragement. Who could possibly ask for more?

Lessons Learned the Hard Way

I could give you a list of reasons why it’s been three months (!) since my last blog post, but that would accomplish nothing. The real reason I’ve been hiding – yes, hiding – is that I made a series of avoidable mistakes in a jacket that made me lose confidence in my abilities. Simply put, I was too embarrassed to post anything.

This episode has taught me that it is absolutely essential to check all assumptions and reinforce the basics no matter how far I think my skills have progressed. With a lot of encouragement from Sarah Veblen, I overcame the urge to allow the jacket to become yet another UFO and then worked with Sarah to correct the pattern mistakes I had made for a new version of the jacket. We also revised the collar pattern because the design needed some fine-tuning. The final step in this learning process will be to make the 2.0 version of the jacket. Before going on to that step, I want to share the experience to reinforce the lessons learned so that I don’t make the same mistakes again and, I hope, you will be able to avoid making them in the first place.

Back to Basics

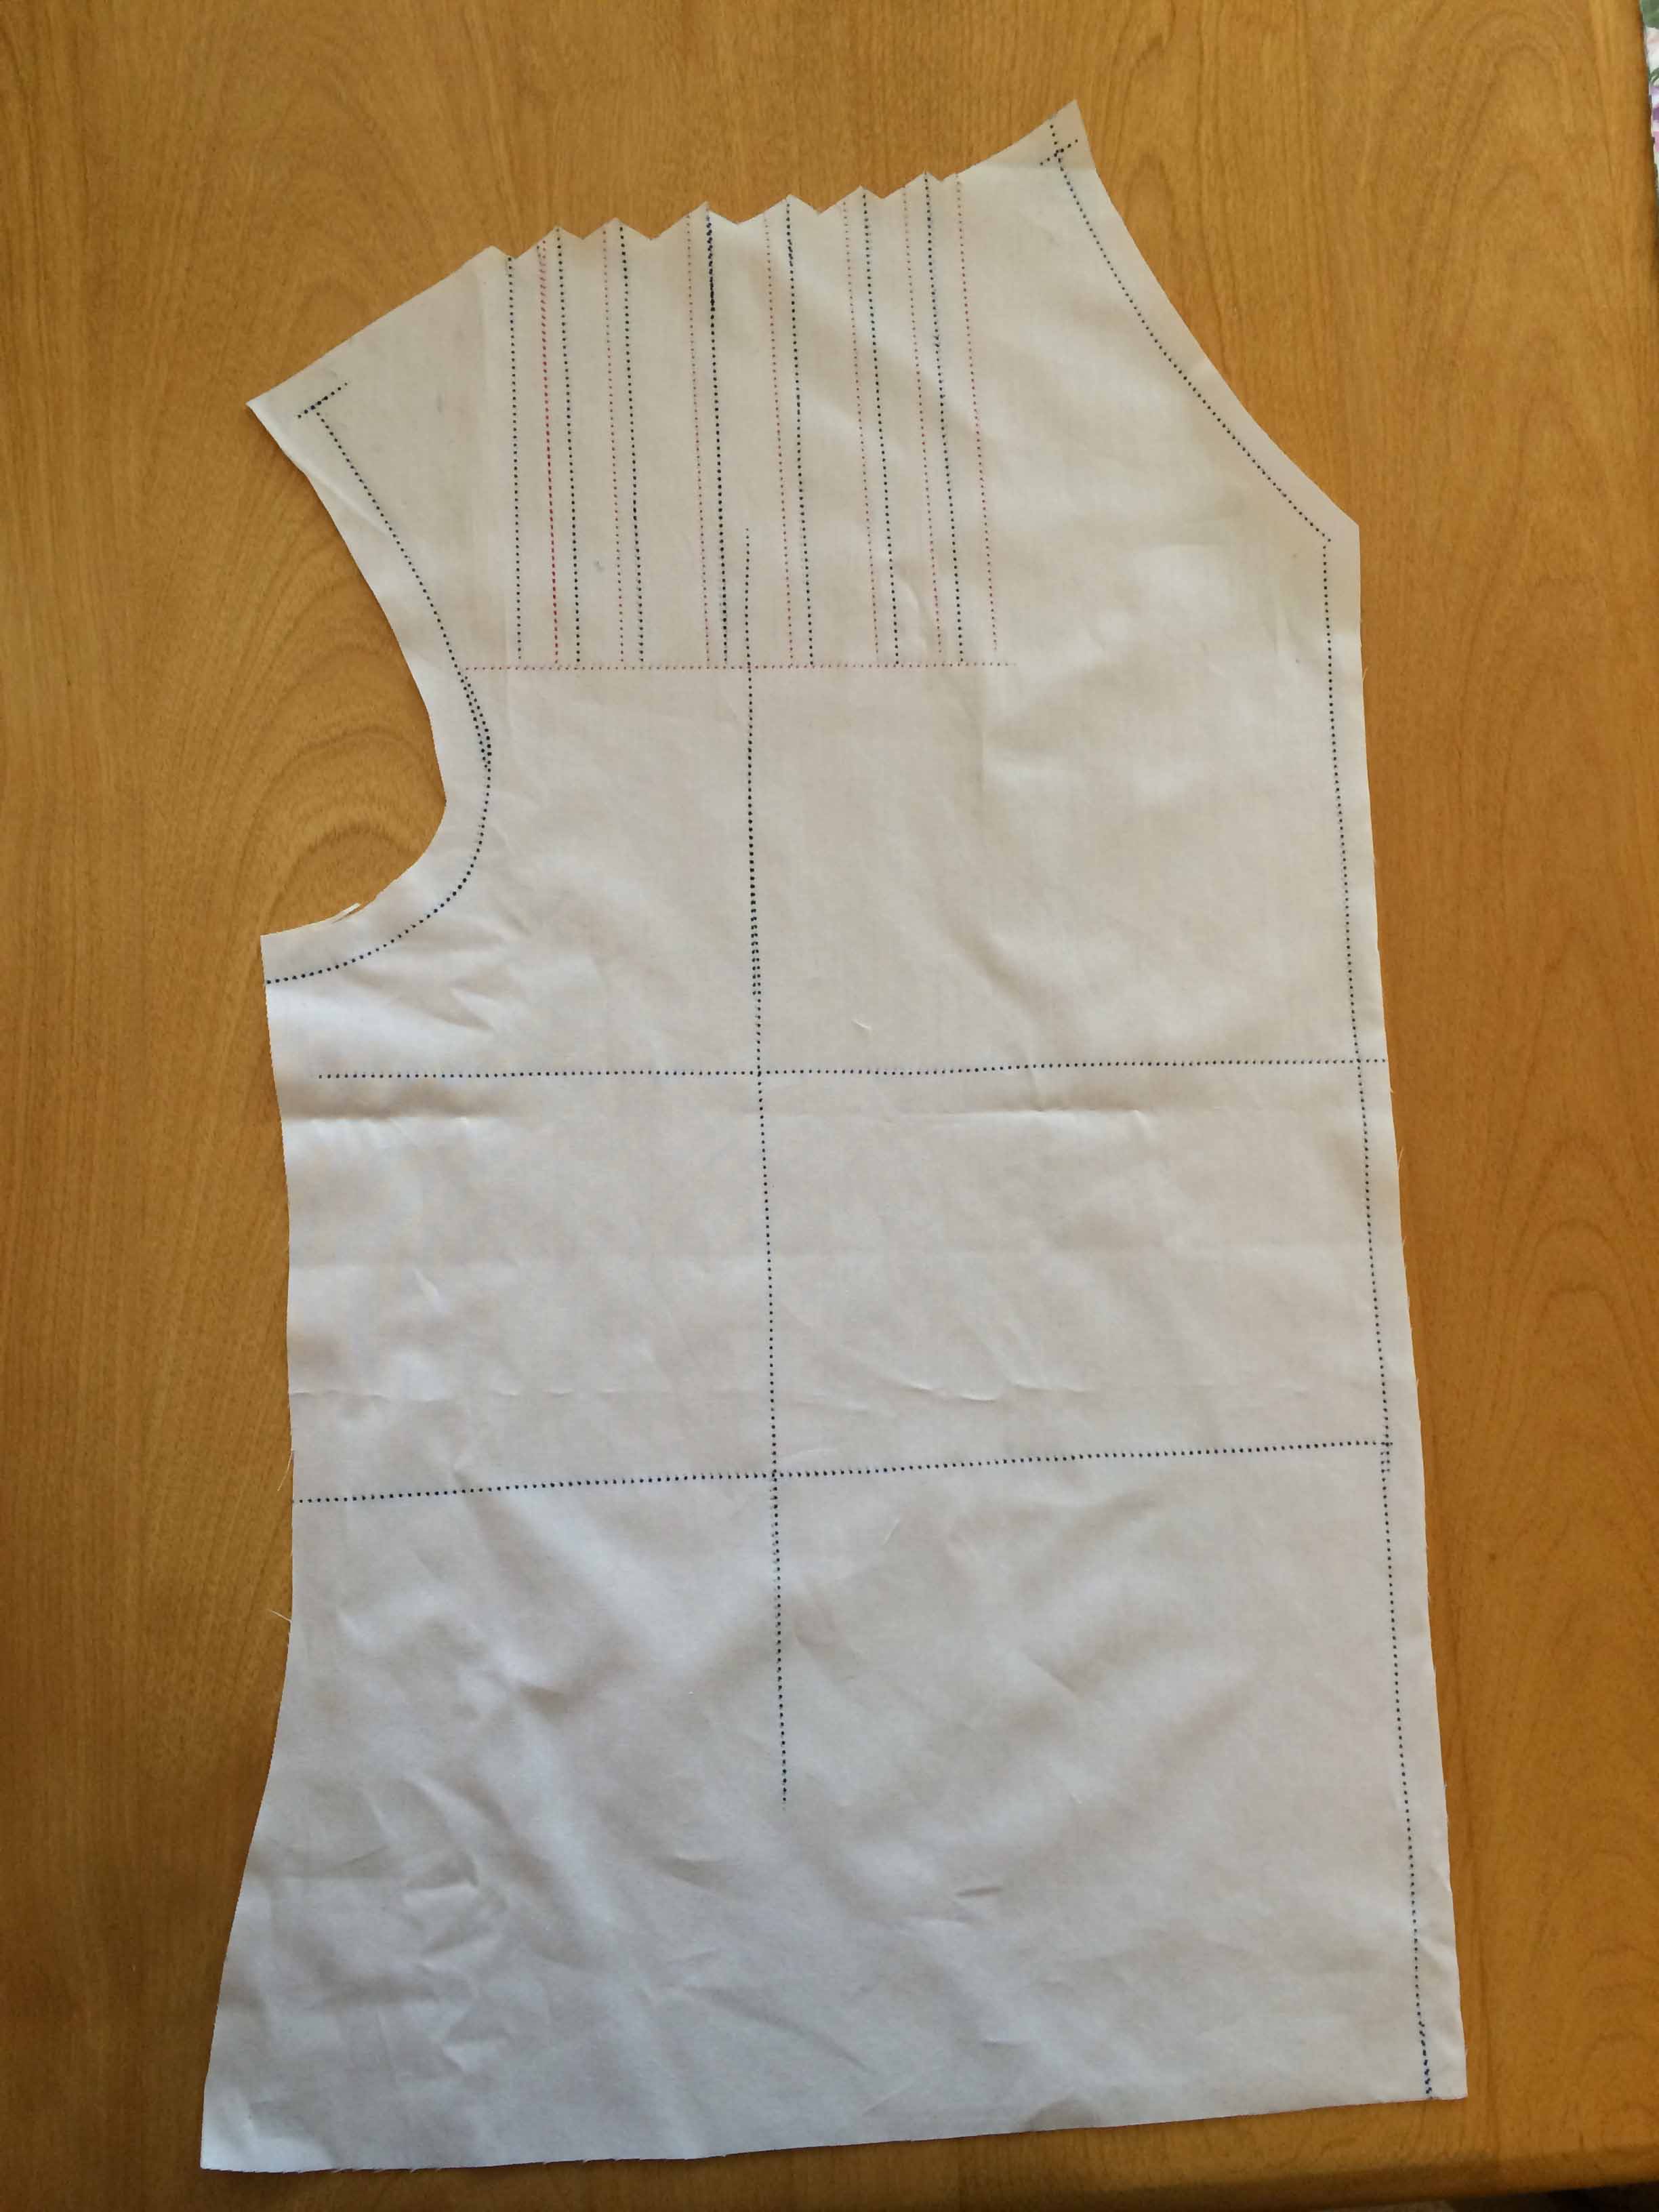
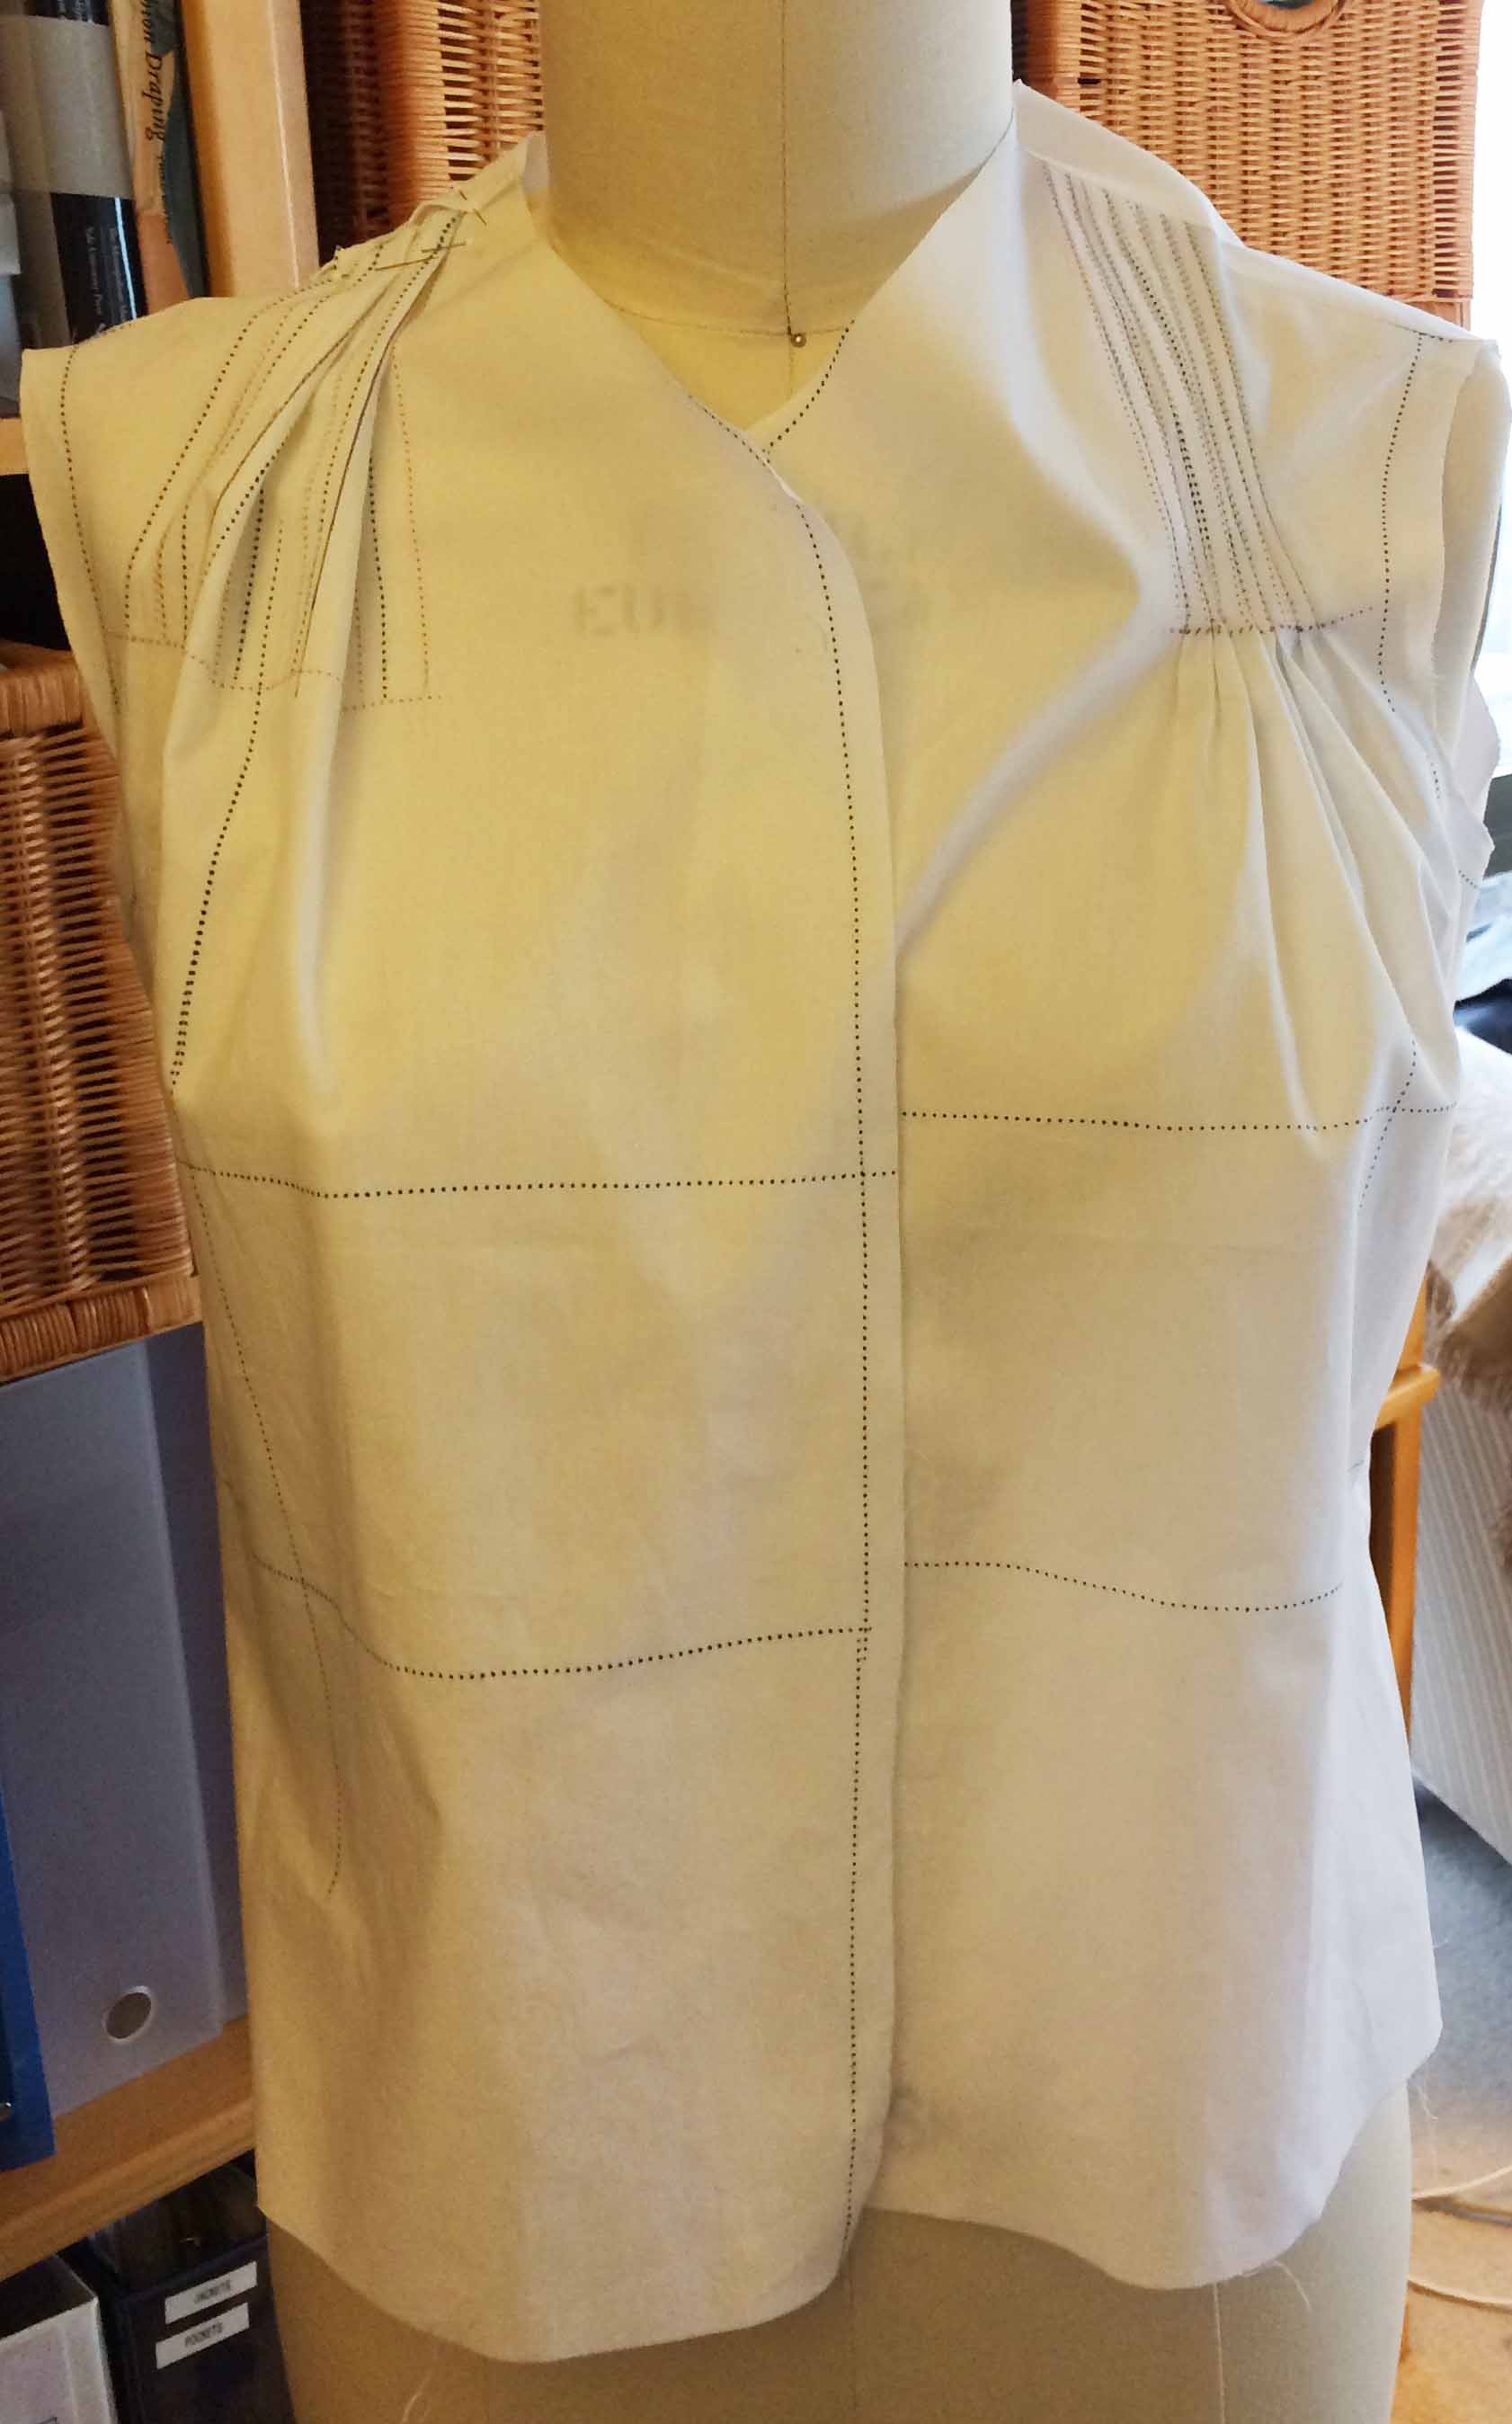
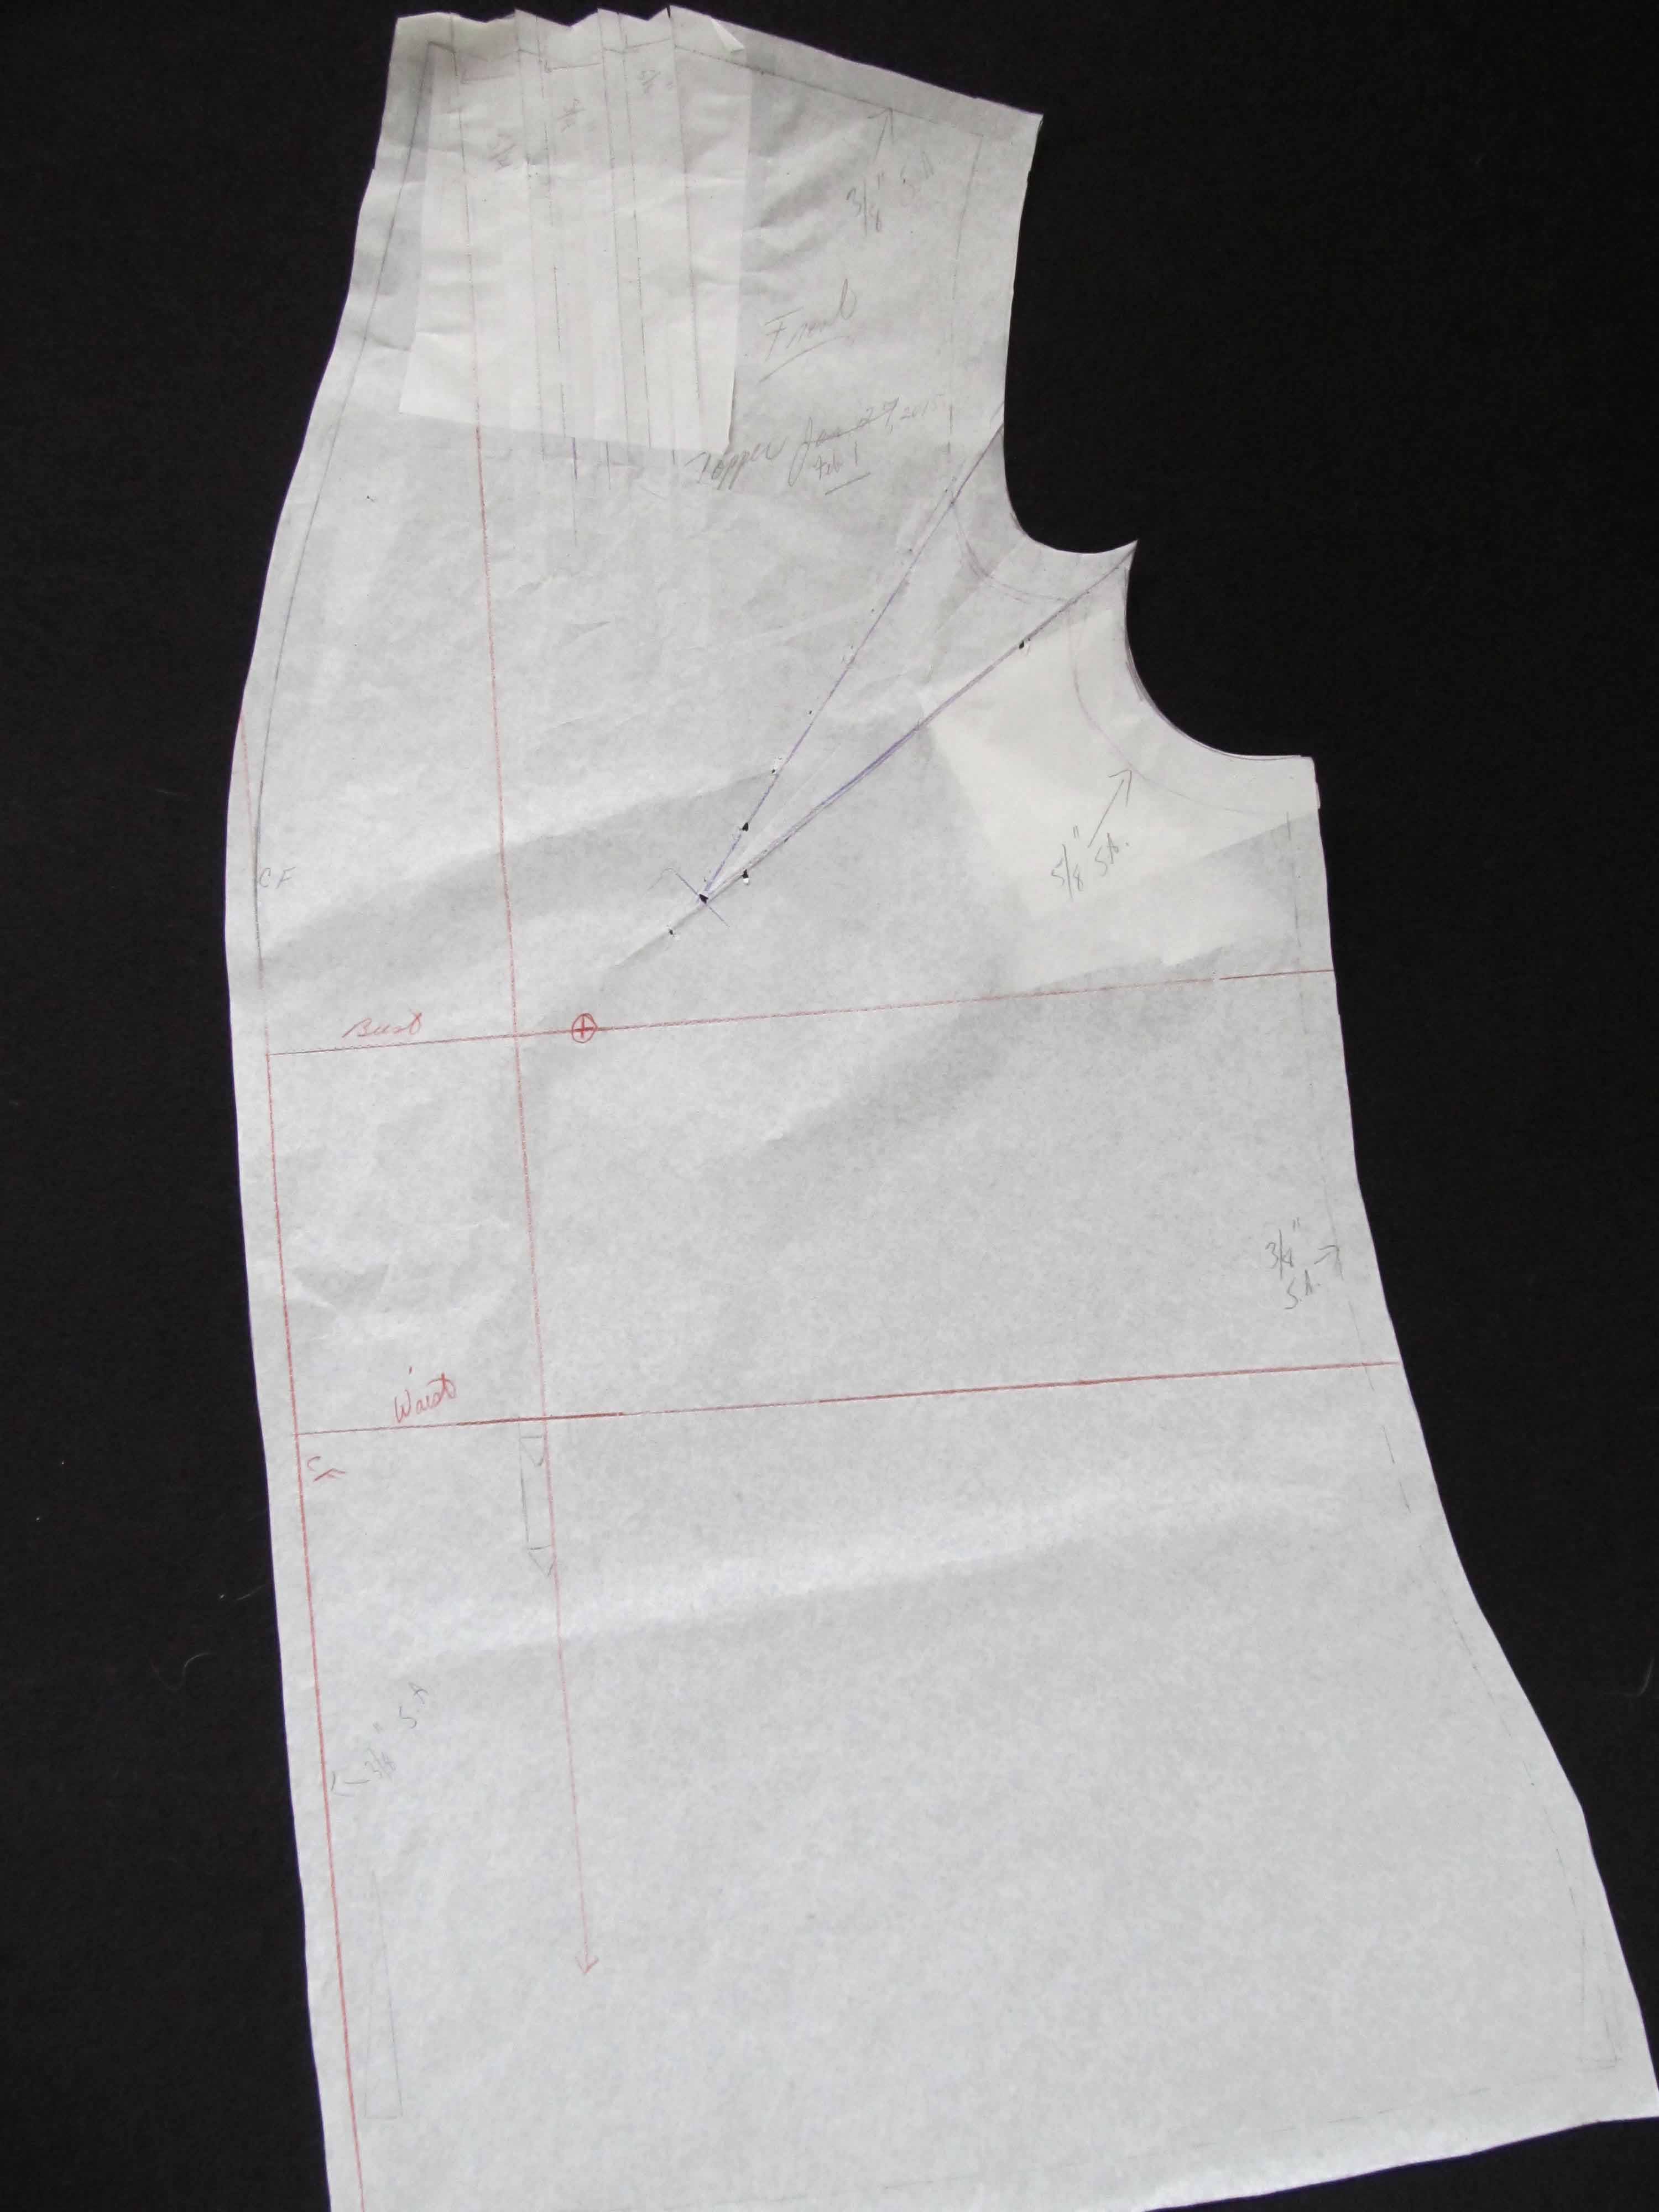
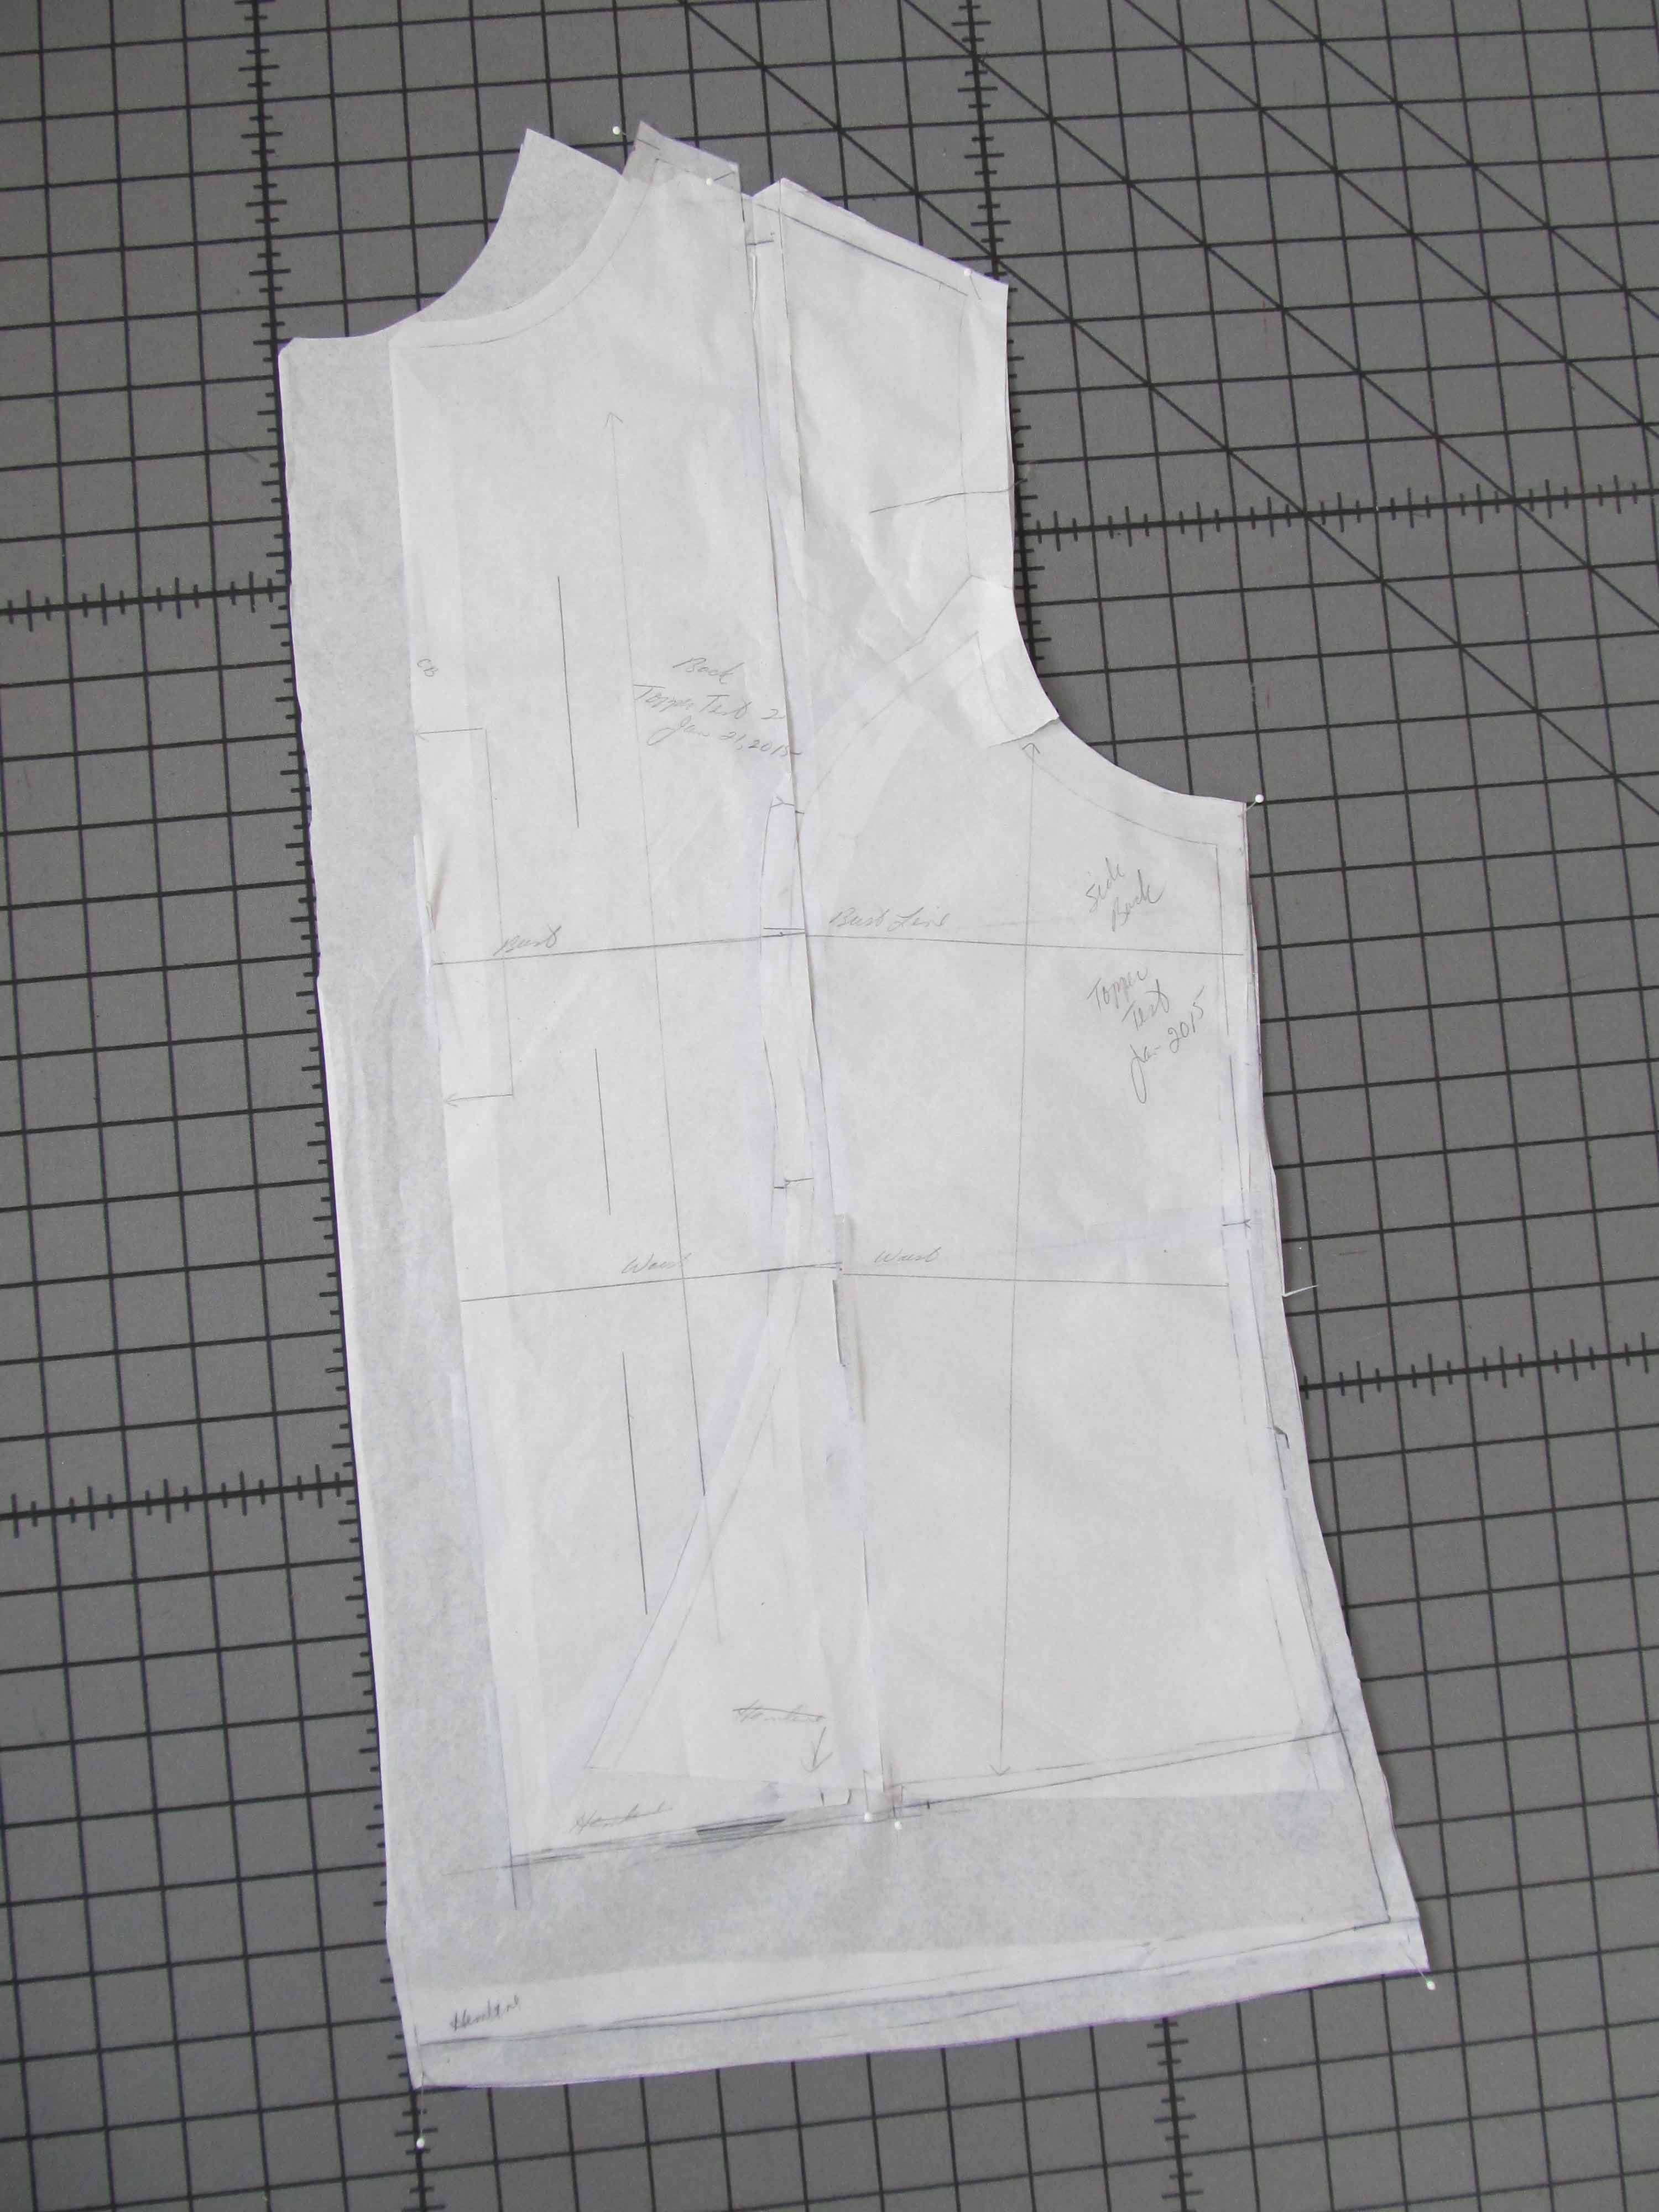
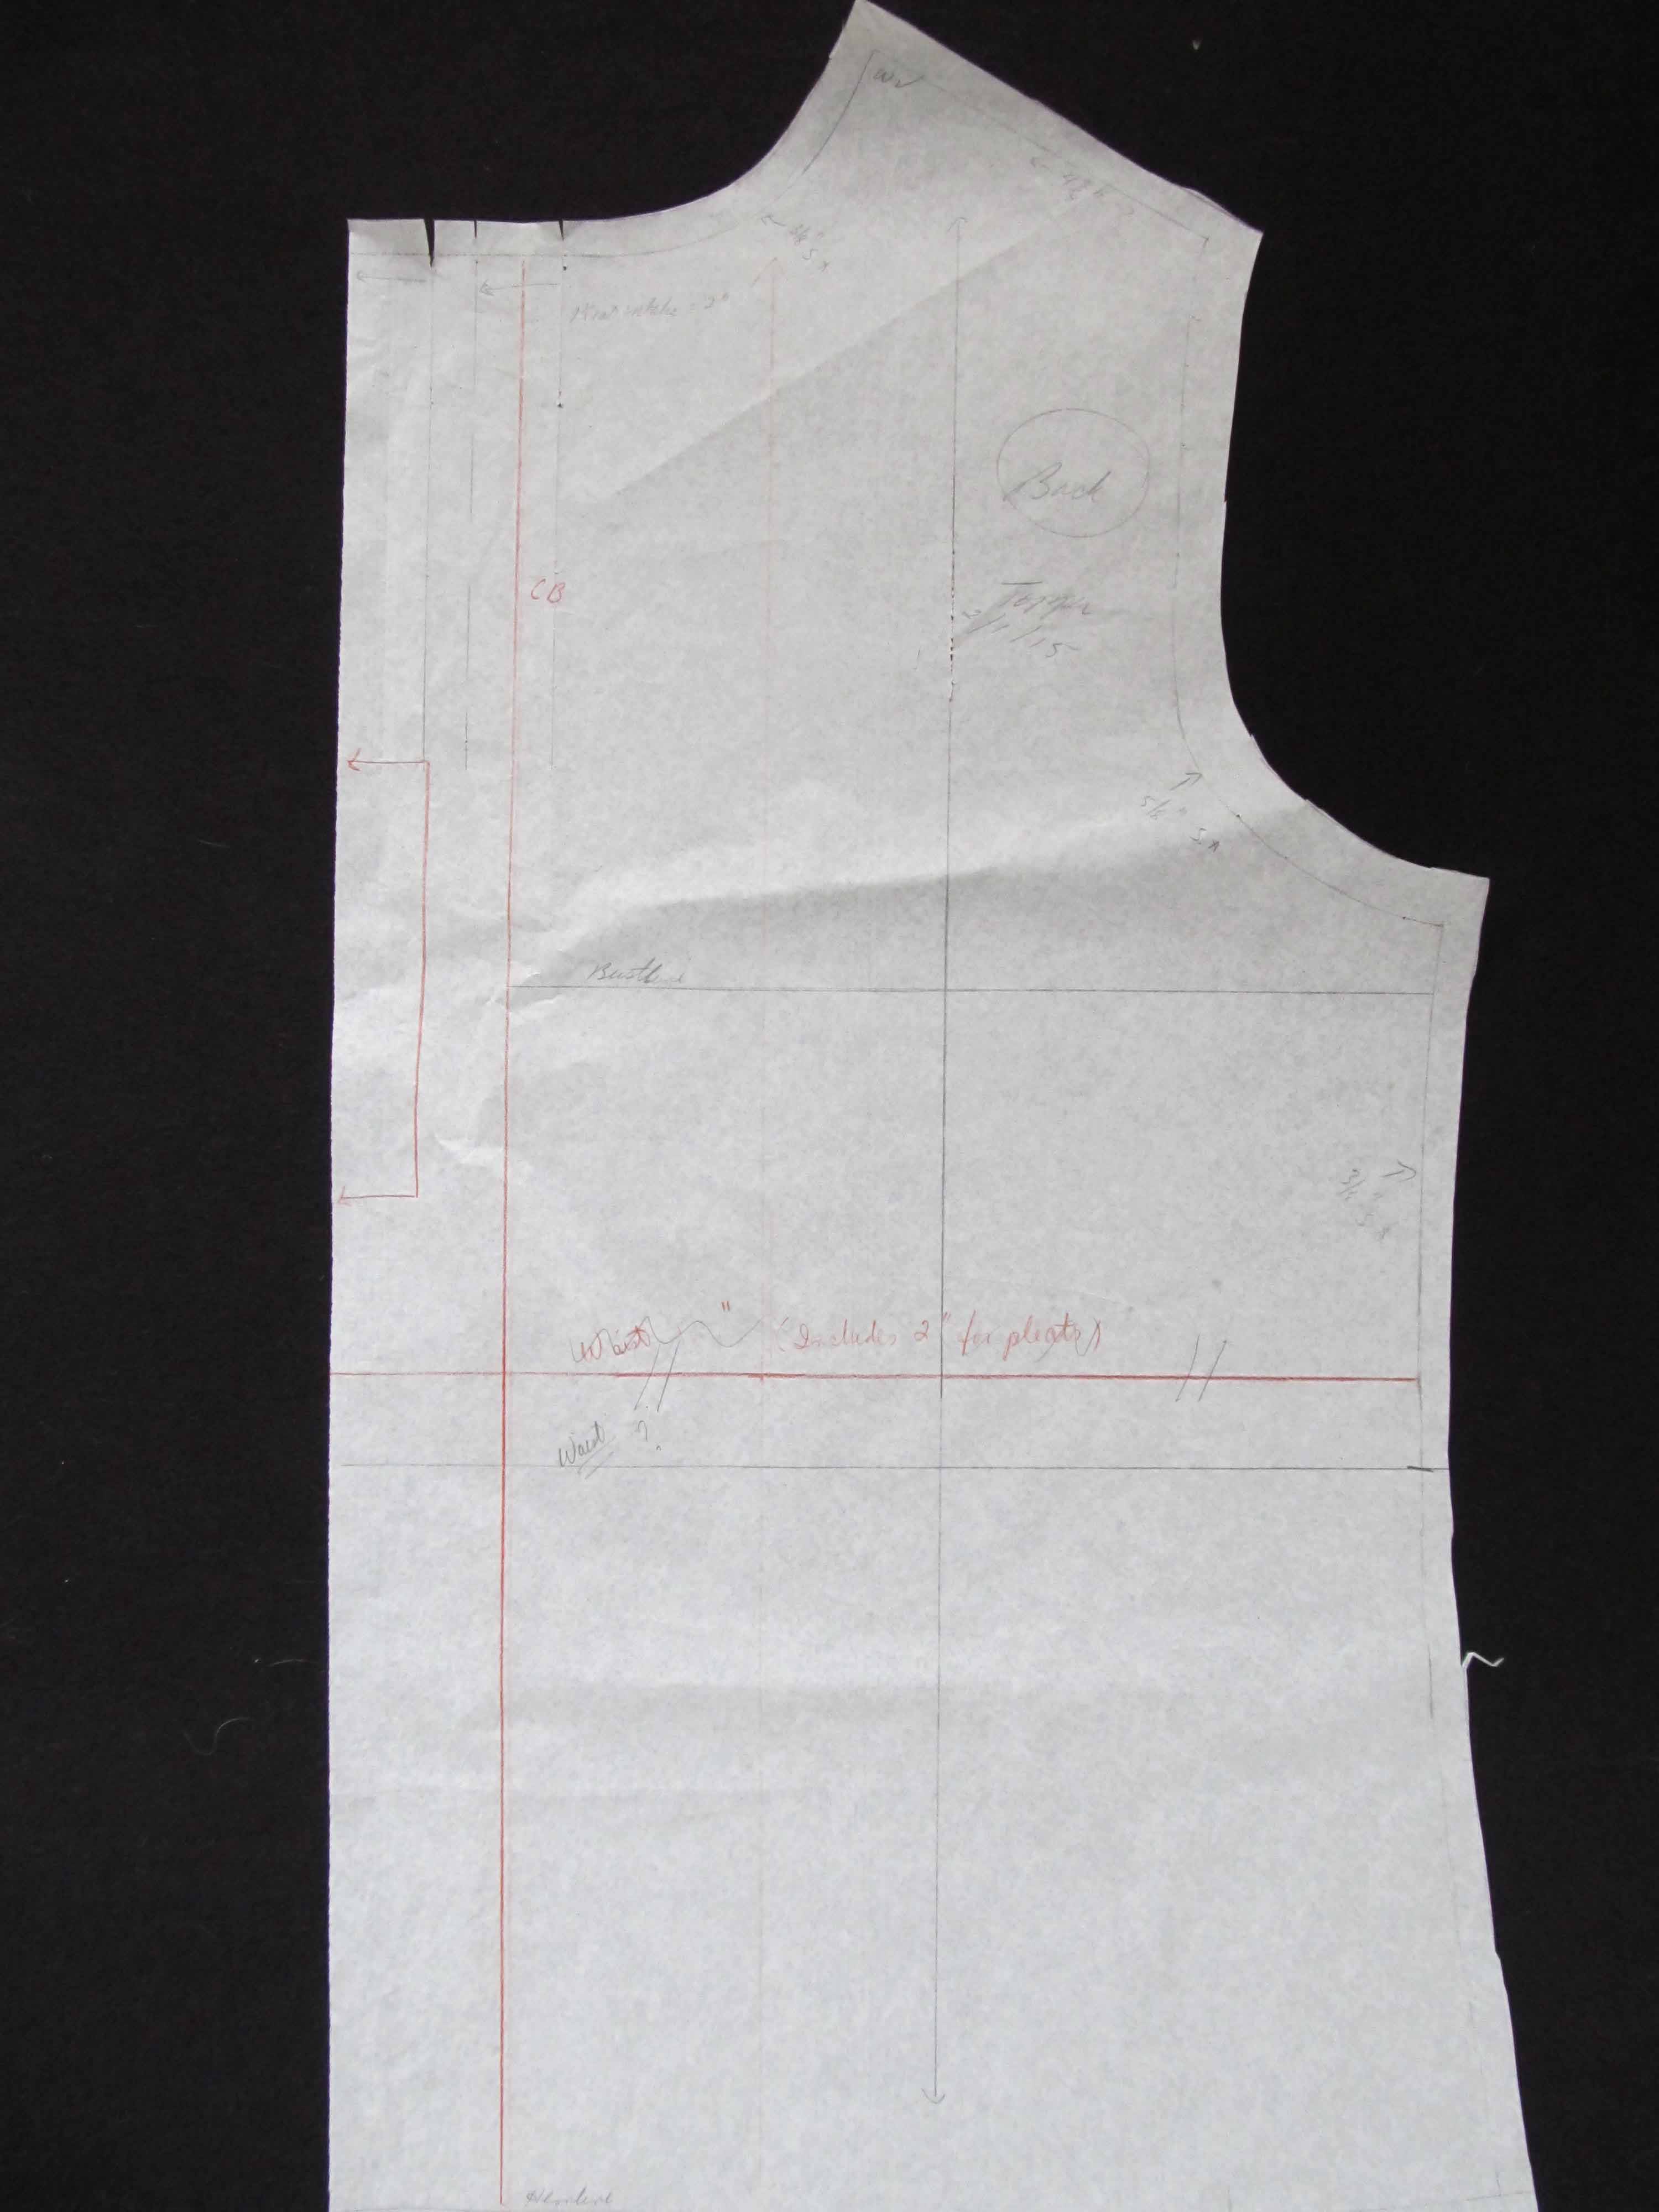
First and foremost, test all assumptions. I made two muslins, so all the adjacent seamlines on the pattern pieces had been walked, right? Then how did I end up with a back piece that had a much longer shoulder seam than the one on the front piece? Obviously, I made an adjustment somewhere and didn’t recheck to make sure the adjacent seams matched before cutting out the fashion fabric. The thing that really got me is that the mistake wasn’t buried in a princess seam or something that took some time to check. The difference in the shoulder seams is something that hits you in the face when you lap the pieces over one another at the shoulder.

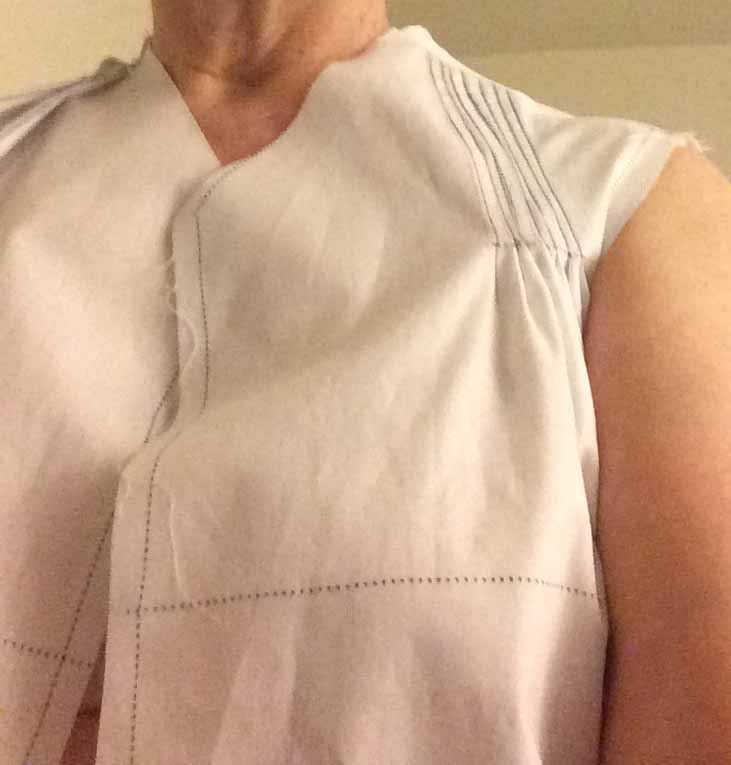
Lesson learned: keep track of all steps. The simple solution is to use a checklist before cutting the fashion fabric. I’m not doing this just when I’ve made changes to the pattern, but also when I pull different pieces from different garments. I might have made tweaks in a garment that I’ve forgotten about, so I can’t assume that the side front piece from one blouse will fit together with the front piece from another project. In this project, I started out intending to make three-piece sleeves, using the pattern from my still unfinished French jacket, but changed my mind and used the two-piece sleeves I’ve used for other jackets. It was only after I found myself struggling to ease in the sleeves that I realized the armscye for my French jacket is smaller than the armscye for my jacket sloper.

My new routine is to make a checklist with all the garment pieces and all the adjacent seams that need to walk. It looks something like this:

  • Front to Side Front
  • Side Front to Side Back
  • Side Back to Back
  • Front to back at shoulder
  • Sleeve to armscye

When everything is checked off, I’m ready to cut.

Resist the Temptation to Combine Steps

When teaching patternmaking in her fit and design workshops, Sarah carefully lays out each step that her students should follow, which includes cutting the pattern on the cut line before walking adjacent pattern pieces. I thought this was a step I could skip and simply cut away excess paper when I used the pattern to cut fabric. I was wrong.

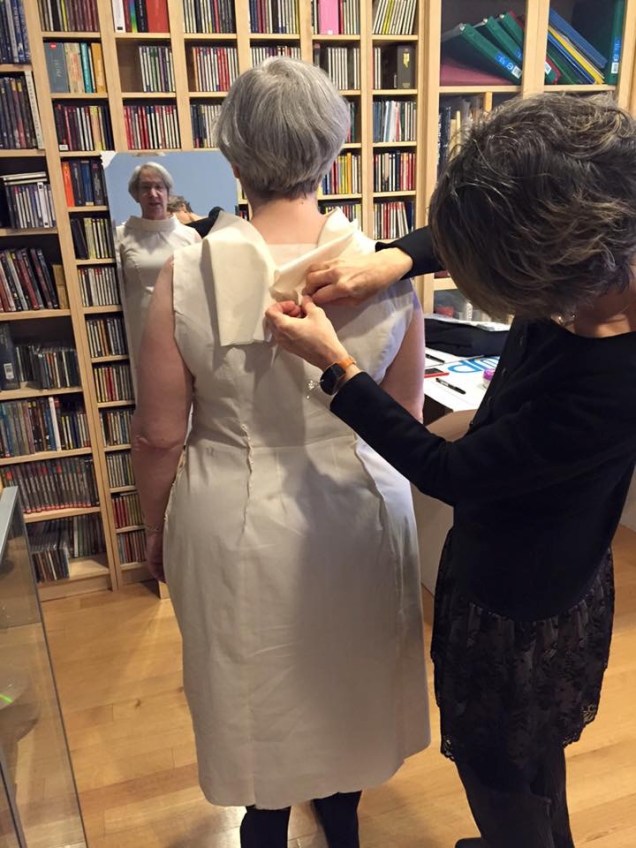
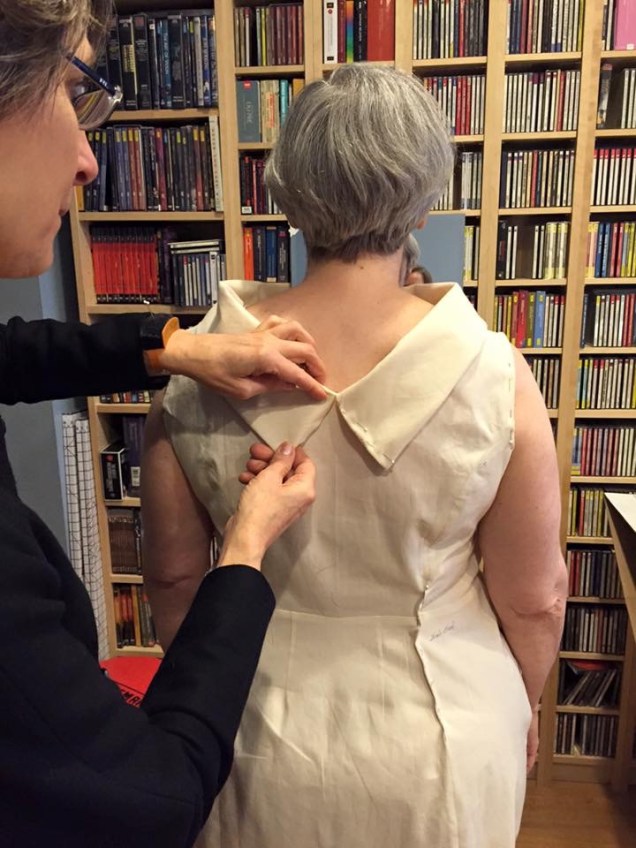
After I had kvetched to Sarah Veblen about all the mistakes I made with this jacket, I worked on fixing each of the problems in a workshop that she calls “You Choose Your Focus,” where each participant works on whatever she needs to accomplish with Sarah’s supervision. As Sarah watched me walk two pattern pieces, she noticed that I had veered off from the seamline on one piece and was walking one seamline onto a cut line. She assured me that this is not an uncommon mistake, especially when changes have been made to the pattern and there are extra lines and markings that have been crossed out. She then said in her gentle, patient and non-accusatory manner that the best way to avoid this mistake or at least minimize the number of times you make it is to trim away the excess pattern paper before walking the pattern pieces.

Lesson learned: If a step seems unnecessary, ask the instructor why she advises taking that step before skipping it.

Don’t Forget to Think Seamline

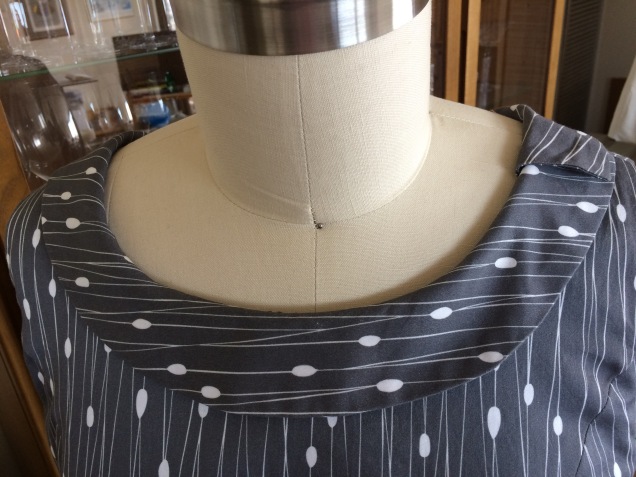
This is another place where the number of lines on a pattern piece can cause confusion. Some lined garments are lined to the edge, whereas others have linings that hang from a facing at the neckline and other really ambitious garments have both a neck facing and a faced hem with a lining in between. Here is what that looks like on this particular jacket:

IMG_0564 (1)

The facings are made of a beautiful black silk taffeta that has a tone-on-tone embossed rose pattern. Sigh. The silk lining is from A Fabric Place outside of Baltimore and I managed to buy more when I was there in November. Yea.

So, on my first attempt to make the lining pattern I marked the depth of the facings on the garment pattern pieces, plus cut lines above and below each of those seamlines, which meant I had three sets of lines at the top (seamline, then cut line for lining and another cut line for the facing), plus two at the bottom, since the lining and hem facing don’t get attached as a seam but have a jump hem instead. I also got mired in math trying to figure out the depth of the jump hem, which is why you see that seam at the bottom of the lining in the picture above. That’s where I attached a bias strip to add length.

Sarah’s advise is to only draw the seamlines, or if you must draw multiple lines, color code them. She draws her seamlines in blue pencil.

Here is a visual for the neck facing/lining segment of that convoluted explanation:

IMG_0572

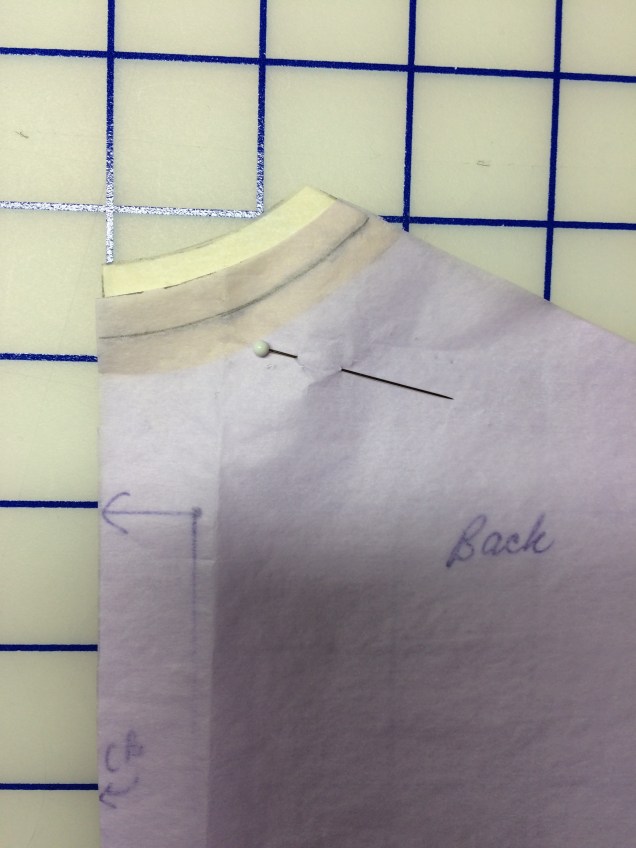
The reduced scale pattern piece for the garment back is on white paper. I’ve marked only the seamline where the lining (purple tissue paper) attached to the facing (yellow tissue paper). As you can see, the lining’s seam allowance extends up like it’s supposed to and the facing seam allowance extends down. The process was to mark only the seamline, then draw the facing piece, add the seam allowance and cut, then draw the lining piece, add the seam allowance and cut.

Lesson learned: Pattern pieces that get too cluttered are confusing and it’s a mistake to think I will always be able to remember which piece goes up and which goes down.

The whole jump hem thing is a little more involved, so it gets its own section.

Map Out Jump Hems Visually

You don’t have to be math-challenged for math to trip you up, at least I don’t. And there’s something about jump hems that have had me confused for a long time. Sarah walked me through the process visually with strips of paper and I think I finally get it.

When a jacket is lined to the edge (no neck facing) and the hem is turned up (no hem facing), the lining pattern pieces are the same length as the fashion fabric pattern pieces. To get a nice jump hem that covers the hem stitches and ensures that the fashion fabric isn’t pulled up by a too-short lining, we build in a jump hem, which simply means that the fabric hangs down part way over the hem allowance, has a soft fold, comes back up to the hem stitching line and is hand stitched in place. Sarah advises to turn the raw edge of the lining under by ¼” and pin that fold to the hem stitching line and then stitch. Everything works out just fine.

Here is an attempt at a visual representation of how that works:

IMG_0015

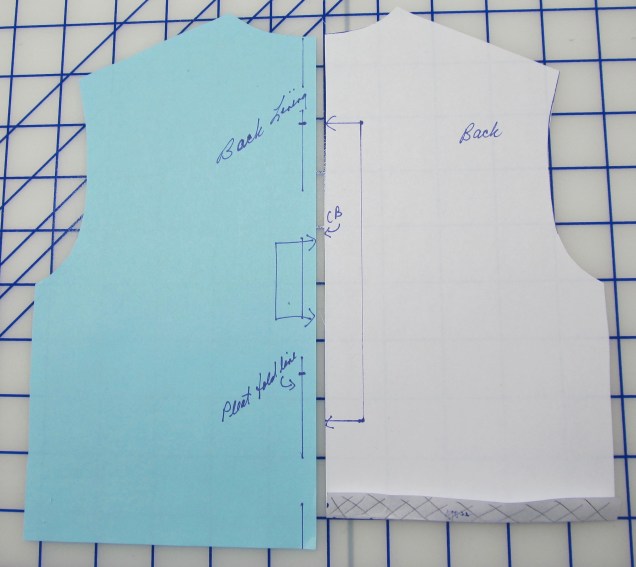
The blue paper simulates a back lining for a jacket that is lined to the neck edge. It is the same length as the back jacket piece. The only difference is that it has a little extra width to allow for a pleat at center back and it is marked in approximately the places where the stitching ends to allow for arm movement. The white paper represents the fashion fabric pattern piece, which is turned up at the hem with cross-hatching to represent the right side of the fabric in the hem allowance.

IMG_0017

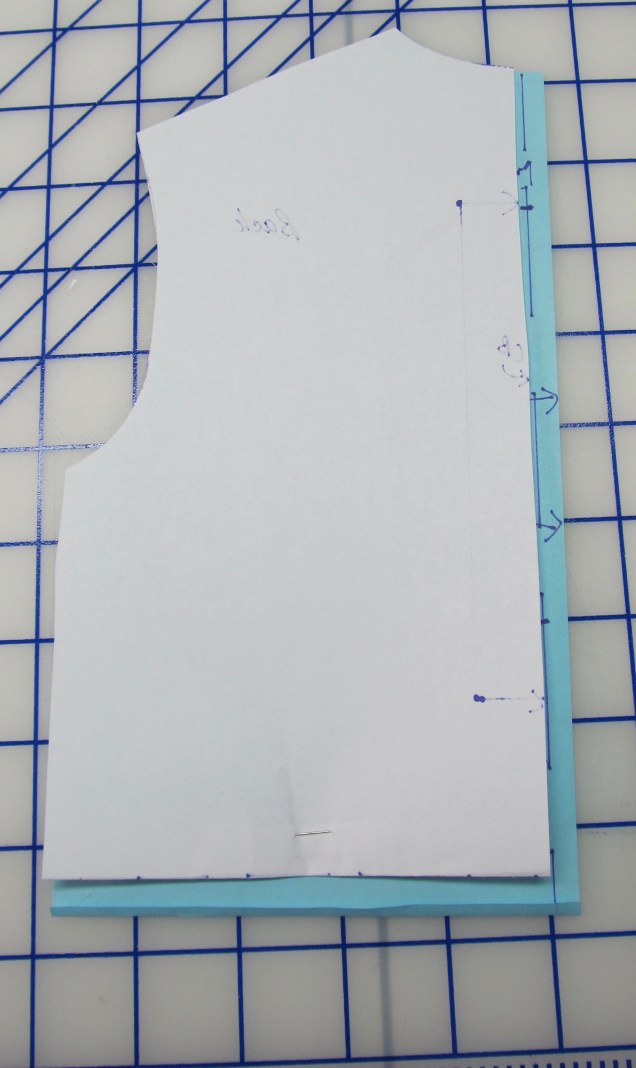
The picture above shows the fashion fabric piece with the hem turned up overlaying the lining piece, which has ¼” turned up at the hem edge.

The rest of the pictures show mock-ups of a jump hem with a lining, neck facing and faced hem. The principles are the same. The only difference with the faced hem is that you want a bit more of the facing to not be covered up by the lining.

IMG_0568 (1)

Here we have the lavender tissue paper as the lining (it worked much better than the stiff blue paper I used earlier), plus the yellow tracing paper showing the facings at the neck and hem. I’ve turned the lining under ¼” and pinned it to the top edge of the hem facing. Notice the fullness above the area that’s pinned.

IMG_0569 (1)

Here it is with the lining tissue smoothed down. Try to ignore that hemline that I drew in.  Obviously, I misjudged where this would end up, which is why this method is better than doing the math.

IMG_0570 (1)

Here is a view that tries to show everything that’s going on in the area under the jump hem that is hidden when you see a sewn sample.

Lesson learned: Visual mock-ups can avoid a whole bunch of stress and can sometimes clarify things that were once a mystery.

Resewing Has Its Limits

Not all of the problems I encountered were in the pattern. I made some plain, vanilla sewing mistakes that gave me quality time with my seam ripper. There was a snowball effect to this, which I encounter quite a bit. Once I make one dumb mistake I seem to make a whole slew of them. One example was that I set the collar with right sides together. Very dumb. Ordinarily, sewing mistakes are easy to fix, assuming you haven’t trimmed or clipped anything yet. But the lovely silk and wool blend fabric I used for the jacket raveled an unbelievable amount when handled. No matter how careful I was in removing stitches, I was left with very little seam allowance in many areas. It makes me worry about the jacket falling apart when I wear it.

Lesson learned: check the big picture before sewing a seam. Just because the pieces went together nicely when pinning doesn’t guarantee that they are oriented correctly.

There’s More, But It Can Wait

I also learned that my understanding of collars and undercollars had some gaps. We can walk through that in a later post once I’ve gotten comfortable employing my new knowledge on the subject. Besides, I’m more than ready to stop dwelling on my disappointment and move on to some successes.

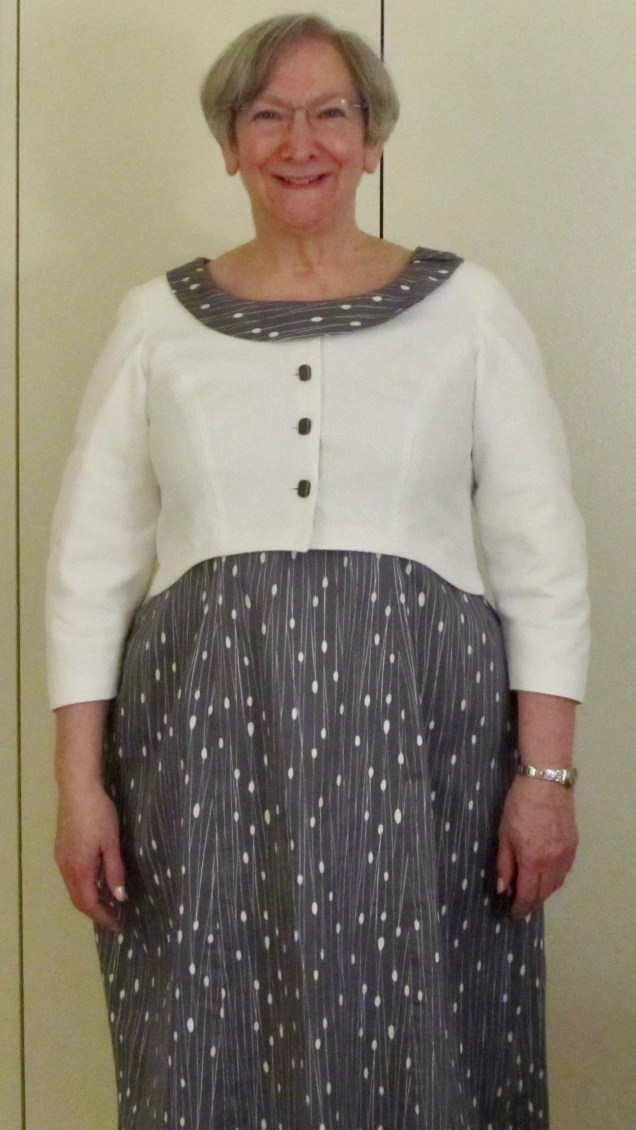
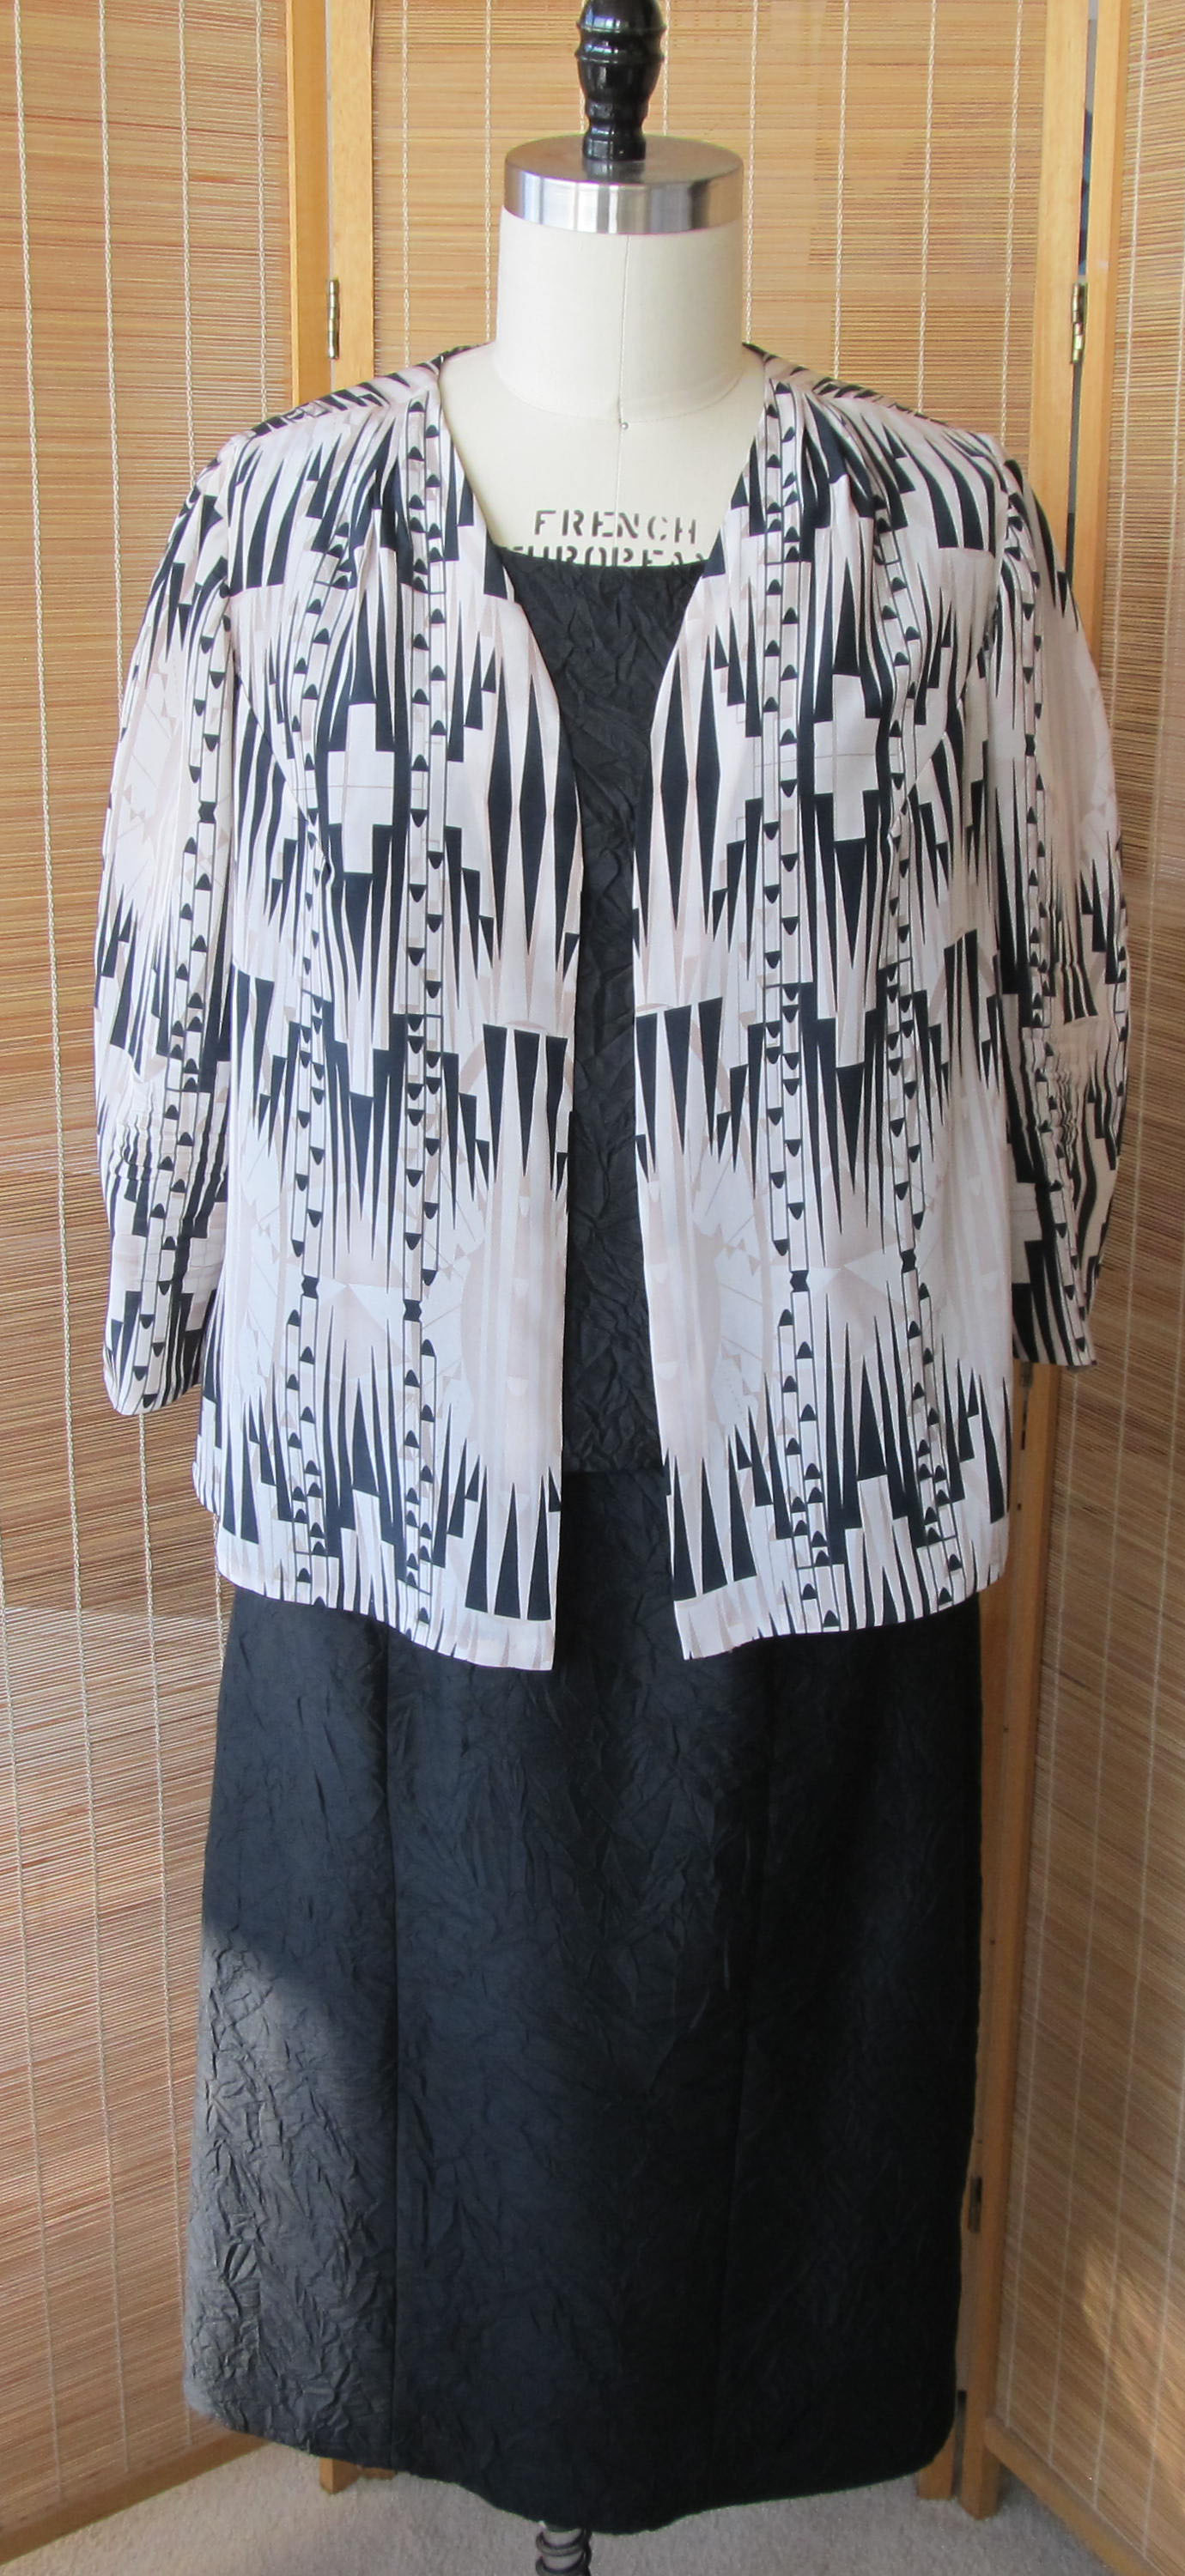
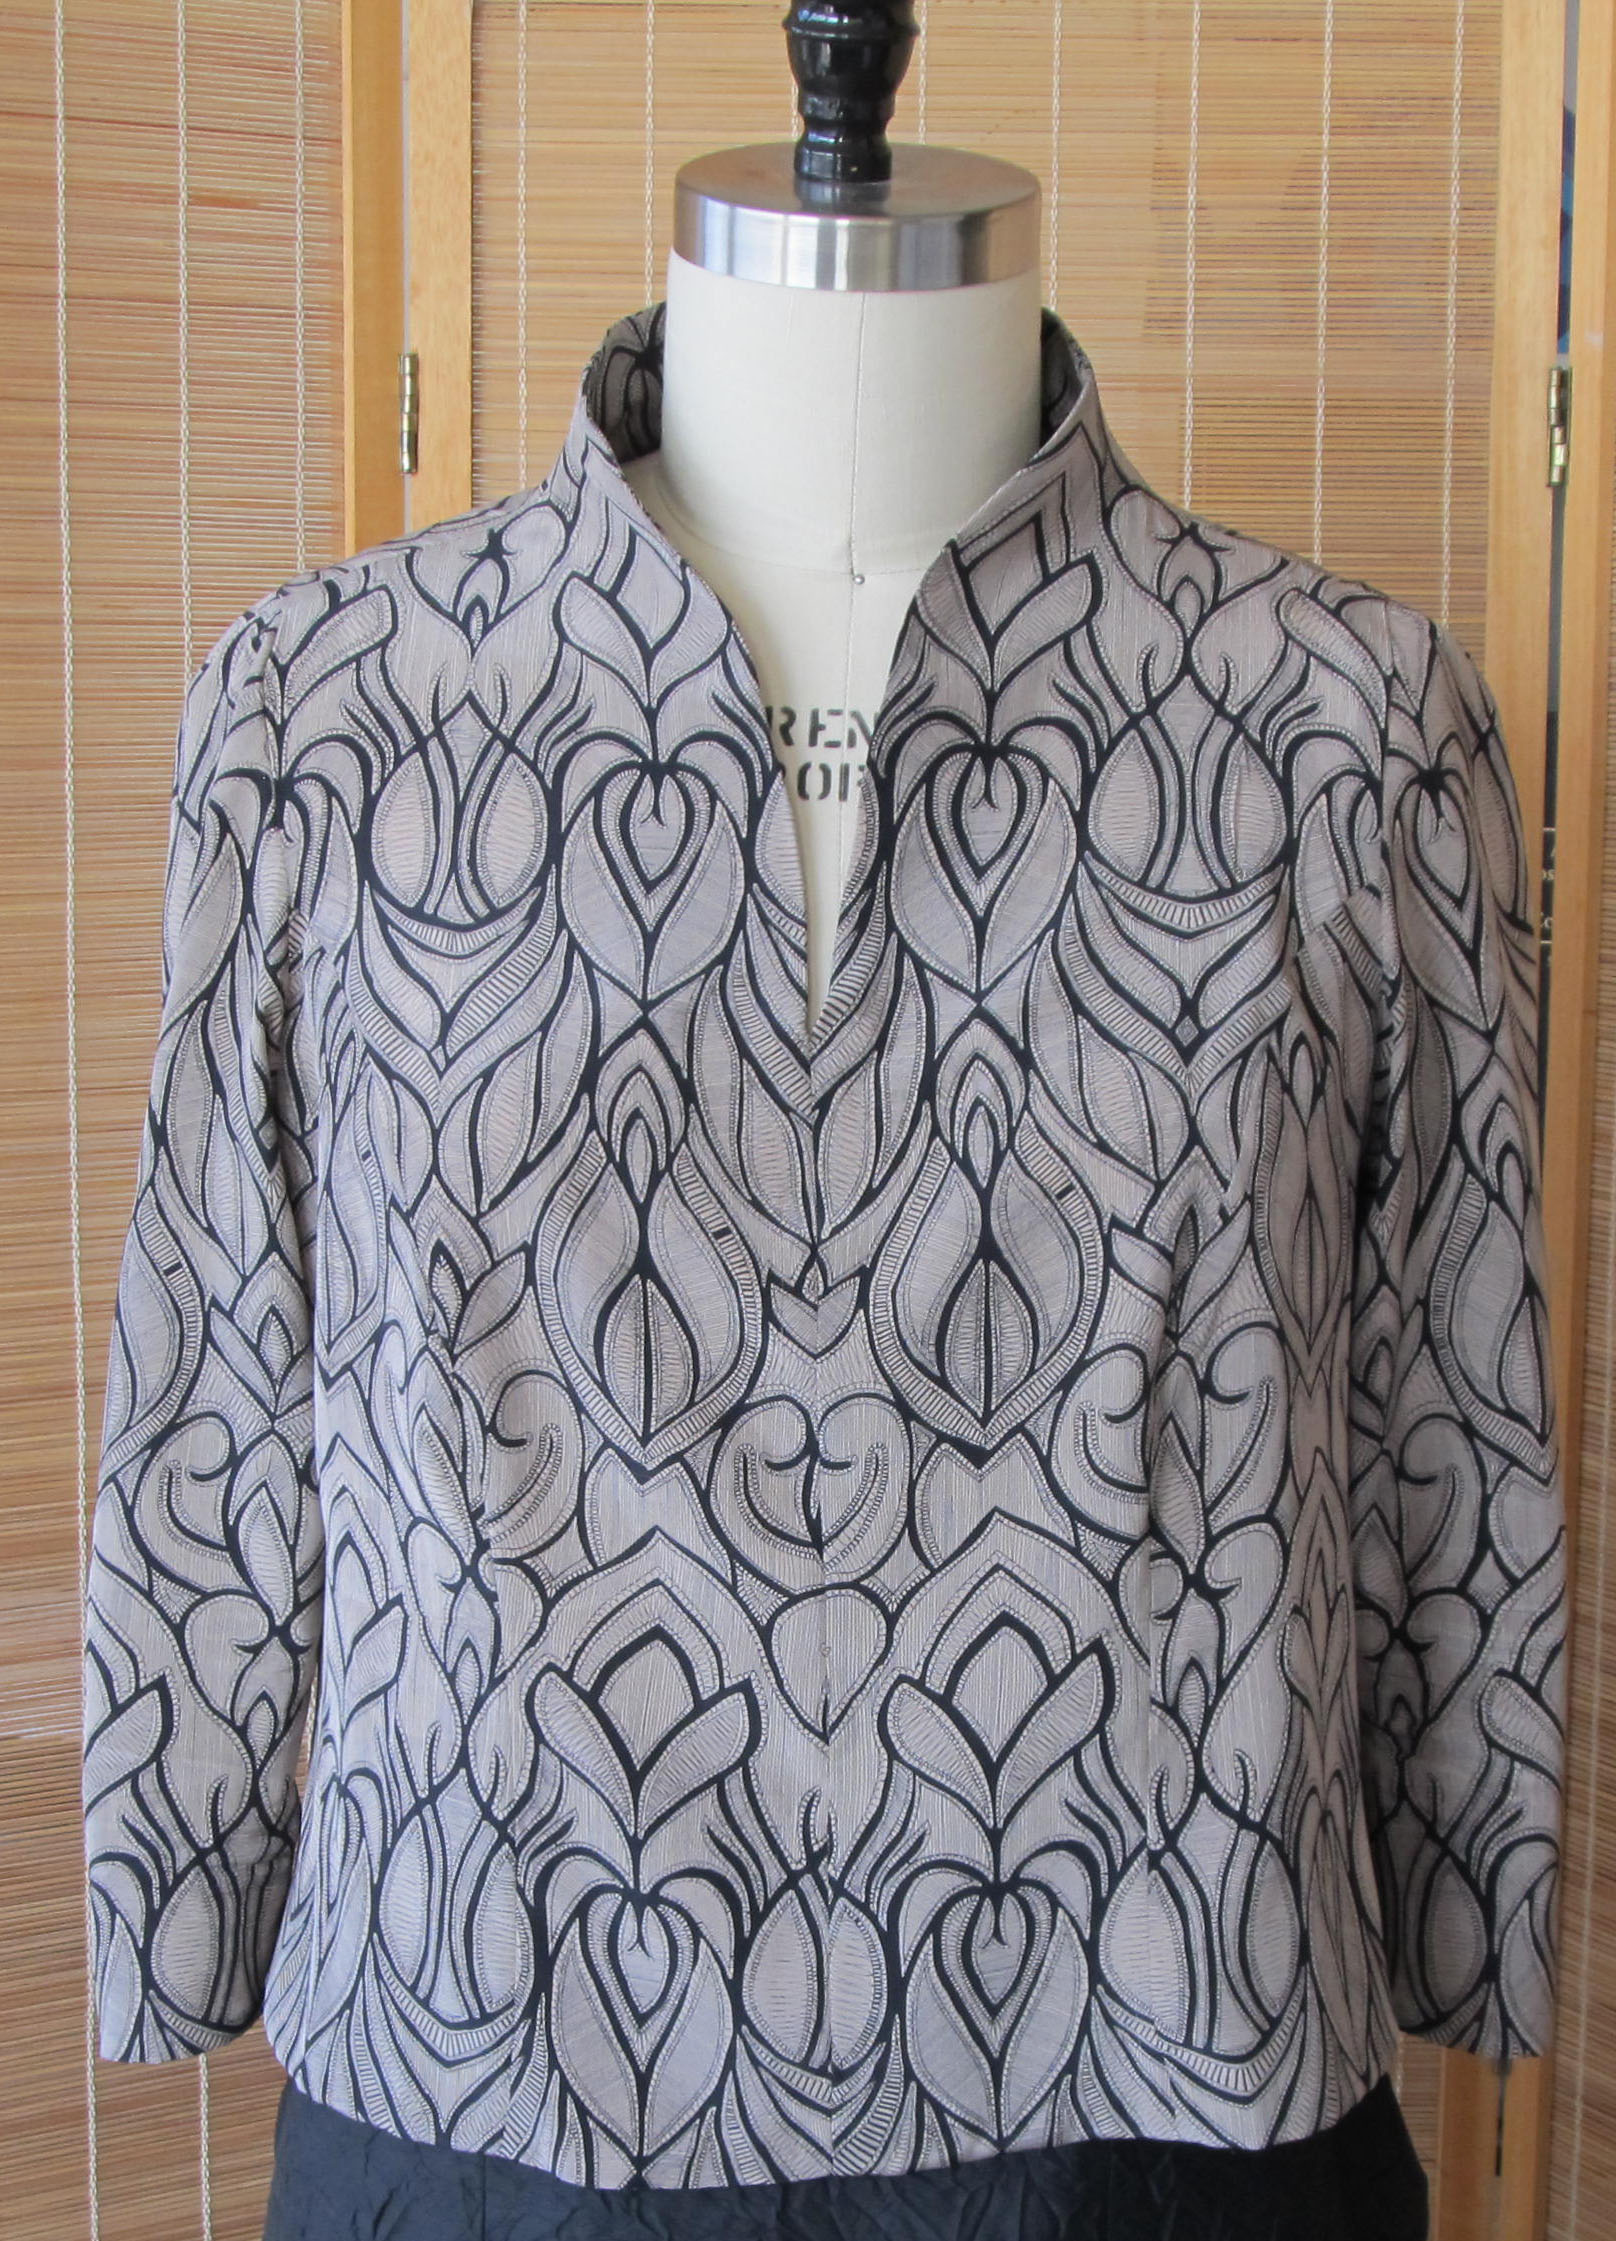
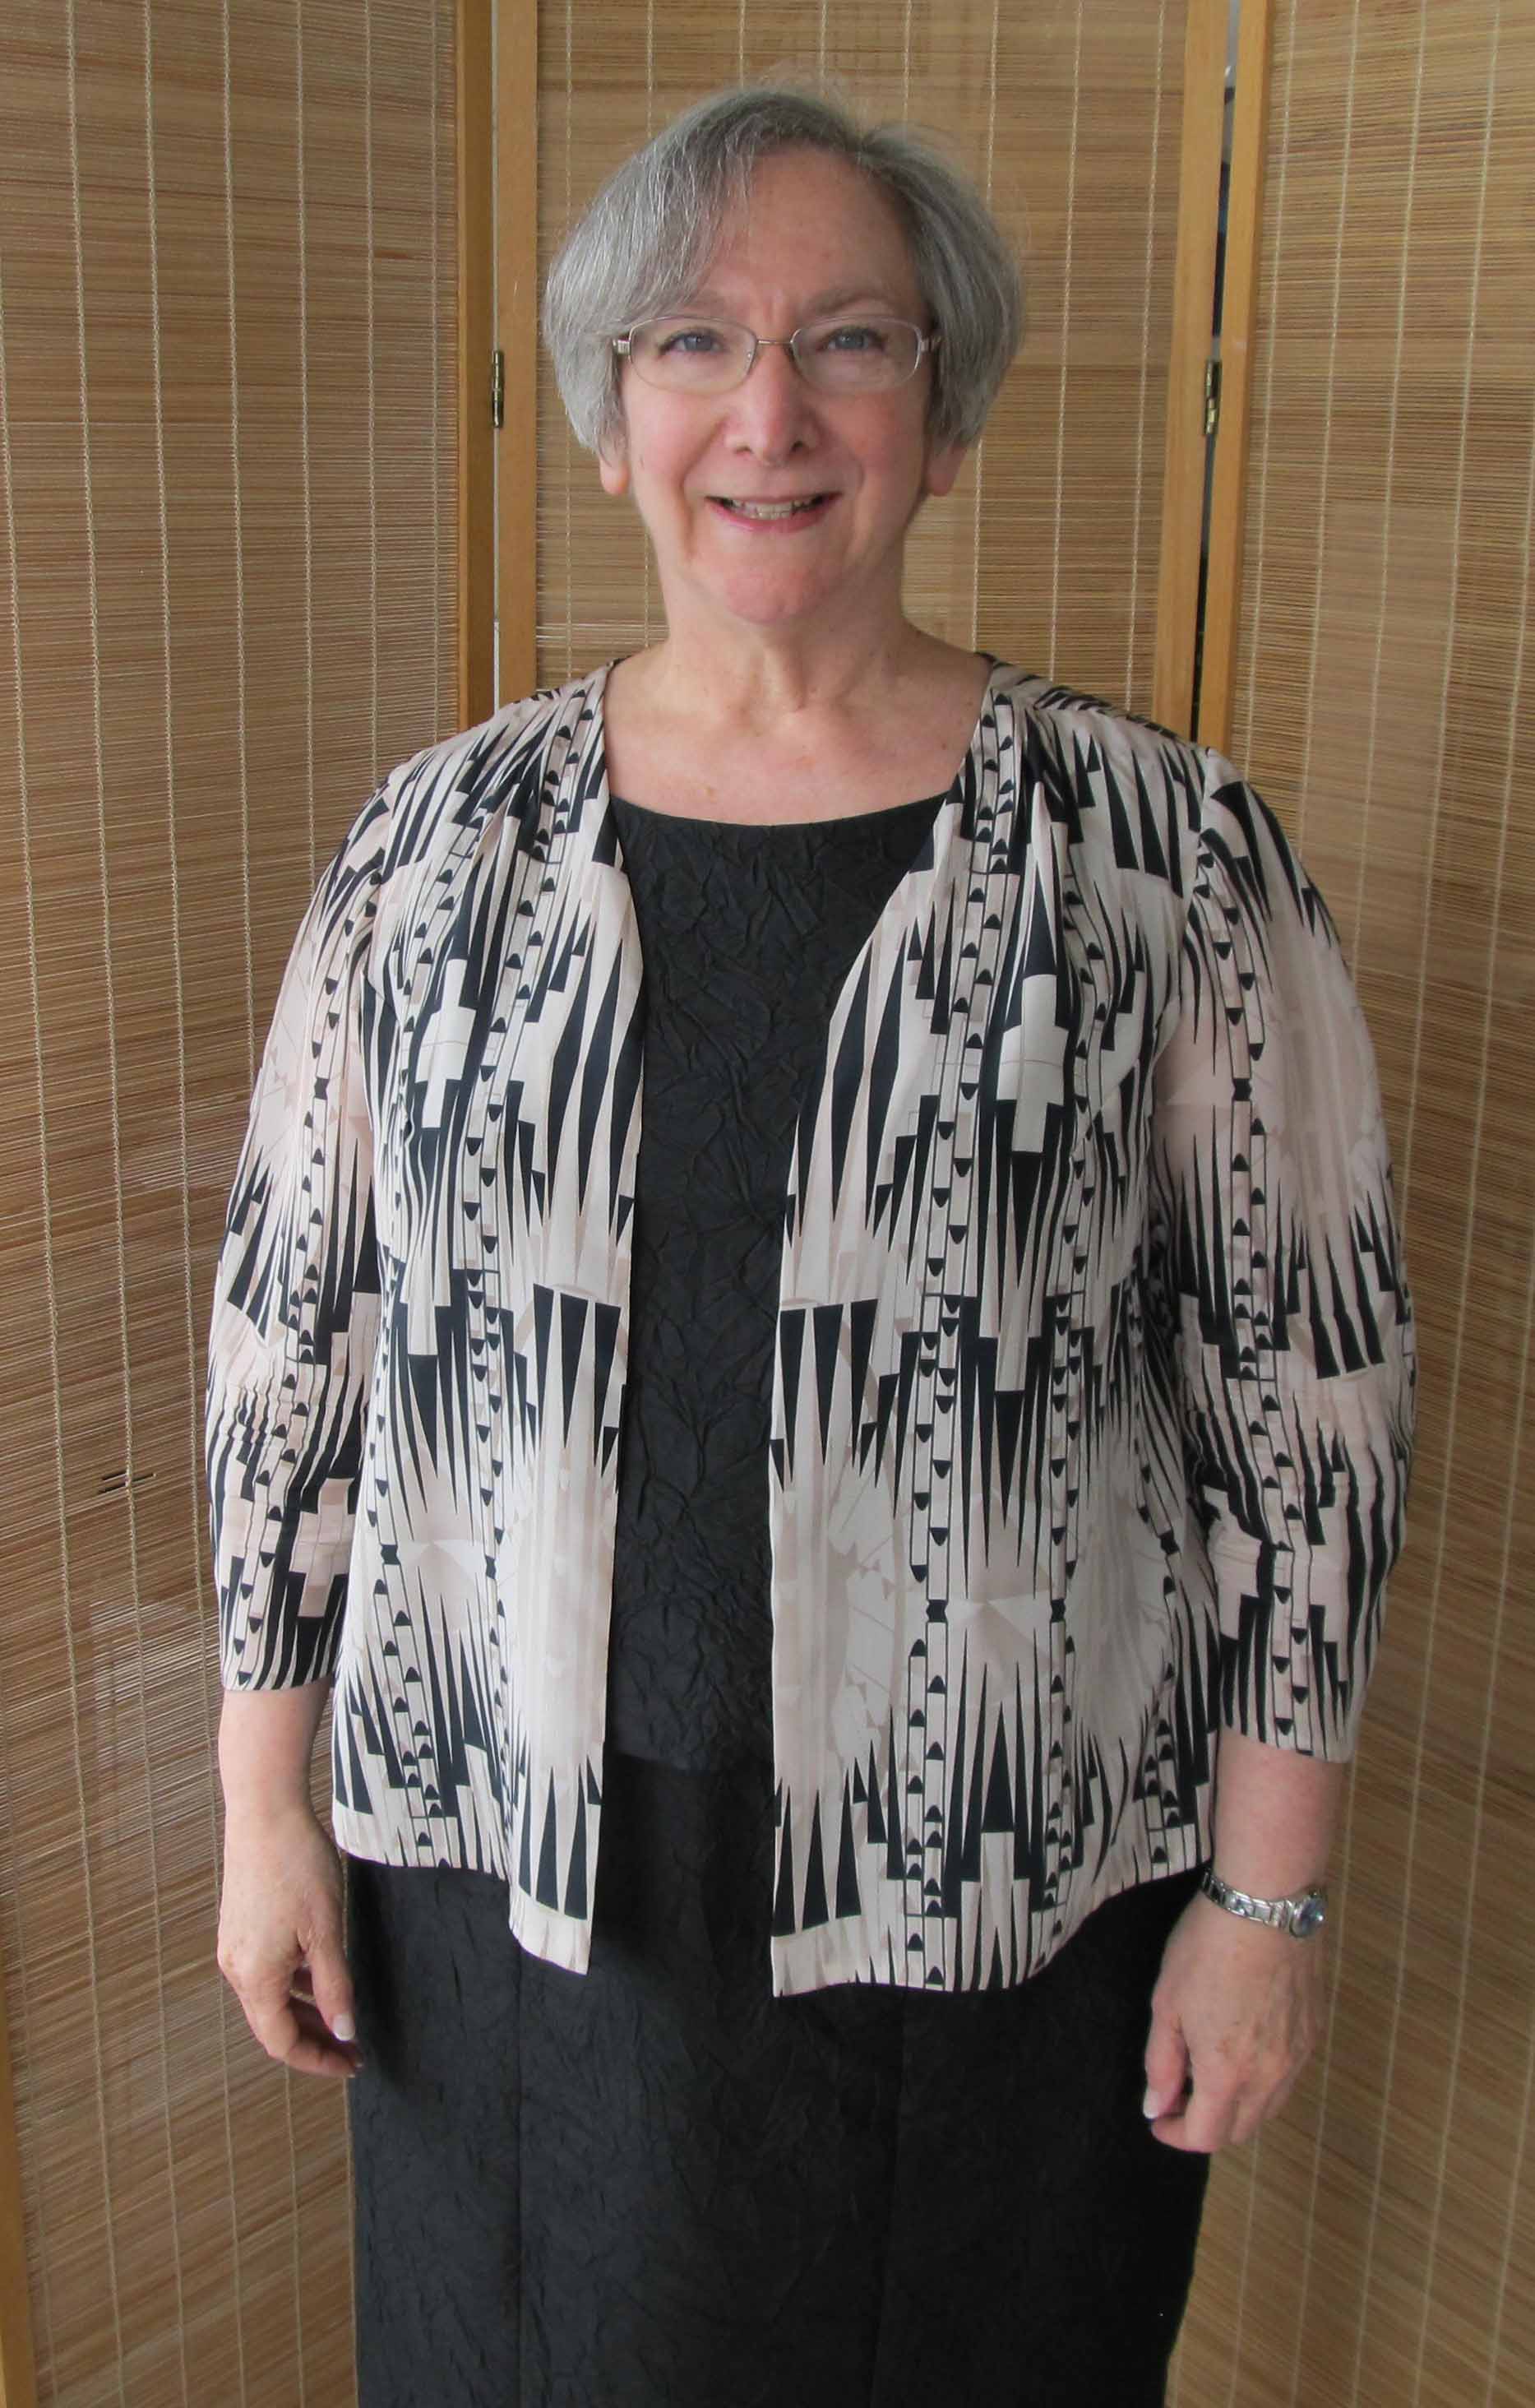
Here is what the jacket looks like. I finished it in time for the Sew Chicago holiday brunch. Everyone was very supportive and had nice things to say about it and I know that if I hadn’t blabbed about all the mistakes I made most people would never have noticed. I’m looking forward to getting the 2.0 version of it done and feeling really good about the work.

Homage Jkt 1 Modeled

The No-Close Topper That Plays Well With Curves

Silk TopperYou may be wondering whether all of my sewing projects start out looking simple and end up being way more involved than I bargained for. A lot of them do, and those are the ones that teach me the most. My seemingly simple project to create a no-close topper to go over a knit tank or sleeveless shell is another example.

I started this project thinking I could take my basic bodice sloper, change the neckline, add seam allowances at center front, draft a front facing, set in my basic sloper sleeves and have a nice layering piece that isn’t a jacket. When I did that, I quickly discovered that, even though the garment would have fit just fine as a blouse with a closure, when left to its own devices the front automatically traveled outward. Not just a little, either. The two front pieces wanted to settle out near my arms. It hadn’t occurred to me that a pattern designed to accommodate my particular bust shape and size would resist staying put. So that’s why RTW makes these pieces so oversized, I said to myself. But if I want to wear oversized, shapeless clothes I don’t have to go to the trouble of sewing them.

At this point, I sewed my first attempt together at center front, called it a blouse and put this project on the list for my next video consultation with Sarah Veblen.

Silk Tulip Top

We discussed a number of solutions and I tried a few in a mock-up, but I still wasn’t getting the look I was after.

After more discussion, we came up with an approach that turned this into a redesign project. The idea was to convert my armscye princess bodice sloper pattern into a pattern that transferred the bust shaping to tucks at the shoulders. This involved dart rotation, a really educational patternmaking exercise.

Patternmaking books tell you that you have to rotate darts (or in this case, princess seams, which are dart equivalents) at the apex. Turns out that’s one of those rules that can be broken. In my case, I needed more fullness at the apex than the princess seams give me, because I wanted the fabric to hang straight over the bust on its own. That meant the dart rotation had to take place below the apex. Here is what that looked like.

Front Convert PrincessAs you can see, the Apex is off to the right and the pivot point is about 1.5 inches below it.

This picture also shows something that I found nerve wracking. I knew that moving away from princess seams was going to mean giving up the great curve-hugging fit I’d worked so hard to achieve with Sarah. I didn’t know whether I was going to like the final product, but this was a test and nothing ventured, nothing gained. The thing that set me back on my heels was the amount of distortion that took place in the shoulder seam. Seeing that dredged up all the missteps and wrong turns I’d taken when trying to make pattern adjustments. I had to remind myself that this was just an experiment and the worst thing that could happen would be I wouldn’t have this type of garment in my repertoire. So, I filled in all the gaps with paper, drew a line from the neck edge to the shoulder point and kept going.

Of course, the overlapping you see at the hem has to be added back in somewhere to provide the correct circumference. For my first muslin test, I put almost all of that into extra fabric at the shoulder that became pleat intake. The rest I added to the side seams.

Here is one of the bodice pieces cut and marked in muslin.

All rotated to shoulderI was pretty sure I wanted pleats, as opposed to just tucks, at least for the woven version. One thing I had to work out was how far down I wanted them stitched. As I worked on this it also occurred to me that a variation with a yoke might be nice, but first I had to get the concept to work.

Skewed pleats and splayedAs you can see, the first test did not turn out well. Although the pleats were marked on grain, they pointed outward on the body.

The next picture shows my experiments with tucks versus pleats stitched almost to the bust.

Muslin Test1_2After trying it out in rayon to mimic the drapiness of the fabric I was planning to use, I still wasn’t happy. I ended up splitting the bust shaping between shoulder pleats and an armscye dart. Here is what that looks like on the pattern.

Front FinalThe back was a more straightforward conversion. Here is what it looked like in development.

Back DevHere is the final pattern piece. All of the intake was rotated to pleats at center back. The center pleat is the deepest.

Back FinalAnd here is the final product on me. The fabric is silk crepe de chine. I love the fabric and I like the topper. It’s completely boxy and oversized, but it isn’t as flattering as the fitted pieces with princess seams. Still, I’m glad I added this to my repertoire.

Topper Modeled