In The Sketchbook – September 2016

Welcome to In the Sketchbook, a monthly look at fashion design sketches that we are working on for ourselves. Sketching garments on a personal croquis is a great way for the individual couture enthusiast to move beyond the use of commercial patterns and into a world of personalized design! It can be intimidating at first, but with a little bit of practice it becomes something you look forward to. Join us for a look of what we have going on In the Sketchbook! Brought to you by Wendy Grossman of Couture Counsellor and Steph King from Siouxzeegirl Designs.

I have been busy sewing this month, but not anything that’s quite ready to show here. I did launch what I hoped would be a daily habit of sketching in the morning while sipping coffee and getting ready to start work. The routine was interrupted when I had to start work extra early (making a living can really crimp the creative endeavors), but it’s something I’m hoping to get back to. Here is what I came up with while trying to form a daily habit.

It started with having to sketch a tailored shirt I’m working on for the Sew Chicago group entry in next month’s ASG Chicago Chapter fashion show. I’m making a test version of the shirt first and so I didn’t have any pictures to send to the show coordinator. Once I did that, it occurred to me that I should sketch the blouses I’ve been wanting to make this fall and put them together with fabric swatches.

Shirt and Blouses

I need to learn how to sketch soft, drapey fabric better. These look too structured to me. The bold print on the upper left is a lightweight cotton, similar to a cotton lawn. The swatch in the middle is a lovely silk double georgette and the teal on the bottom is hammered silk that has a lovely floaty quality.

I also played some more with a jacket design that can coordinate with a soft or soft-and-sheer skirt.

aug-1-2

Then there’s the idea that I want to make a blouse with tulip sleeves.

aug-1

I made a sheer blouse with tulip sleeves a while back that wasn’t right. Now that my skills have improved and I have Sarah Veblen as a mentor, I want to give it another try. This sketch is an attempt to echo the tulip theme in the body of the blouse. The petal collar seems like it’s too much to me, so that’s something I’ll have to test out in a mock-up.

Finally, remember that unstructured jacket I sketched last month? To remind you, here it is again.

IMG_1990

It was on my mind days later and so I decided to play around with what might make a nice personalized version, starting with set-in sleeves.

img_2038

That looks better to me. Then I thought about adding a collar. Collars seem to make a big difference in my garments.

img_2039

Oh yeah. That’s something I would enjoy wearing. (Please ignore the fact that the croquis and the back of the jacket are both visible.) Actually, I think I like it either way. The set-in sleeves make all the difference.

Of course, I’m probably not going to be able to find fabric that’s right for this jacket and I’ll end up having to learn how to do online digital fabric printing. Or worse, like piecing fabric together to make the stripes. Not my thing at all. Maybe the fabric gods will be kind to me and the perfect fabric will appear online.

That’s it for now. Be sure to visit my dear friend Steph King of Siouxzeegirl Designs at https://10sewingmachines.blogspot.com to see what amazing things are in her sketchbook this month. And if you’d like to join in on the fun, please leave a comment for one of us.


In the Sketchbook – June 2016

Welcome to In the Sketchbook, a monthly look at fashion design sketches that we are working on for ourselves. Sketching garments on a personal croquis is a great way for the individual couture enthusiast to move beyond the use of commercial patterns and into a world of personalized design! It can be intimidating at first, but with a little bit of practice it becomes something you look forward to. Join us for a look of what we have going on In the Sketchbook! Brought to you by Wendy Grossman of Couture Counsellor and Steph King from Siouxzeegirl Designs.

This month, I’ve been playing with pleats. I like the idea of pleats in only part of a garment as an accent. In sketching on my croquis I’ve discovered that ideas that seem good in my head would look terrible on my body. Here’s an example:

IMG_1672

It’s so nice to be able to see what a mistake a design would be without investing more than a couple of minutes to sketch it out.

Here’s the back of a jacket that I think has some potential. The pleats would be stitched down with topstitching above the belt detail.

IMG_1673

I tried out several different skirt designs to go with the jacket and erased them all. Then I tried out these  for the back of the skirt only.

IMG_1678

I need to let this percolate through my brain some more before deciding about the skirt.

I added other skirts that have nothing to do with the jacket design.

IMG_1671

I think I’d like to try one of these:

IMG_1674

I’d love to hear what you think about these and about what you’re sketching. Be sure to check out what’s in Steph’s sketchbook at 10 Sewing Machines & a Serger.

A Big, Bold Departure from My Norm

IMG_1399

This is a dress that really surprised me. After the Haute Couture Club of Chicago fashion show I was mentally and physically exhausted, but I still had another huge project ahead of me. I had taken on the task of designing and editing a cookbook for a bride-to-be and co-hosting her bridal shower, which was six days after the show in New York. I was feeling good about the fact that my dress for the wedding was pretty much done and really looking forward to sewing without a deadline for a while when I learned I was going to be invited to the rehearsal dinner. I don’t mean to sound ungrateful, but the only thing I could think of was that I had no idea what to sew and was fresh out of inspiration.

Not that it matters, but I didn’t want to wear the same silhouette to both events. Then there was the question of fabric. I didn’t really want to do black again, although I have a very nice black eyelet that would have been perfectly fine for a summer evening dinner party on the patio of a hip Brooklyn bistro. With all those negatives floating around in my head, is it any wonder I was uninspired?

The one thought that did develop was that I wanted a print in silk or linen, but I couldn’t find anything that appealed to me.  Clearly, I needed a mentoring session with Sarah Veblen to get me on track. Over FaceTime, I went through a pile of fabrics I have in my collection that could work, and we discussed each one. Most of the fabrics I have that could be made into cocktail or evening wear would work in any season other than summer. Other fabrics failed to spark any enthusiasm.

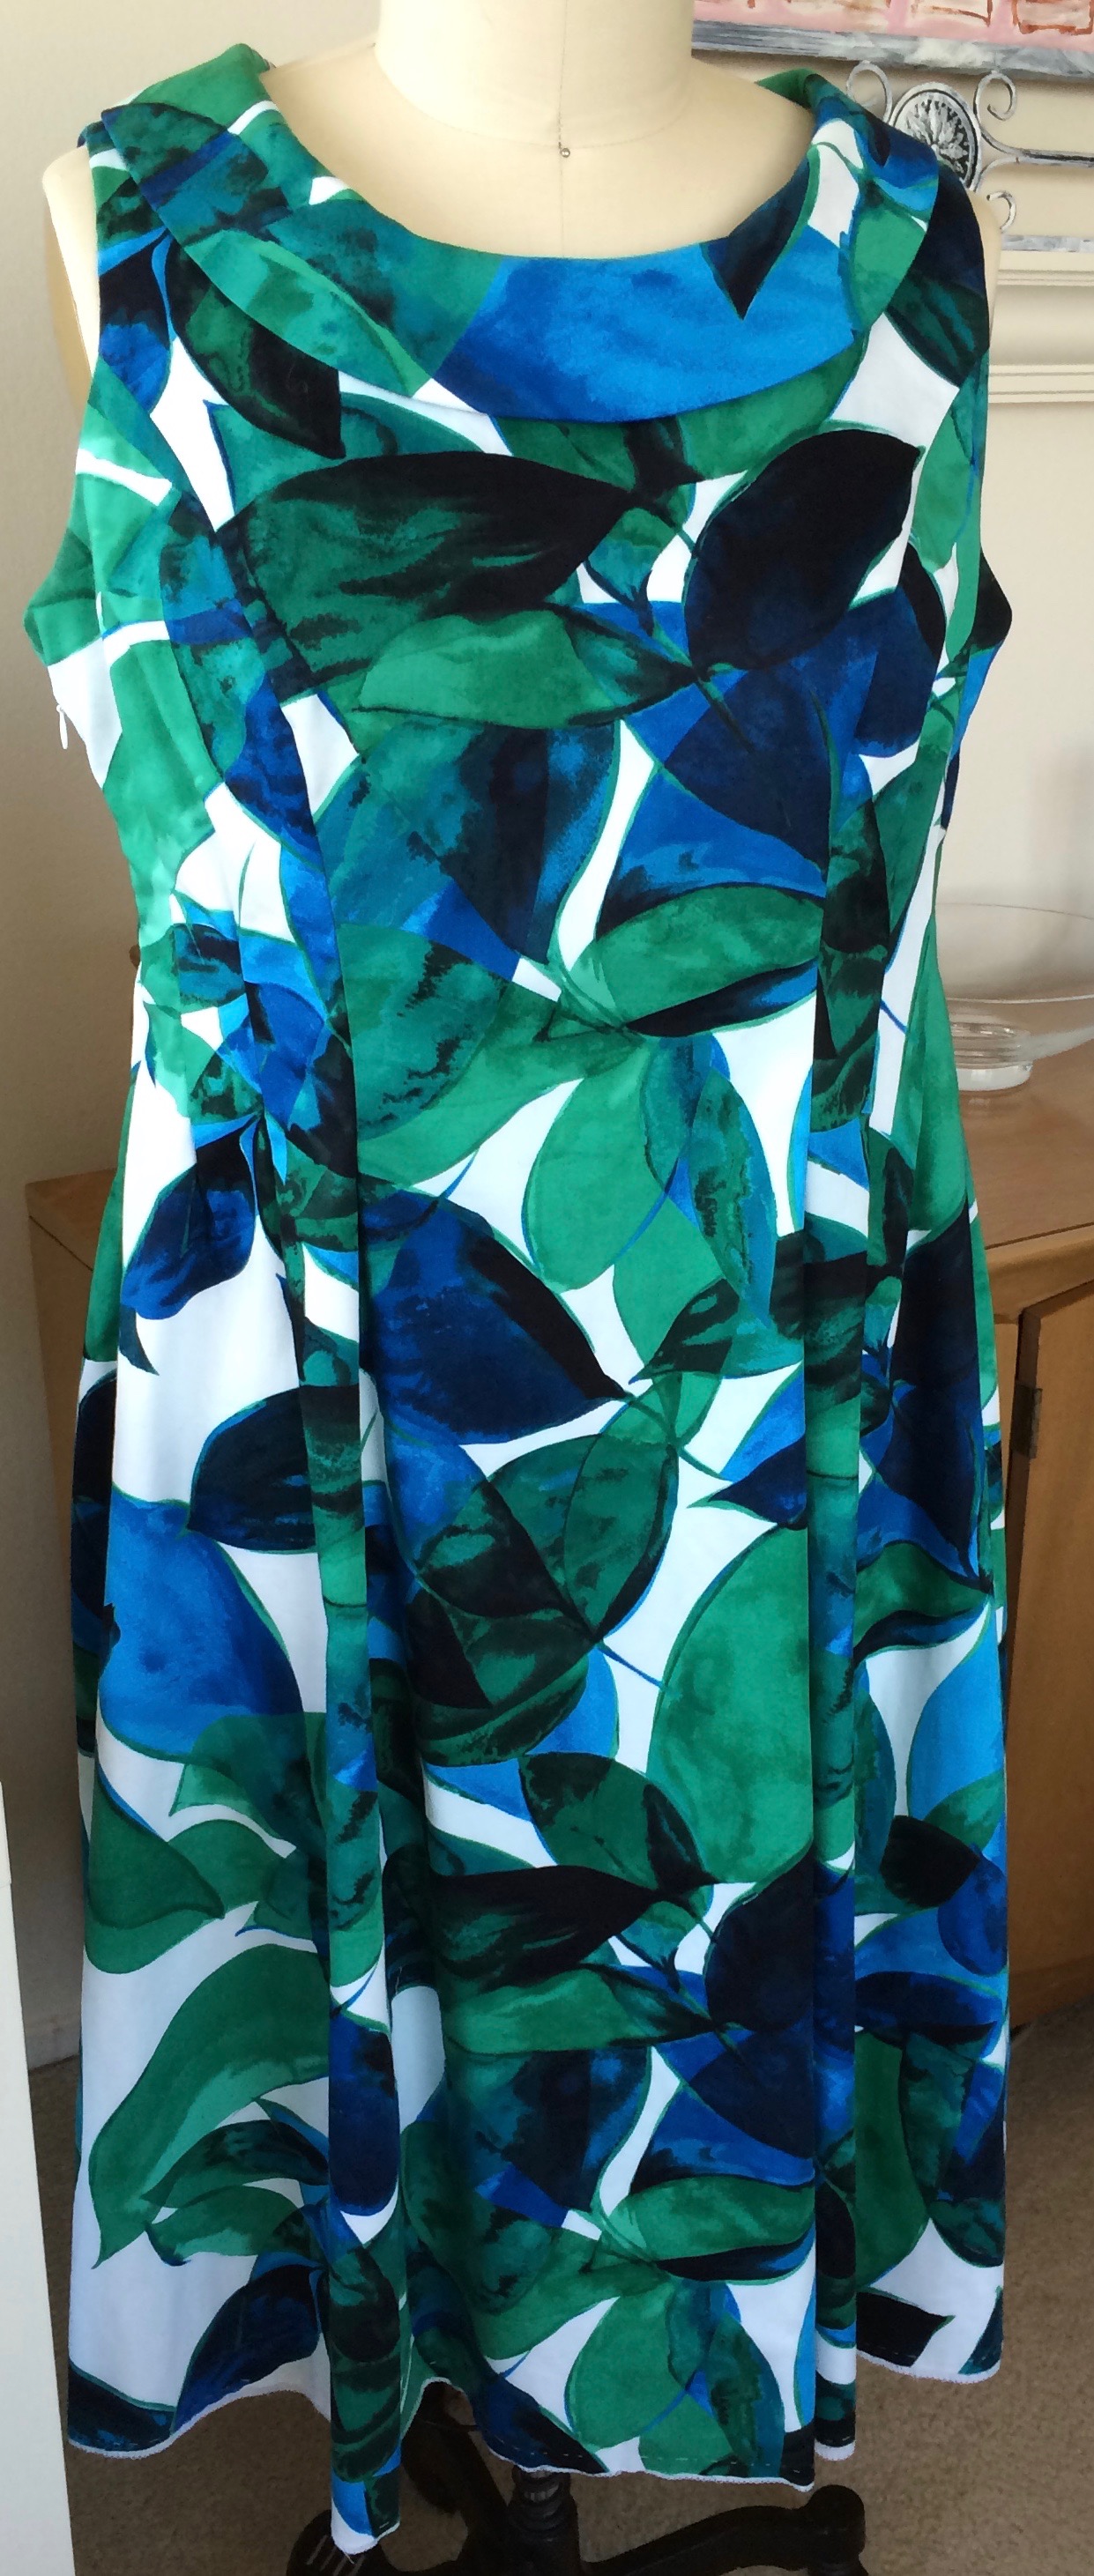
In discussing other possibilities I mentioned how much I liked this blue and green leaf print from Sawyer Brook and then quickly explained that I’d dismissed it because it was a large scale print with bold colors which brought it outside my comfort zone and the fabrication was wrong  —cotton sateen with stretch. Cotton can be a perfectly lovely fabric for a summer dress that’s a little bit dressy, but I’m not a fan of Lycra in woven fabrics. It interferes with the drape and makes the fabric overly heavy. It also makes the fabric uncomfortably warm, destroying its ability to breathe.

Once Sarah saw the print, she insisted that I order the fabric. Her answer to the fabrication objections was that I should underline the dress in cotton batiste and not line it.

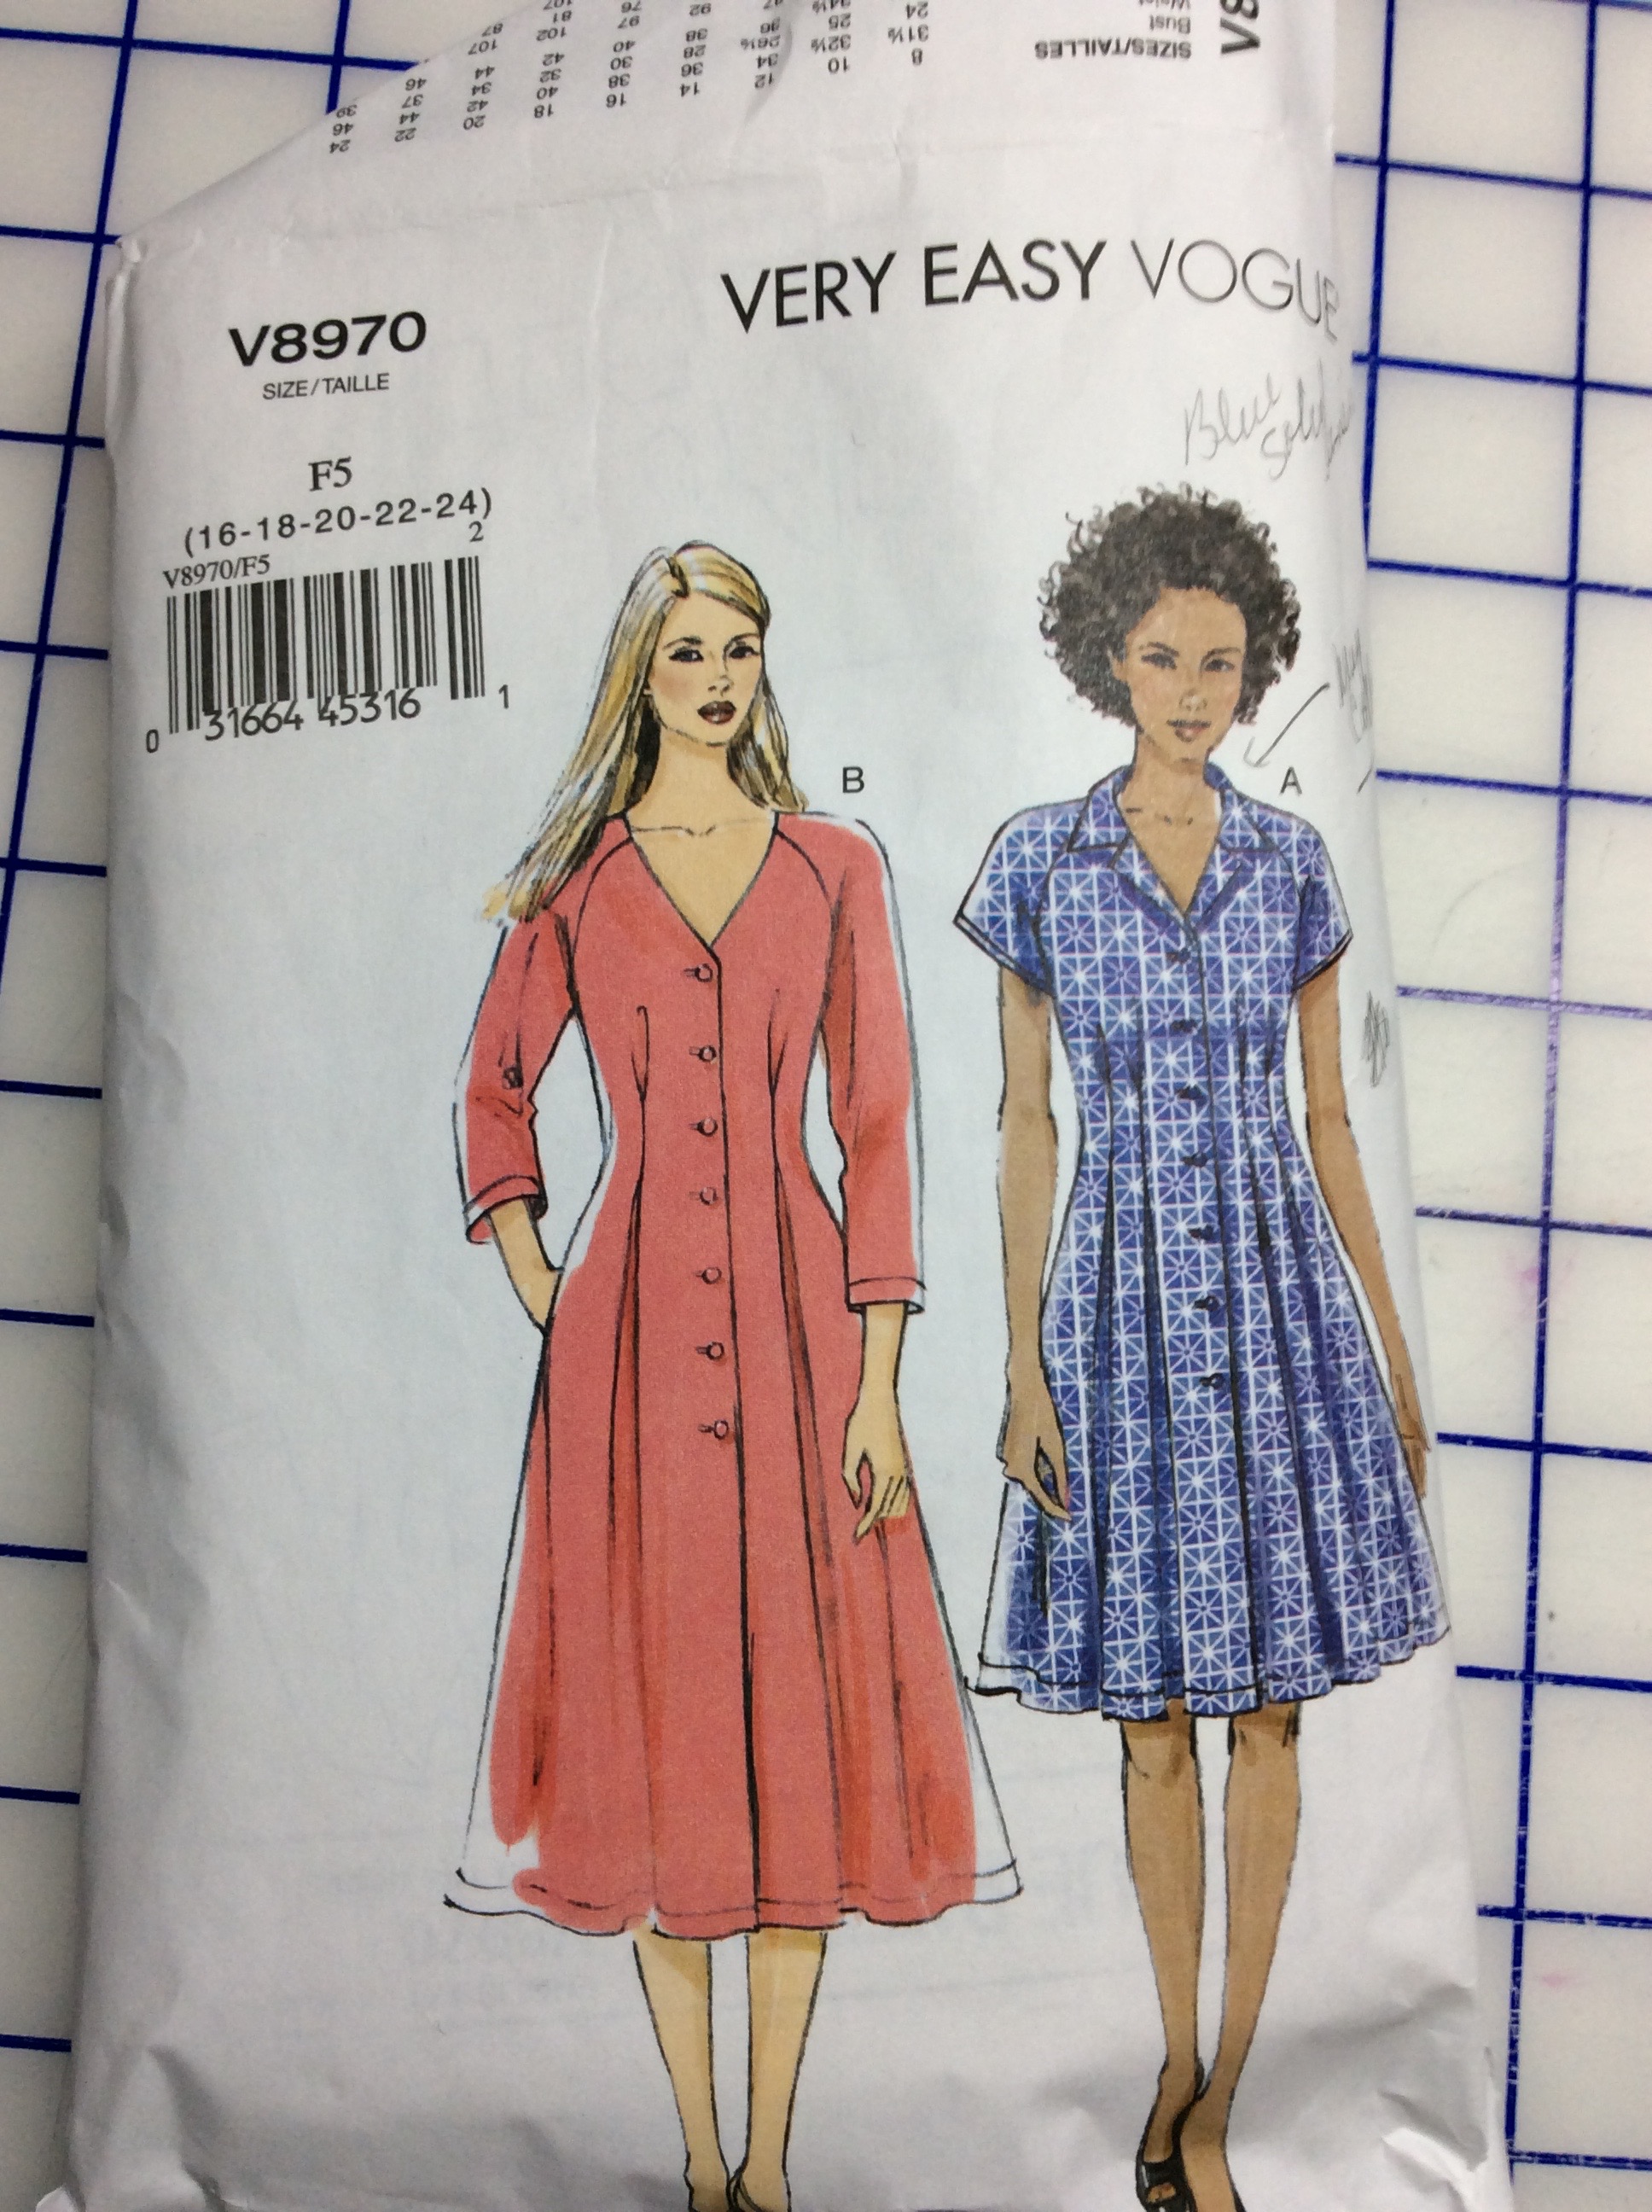
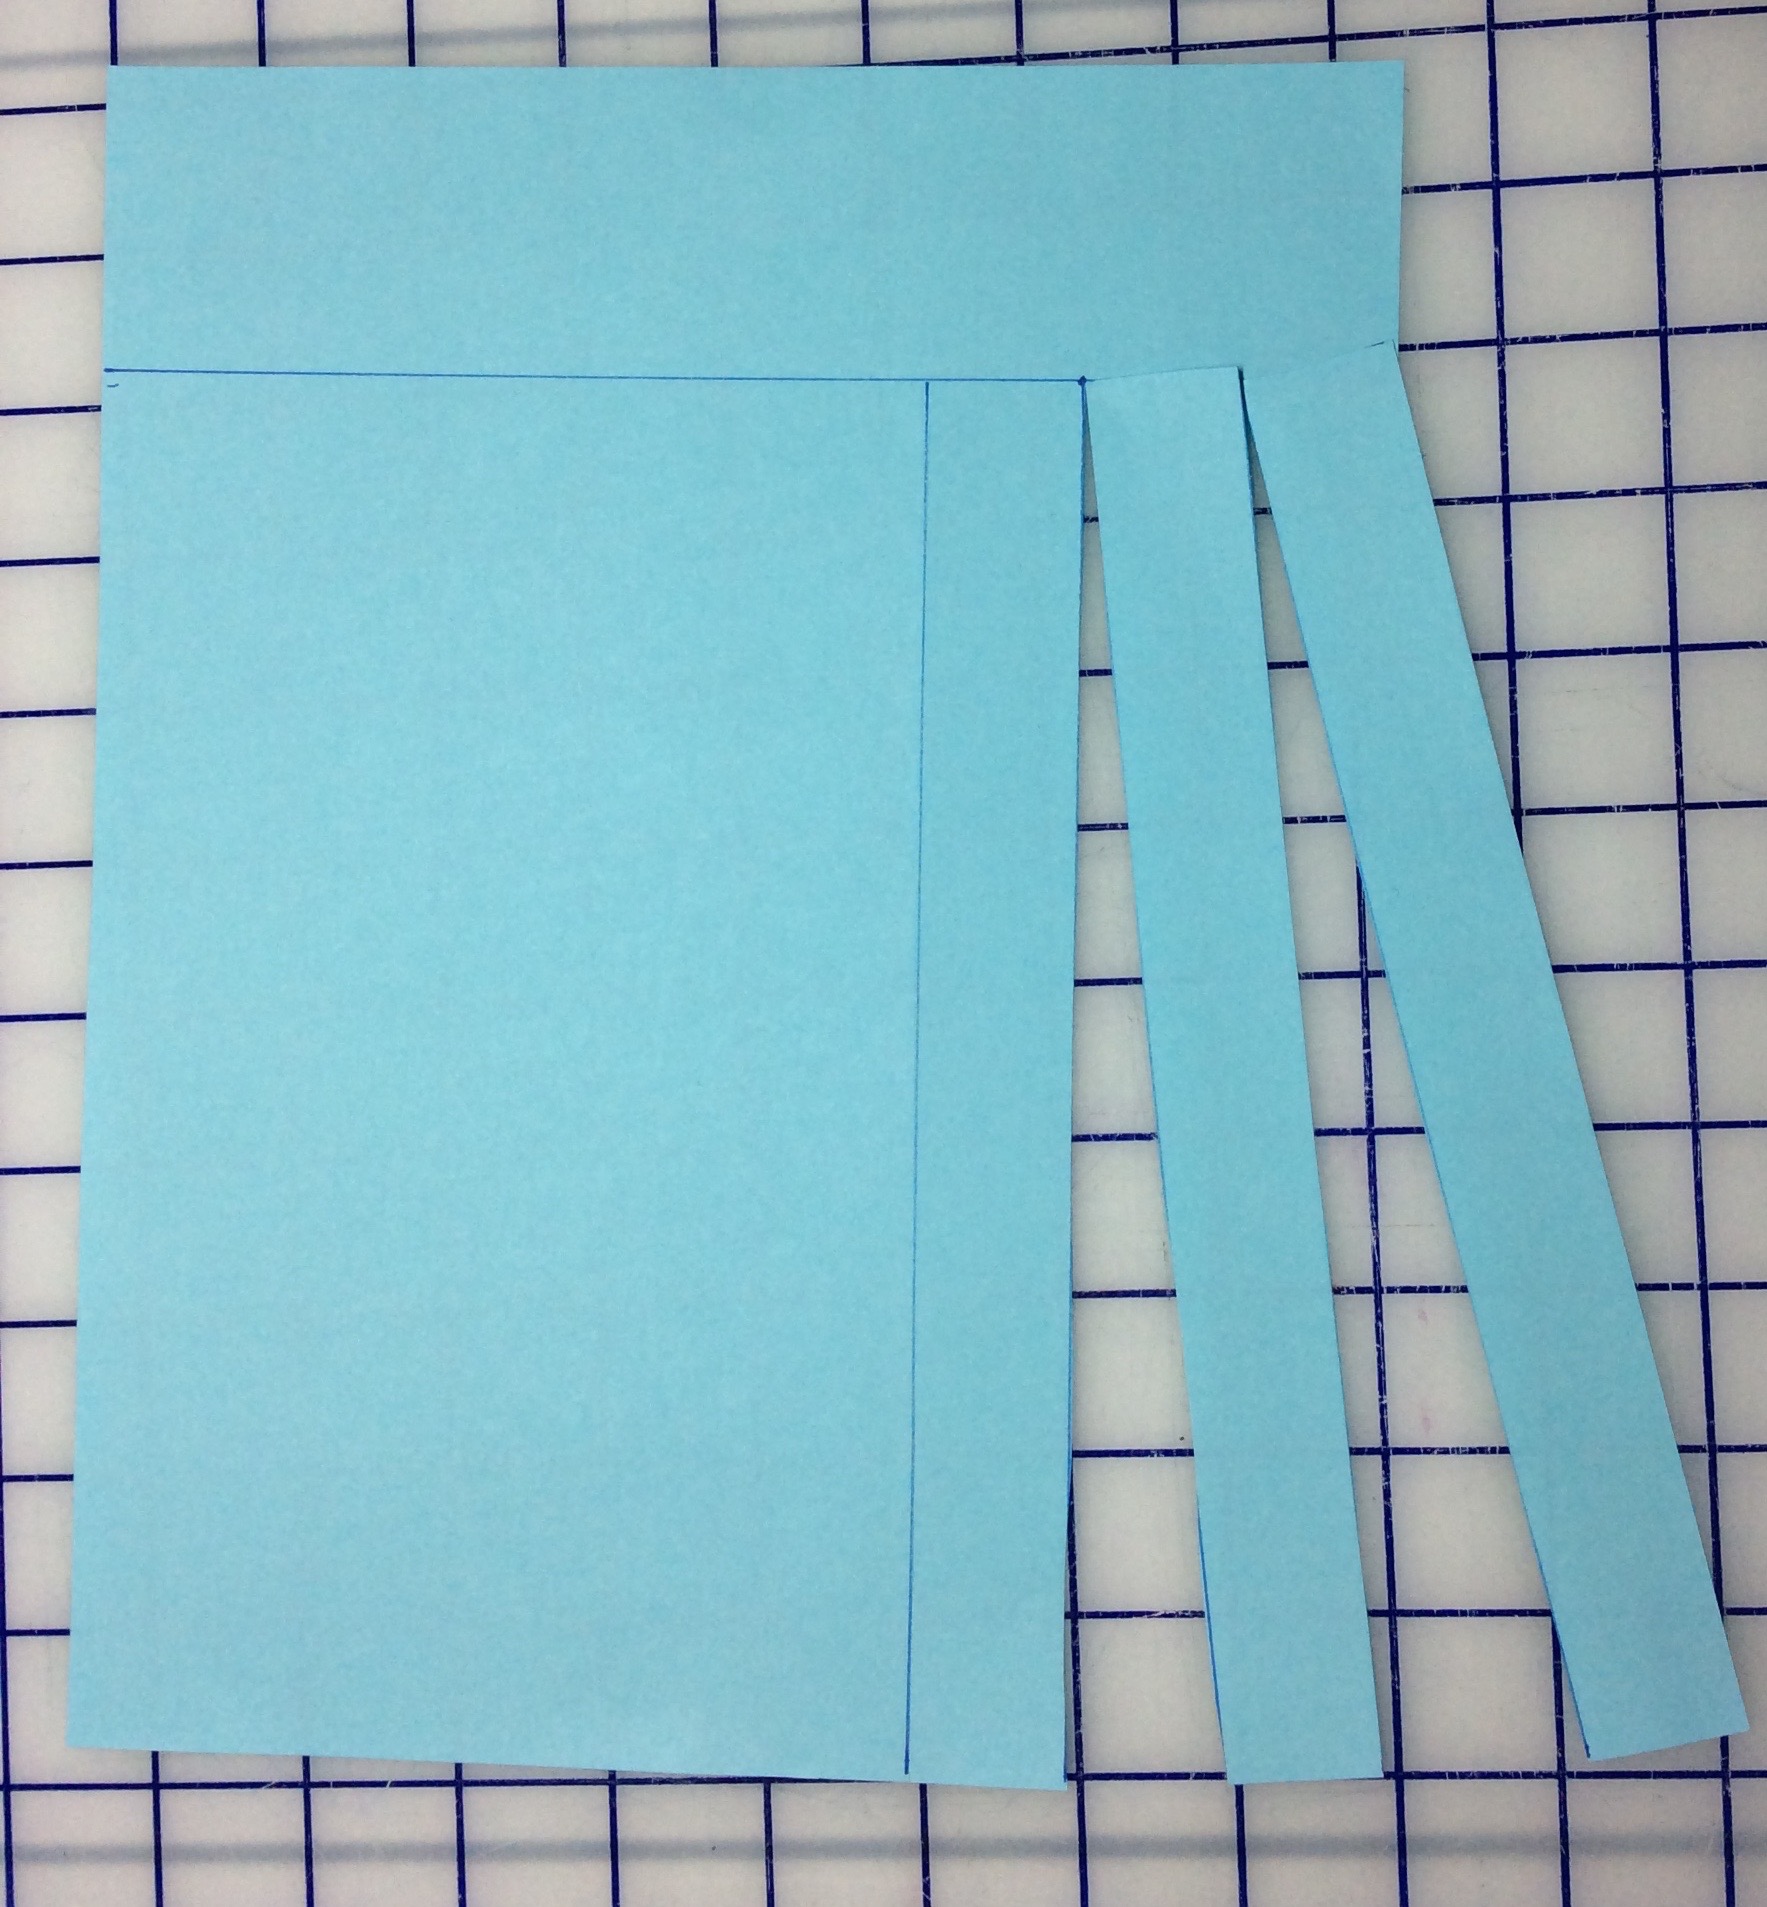
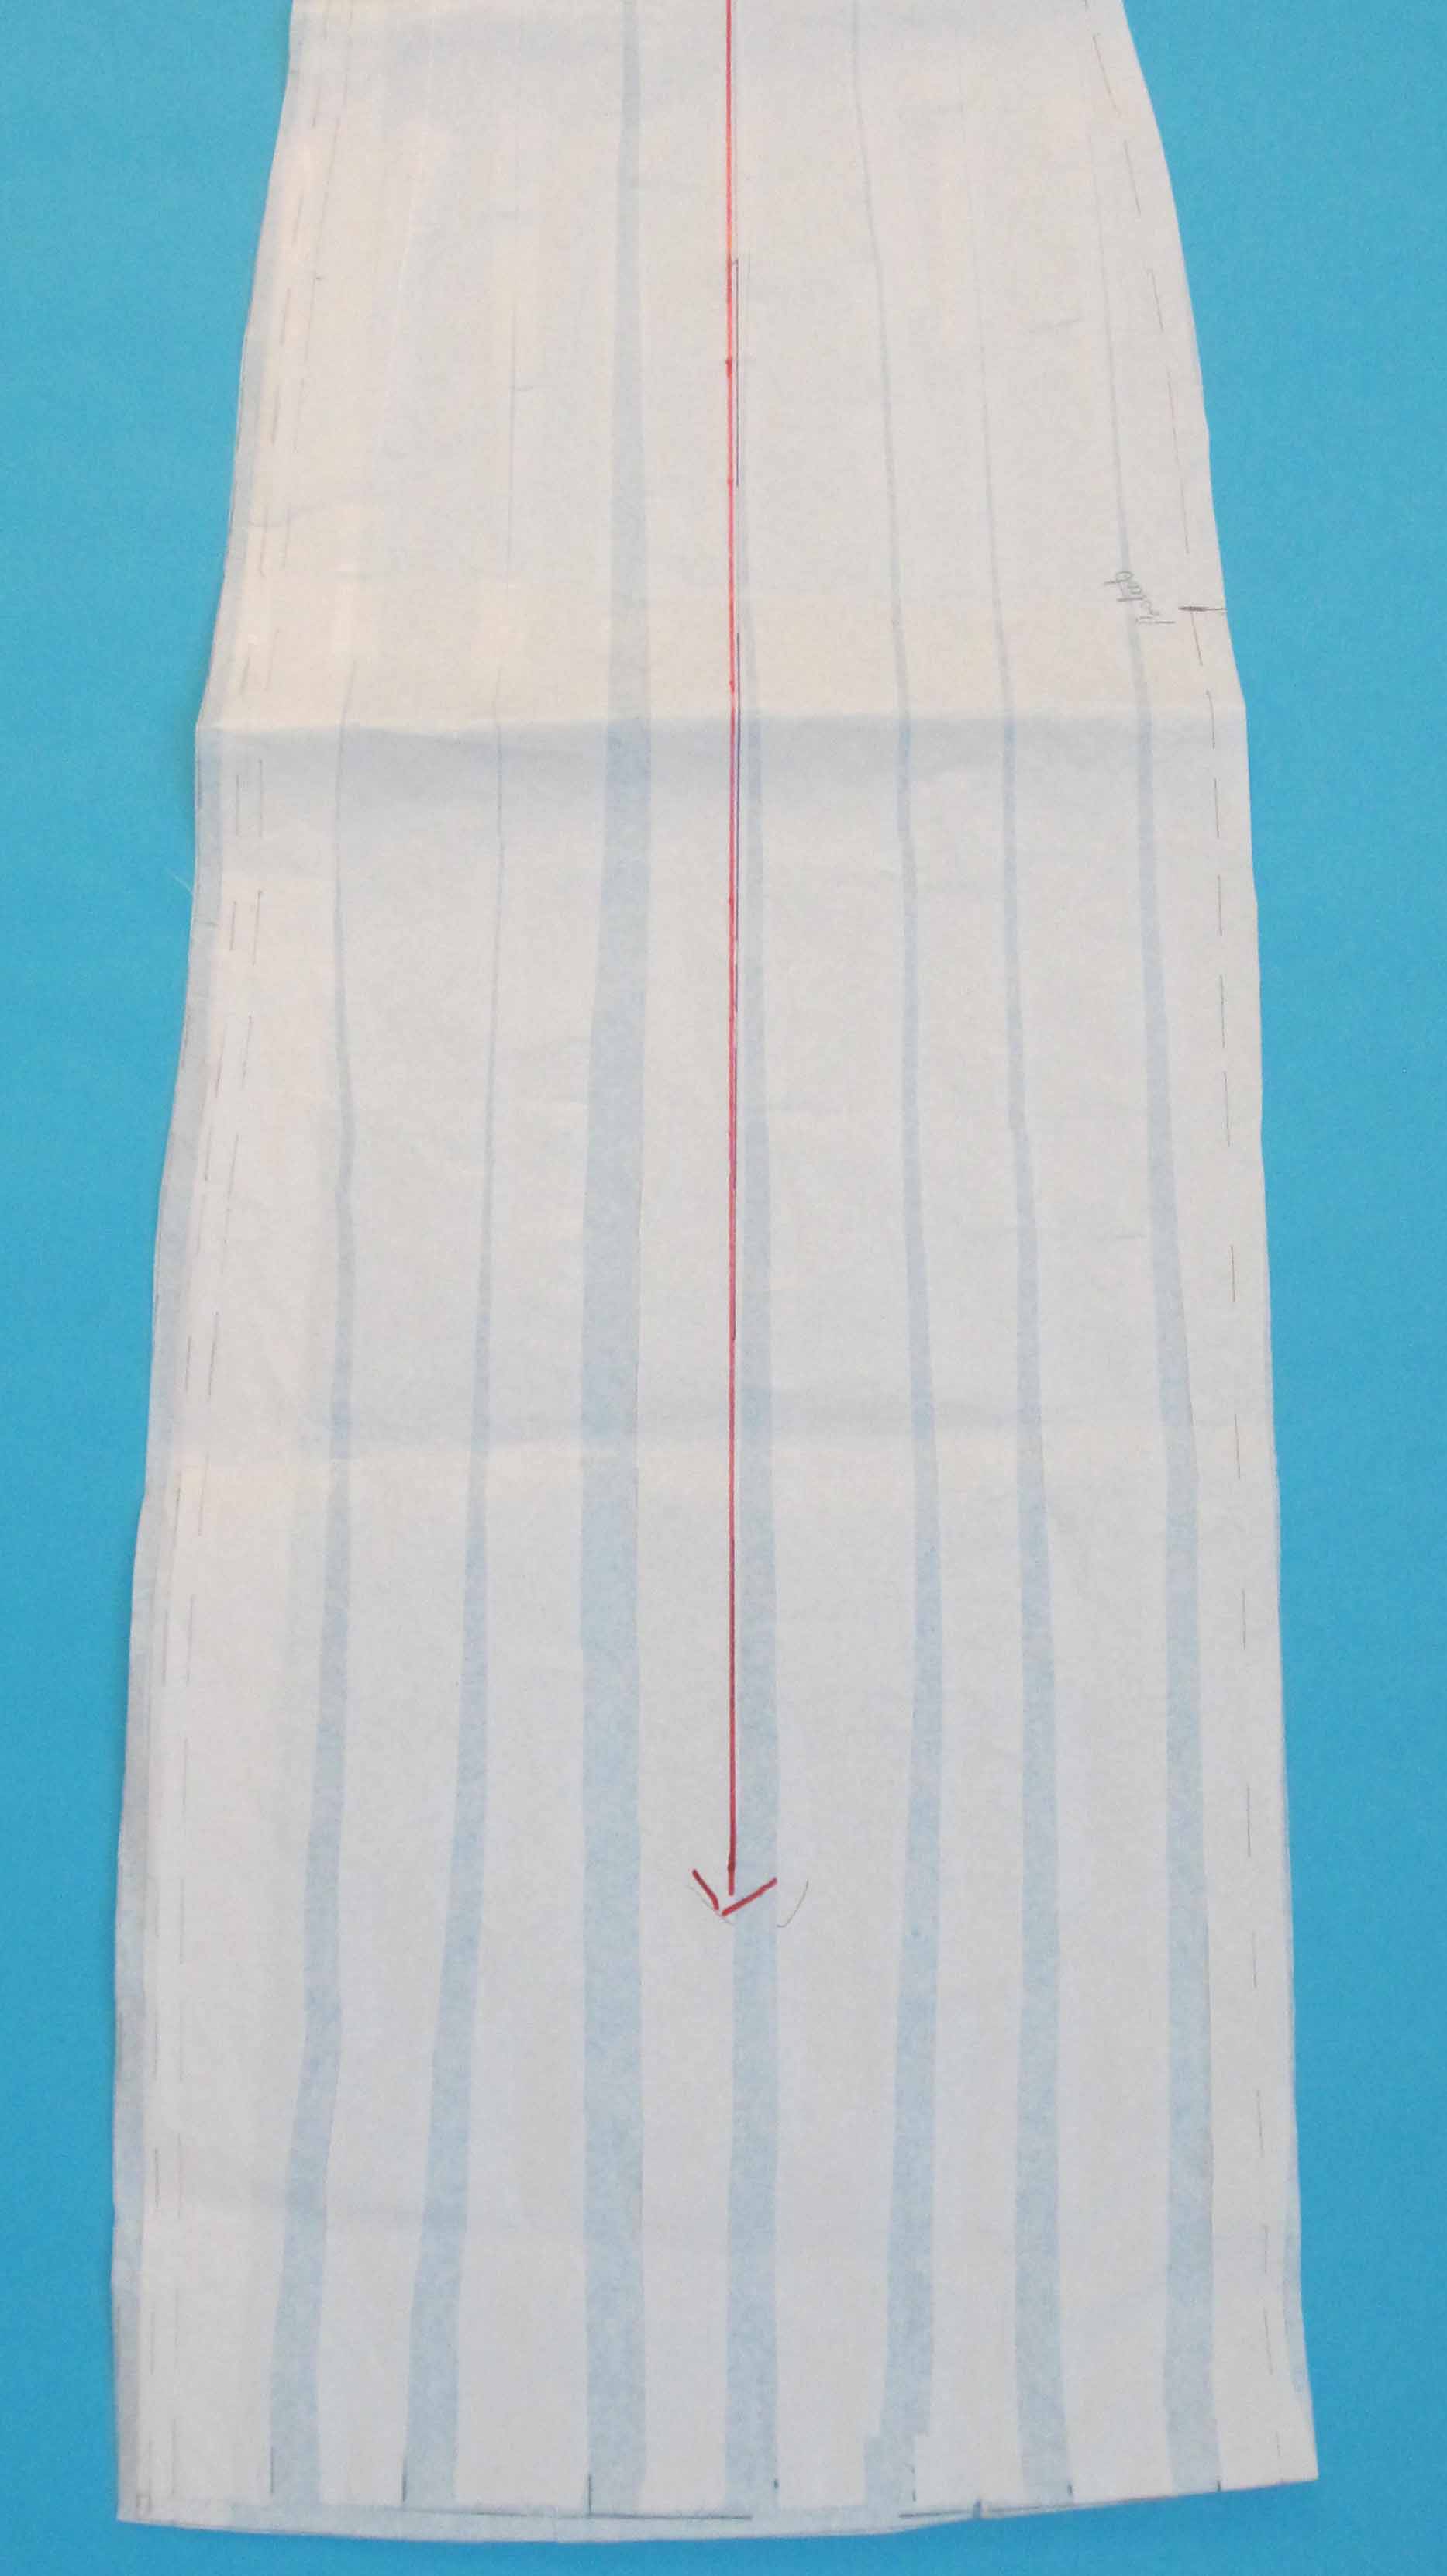
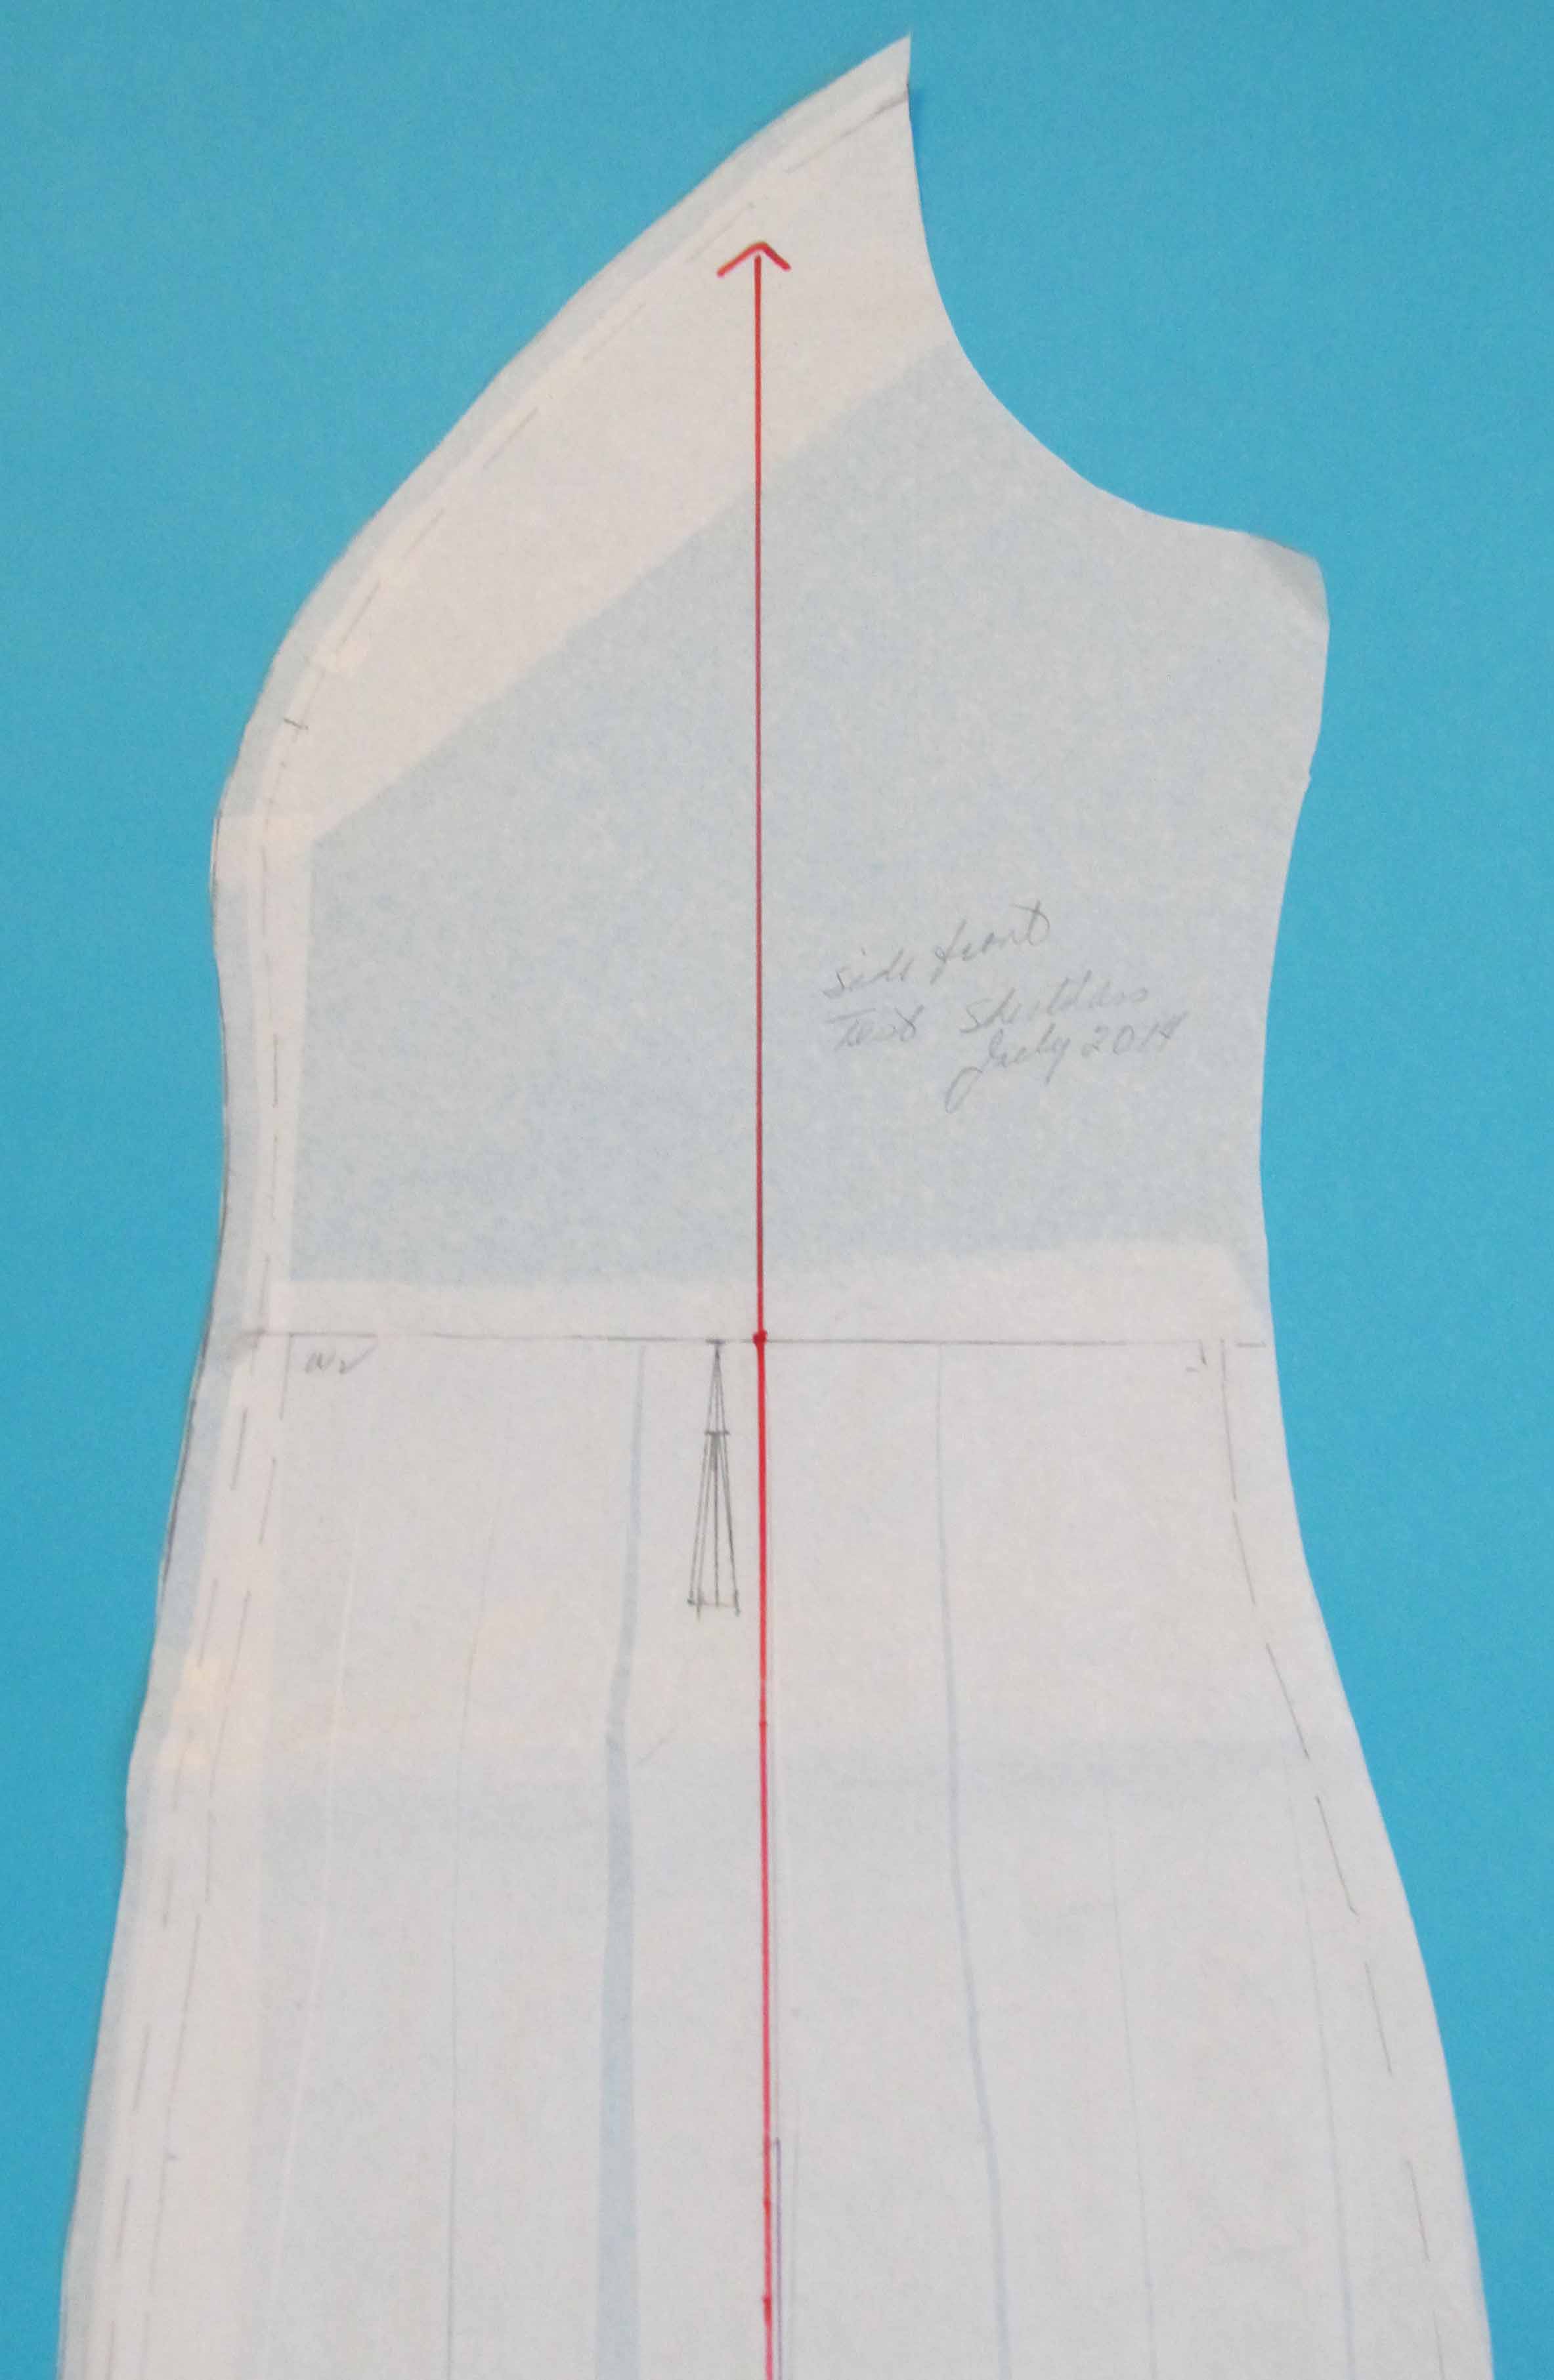
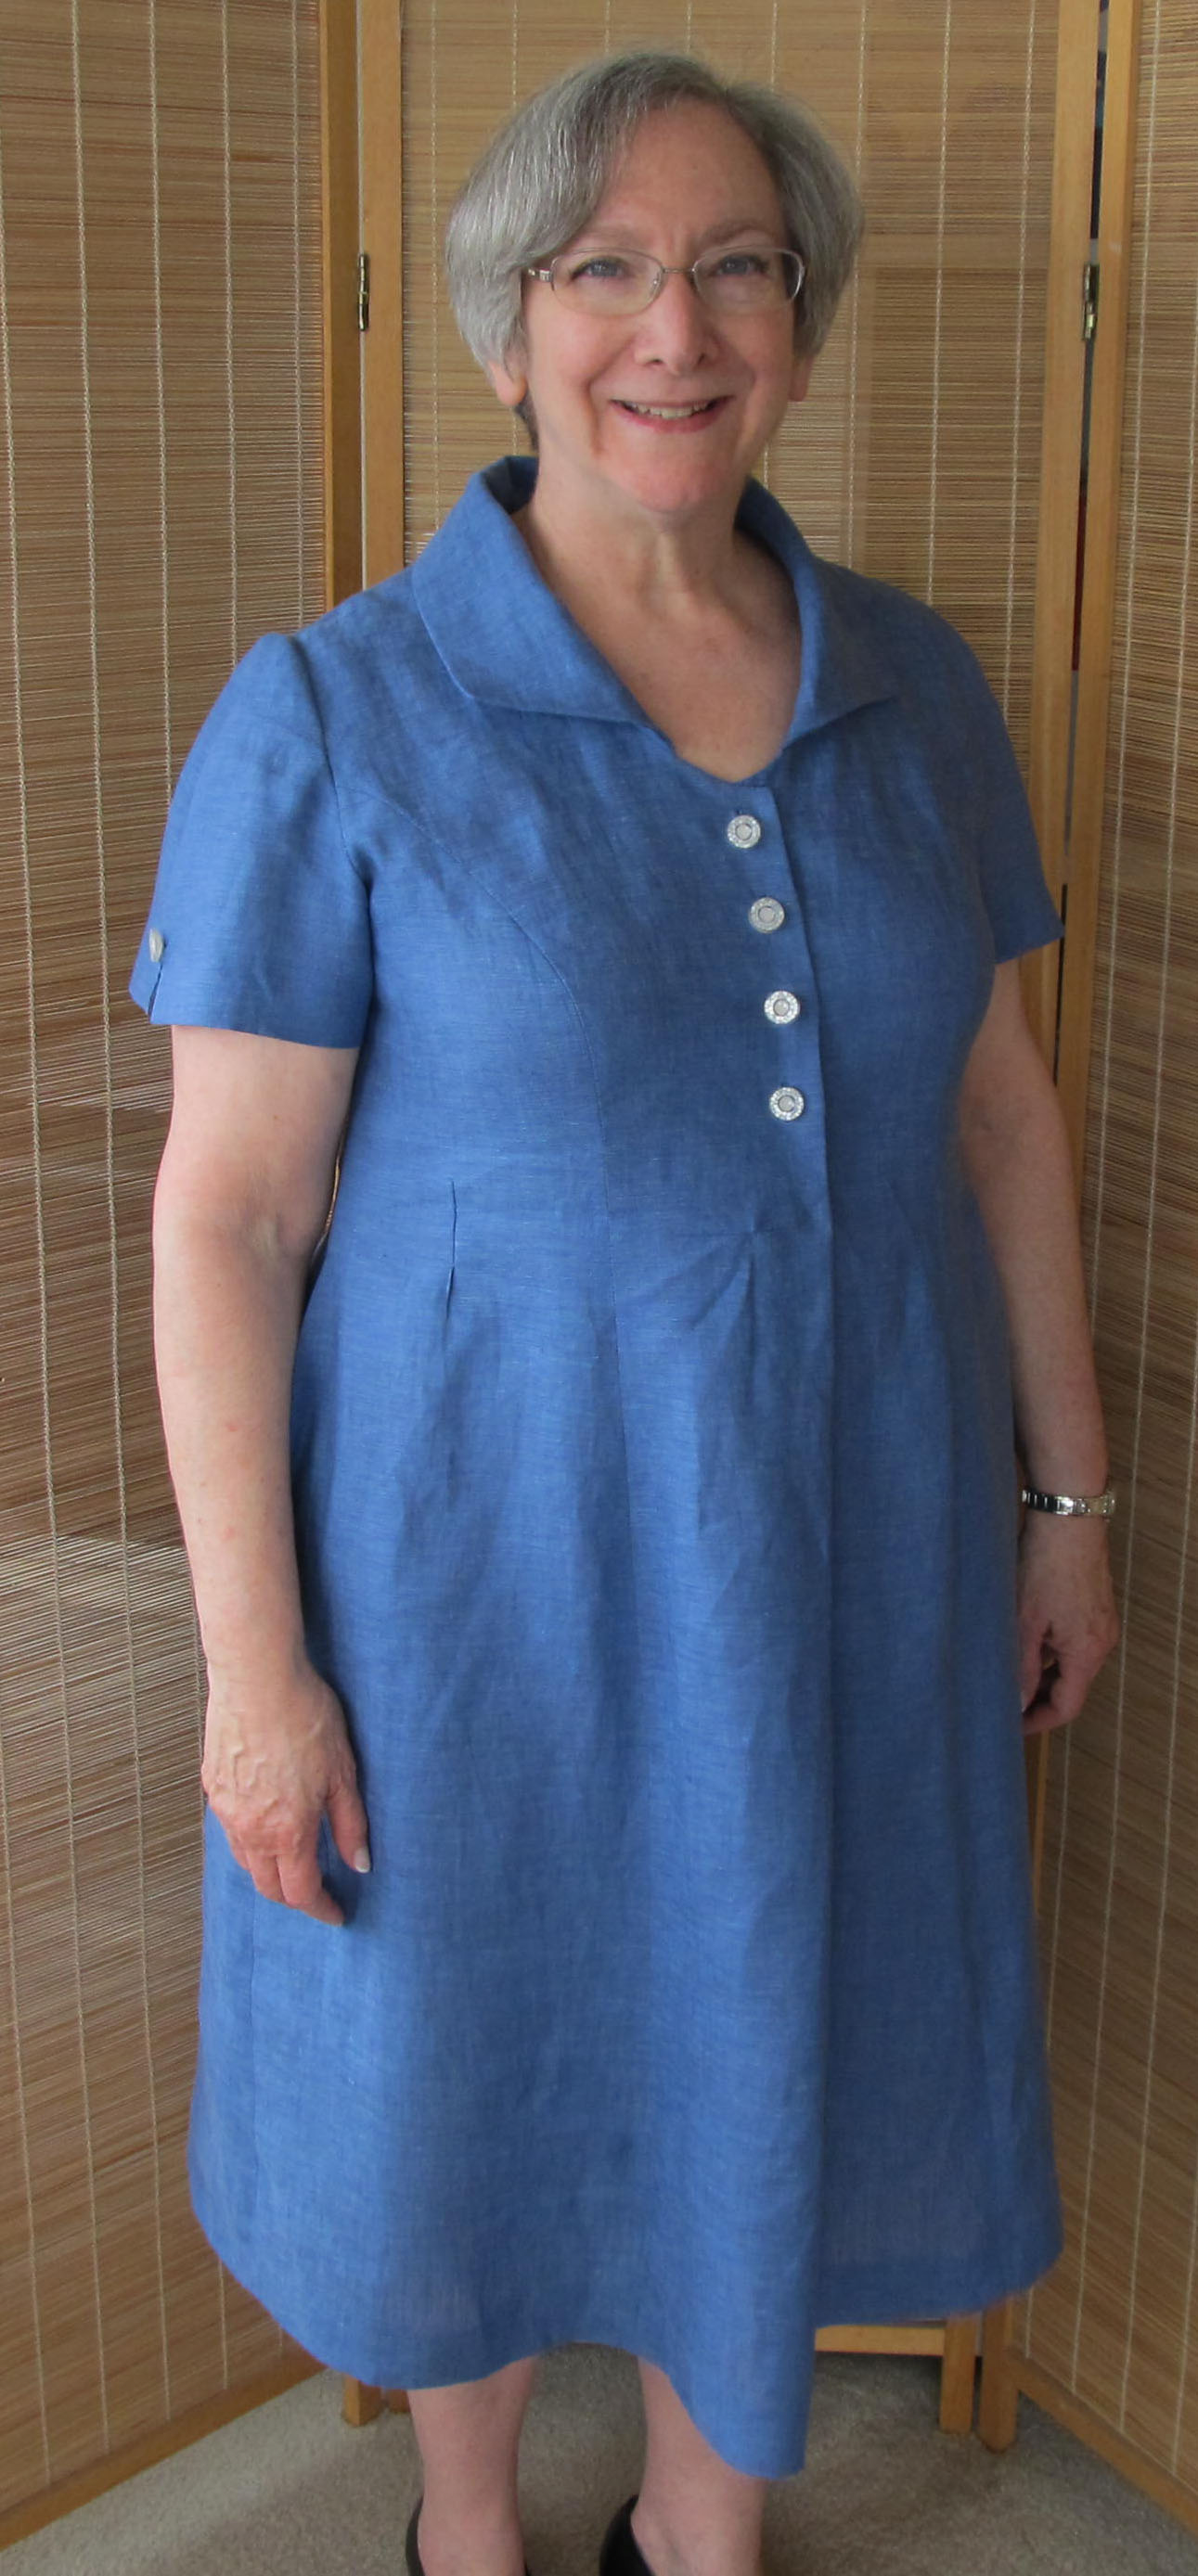
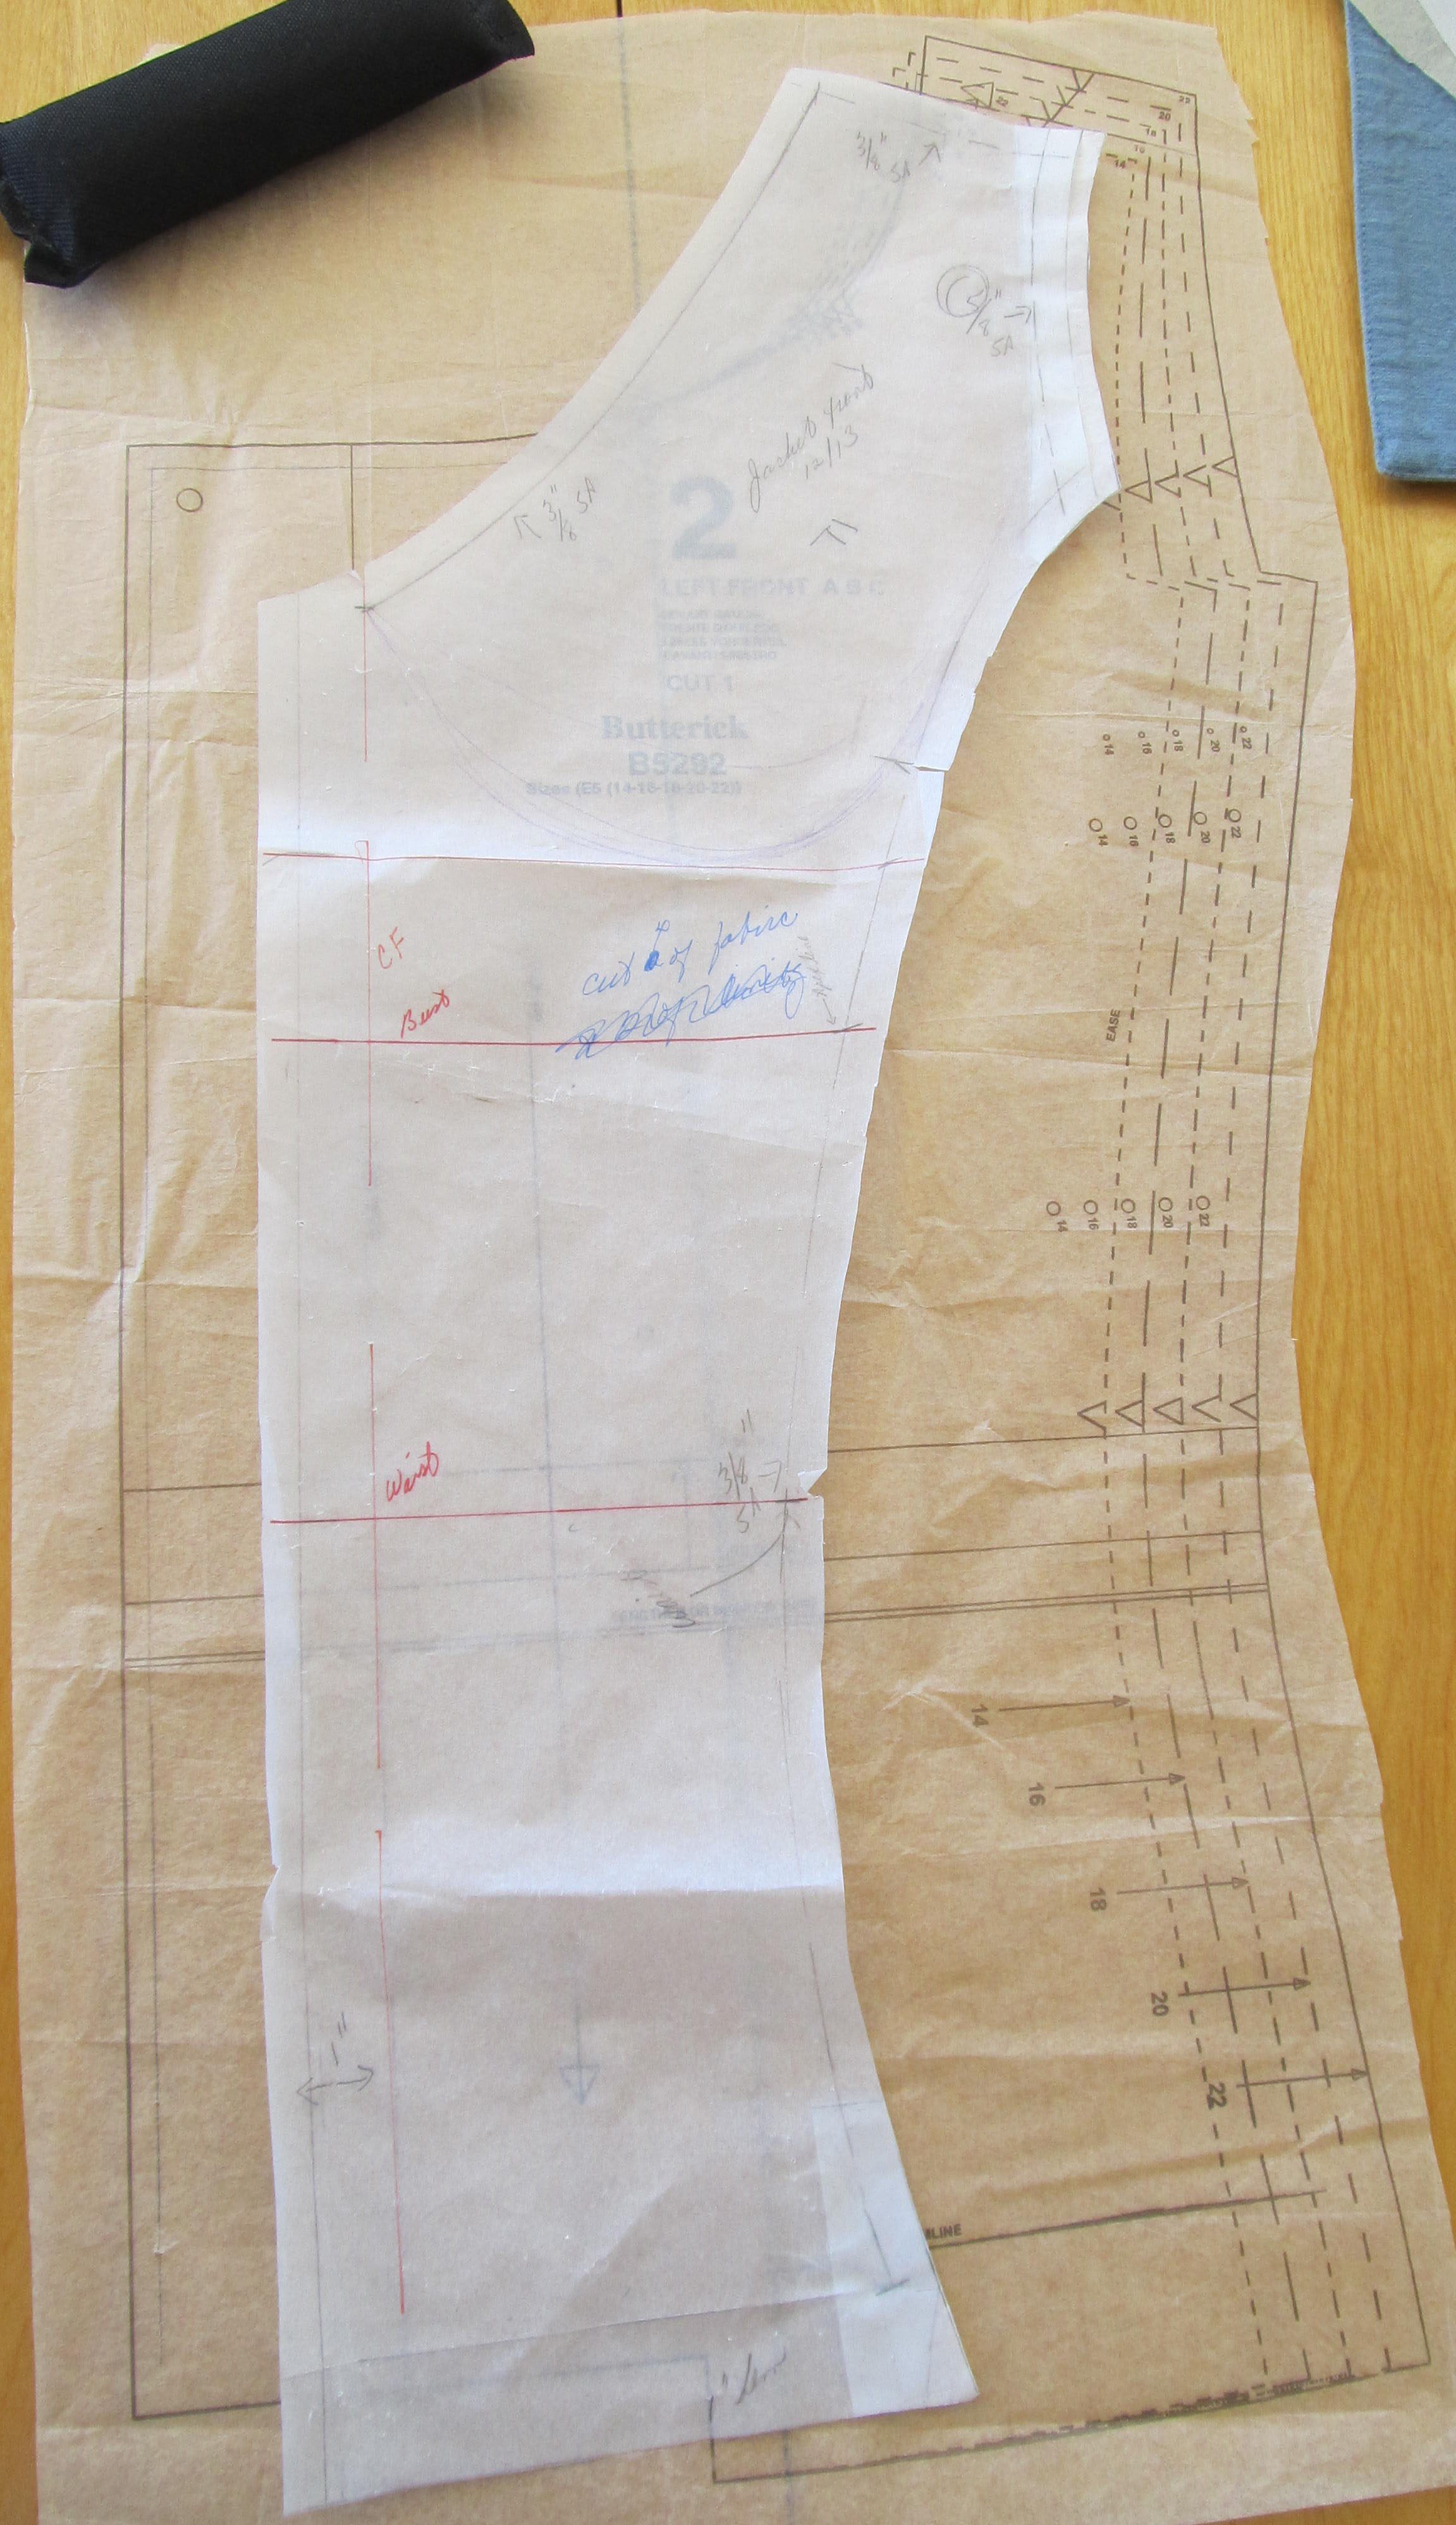
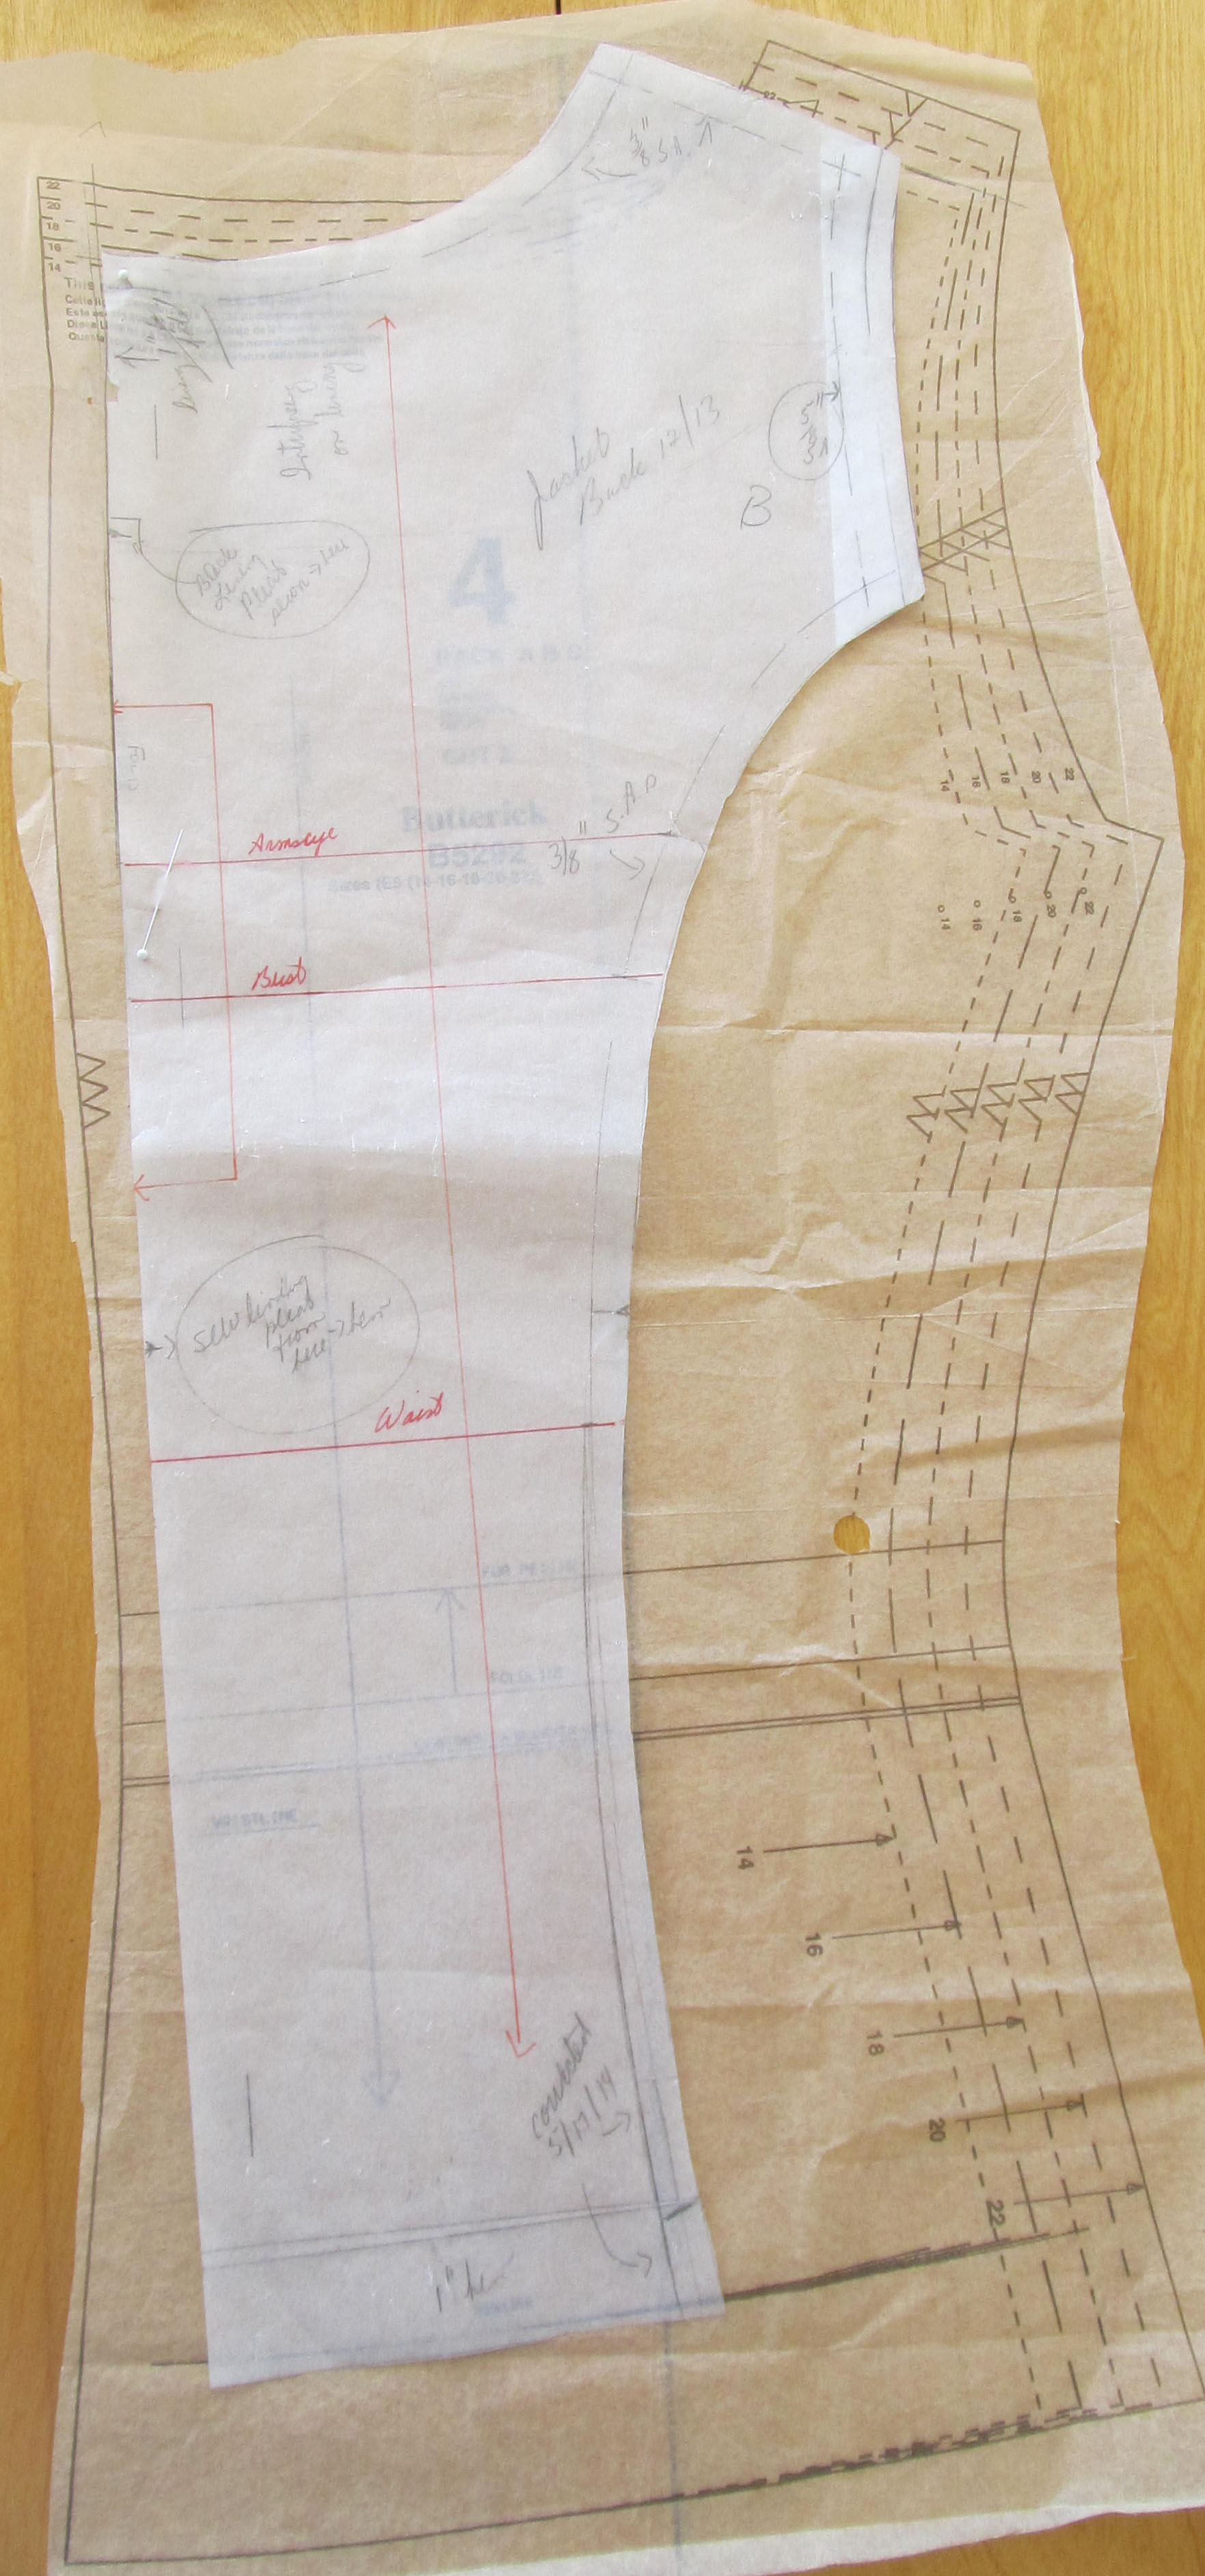
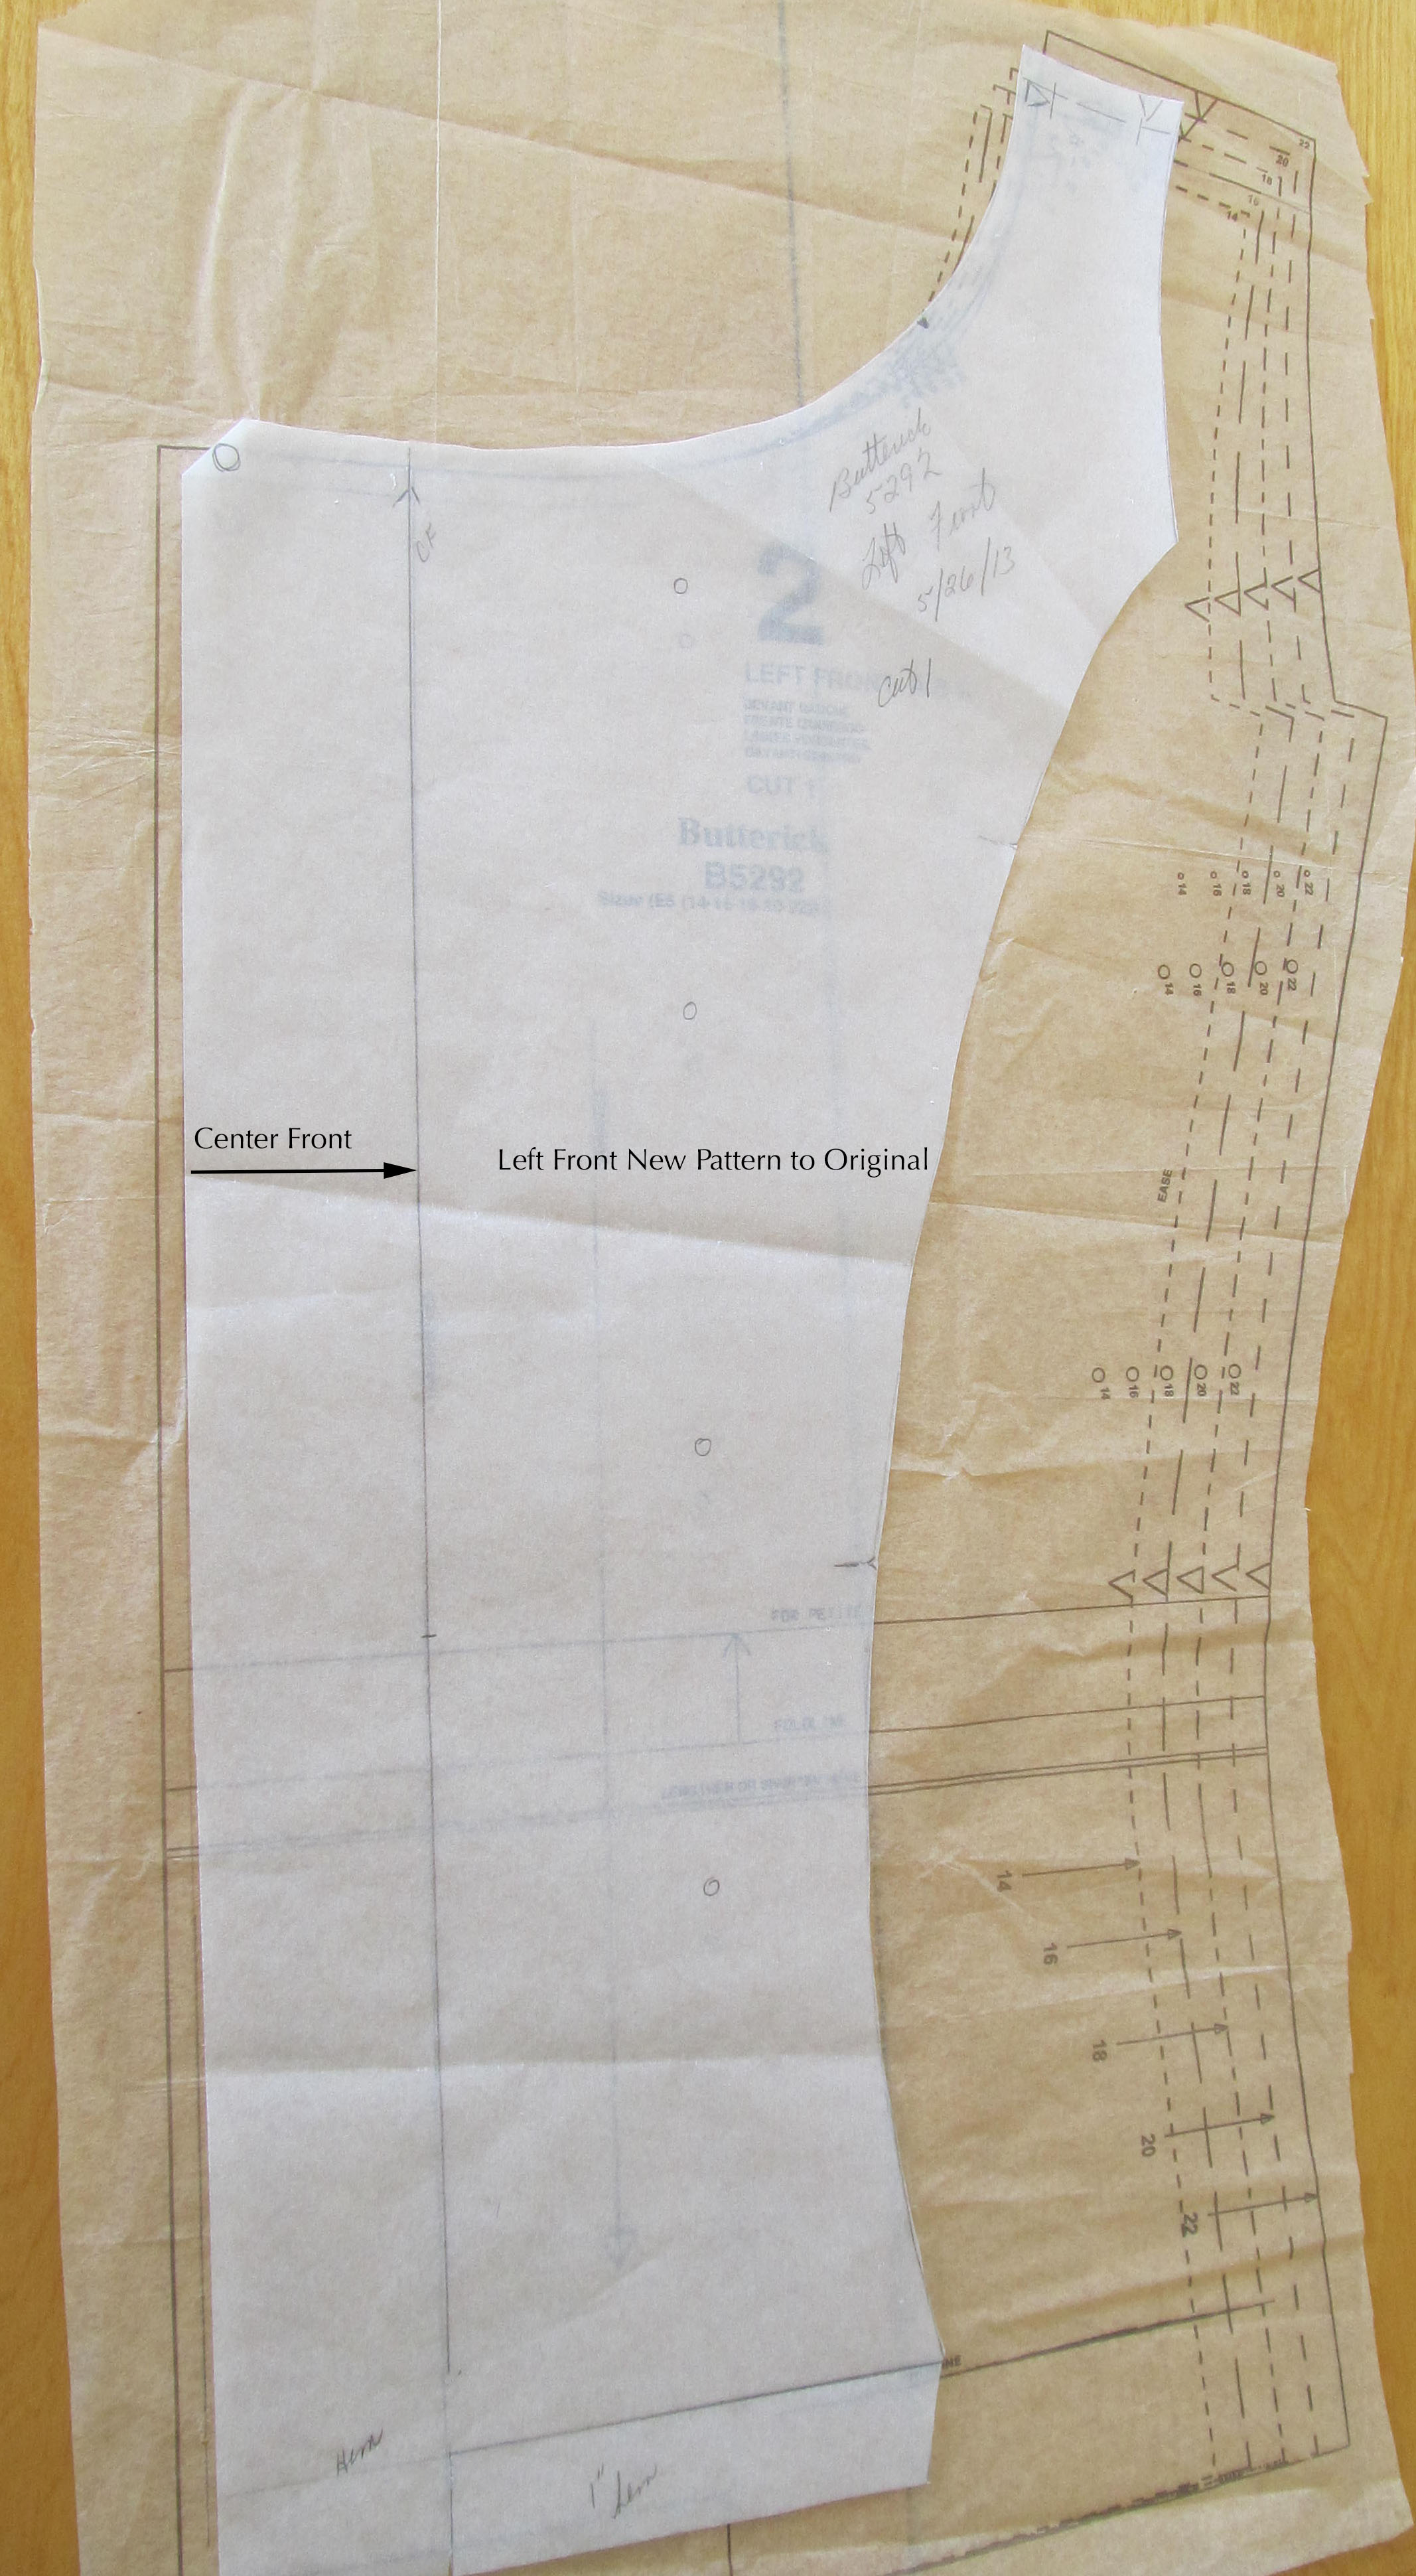
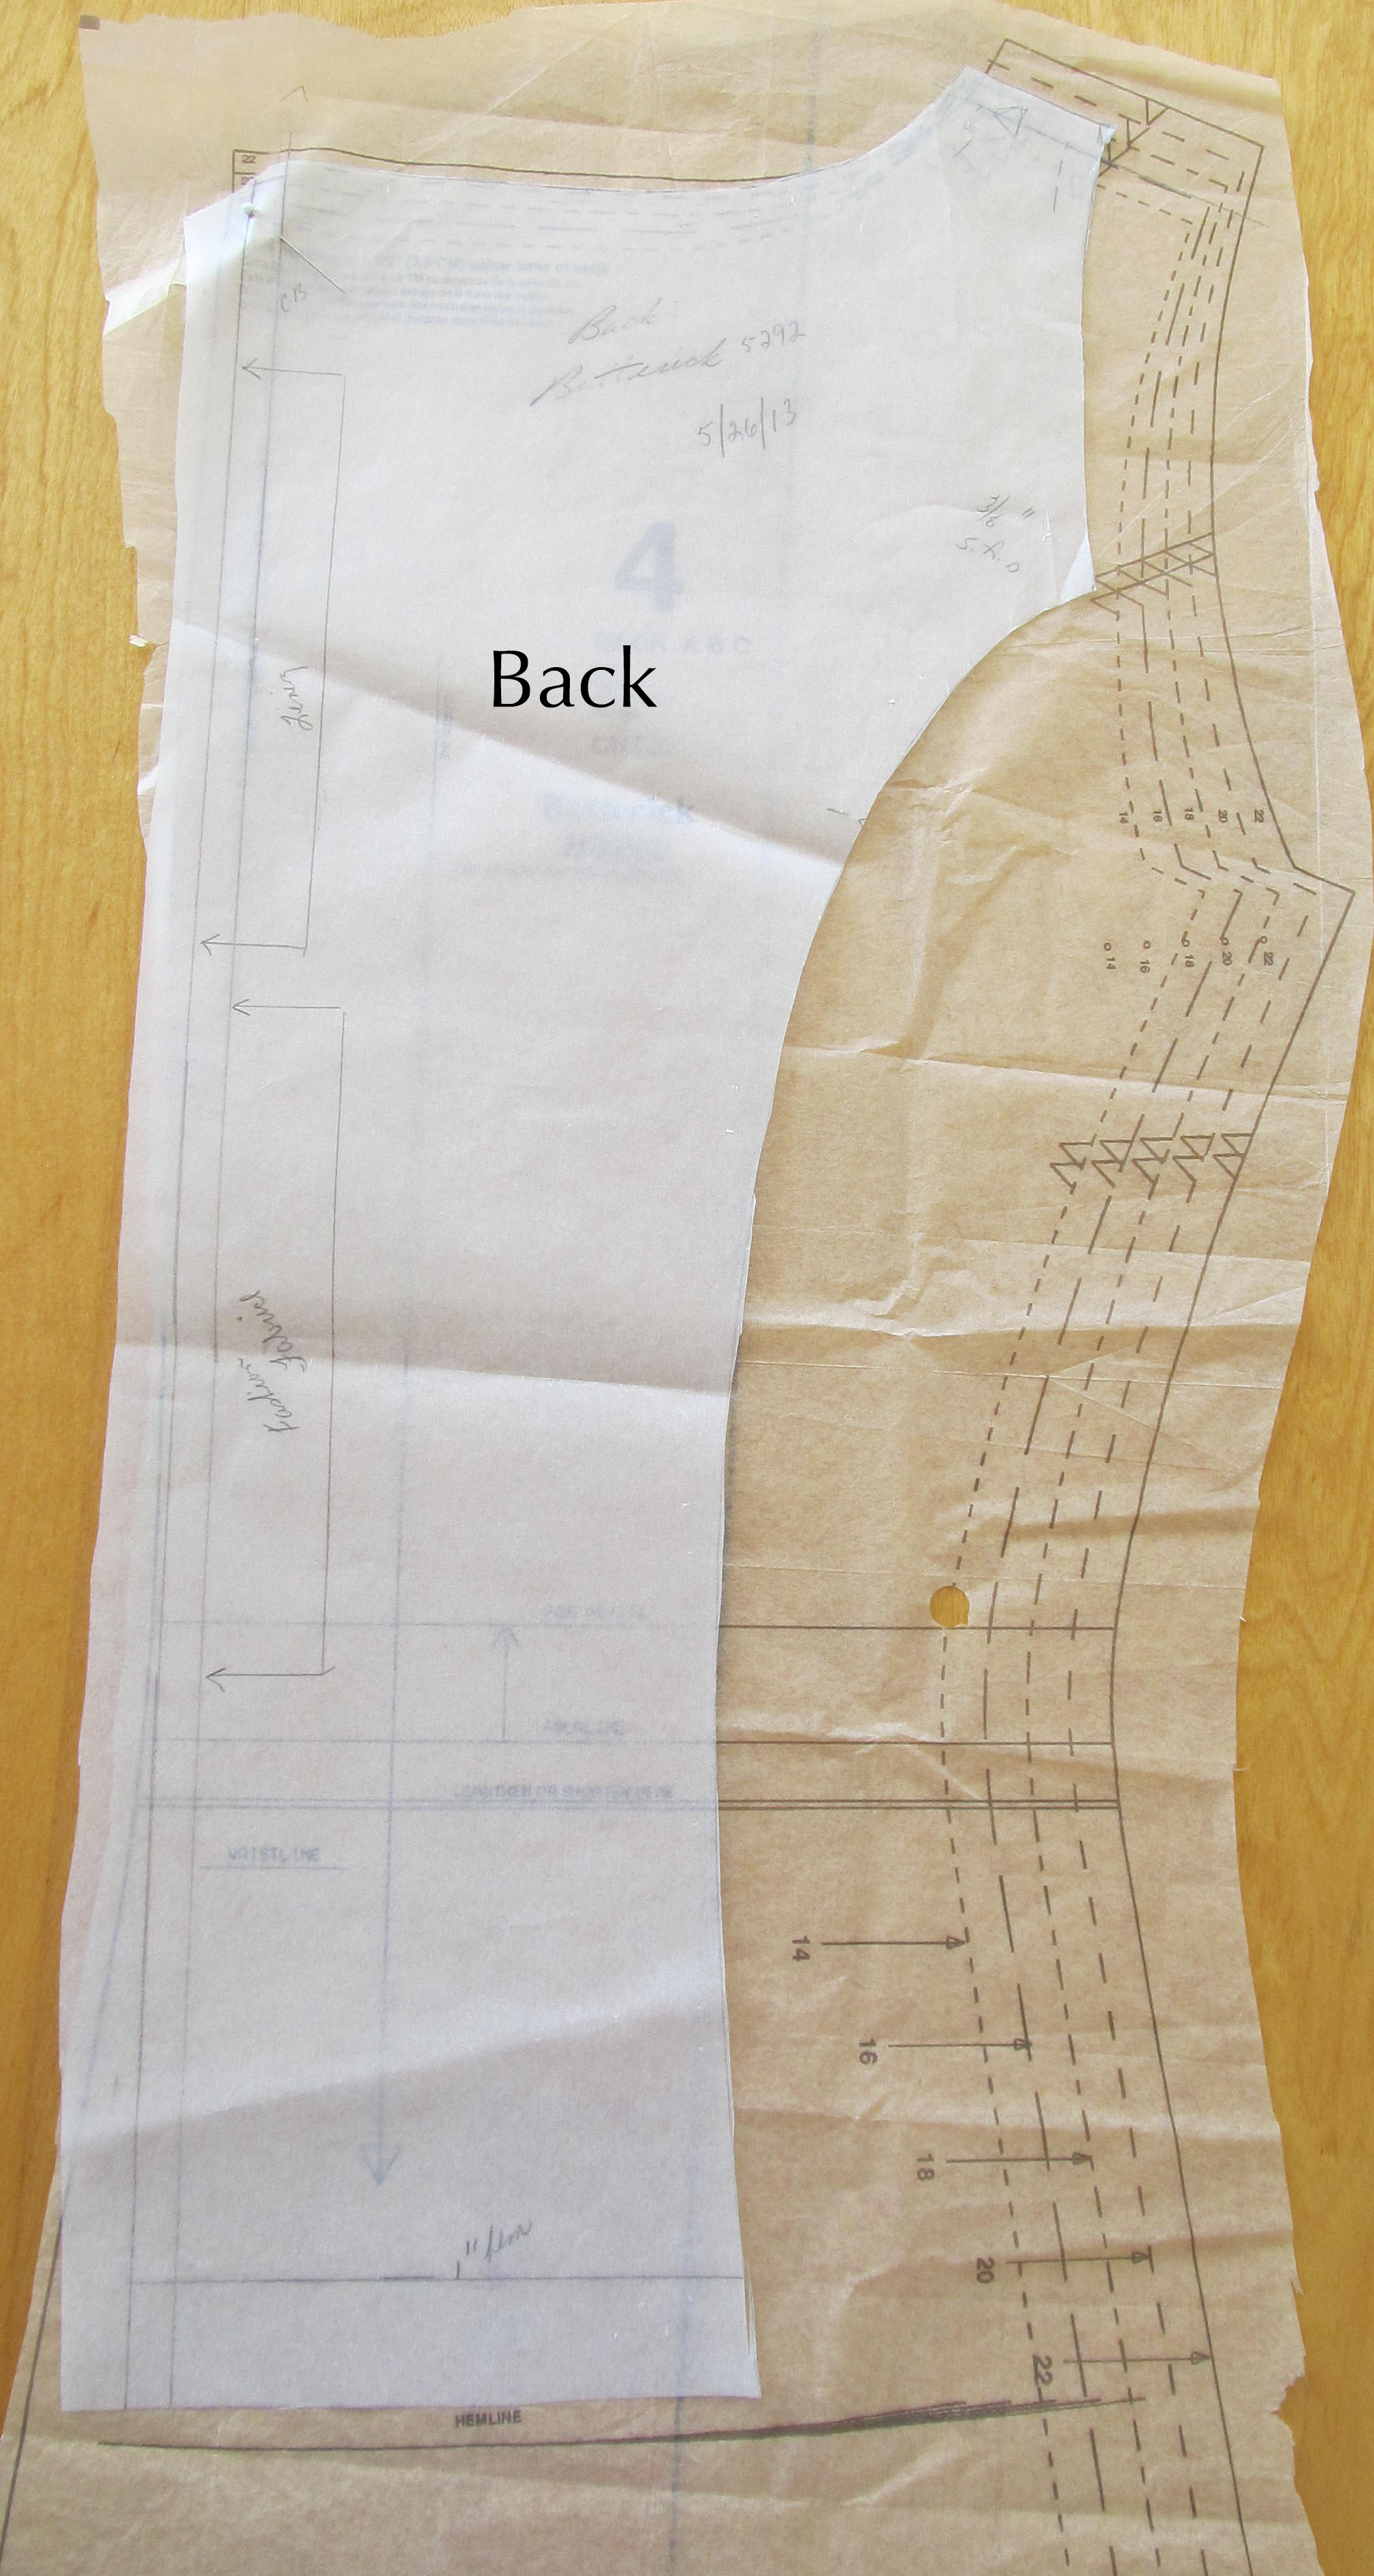
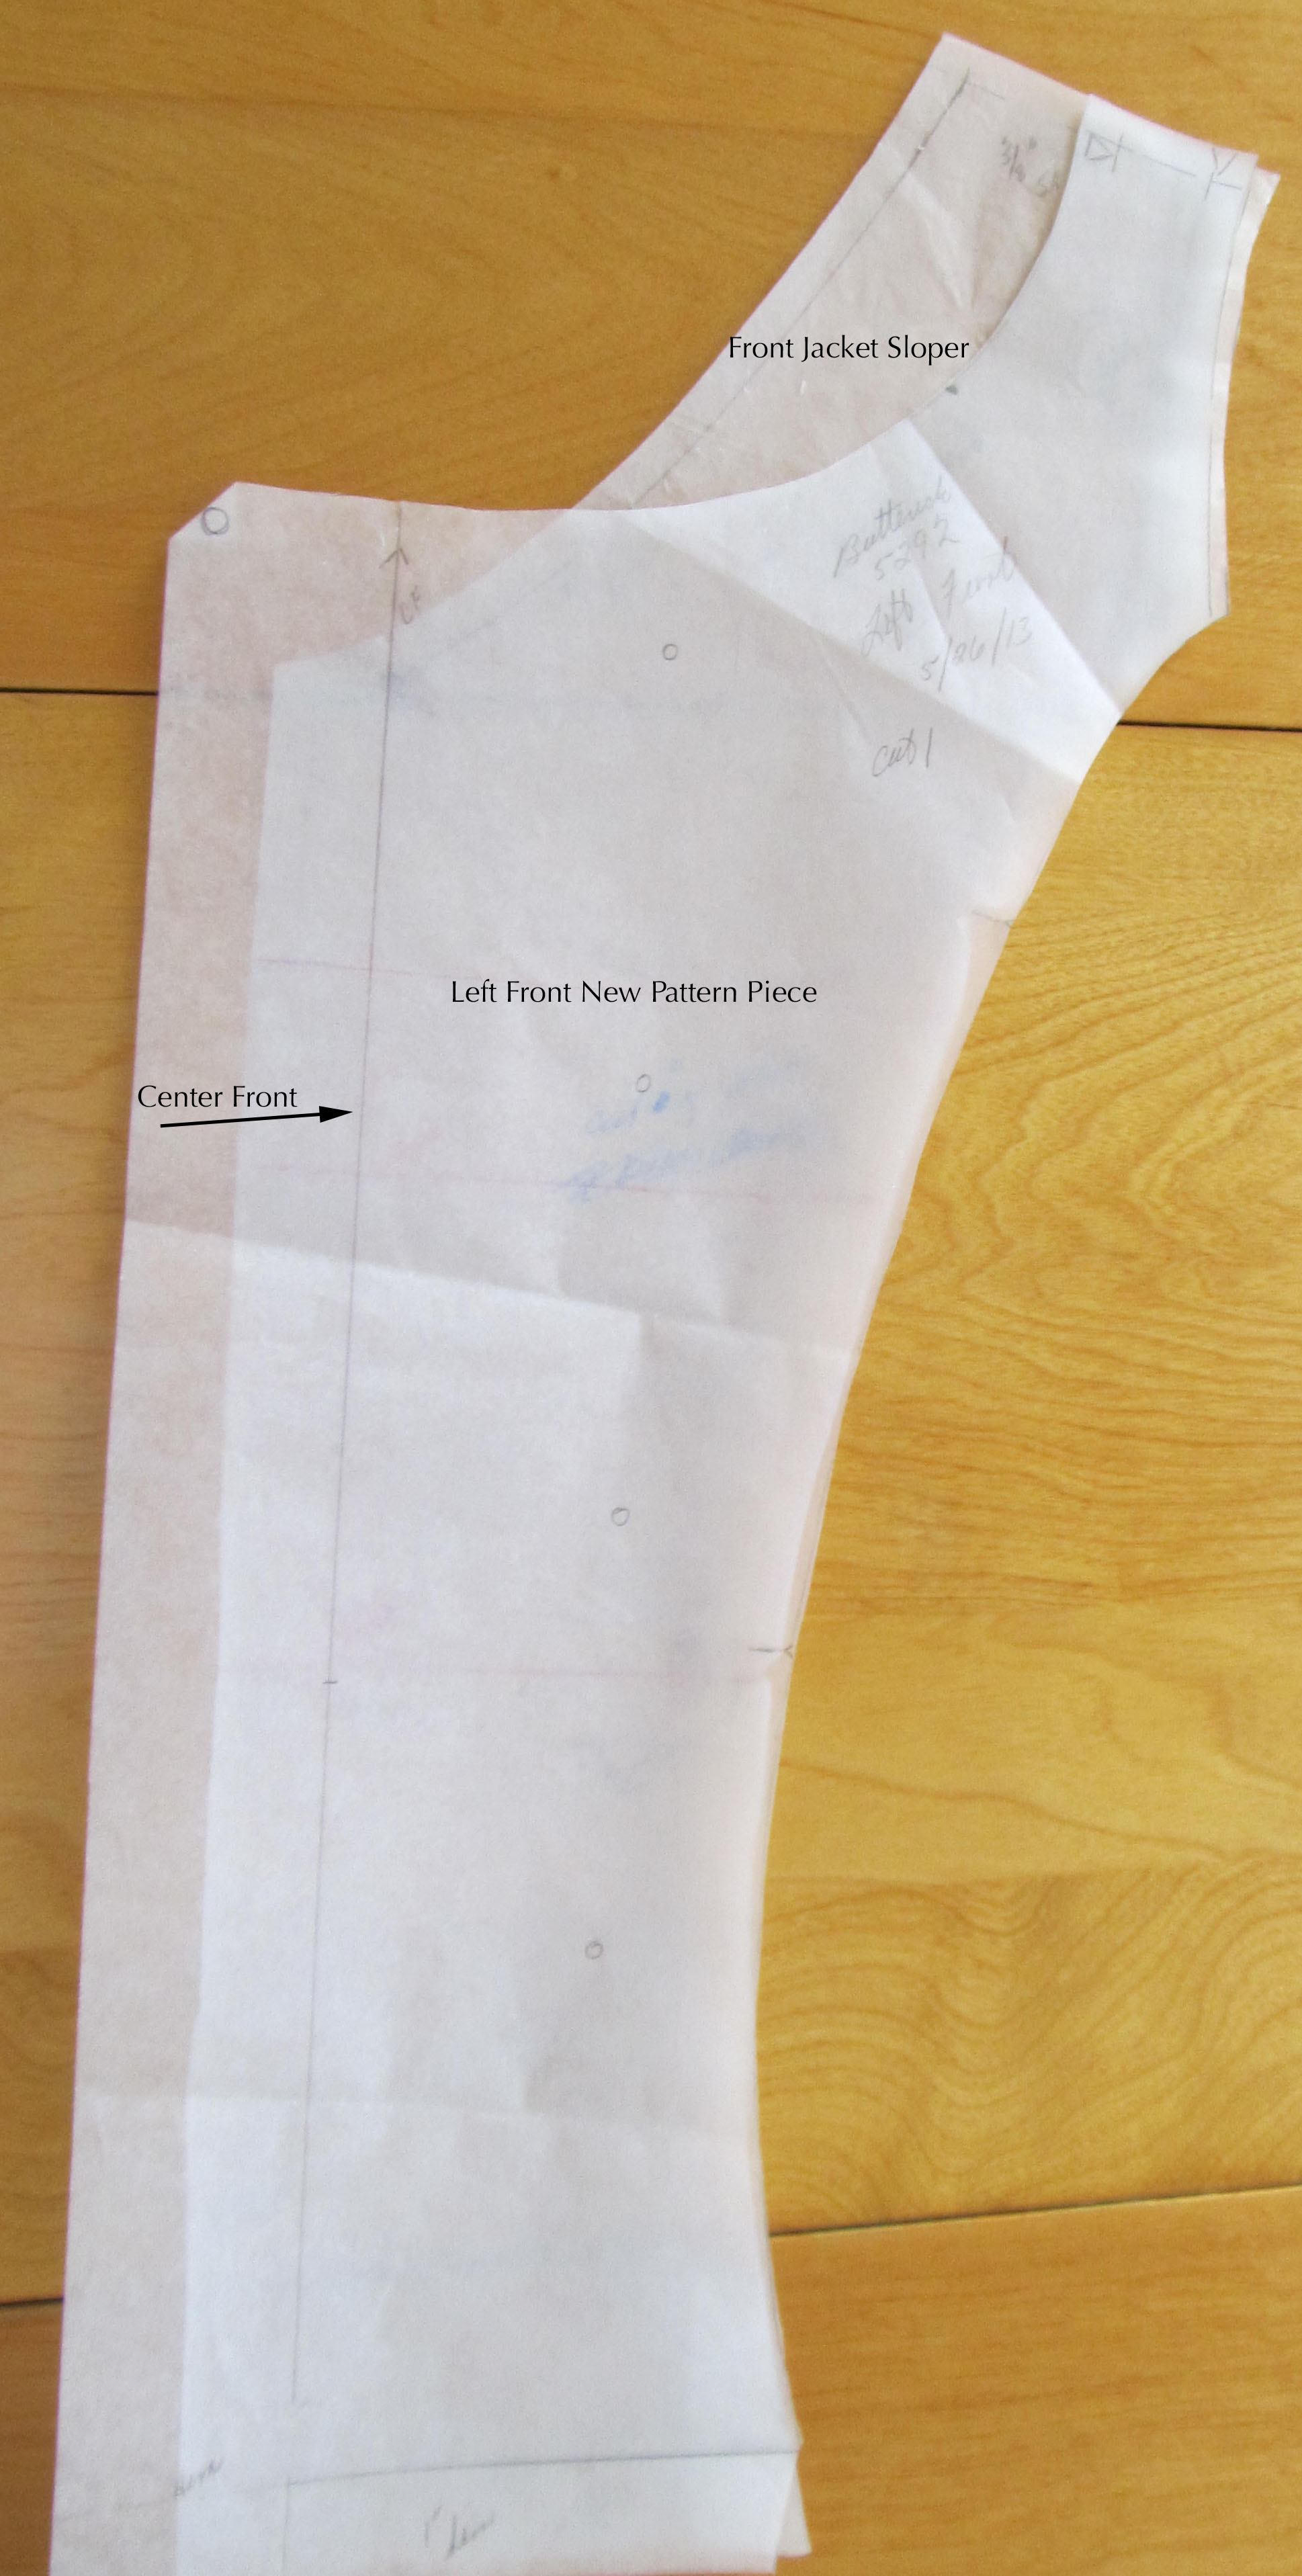
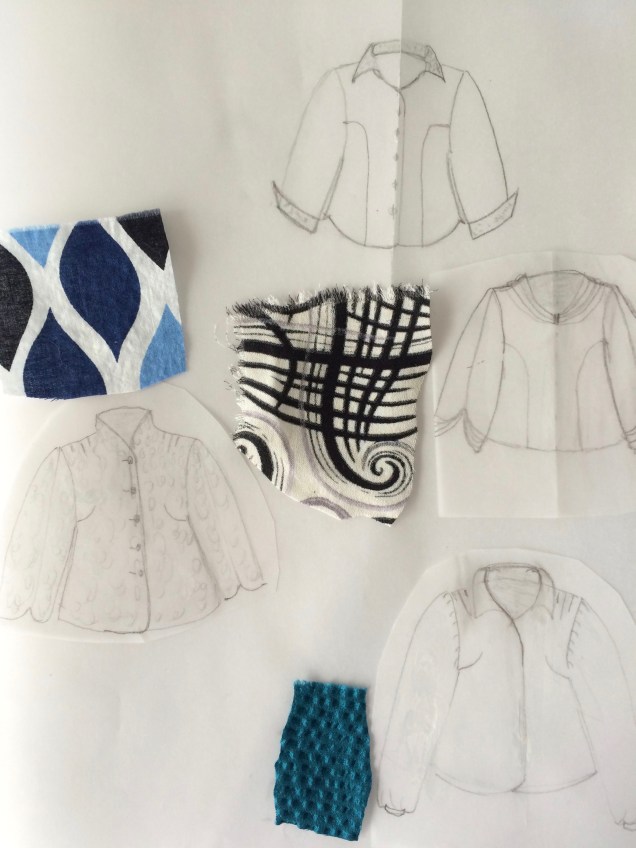
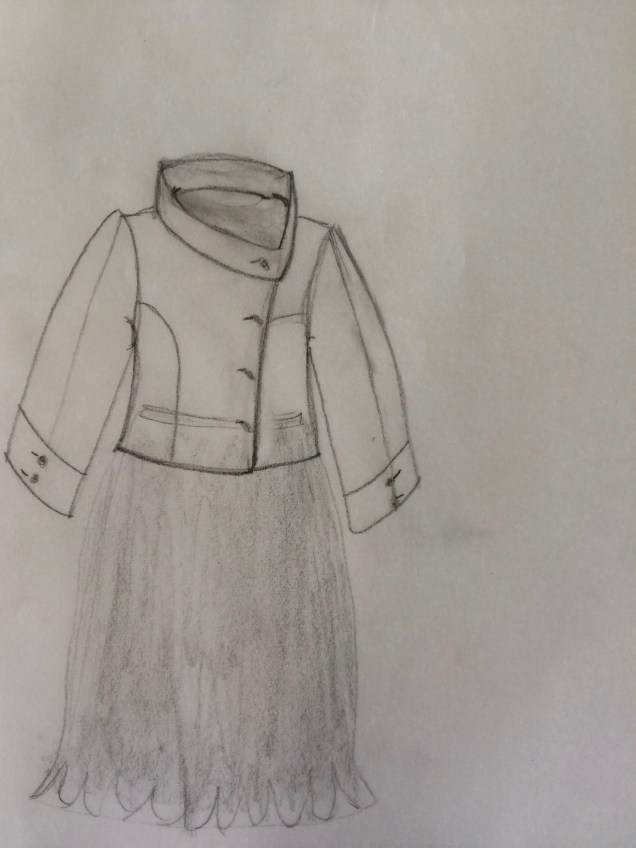
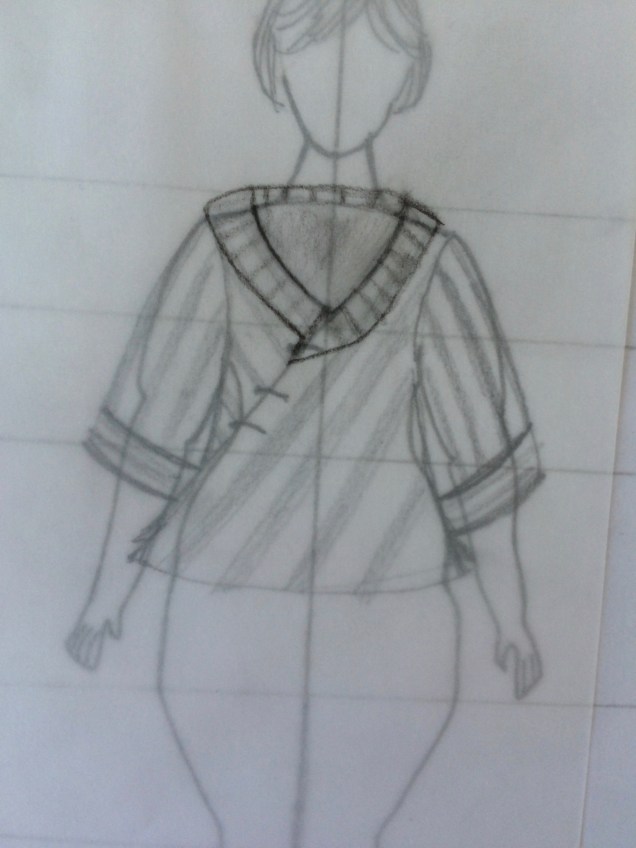
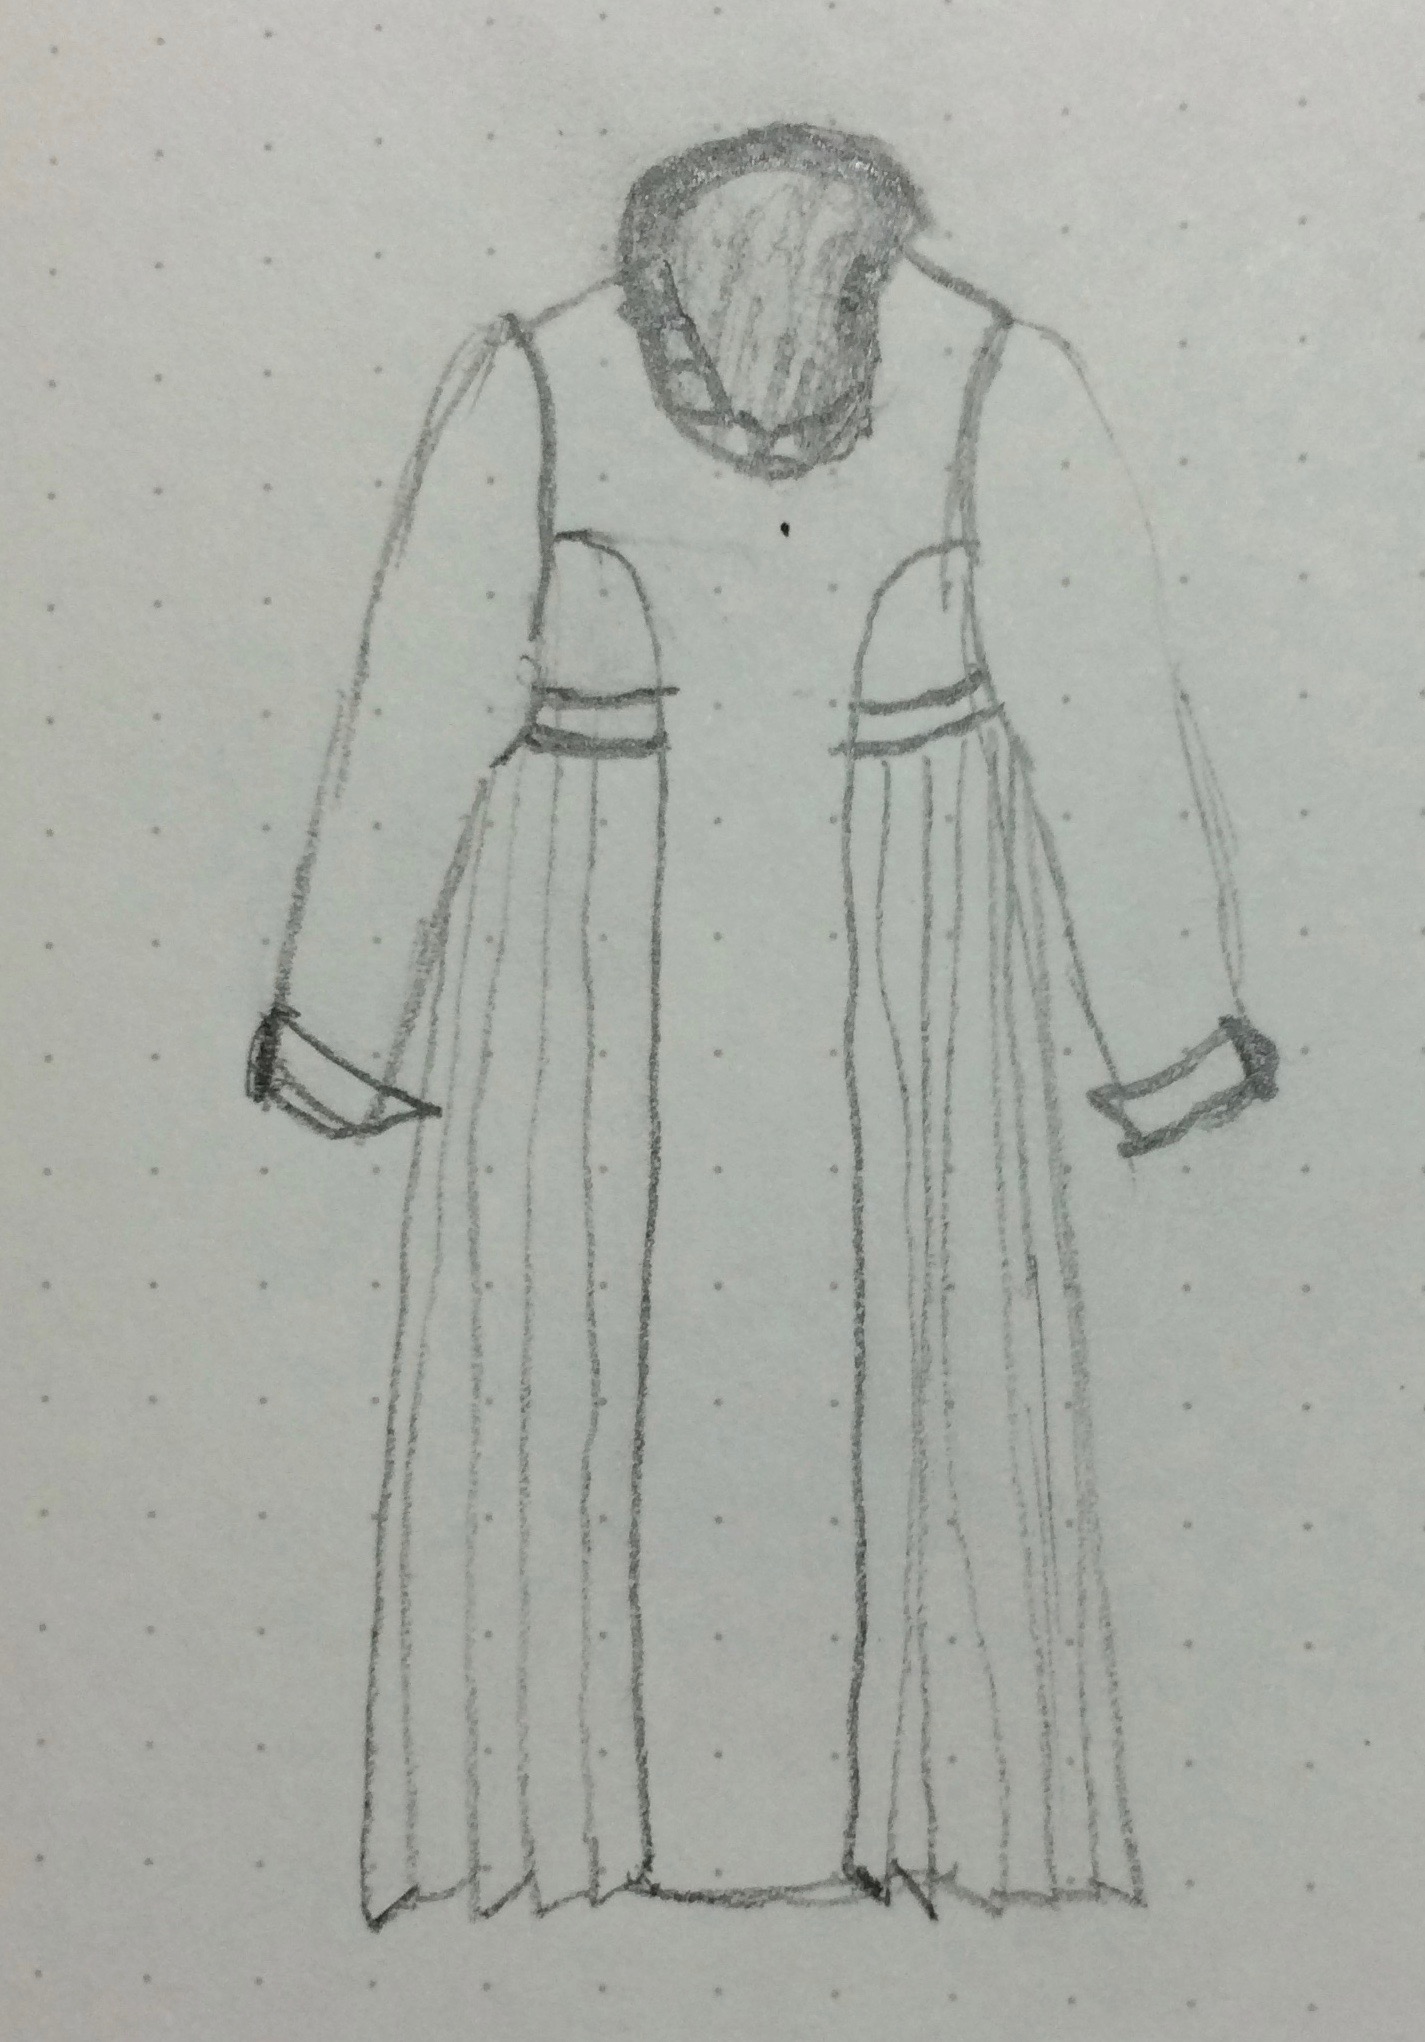
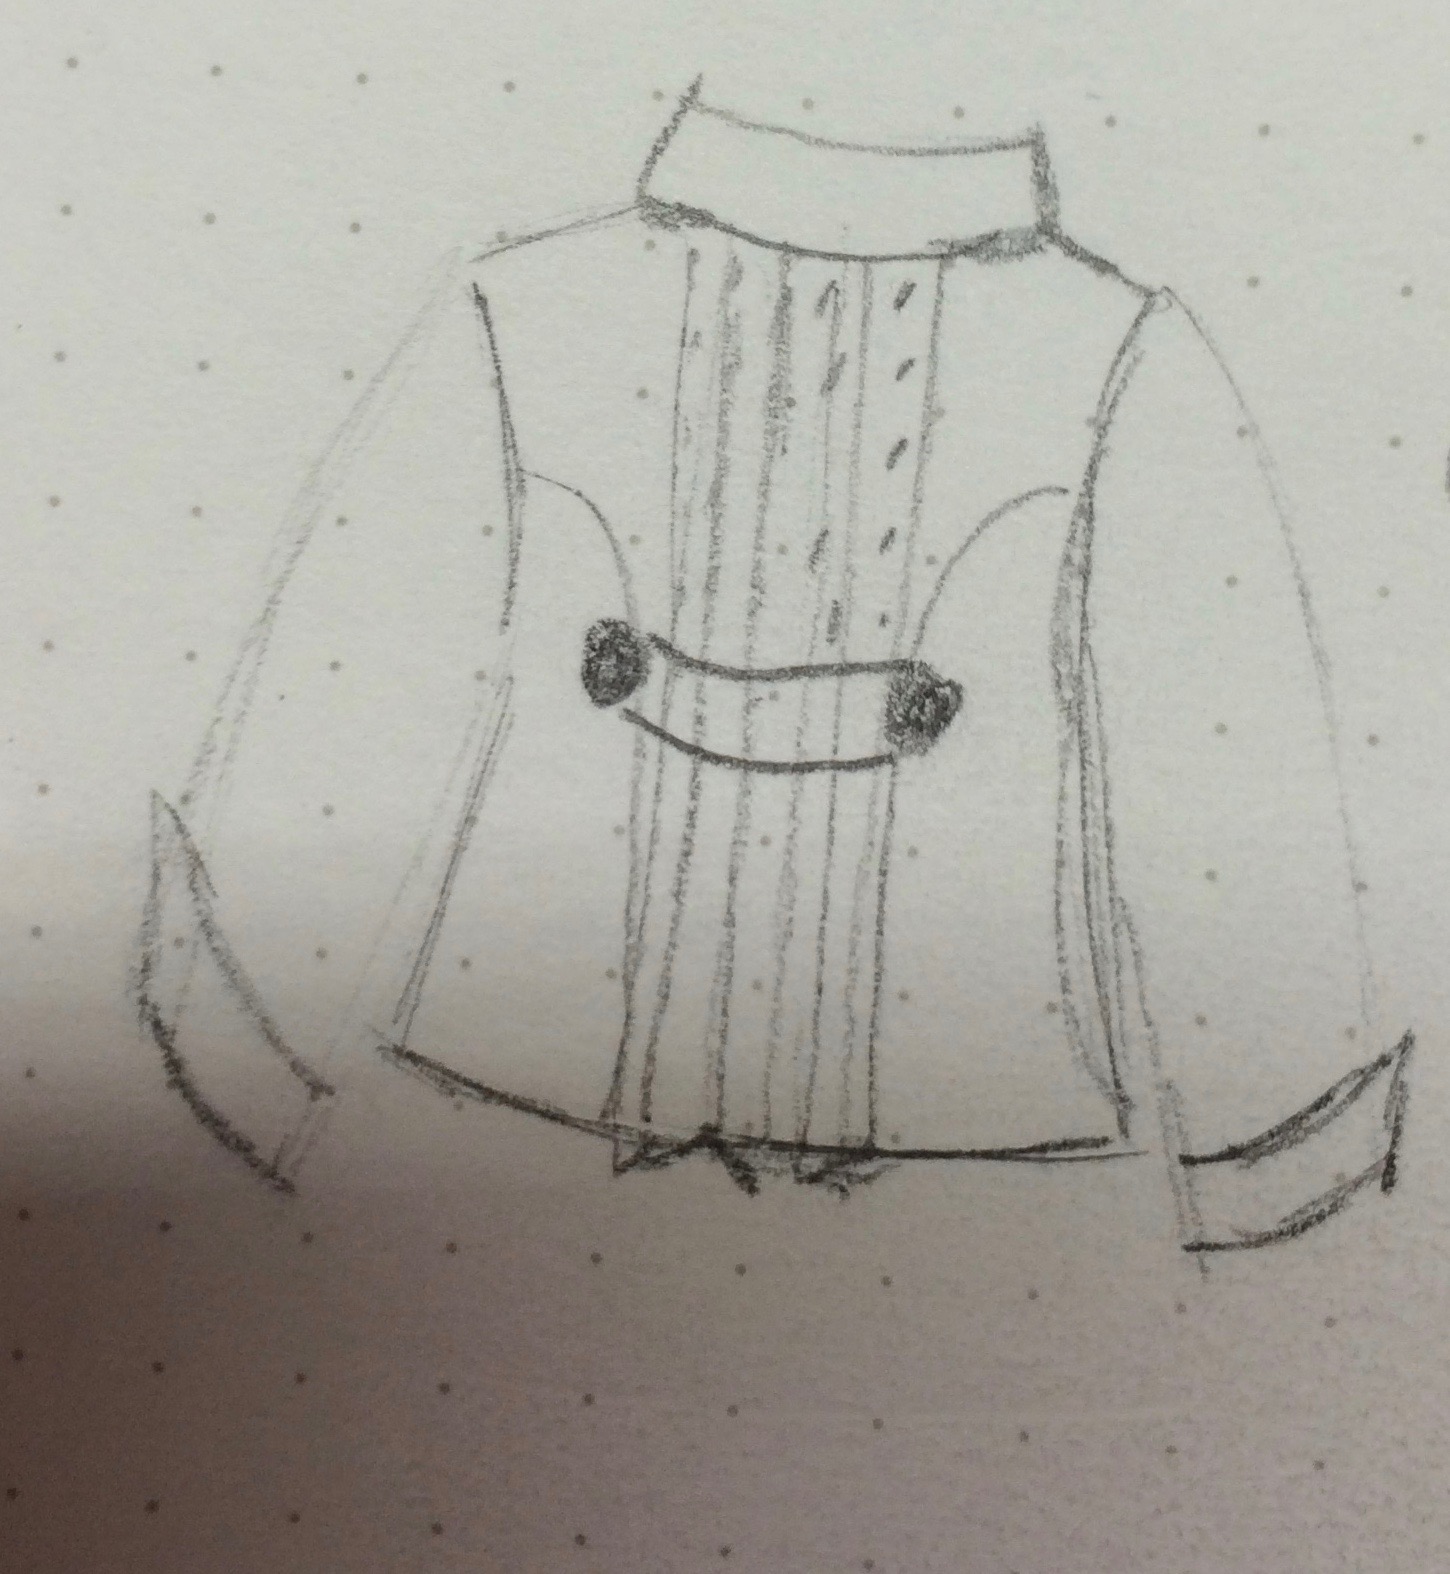
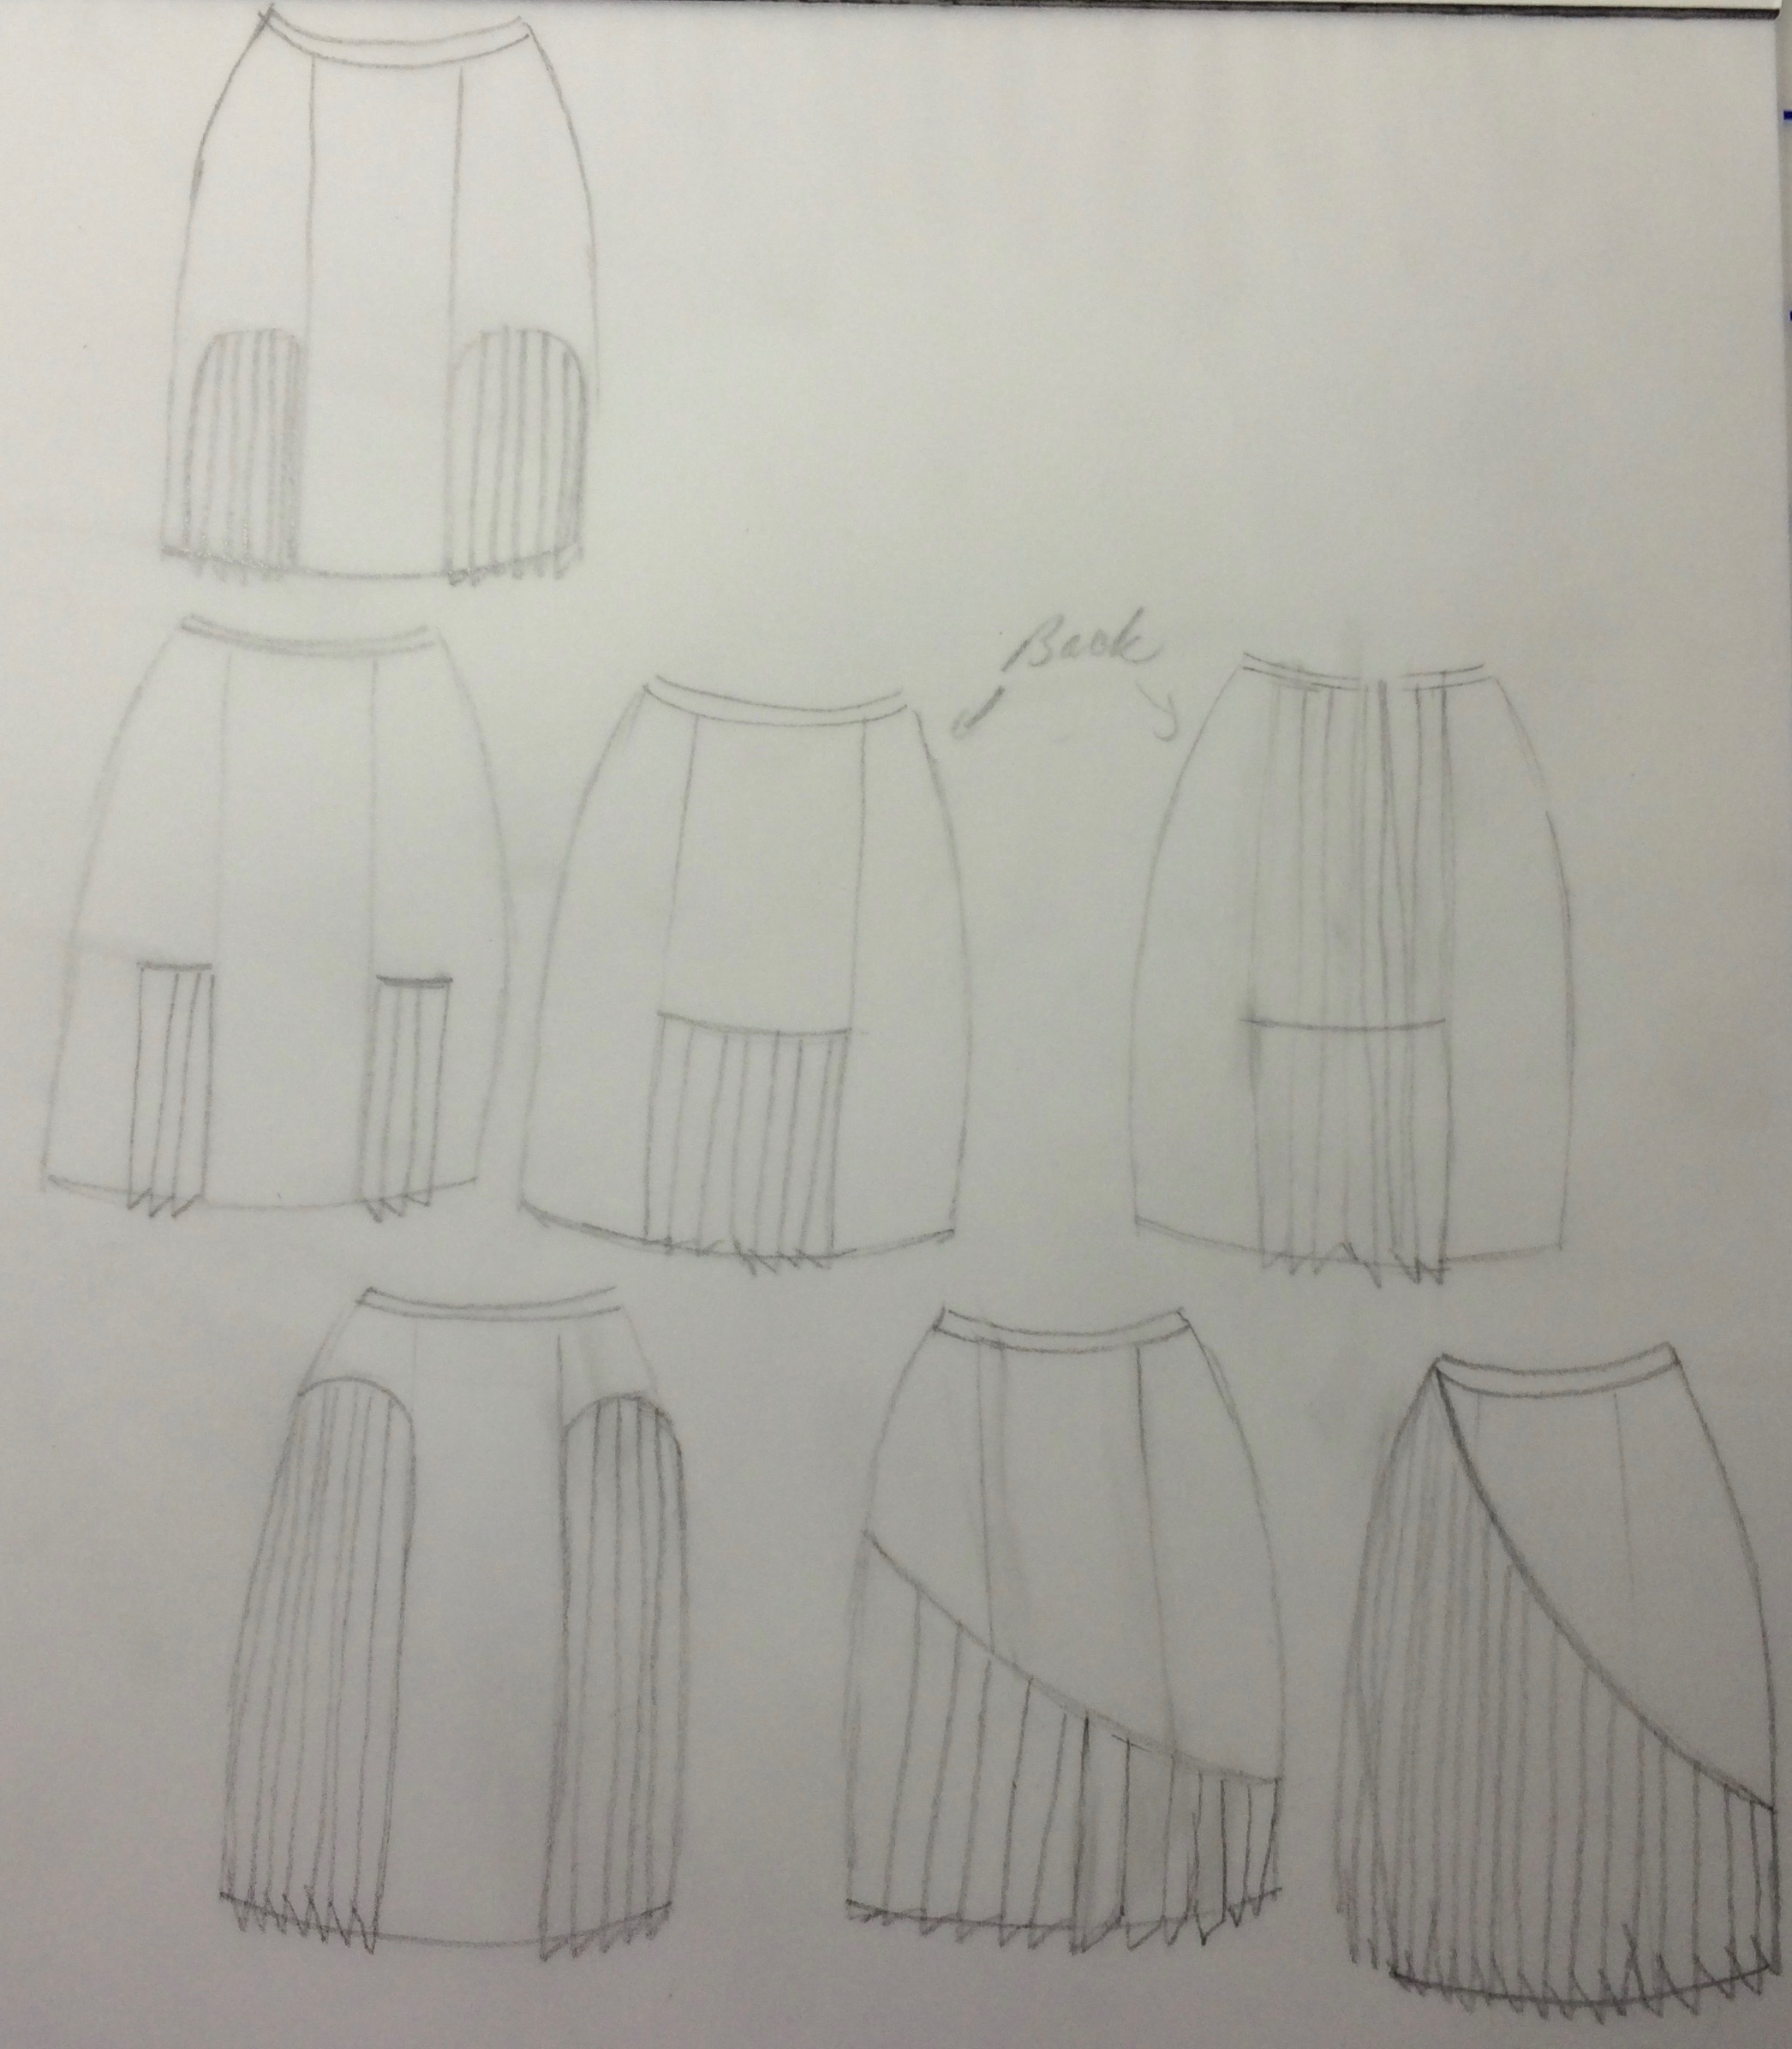
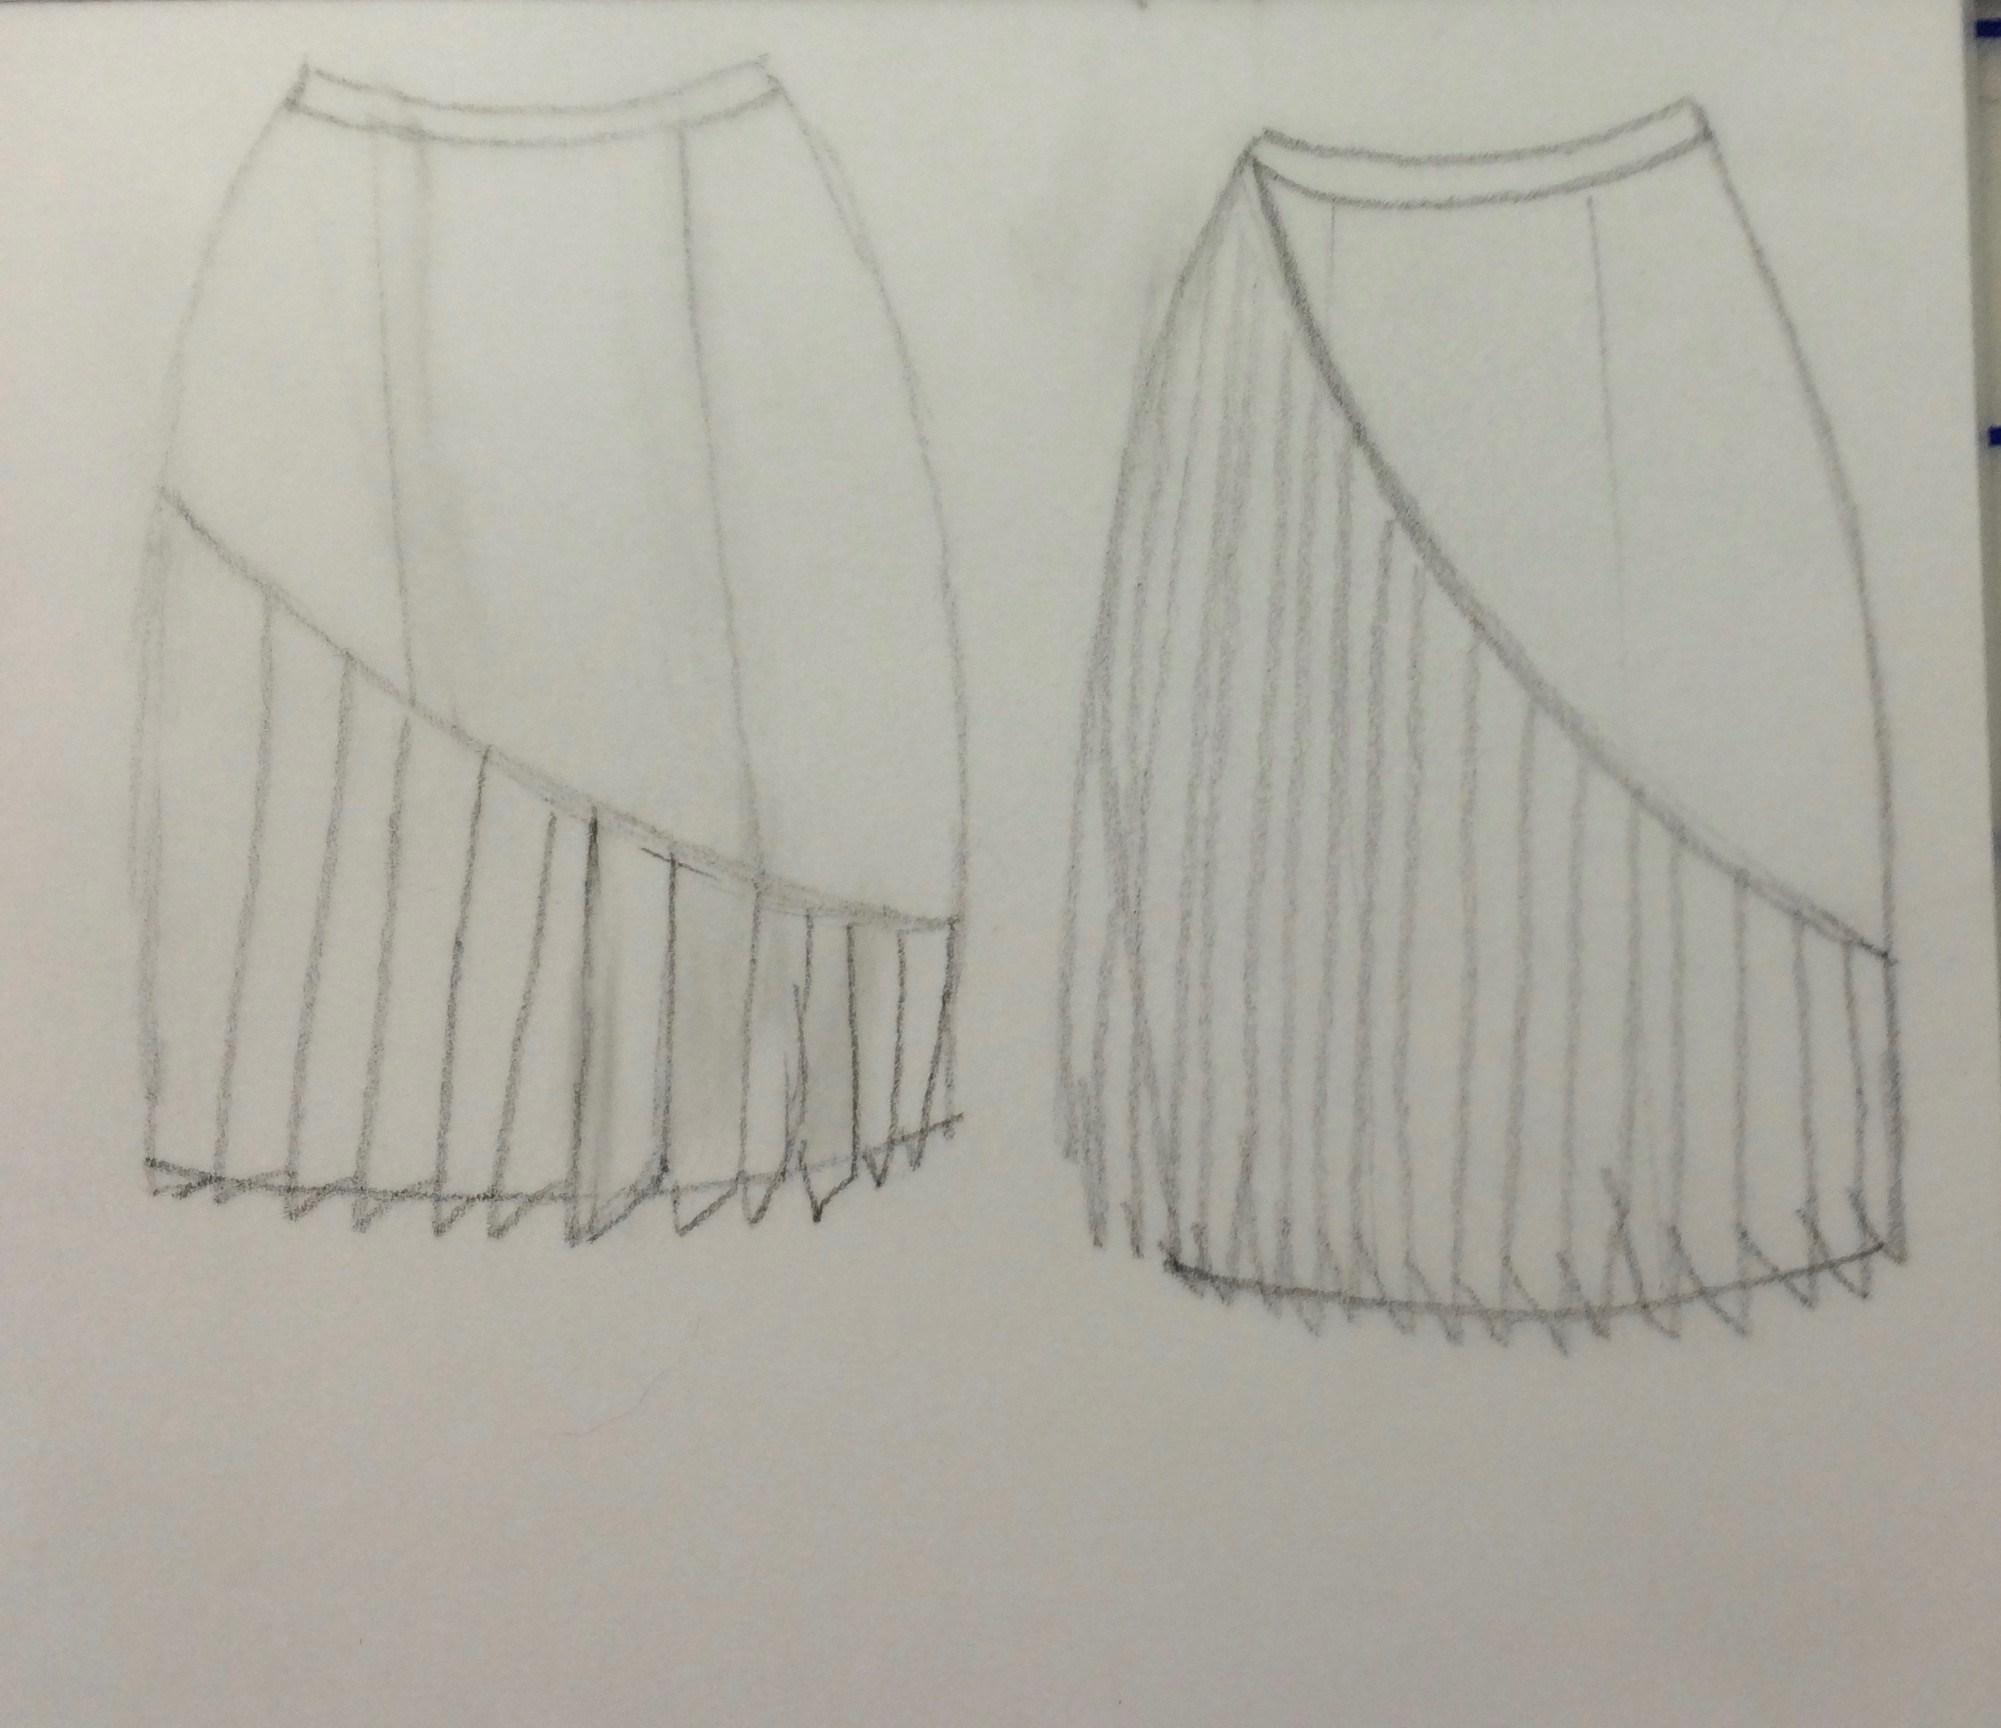
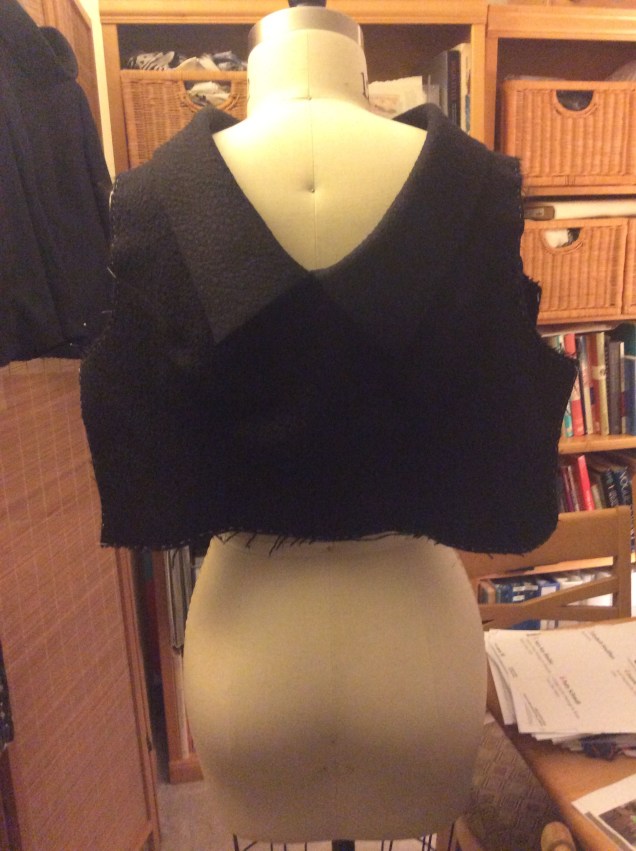
With the fabric selected, it was time to develop a pattern. I wanted a full skirt, which was achieved by slashing and spreading copies of my basic armscye princess dress pattern pieces. Instead of a waist seam that would cut me in half and add bulk where I’m plenty bulky enough, I wanted to achieve the transition from a fitted bodice to the full skirt with fairly generous release pleats. I also wanted a wide, gently curved neckline and a rolled collar that had overlapping ends on one shoulder.

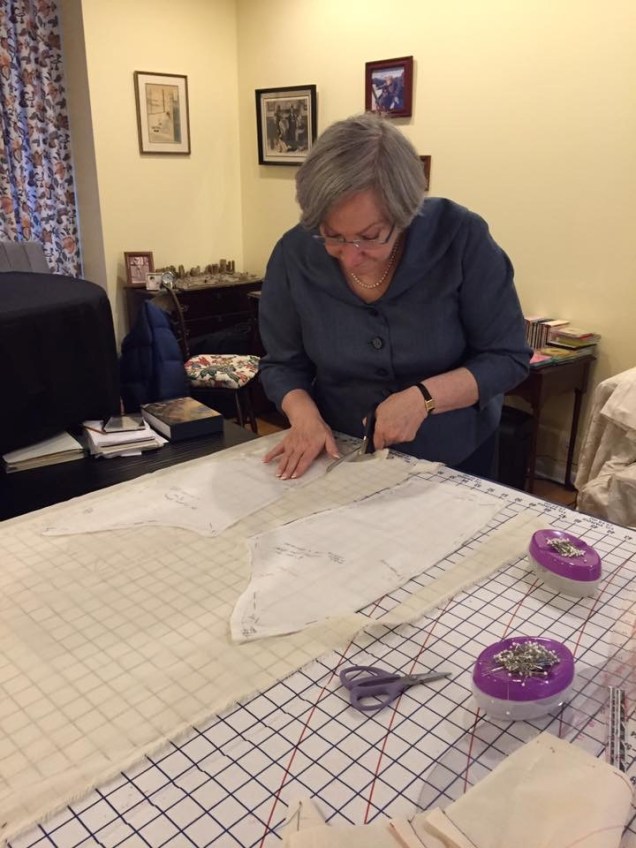
I was scheduled to share a day with my friend Steph King from Siouxigirl Designs working privately with Sarah Veblen before attending her class Exploring Fashion Design—Design I in mid-May. Steph brought several muslins and I had planned to do the same when we originally scheduled the session. But, with the leaf print dress project that needed to be completed before June 10, that became the only thing I was going to have time to work on that day. Grouse, grouse grouse!

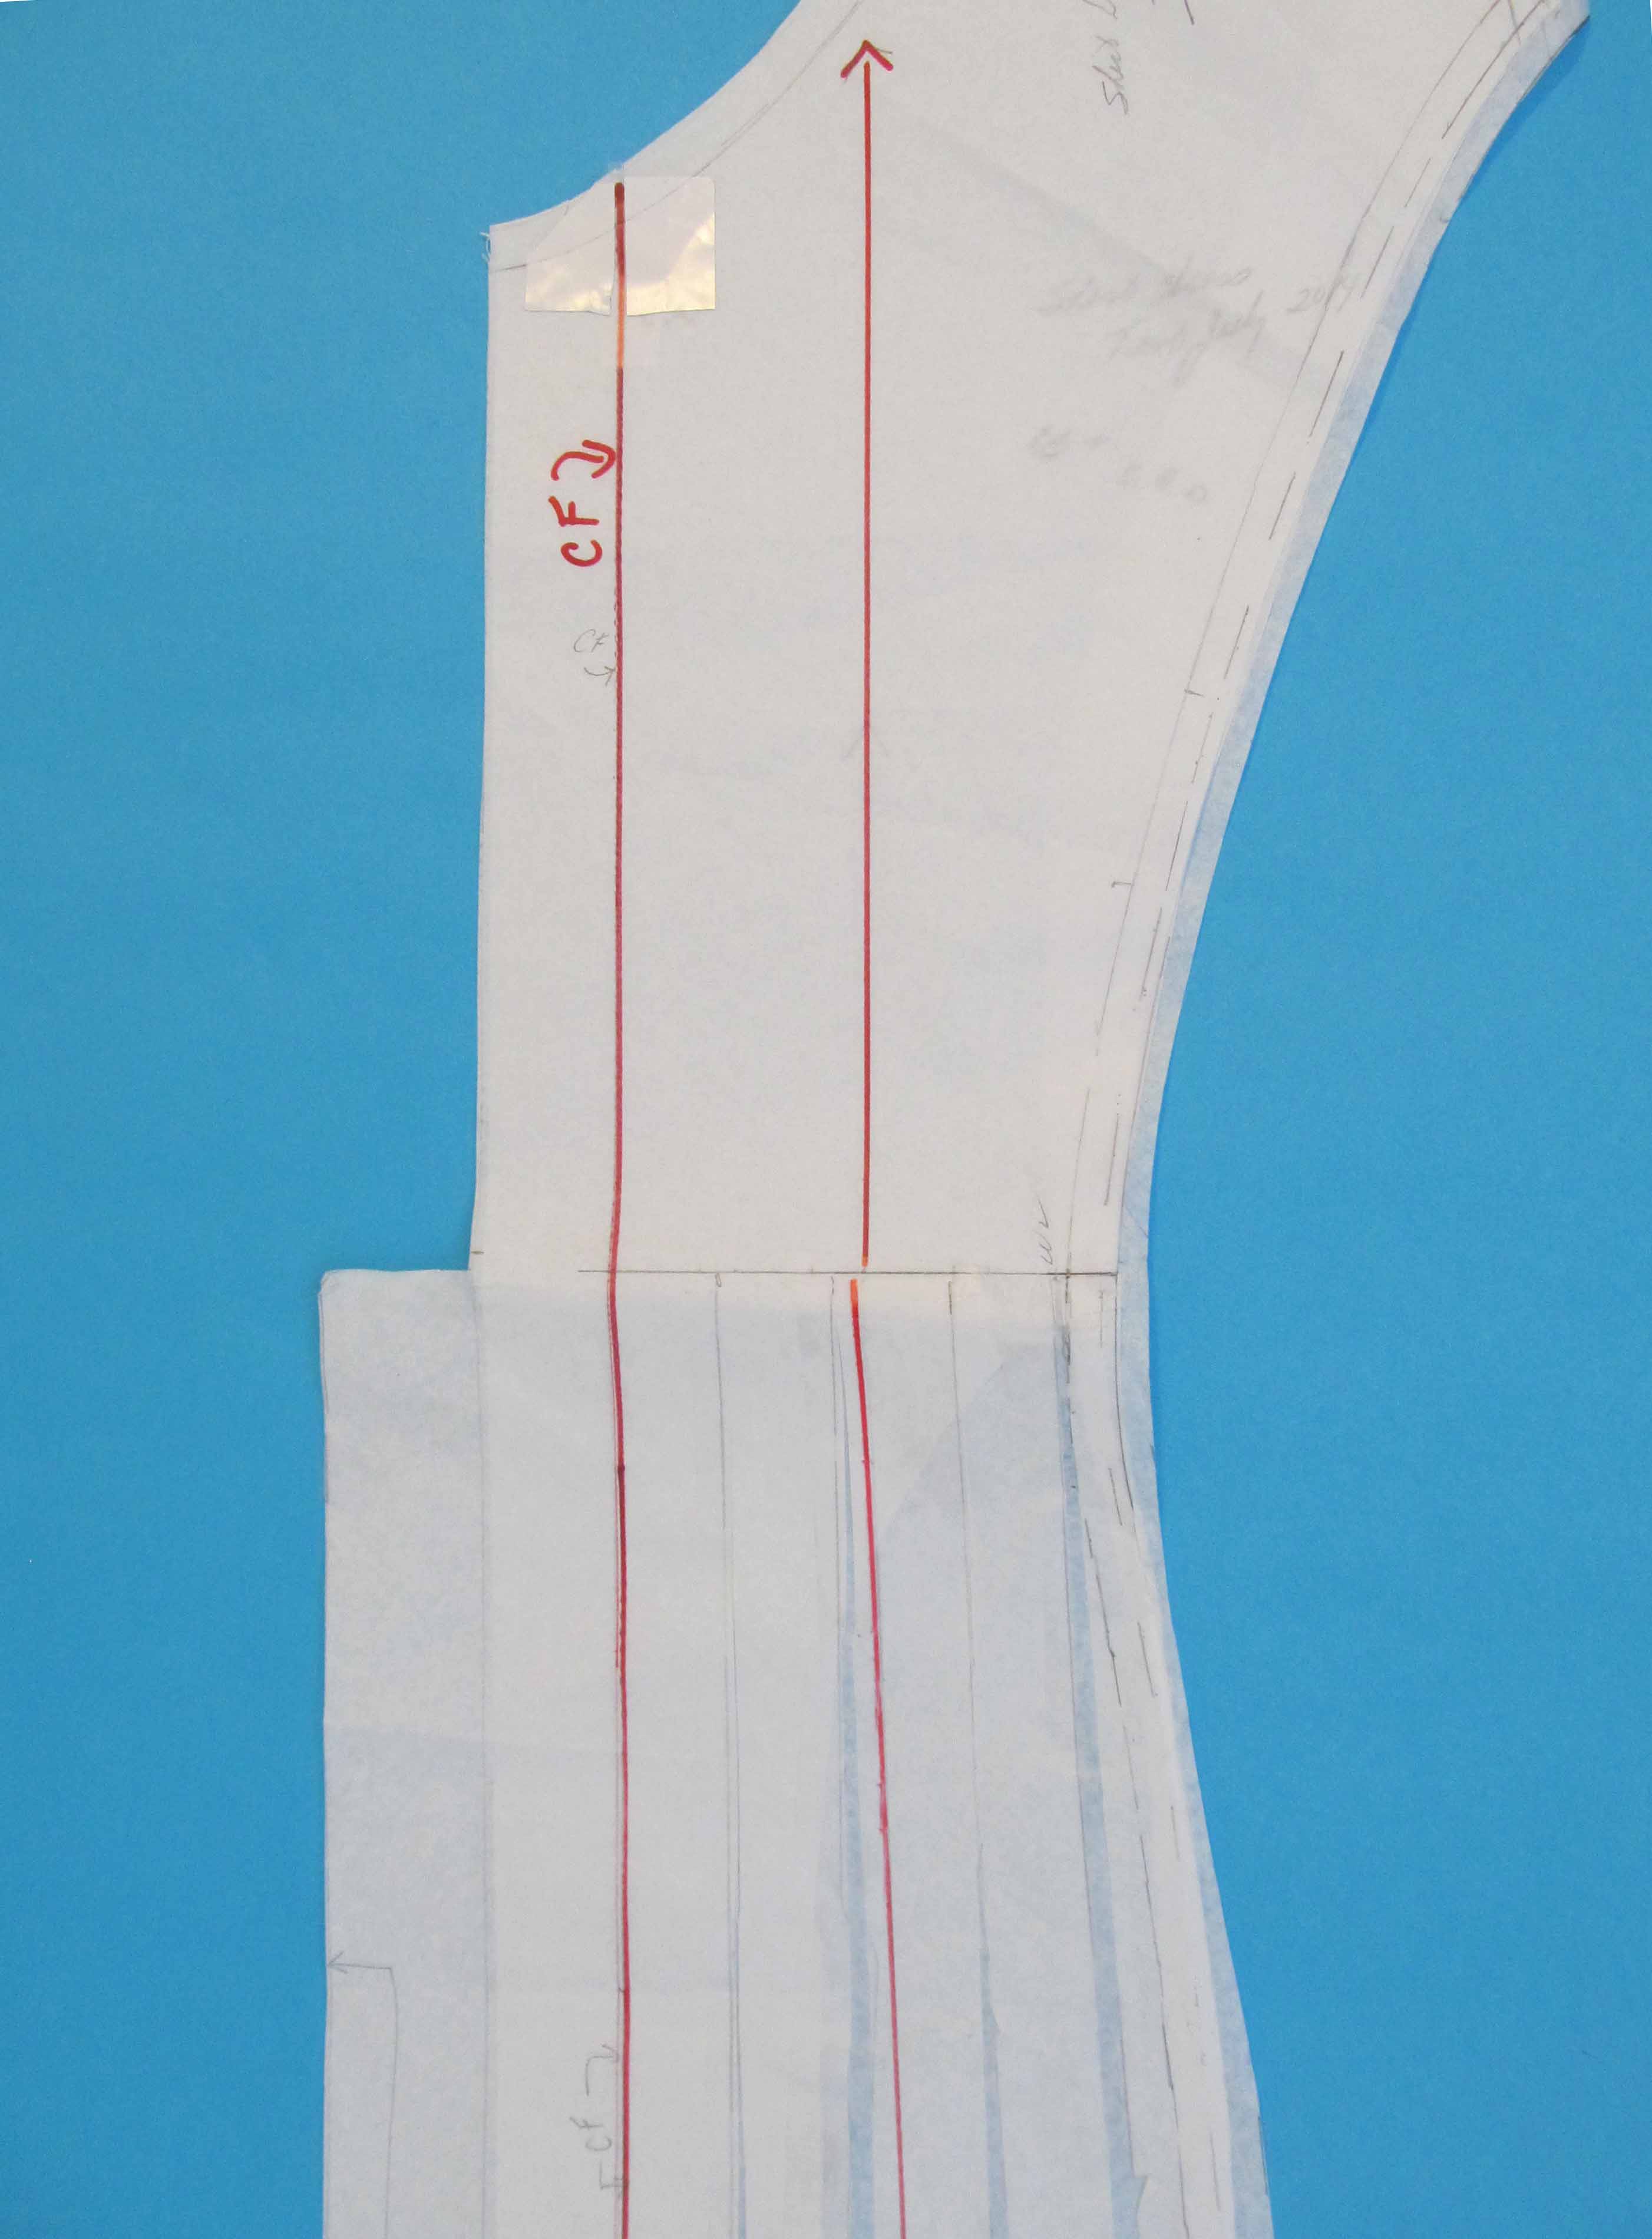
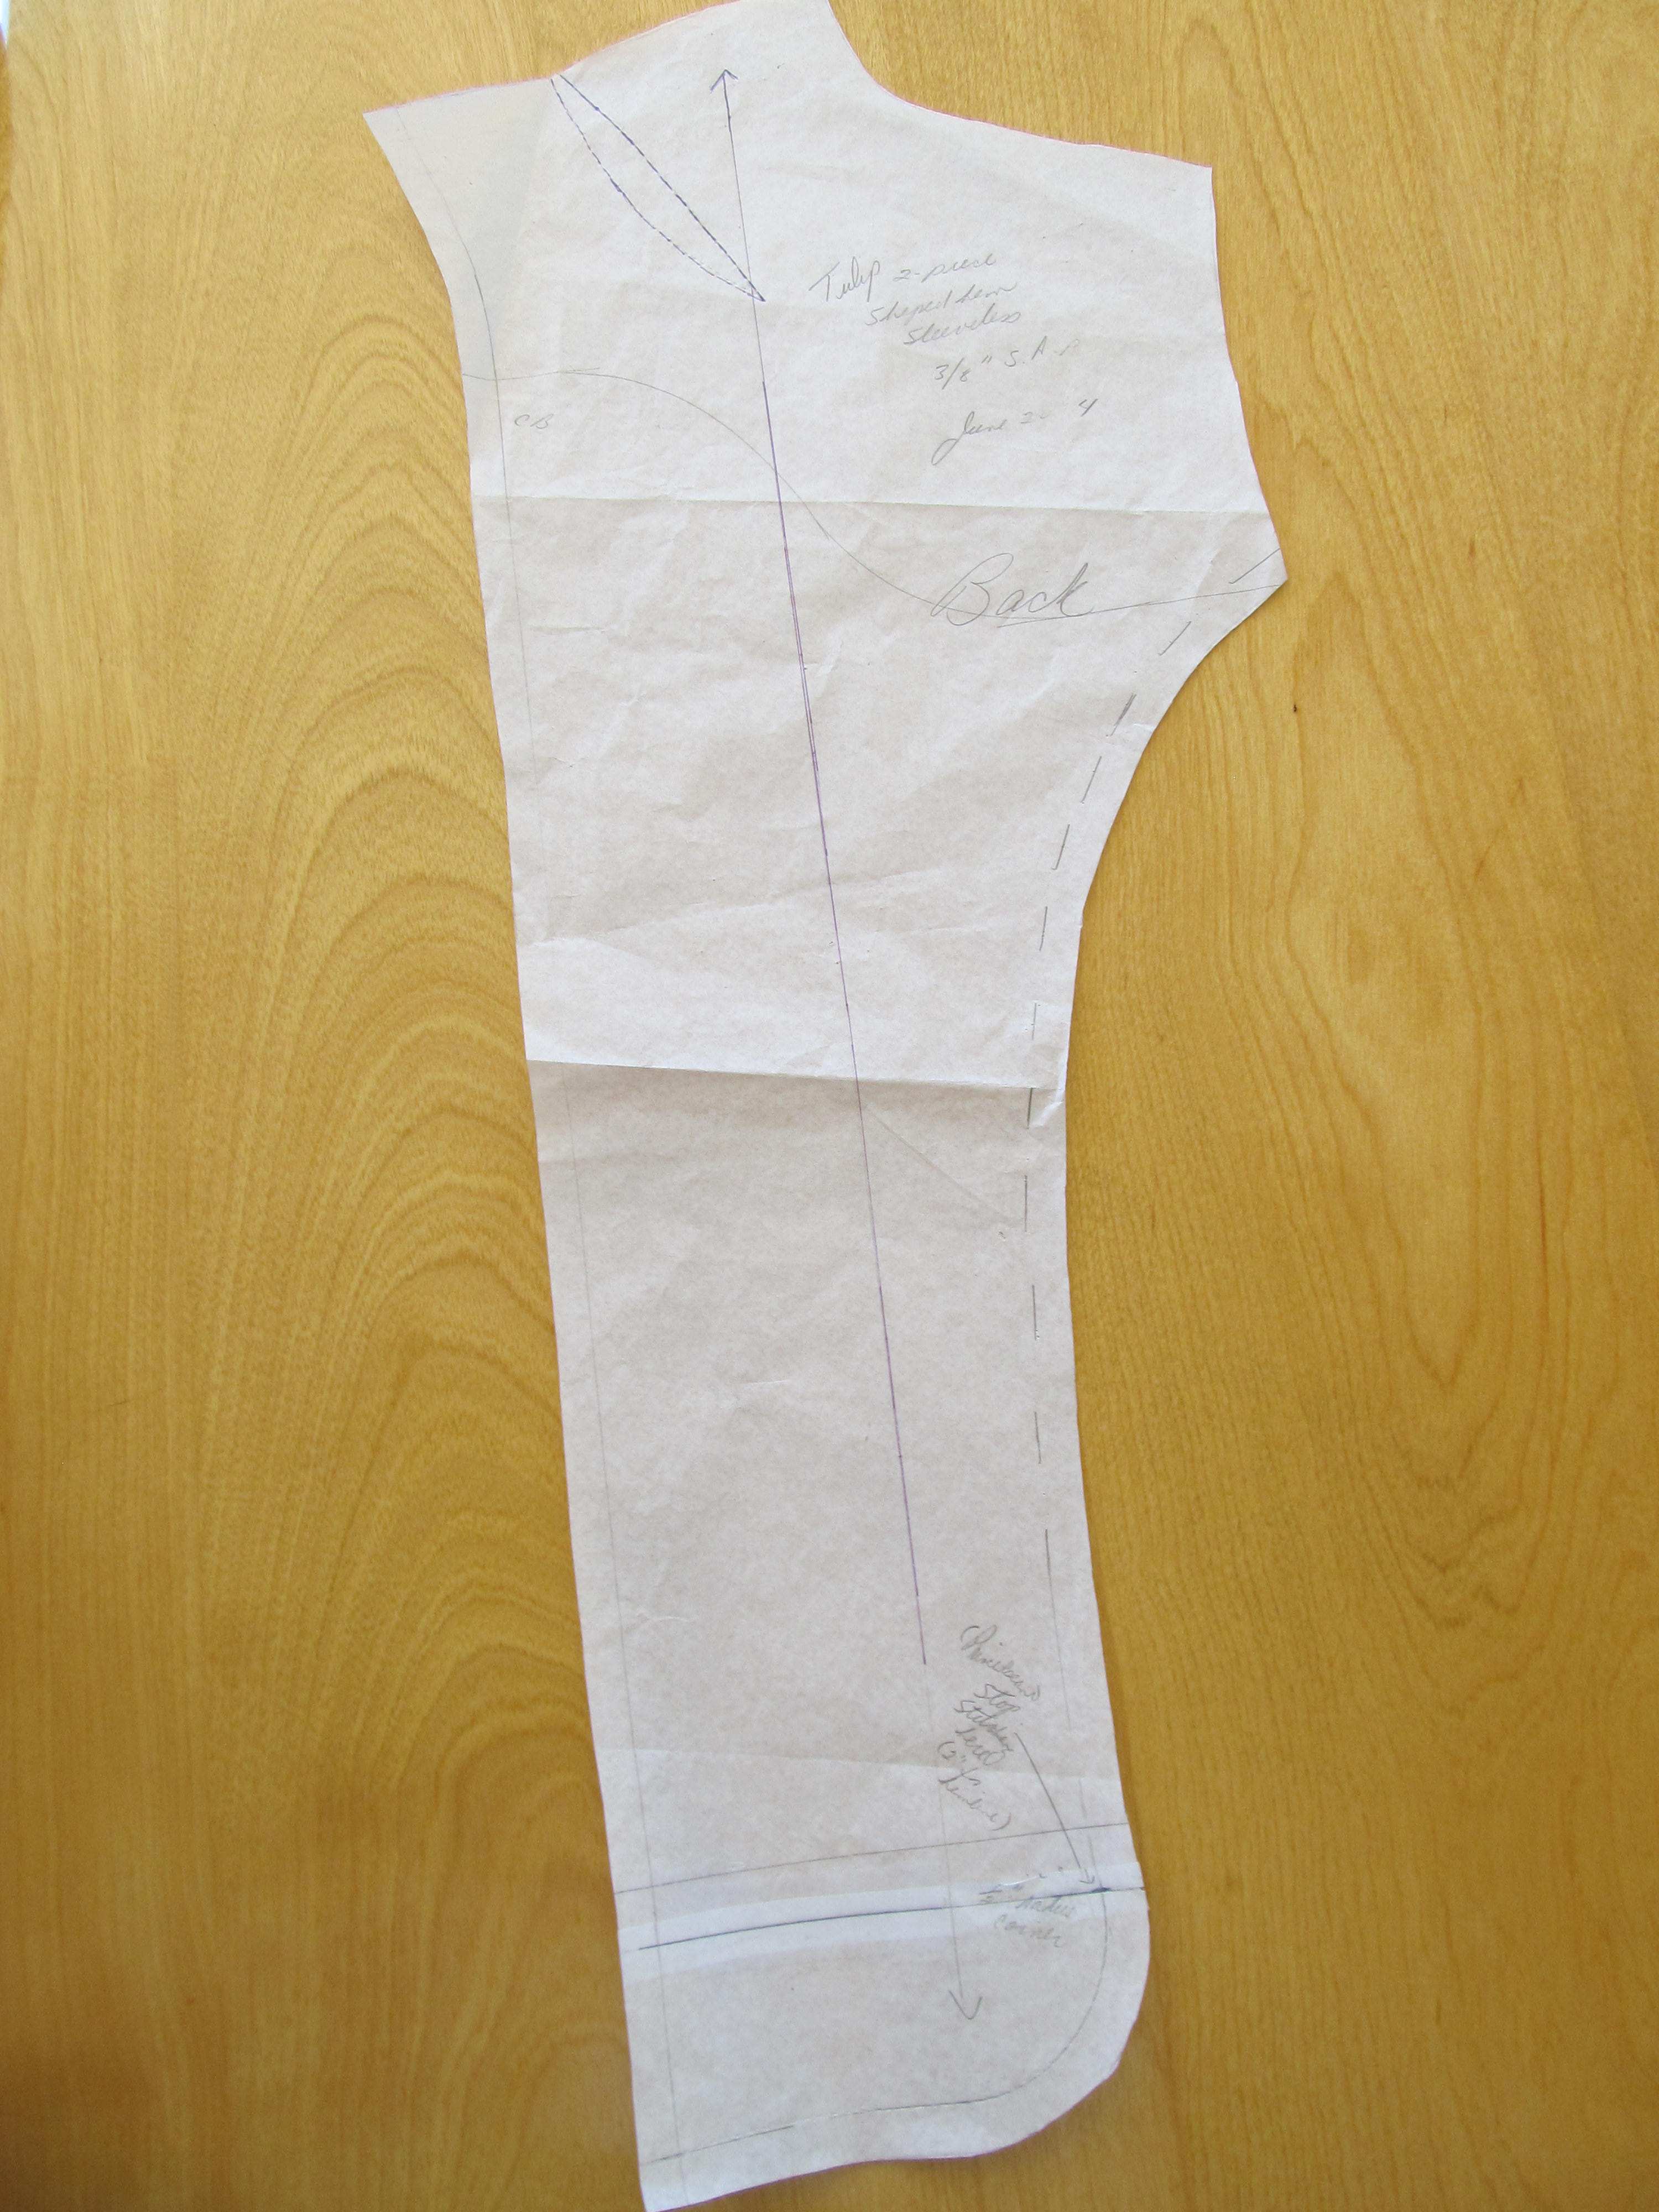
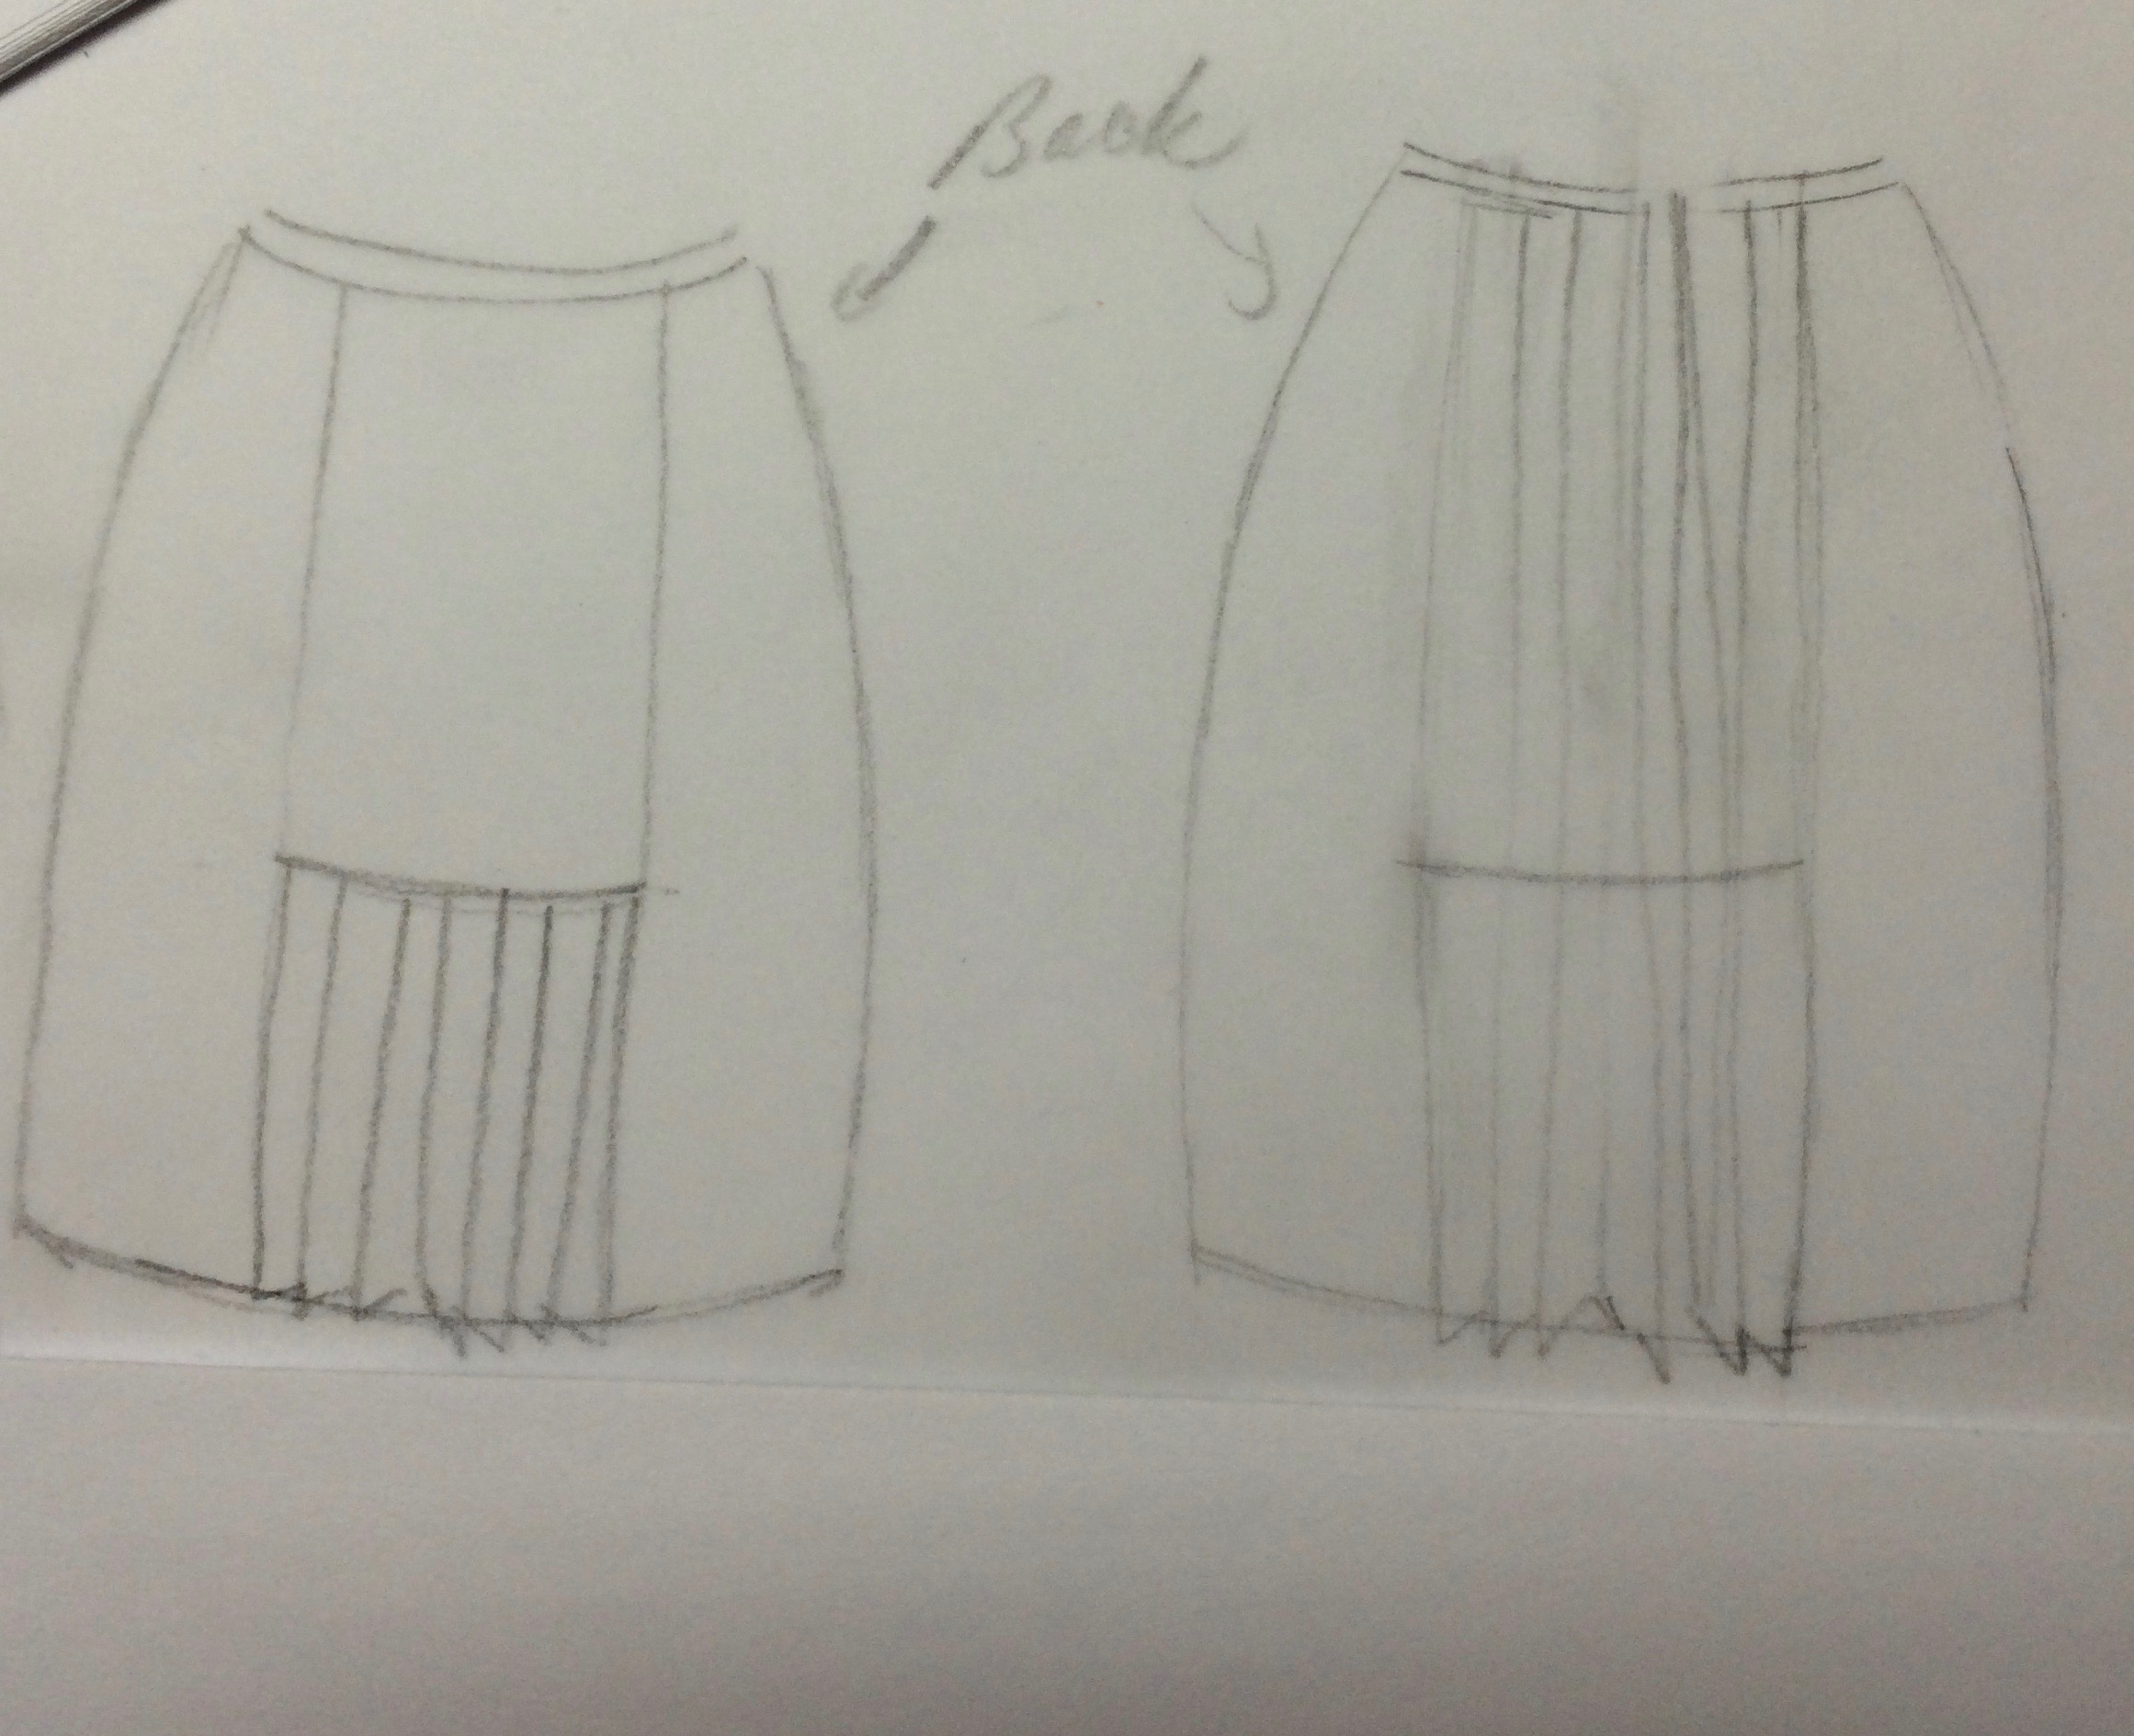
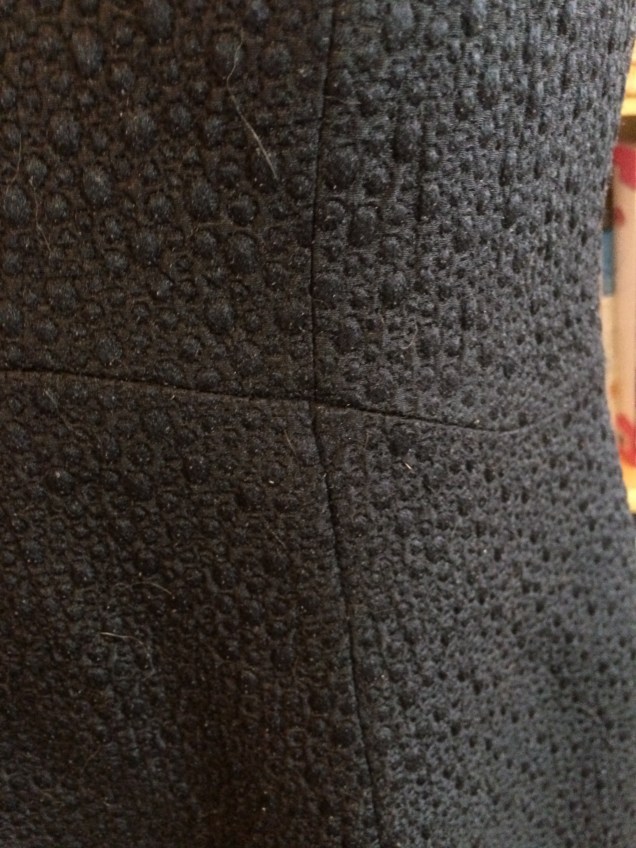
Before flying to Baltimore, I drafted the pattern and mocked it up in muslin. I left the release pleats for Sarah to place and drape on me. We decided the dress needed a third pleat on each side at the front princess seam. That required angling the princess seam outward from above the waist to the hem. It also required some working out of the construction process, which ended up to be sewing the princess seam first and then pressing and clean finishing the seam allowances. The next step was to sew the release pleat, which started at the seam and branched out below.

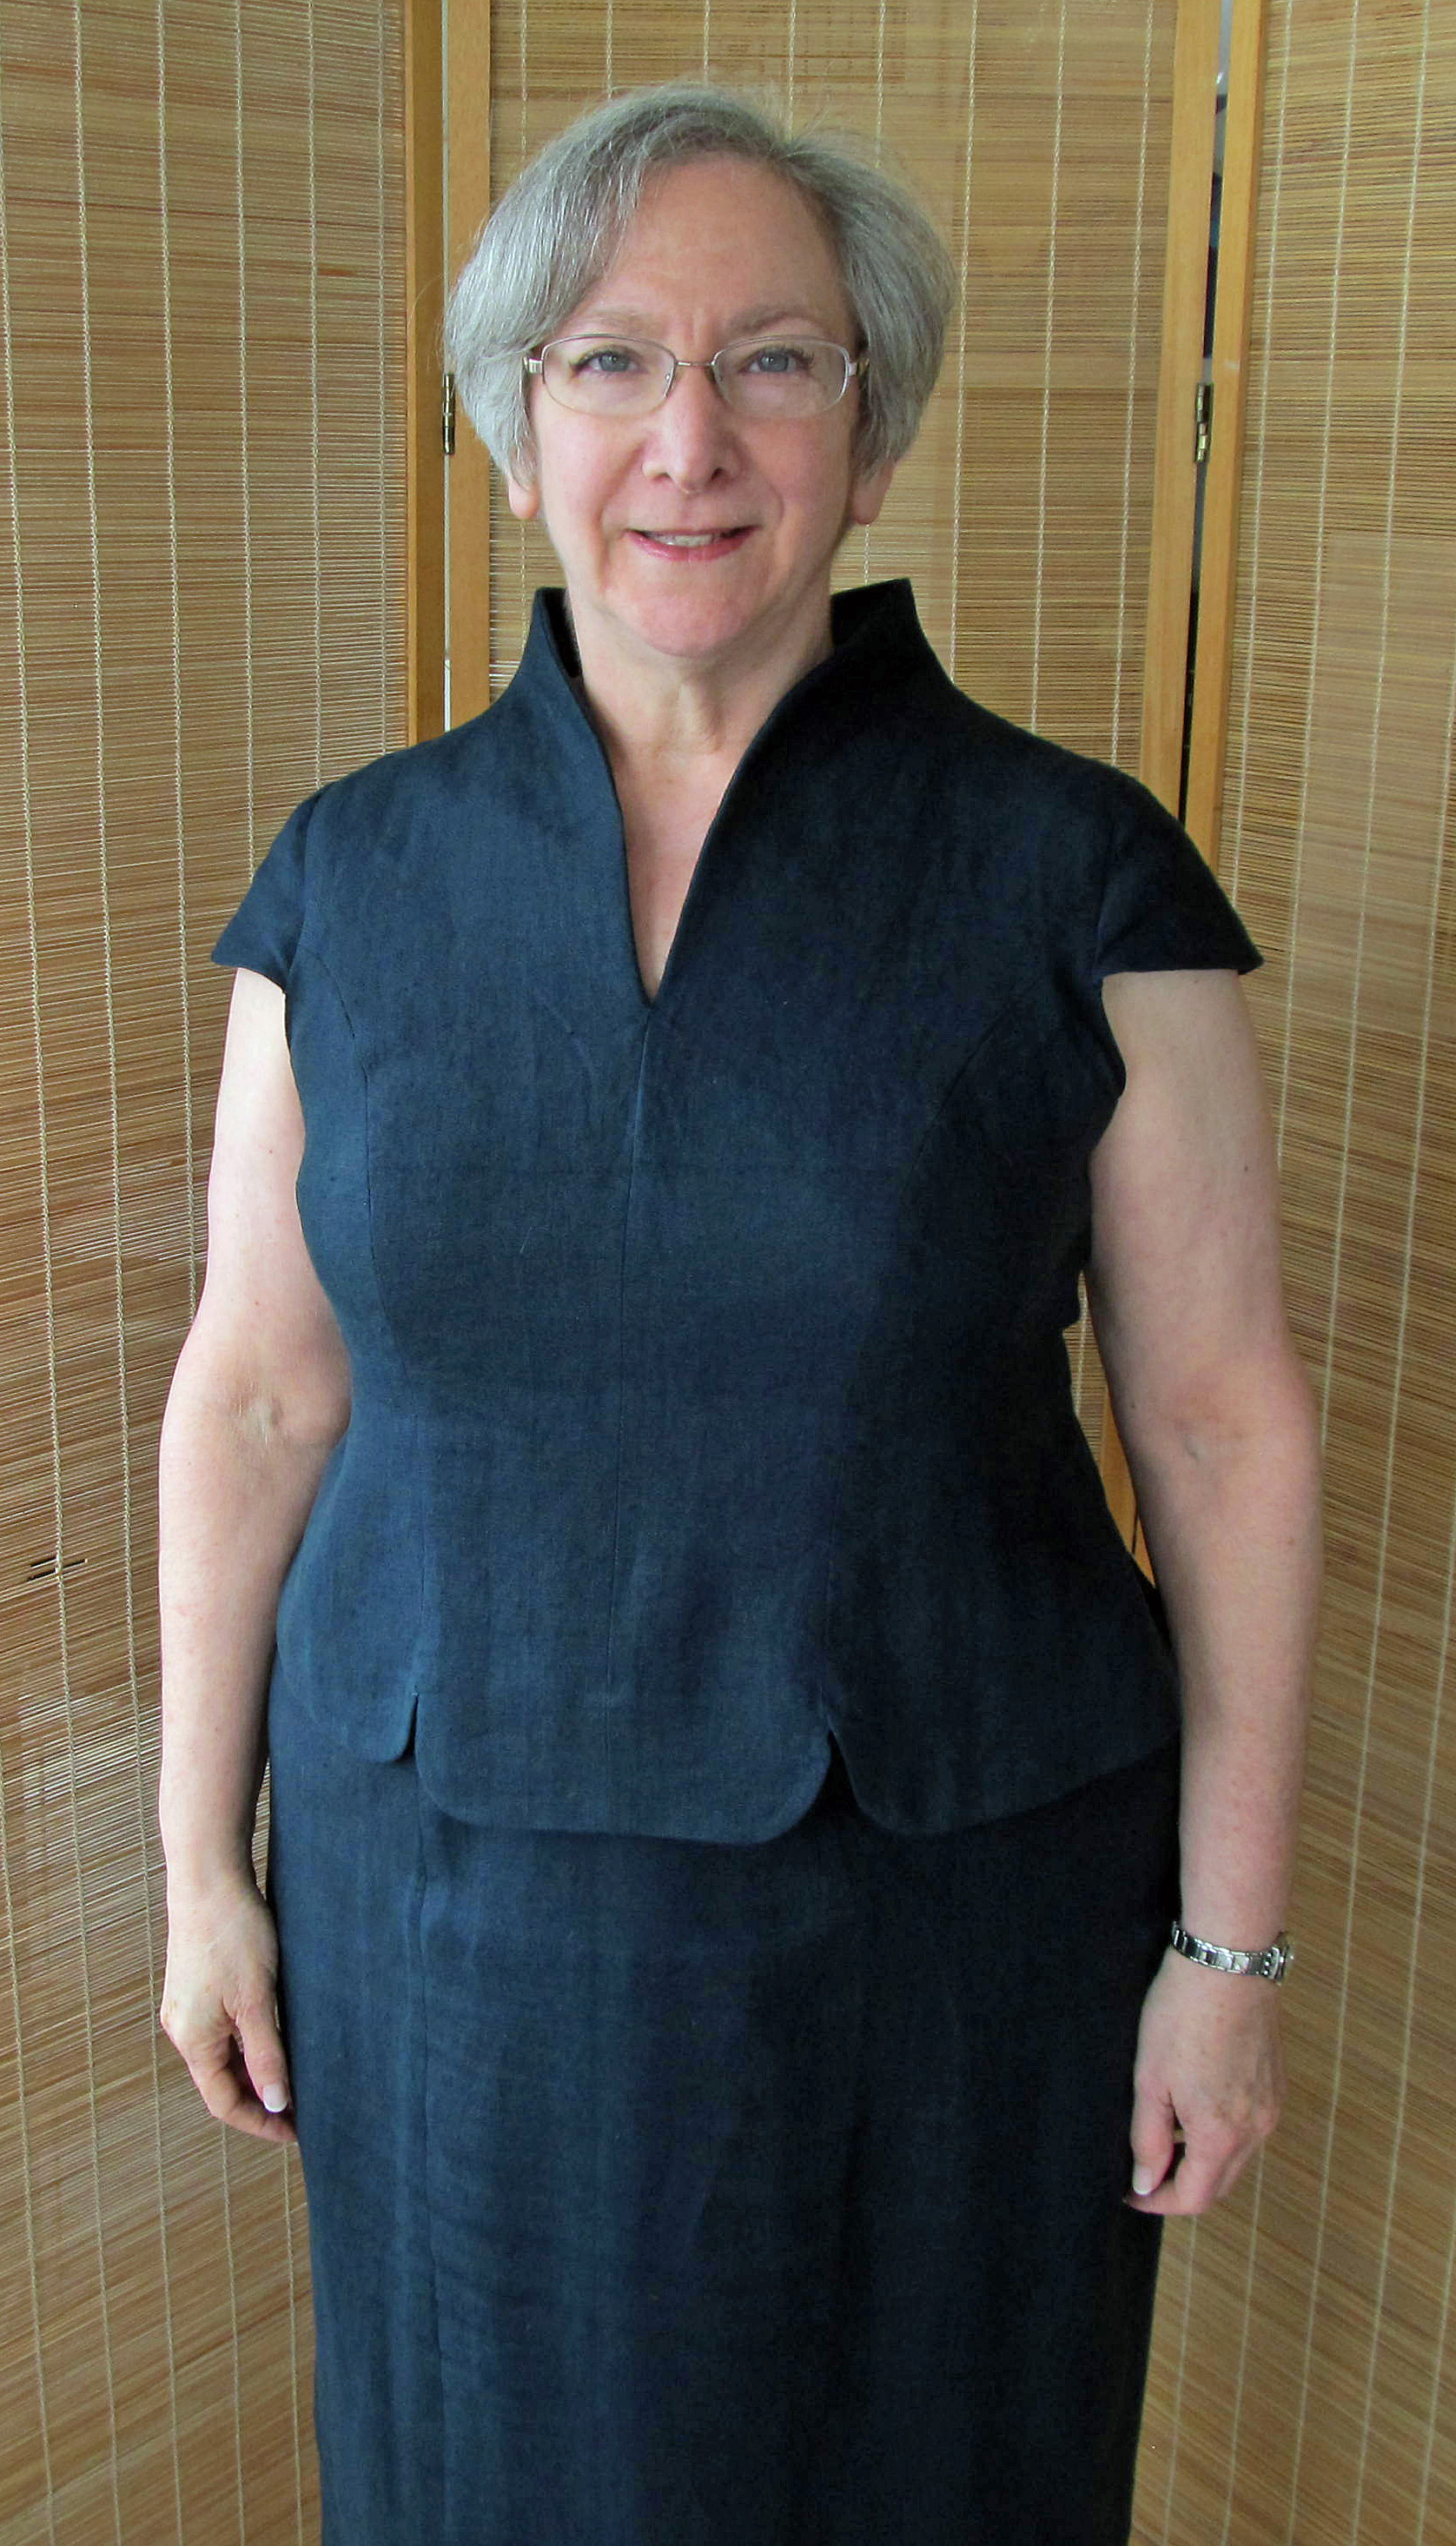
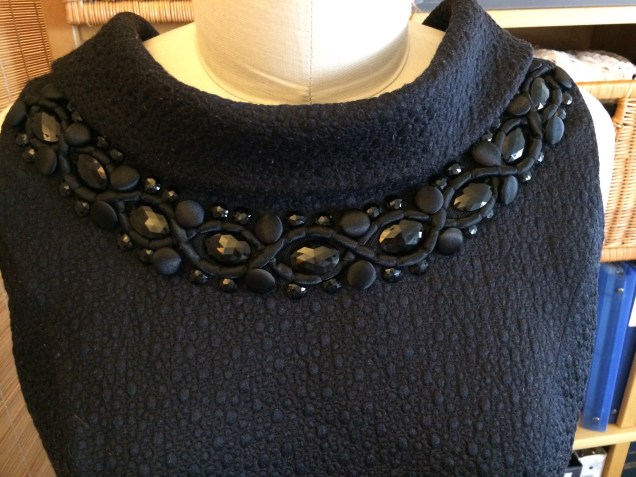
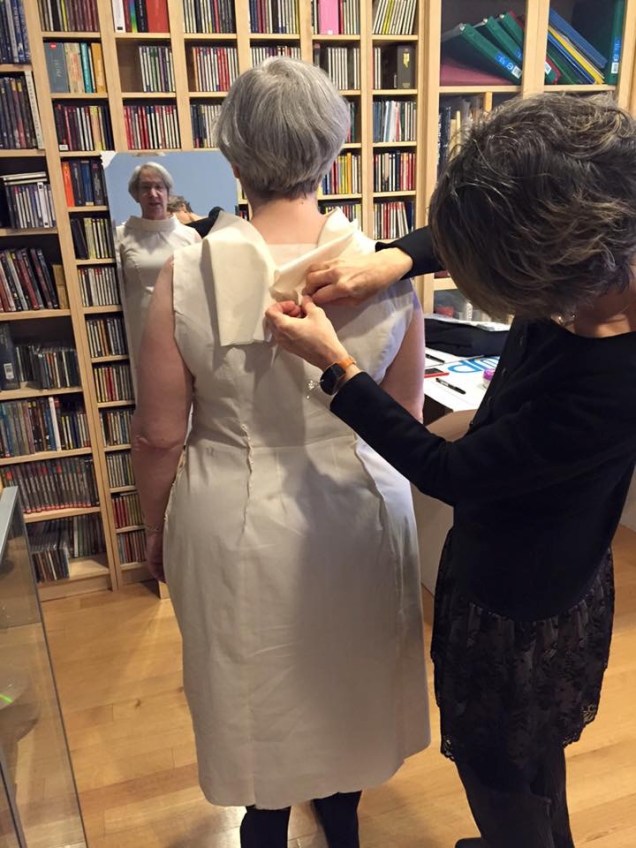
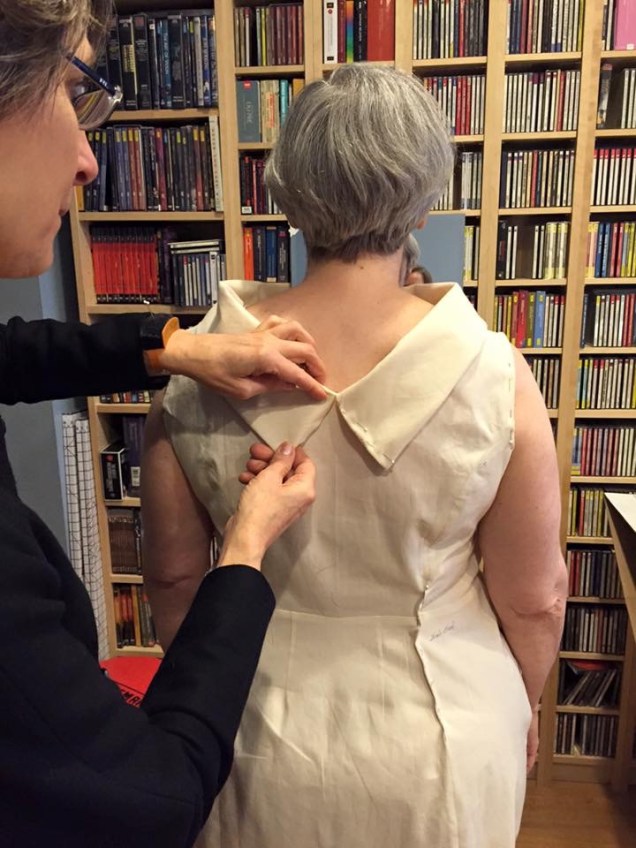
We took a critical look at the collar and ultimately decided to eliminate the overlap at the shoulder. Instead, I connected it at center back. Sarah suggested a silk dupioni undercollar, which I interfaced with soft stretch fusible. The upper collar is underlined like the rest of the dress.

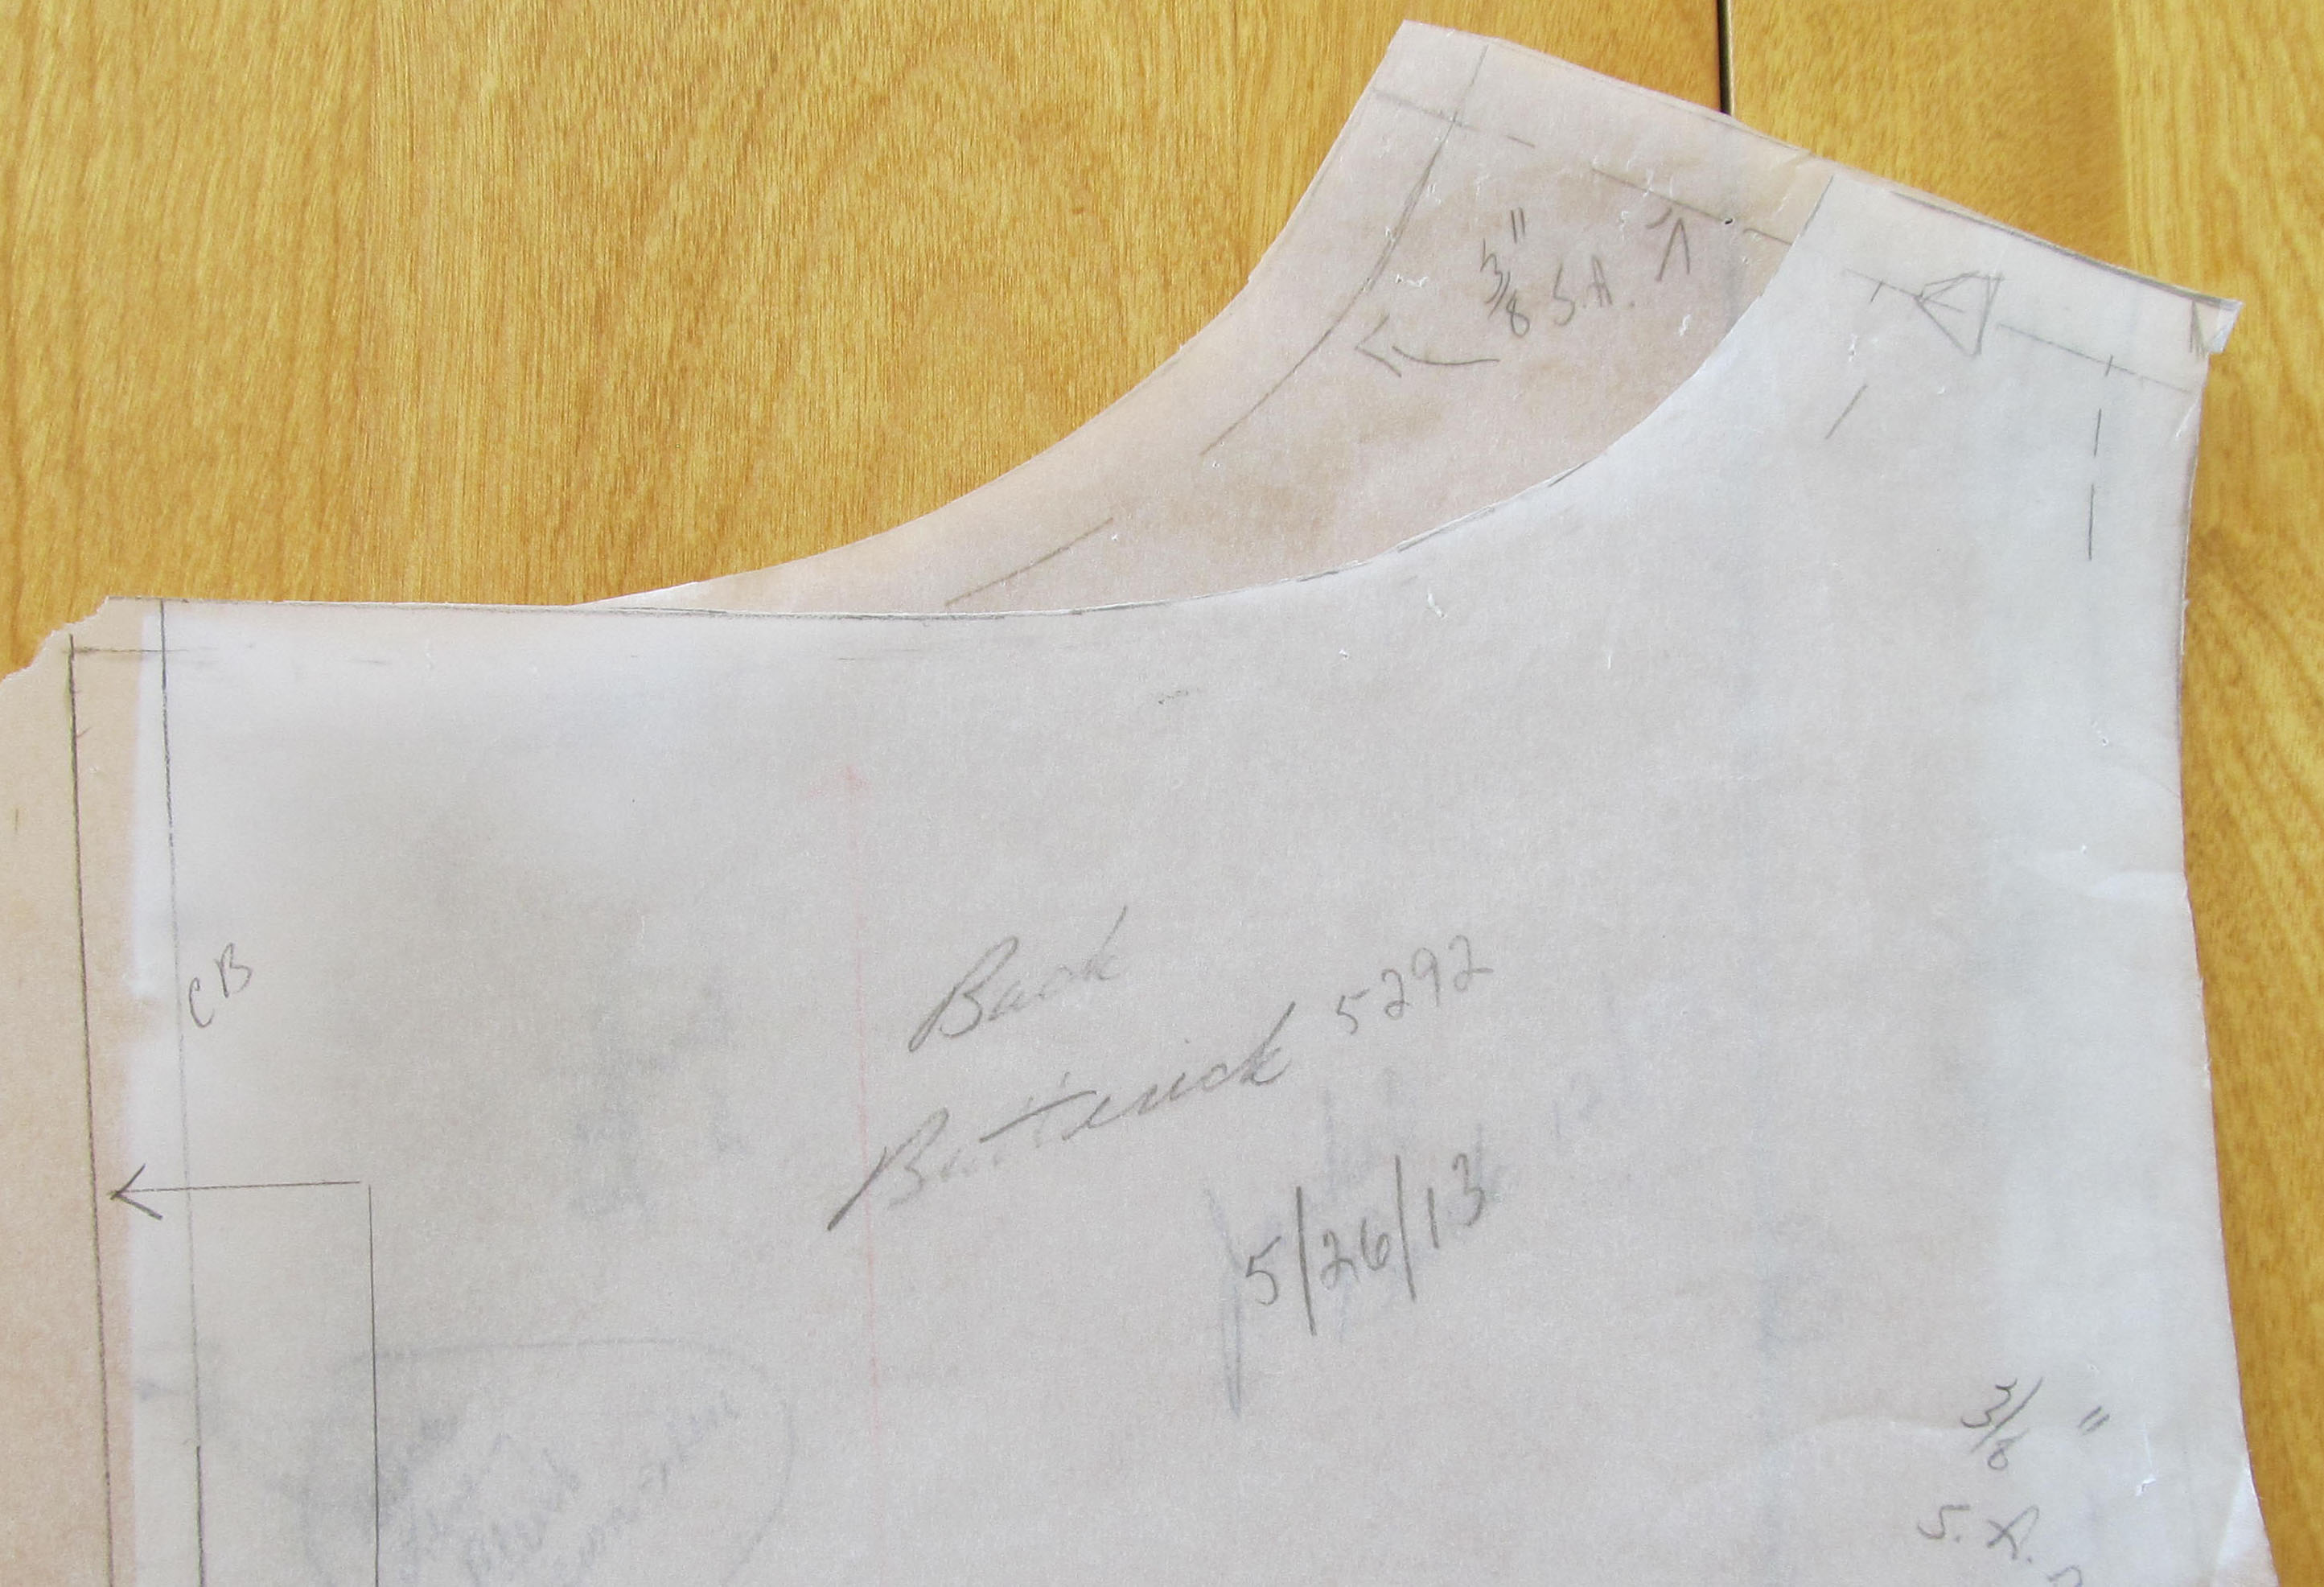
Sarah had told me to bring the fabric with me so she could help me lay out the pattern. Because of the scale and complexity of the print, I ordered lots of extra fabric. Ordinarily, I order three yards of fabric for a dress and I have plenty left over. I ordered five yards and don’t have much of anything usable left over. I knew that strategic placement of the pattern would require full pattern pieces for the front and back as well as the collar, because each piece had to be laid out on a single layer of fabric.

Sarah walked me through her thought process in placing pattern pieces. One of the primary goals was to break up the white areas. Next, it was important to avoid having the print march across the dress. This is not a print where we wanted to match motifs at seamlines, but we wanted transitions that weren’t jarring. If I had been left to my own devices on this step, I would have spent a lot of time wondering and questioning my decisions. Instead, Sarah guided me in placing each piece. She left me to pin and cut and then come up with an idea of where the adjacent piece should be placed while she worked with Steph or did something else.  I’m pretty sure all the placements I suggested were changed, but each time the reason for the adjustment made sense.

IMG_5613

The last decision to make was where to place the collar. We rejected having black at center front and knew we wanted to avoid white there. We opted for that pretty blue and found an orientation that worked. It took hours to get this thing placed and cut!

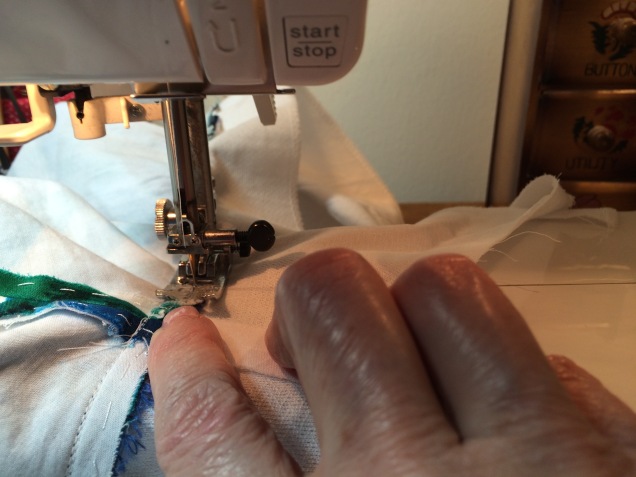
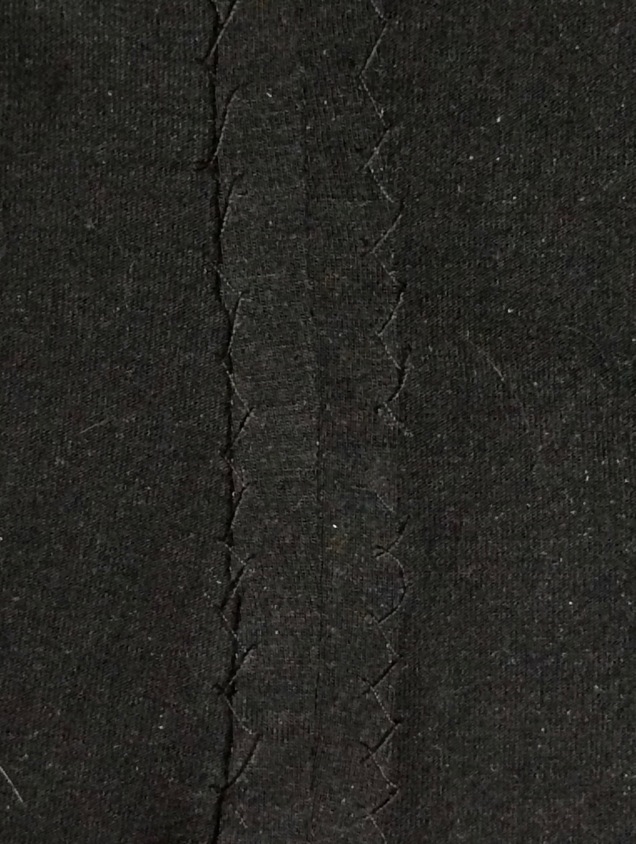
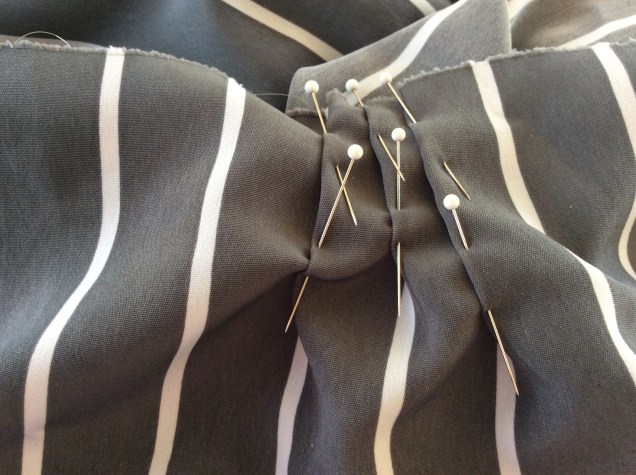
After hand basting the batiste to the fashion fabric, construction was fairly straightforward. I mentioned the process we worked out for the princess seam release pleat earlier. The other four release pleats (two on each side front panel) start and stop in the middle of the fabric with the starting points staggered. For these, I started with a locking stitch, then sewed for about an inch with very short stitches (1.1 on my machine). I then switched to a regular stitch length, returning to the short stitches an inch before the end. At the end, I used a locking stitch, stopped with needle down, raised the presser foot and pivoted then stitched over the last inch with the same short stitches.

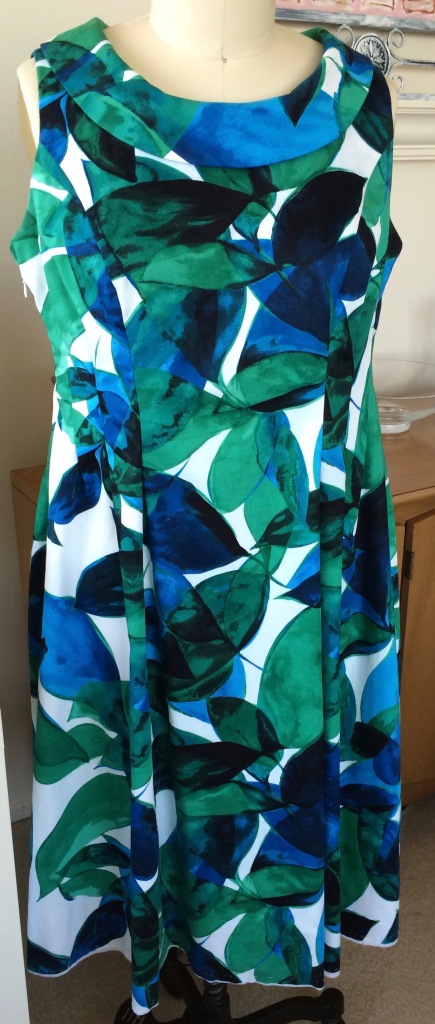
The cotton batiste underlining really makes this dress work. It controls the stretch in the fashion fabric, which was the primary reason for adding it, but it also makes the skirt in the area below the release pleats fall in nice soft folds.

This is the first garment I’ve made in a long time that isn’t lined. Because it’s a summer dress and it already has that extra layer of underlining, Sarah advised me to not line it. The seam allowances are serge-finished. The side seams are pressed open and were serged before stitching. The princess seams were serged together after stitching, pressing and clipping the curves where necessary. Those seam allowances are pressed toward the center.

When working on the design, Sarah advised me to make a facing with the cotton batiste I used for underlining. I drafted an all-in-one facing for the neck and armholes and interfaced the batiste with soft stretch fusible. In drafting the facing, I was overly timid about its depth. For next time, I’ll draft a facing pattern that is more generous. In this one, I made sure I anchored the bottom edges by hand sewing them to the underlining. I also anchored the pleat intake the same way.

IMG_1618

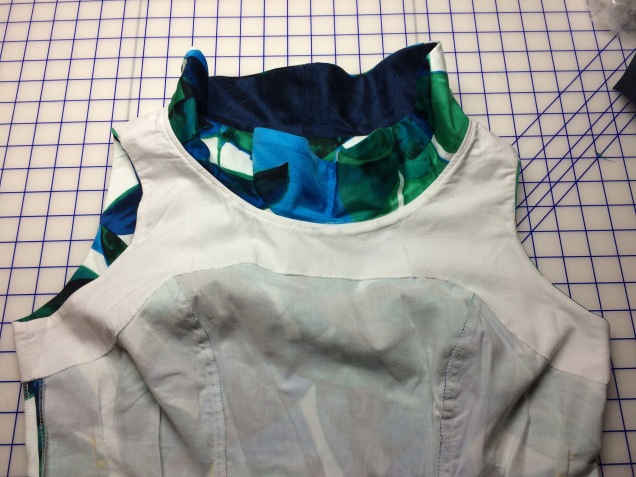
I was able to attach the facing to the neck seam and armscyes completely by machine. I first attached the facing at the neck on the outside of the dress, with the collar sandwiched in between. With the underlined fashion fabric, interfaced undercollar and interfaced facing, there was a pretty hefty stack of layers to deal with and even more when sewing over the shoulder seams.

After stitching, pressing and clipping the curves where needed, I understitched all around. The key to understitching is to make sure the seam allowance and facing (or lining) are flat on the bed of the sewing machine and any clips to allow for curves are spread out so they can do their job. And it’s really important to make sure that the only things under the presser foot are the seam allowances and facing. In another project, I kept catching bits of the collar and decided I needed to take a break.

IMG_1352

To attach the collar, attach the facing and understitch, I used directional stitching. That is, I started at the shoulder seam and sewed to the center front, then sewed from the opposite shoulder to center front and repeated the process in the back.

The facings are drafted with ¼ inch subtracted at the armscye from the shoulder, tapering back to the original seamline at the princess seams. This encourages the facing to stay hidden. To attach the facing at the armscyes, the facing is already turned to the inside of the dress, but by doing this step before the side seams were sewn, I was able to attach the lower part of the facing to the lower parts of the arsmscyes without any fancy gymnastics.


IMG_1354

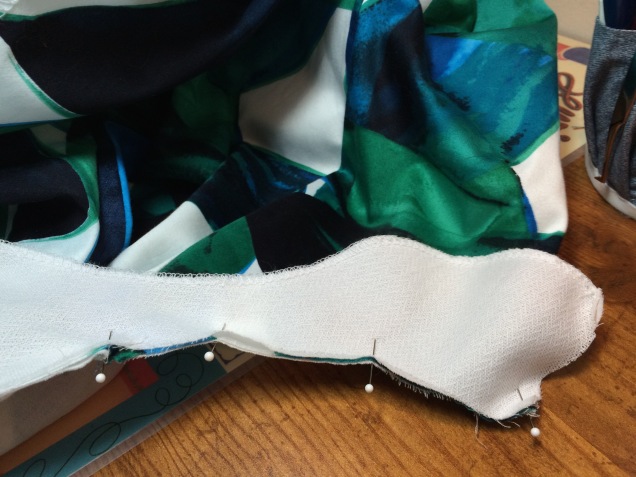
Things get pretty weird looking when you get toward the shoulder seams. You have to reach in between the fashion fabric and facing and pull the work down through the opening at the bottom of the facing to pin and sew the rest of the seam. The way to avoid having to redo this step is to make sure that anything that isn’t supposed to be sewn stays tucked into the tube and the only layers under the presser foot are the underlined fashion fabric and the interfaced facing. Frequent stops with the needle down to feel for that ridge of excess fabric and readjust as needed prevents having to spend quality time with the seam ripper.

The way to make this process go smoothly is to pin and sew one side (front or back) to the shoulder seam, then pin and sew the opposite side. When pinning the second side, the work can slide out easily and because it’s sewn in place it stays where it belongs and creates a path that shows where the new stitching is supposed to end up.

When done, it looks like a fabric sausage.

After turning it out, it had to be pressed with favoring so the facing remains hidden. I understitched as far as possible and pressed again.

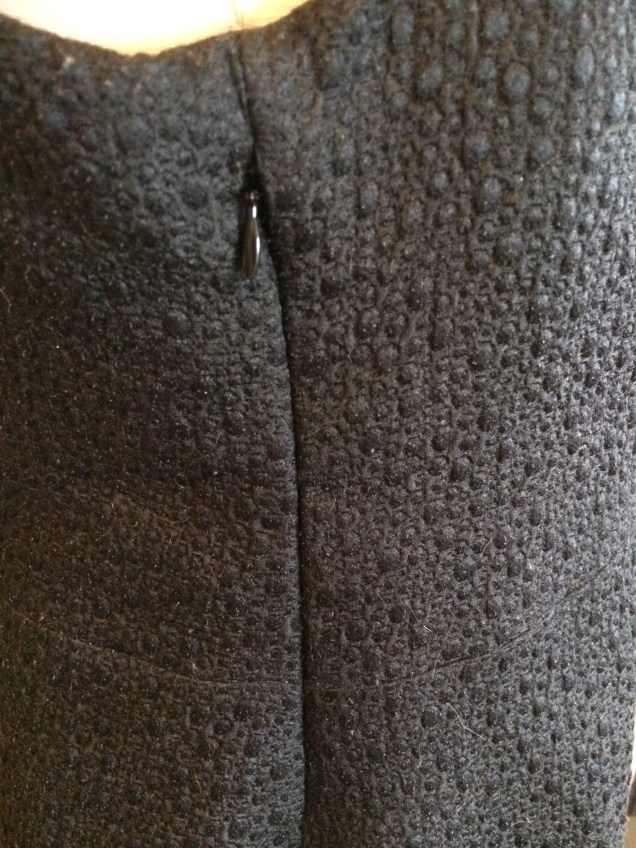
Every sewing project gives me grief at one point or another and this time it was the zipper. It’s an invisible zipper at the side seam, which I’ve done before and shouldn’t have been a big deal.

As much as I love the print and enjoy wearing the finished product, I’m still not a fan of stretch wovens. When the fabric arrived, it had some stubborn creases that resisted steaming and pressing and could only be removed with a vinegar and water solution and additional thorough pressing. The finished dress also developed quite a few creases in my suitcase and required thorough pressing before I could wear it. It’s pretty difficult to avoid woven fabrics with stretch these days, so I may just have to learn to live with these annoyances.

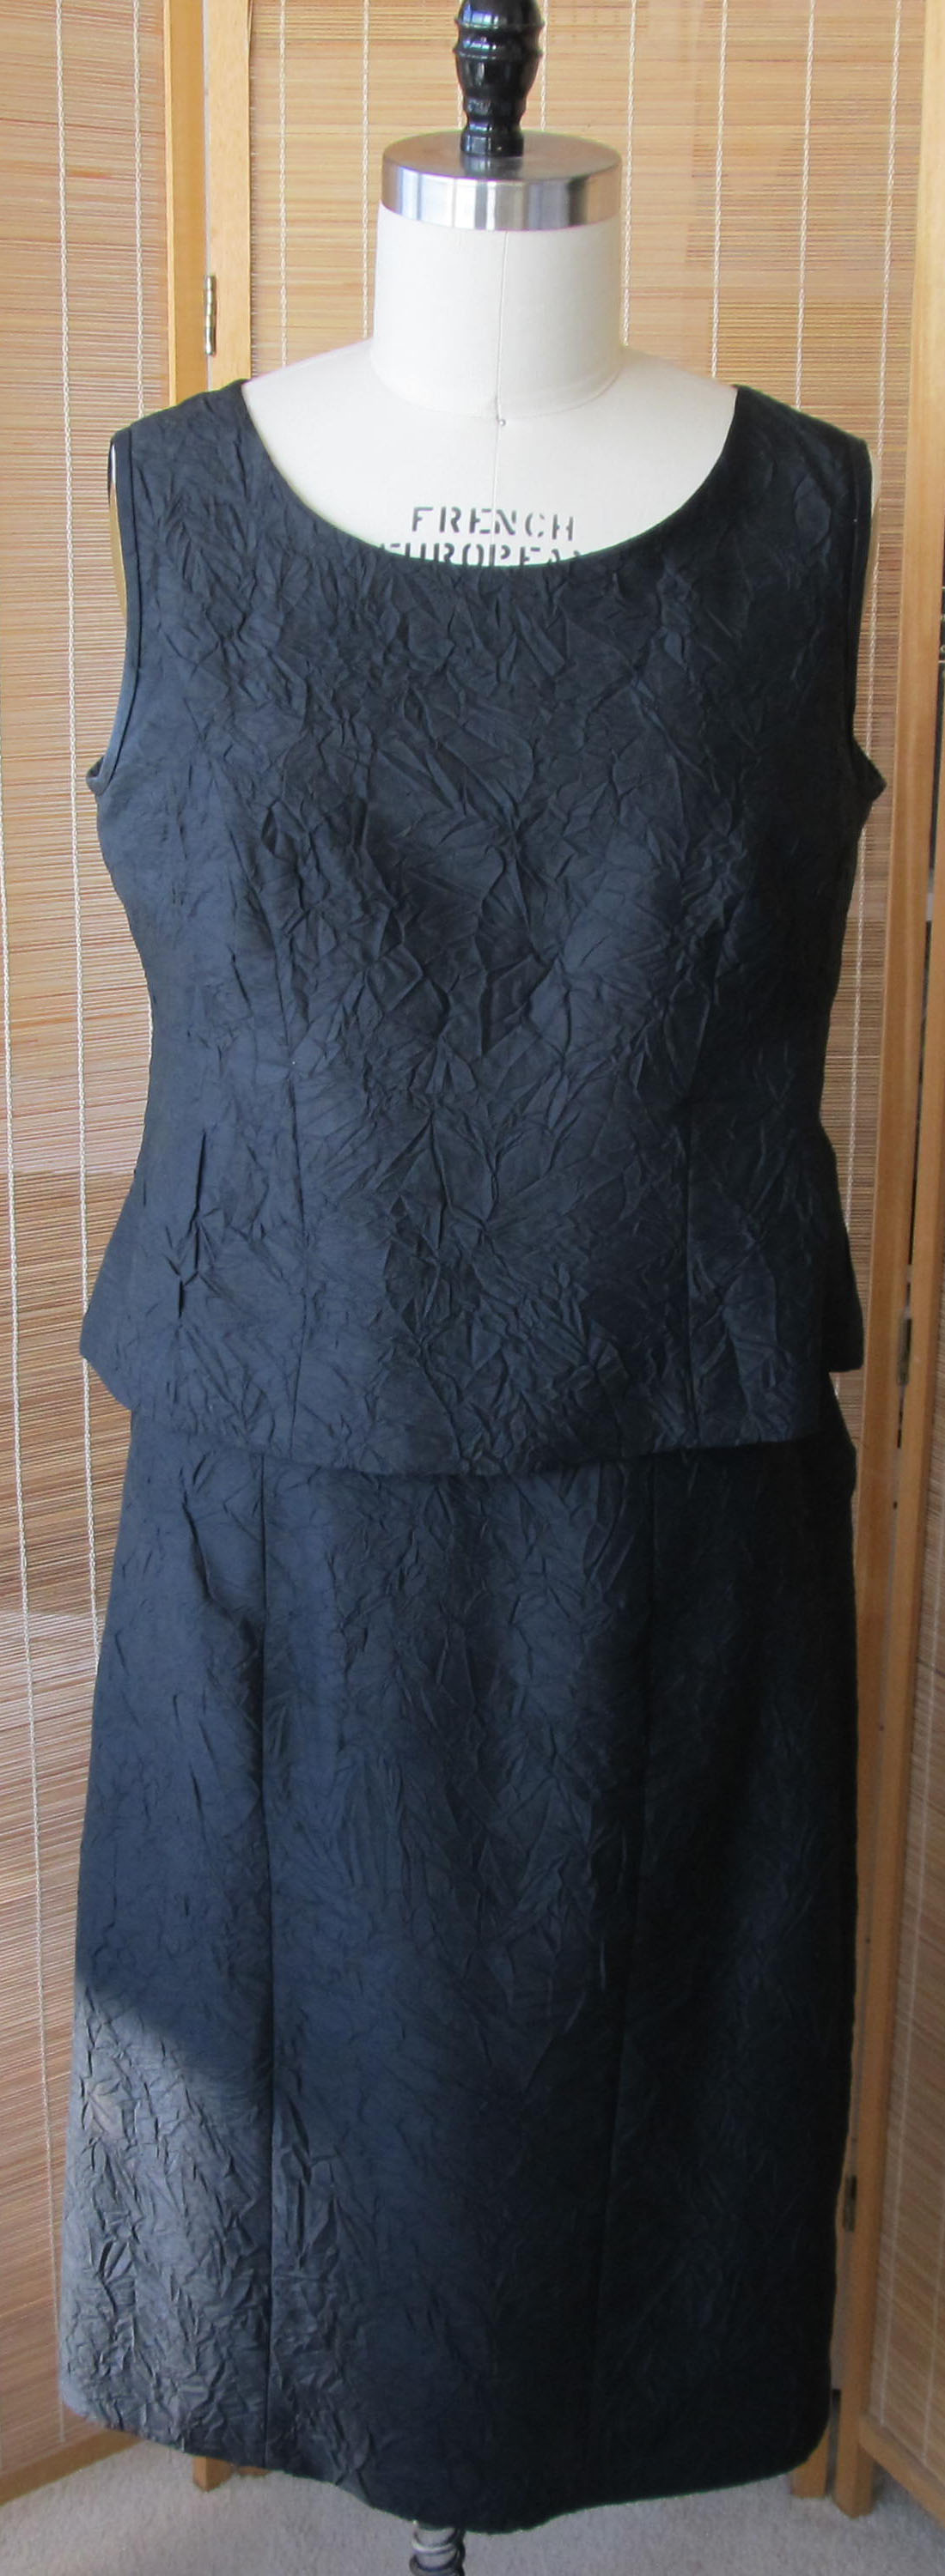
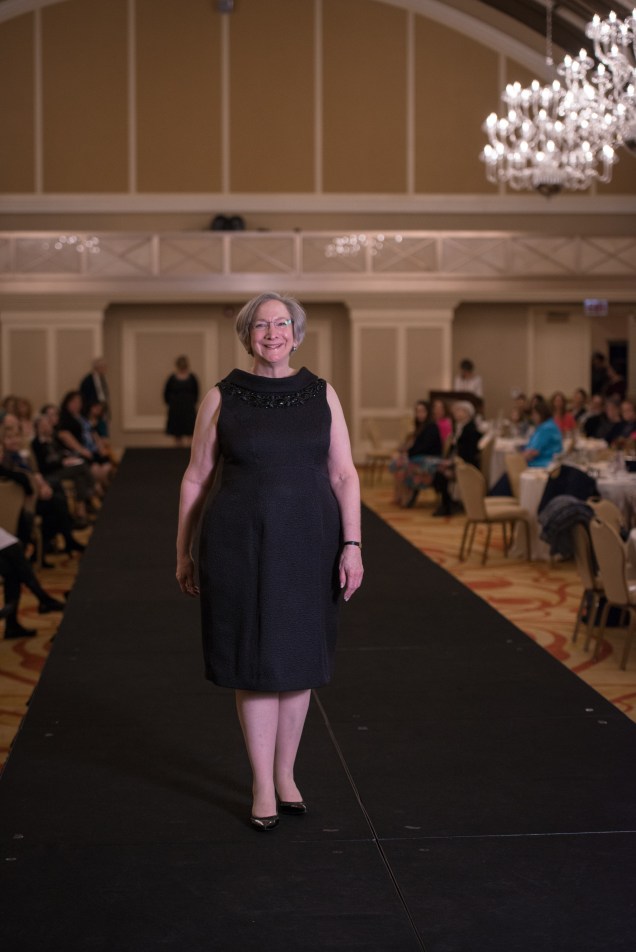
In the end, I think that overcoming the lack of inspiration, lack of enthusiasm for the fabrication and hesitation about wearing a big, bold print turned out to be worthwhile. I love the swishiness of the skirt and will keep this silhouette in my repertoire.

IMG_1466

My Little Black Dress

IMG_0230
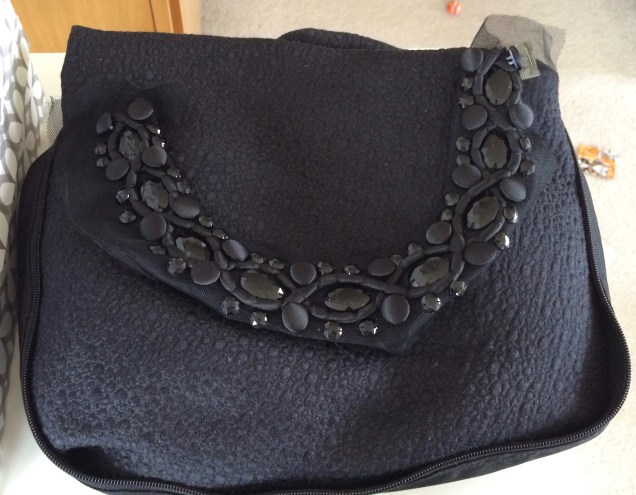
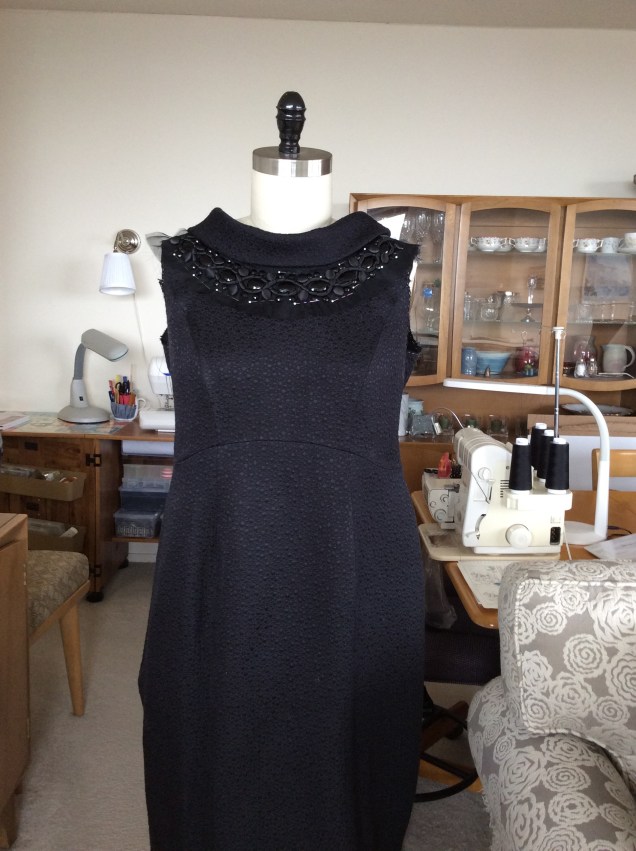
I needed a dress for an evening wedding in New York this month and, for once, I started early.  I brought a muslin, the fabric I wanted to use and the embellishment I was thinking of using to the You Choose Your Focus workshop Sarah Veblen taught here in Chicago in February.  The details of that workshop and the design of the dress are here.

With the pattern work done, the next step was to cut and then hand baste the silk organza underlining to the black silk and wool matelassé fashion fabric. This step seemed to take forever. The fashion fabric was pretty wiggly and underlining was still a new process for me. I found myself pulling out stitches and repinning organza to fashion fabric until I thought I’d lose my mind. It didn’t help that the clock was ticking on the fashion show I was co-chairing and work got really crazy. What I now know can be a relaxing, almost meditative part of sewing was none of the above for this project.

In addition to the underlining, the bias collar is supported by soft stretch fusible interfacing, which I fused to the silk organza before basting it to the fashion fabric. The dress is lined to the edge in silk charmeuse, so I also fused interfacing to the  the area around the neck and armscyes in the shape of what would have been a facing.

Once the fabric was underlined, I loved the hand of the combination and the way it behaved. The princess seams in the bodice went together beautifully. Once those were done, I was sure the skirt seams would be a breeze. I was wrong. More about that in a bit.

The collar/neckline seam always requires directional stitching and on this dress I was concerned about getting the point at center back right. This was a bit more challenging than usual because there is no center back seam in the dress. I followed Sarah’s instructions that included careful marking of the point and machine basting then checking the placement. Once I was satisfied that things were where they needed to be, I went back over the machine basting with a normal 2.5 stitch length. After checking it again to be sure it was right, the final step was to sew at 1.1 stitch length from about an inch away from the point, stop with the needle down and pivot and then continue for about an inch on the other side.

IMG_0228

With the part I was worried about behind me, I proceeded to sew the skirt pieces together. That’s when the trouble began. The first seam was off by more than 1/4″ by the time I got to the end, so I unstitched, steamed the pieces and made sure they matched when I repinned them. I stitched again after adjusting the tension on my machine and the same thing happened. I knew that if I couldn’t get the vertical seams to match there was no way I was going to be able to get the four-way intersections of vertical seams and Empire seams to come together. I was in a panic. All I could think to do was hand baste the seams before sewing them on the machine. I did this with one seam, saw that it worked and called it a night.

A couple of people suggested using a walking foot and Sarah confirmed that that should solve the problem. I’ve used a walking foot before and I don’t know why I resisted at first. Turns out that was the perfect solution. The walking foot is my new best friend. Here is how those four-way intersecting seams turned out.

IMG_1262

This made me think about those new machines that have built-in even feed and I had to push those thoughts out of my head! This is not the year for a new machine

The next dilemma was the zipper. You can’t install an invisible zipper with a walking foot. That’s where hand basting was necessary. I sewed the first side of the zipper into the side seam as usual with the invisible zipper foot. I then hand basted the second side and made sure the Empire seam was aligned before sewing that side on the machine.  Here is the result.

IMG_1260

Whew!

The next step was to attach the lovely trim from Soutache. Sarah had demonstrated how to clip the net backing until it fit the shape of the neckline seam. I clipped the rest of the netting and pinned the embellishment on the dress form so the placement would conform to the dress with a body inside instead of a flat surface.

IMG_1261

There are a LOT of beads and buttons in this trim!  I tried to sew each one before the fashion show, but I ran out of time. That’s why I needed my friends to rescue me with hemming and temporary stitching of the lining at the neck seam. After the show, I finished stitching every bead and every button to the dress and trimmed away the last of the stray netting at the edges. I then reattached the lining at the neck edge and understitched.

The dress is now ready to wear to the wedding. I’m also going to get another chance to model it in the ASG National Conference fashion show. This will be my first time in a fashion show at Conference. It should be fun.

PTPE.Haute Couture Fashion Show.2016-290

Inspired by Miss Fisher

I adore the Australian TV series Miss Fisher Murder Mysteries. Set in the 1920s, the series has much to offer in the way of engaging characters you can’t help caring about, but the bonus is that the costumes are absolutely fabulous. I’m talking rivaling Downton Abbey fabulous, and that’s saying something. The show had a three-season run that can be streamed here in the US on Netflix and sometimes found on PBS. After watching an episode all the way through, I would often rerun it so I could stop and sketch costumes that inspired me. In one episode, Miss Phryne Fisher appeared in a pair of black wide-legged trousers and a black top that had a mesh inset at the top and sleeves made of the same mesh. I had to have one of my own.

The pattern I used as a starting point is my knit version of my basic fitting bodice, which has armscye princess seams. I know, fussy for a knit but the shaping is worth it. Besides, I managed to make this project quite a bit fussier.

The pattern work was pretty straightforward. Buy a strapless bra. Try on a muslin from another garment and trace where the bra ended. I drew a line  across the front pattern piece that was above that point and made two new pattern pieces with seam allowances.

IMG_0729

Miss Fisher’s version of the top has a jewel neck, which I tend to avoid. Still, I think I could have gone a bit higher on the neckline for this.

The black knit has been residing in my fiber archive collection for some time. The mesh inset is a Pointe d’Esprit that sang out to me on Marcy Tilton’s web site. She has an entire section on her web store devoted to mesh, lace and net.

I had never worked with mesh before and so I did some reading and tested some seaming options on scraps. I decided to baste the mesh on the sewing machine and then finish the seams with a narrow hem on the serger. It gave me the effect I was after.

IMG_0732

Of course I needed to sew down the seam allowance on the seam separating the mesh from the knit so that it would stay hidden, but when I tested topstitching I didn’t like the way it looked. That’s where this project started getting more involved than I had planned.

IMG_0731

I remembered from an online class taught by Susan Khaljie that in couture, the generous 1-inch seam allowances are attached to underlinings with catch stitches. I didn’t have underlining to work with, but I wasn’t using a tissue knit so I figured I could just catch a thread or two in the body of the garment in each catch stitch and it wouldn’t show on the the outside. The results were nice and smoooth. That’s when I got carried away and decided to use the same treatment for the princess seams and the hem.

IMG_0734

Yes, that’s the point at which I asked myself if I was completely crazy to do this much work for a knit top, but it’s not just any ordinary knit top.

I considered binding the neck edge and sleeves with a strip of the knit fabric, but I decided that would be too heavy. Instead, I opted for a bias binding of China silk. Of course, that was attached on one side by machine, then wrapped around the edge, pinned and sewn to the inside by hand.

So, it’s definitely a fussy project but I enjoyed the process of experimentation and discovery and I really enjoy wearing the finished product. So far I’ve worn it with black slacks, but I’m contemplating a black trumpet skirt (the current term is fit and flare) in a drapy rayon crepe that I think will look great with it too.


Sarah Veblen’s You Choose Your Focus Workshop

Last weekend I took another quantum leap in developing my sewing and personal design skills. As always, Sarah Veblen was at the heart of this experience.

Sarah was here in Chicago to teach a workshop she calls “Choose Your Focus.” Instead of having a predetermined topic such as fitting or jacket fit and construction, this workshop provides an opportunity for each participant to work one-on-one with Sarah with whatever project or projects are at the top of that person’s wish list. It is basically private instruction in a group setting. This is the second Choose Your Focus Workshop I’ve attended and it definitely won’t be my last.

All levels of skill are welcome in these workshops and Sarah is more than capable of meeting each participant’s particular needs. Everyone’s experience in these workshops is unique. Steph has shared her perspective on her blog, 10 Sewing Machines & A Serger, and she also generously allowed me to use her workshop pictures in this post. I always start out with the intention to document with pictures, but often don’t follow through.

The first morning, the group gathers and each participant discusses what she hopes to accomplish in the workshop. Often we’ve emailed Sarah in advance to give her an idea of what we will be bringing, but this is everyone’s opportunity to crystallize their thinking and Sarah’s opportunity to formulate an idea of workflow and how she can most effectively help the participants reach their goals. Some topics come up that will best be handled with a demo, which the entire group will benefit from watching. This exchange also allows other participants to learn from the other projects that are being worked on.

IMG_0168

I arrived with a list of projects in order of priority that I placed into two categories: “required” (a/k/a “gottas”) and “extra credit.” The workshop was three days long, but I only had 2½ days because of a volunteer commitment. Factor into that my lack of speed in all things sewing and patternmaking and I knew that I needed wiggle room in my list of goals.

At the top of my “gotta” list was finalizing the design, pattern, fabric, embellishment and construction methods for a Little Black Dress to wear to a wedding in June and, I hope, model in the Haute Couture Club of Chicago fashion show that I’m co-chairing in April. I had chosen a lovely matlesse that I bought at A Fabric Place outside Baltimore (known as Michael’s Fabrics online) when I had worked with Sarah at her home studio a while back. I had questions about whether I should make the collar out of a different fabric and whether I should go with my original plan to add a few black faceted beads or use the fabulous embellishment piece made of beads and covered buttons that I bought at Soutache quite some time ago with no idea what I would do with it.

IMG_0667

The verdict was to use it on this dress and Sarah demonstrated to the group how I should handle it. The collar will be made of the same fabric as the rest of the dress. I also asked about underlining—yes, with silk organza—and confirmed that I will be using China silk lining.

I also had questions about fabric choice, closure placement and design details for the dress I’m making to wear to the luncheon portion of the upcoming fashion show and to a bridal shower I’m co-hosting the following week. (It’s going to be a ridiculously busy spring). Those questions were answered and I was able to check that item off my list.

To finalize the design of the LBD, I assembled the muslin pieces that I had cut last fall before the workshop began. The body of the dress is derived from my sheath pattern, which has armscye princess seams. I wanted a curved Empire waist seam that dips lower in the back, but not so low that it reaches waist height and accentuates my most prominent feature. (My derrière draws quite enough attention without any help.) I wanted to use the 60’s-esque collar that I’ve worked with before, only I wanted it to sit higher in the front and extend a little farther out on my shoulders and then follow a dip in the neckline in back and trail off in points. In preparing the muslin, I made the front of the neckline what I thought it would end up being, cut the collar longer than I would need and only attached it from the front to the shoulders so that Sarah could drape it.

IMG_0164

After some testing, we decided to make the front neckline a bit wider and Sarah worked her magic on the back.

IMG_0163

This is exactly as I had envisioned it!

The next step was to transfer the adjustments to the pattern. This is an area where I still am prone to doubts and confusion. As the workshop progressed, I got more confident about drawing new lines with the Fashion Ruler that don’t pick up every single pin placement mark. (It’s only pencil! I have a lifetime supply of erasers!) I’m just so worried about making a mistake that will throw off the entire garment when I sew it. I got better at this as the workshop progressed and was able to draw lines where I thought they should go. This confidence came from knowing I could ask Sarah to check my work right away. Call it a crutch if you must. I prefer security blanket. In any event, the whole point of participating in these workshops is that we don’t have to guess and compound our errors until we end up with a mess.

Anyway, Sarah ended up doing much of the pattern work on the LBD and I did more on my own on the next project.

IMG_0166

The final step was to test out the collar on a quick mock-up of the neckline on Day 2 of the workshop. It worked perfectly. I’m now ready to cut the fashion fabric!

My next project was to address yet another issue that has cropped up with my two-piece sleeve pattern. When I attended Sarah’s workshop last November, I corrected my basic two-piece sleeve pattern so that it fit well and had a total of ¾” ease evenly divided between the front and back when it is set into my basic jacket pattern. However, I’ve been using this as my all-purpose sleeve pattern and when I walked my pattern pieces to make a two-piece dress last month I noticed that the sleeve pattern had too much ease and it was not evenly distributed front to back. Both garment patterns were derived from my basic fitting bodice pattern but there have been some adjustments along the way and now there are differences. When I made this discovery, I prepared muslin pieces for my fitted blouse pattern and my topper pattern and brought the lining pieces for my two-piece dress bodice, along with all three patterns. I also started the project of making a full set of pattern pieces for each of my garments, instead of reusing side panel pieces and sleeves for multiple garment patterns.

I tried to make a mock-up of the sleeve before the workshop by putting in one adjustment to the sleeve pattern to even out distribution of ease, but I did what I almost always do—I added to the piece that was supposed to be made smaller and subtracted from the piece that was supposed to be made larger. I’m amazed at how often I defy the odds in that annoying way. Sarah straightened me out and I made a new test sleeve.

IMG_0161

I now have a two-piece sleeve pattern that works as it should for my fitted blouse pattern, my two-piece dress and my topper pattern. The topper pattern is going to be a building block for upcoming blouse projects.

That brought me to the end of my must-have list. Amazingly, I was able to make substantial progress on my extra credit.

I consulted with Sarah about my plans for developing a “flowy” blouse pattern from my topper pattern for a lovely teal hammered silk and a gray and cream striped rayon that have been aging in my collection for quite some time.

I can’t get the true color of the silk, but the picture is a close-up of its texture. I’ve been wanting to do that trick with the rayon that uses stitched-down tucks to hide the stripes at the shoulder, extending down just a bit. We decided I’d do that at the sleeve cap as well.

IMG_0169

The blouse will use the front pleat from Vogue 1412 that I used in my shirtdress and have a shirt-tail hem or a curved hem with side vents.

IMG_0135

The striped version will have a variation on the neckline from View B of Vogue 1412 and the teal silk will have the shirtdress neckline and collar. For both, I wanted sleeves similar to the one in Vogue 1367, a scaled-back poet’s sleeve. IMG_0673

Development of the sleeve required me to merge the two-piece sleeve pattern together and make the necessary design changes. Sarah worked closely with me to get this done. I then mocked it up and Sarah worked on getting it into the topper armhole.

IMG_0162

We decided on a series of tucks, which are going to be a lot of work but will achieve the effect I’m after. I now have a pattern for the sleeve and cuff and instructions for working with the tucks.

Sarah took this opportunity to give us a demo on her method for attaching a continuous sleeve placket using a bias strip of fabric.

With this checked off my list, I couldn’t believe there were still a couple of hours left in the workshop. I started on my second “extra credit” project, which is to draft a trumpet skirt. The shape will be similar to this picture, but without godets.

IMG_0672

I got a little bit of the way into it, but realized I was tired and that would make me prone to even more mistakes than usual. Still, I have a process plan and Sarah answered my dumb questions about the pattern work so I can pick this up after my “gotta” sewing projects are done.

As always, the workshop time flew by and all too soon it was time to say good-bye to Sarah and get back to the real world where sewing and design have to share time with earning a living and volunteer commitments. I’m really amazed at how much I accomplished and I have renewed energy around my projects. All that, plus I got to spend time with a group of talented, dedicated home sewers who always inspire me and never fail to offer encouragement. Who could possibly ask for more?

Rediscovering the Lost Art of Dress

IMG_0434Reading The Lost Art of Dress by Linda Przybyszewski opened my eyes to a great deal that I hadn’t known about how women and girls learned to dress appropriately in the past and how well-educated women carved out careers for themselves in home economics departments of leading universities in this country long before women entered male-dominated professions in large numbers.

One thing the book reminded me of is how comfortable shirtdresses can be to wear and how perfect they are to fill that gap between dressed up and casual. Professor Pski herself favors  this style and shirtdresses were a mainstay of my mother’s wardrobe as well as my own back when a dress was the most casual thing I could wear to the office on a weekday. And so I was inspired to develop a pattern for a shirtdress.

Of course, I had some specific requirements for this shirtdress. First, I never liked wearing dresses that have buttons all the way down the front, because there is always pulling and gapping when I sit in them. I also liked the idea of having release pleats to control the transition between the fitted bodice and a flared skirt.

Vogue 8970 pretty much fit what I had in mind in terms of the shape.

IMG_0136The blouse pattern Vogue 1412 provided the solution I was looking for to avoid having buttons all the way down the front.

IMG_0135This pattern has a few buttons on a placket and transitions to a pleat that extends to the hem. I opted for a facing rather than a placket, but incorporated the pleat.

The first order of business in developing the pattern was to get the shape of the skirt. I had a false start trying to trace the side seams of V8970, but quickly found that adapting that pattern to my armscye princess sloper either wouldn’t work or would be much more trouble than it had to be.

Going from the sheath pattern to the shape I wanted for the shirtdress was pretty simple. Yes, there was math involved, but just to the point of approximation.

The method consists of cutting the existing pattern into strips, from hemline to a horizontal balance line (HBL) that will be used as a pivot point. Each strip needs to be cut to, but not through, the point where one of the cut lines meets the HBL to form a hinge. Here is an example of how this works.

IMG_0138I decided how wide I wanted the dress to be at the hemline, subtracted the total circumference of my sheath pattern at the hem (not counting seam allowances), and divided that number by four. After rounding for convenience, I subtracted the width of each pattern piece at the hemline to arrive at how much I needed to add to each pattern piece. Then it was a question of cutting strips of equal width to the HBL, cutting the hinges, placing more pattern paper under the work and spreading the strips the same distance apart from one another at the hemline. I think I opted for ½-inch spreads to distribute the additions evenly throughout each pattern piece.

I left center back and center front alone and worked only to one side on those pieces, whereas the side front and side back had to have new graininess drawn after the process was completed. Then I taped it all down and arrived at pieces that look like this at the bottom.

SkirtSpreadHere is what the pattern looks like in the hinge area.

ShowHingeThe picture above also shows the extension for the center pleat, which is cut on the fold, and the extension for the opening where the buttons and buttonholes are placed.

I had a friend mark the placement and depth of the release pleats for me in the side front and side back panels. Here is how that looks on the pattern. Shirtd_SF_Top

I added in-seam pockets to the pattern and was good to go.

This was another project that I intended to complete in the summer of 2014 in linen. When I didn’t get to the sewing in time, I made the first version of the dress with 3/4 sleeves and turn-back cuffs out of a Liberty cotton lawn lined in white cotton batiste.

Liberty Shirtdress

I ran into some issues with buttonholes, so I opted for button loops. I drafted the collar pattern myself and, although I love wearing the dress I decided that next time I would raise the back neck and make corresponding adjustments to the collar. I did that in this linen version, which I finished in July and wore for the rest of the summer.

Linen ShirtdressYou can see the release pleat clearly in this solid fabric. As you can see, I overcame my buttonhole issues for this version. The buttons on both of these dresses are from Soutache.

I’m much happier with this neckline and the way the collar sits in the back. I definitely want to use the collar again, maybe in a blouse next time.

I have some cotton shirting I want to use for another version of this dress with a Mandarin collar. I also have some crinkle rayon that I think would look nice with a shawl collar. As you can see, this is becoming a staple in my wardrobe.

Designing the Tulip Dress

tulip dress modeled copyThis dress has a neckline I’ve been wanting to incorporate into a garment for a long time. I first encountered something similar in a knit top from Talbot’s and later in a jacket from Chico’s. I set out on a mission to find a pattern for it, but I never thought they got it quite right. The knit versions collapsed and the patterns for the woven versions stood up a bit but leaned into the neck. Then I saw a picture of a jacket made from a Burda pattern that looked right. I tracked down the pattern on a vintage pattern web site, bought the only size they had and discovered the secret to achieving the effect I was after: darts.

Burda         Back Facing

Shaped darts in the back of the neck, to be precise. One on either side of the center back seam.

The pattern drafting was pretty straightforward.  I decided how high I wanted the neck to go up and extended center back to that point. I curved the line out a bit, which meant using a center back seam instead of cutting the back on the fold. A center back seam also has the advantage of adding structure, which helps prevent the neckline from collapsing.

From the shoulder, I drew a curve to the height I was going for, then connected those two points and added the dart. The picture below compares the final back pattern piece to my jacket block pattern piece. The back seam is at the left in this picture.

9For the front, I wanted the neckline to open out into a shape reminiscent of a tulip. Starting from a copy of my sloper bodice front piece, I marked the same height that I used for the back and drew a shoulder seam that curved from the shoulder point to that highest point. I played with curves from center front to the highest point until I was happy with the shape. Here is a comparison between the final front pattern piece and the front of my jacket block.

8The next step was to test it out. I made a mock-up of the upper part of the front and back pattern piece, sewed in the darts and tried it on. I brought it with me on a trip to work with Sarah Veblen and she made some adjustments.

Mockup FrontMock Up

During that same session, Sarah draped a cap sleeve on me that I used in a blouse and this dress.

The next idea I had to complete the tulip theme of this dress was to incorporate a shaped faced hem like the one in McCall’s pattern 2818.

IMG_0028(Do I have two copies of this pattern? Oh no. I have three. Tracking my patterns in an app is the subject of a future blog post.)

To achieve this, I drew a curve at the bottom of each princess seam with the help of one of those pocket curve templates. I also marked the point where the stitching needed to stop when joining the seams and I drew a line to mark the top of the hem facing pattern piece I needed to make. The curved line drawn toward the top of the pattern piece is the bottom edge of the back facing piece.

IMG_0024

With the pattern work done, I was all set to make the dress. The problem was that I wanted to use the inky navy linen from MarcyTilton.com that I had been saving for just the right summer business meeting-appropriate dress and there wasn’t enough of summer 2014 left for me to get it done. So, I packed the partially-constructed dress away and worked on it in spring 2015. Constructing this dress was an adventure in itself that we’ll cover in the next blog post.

Frankenpatterns – Cute Name, Wrong Vibe

Frankenpatterns is a word that some sewists are using to describe projects they make by combining elements of two or more patterns. I have some issues with the term. First, this isn’t anything new. I know there are some experienced sewists who never deviate from a pattern, but many of us have been pulling details from one pattern and grafting them onto another without thinking we were doing anything out of the ordinary. A case in point is this two-piece dress that  I made by combining my sloper, or basic fit, bodice pattern and the neckline and collar from Vogue Pattern 8667. V8667, Misses'/Misses' Petite  Dress

IMG_0003FYI, the collar is just a rectangle cut on the bias. The pattern doesn’t say to interface it but I always interface my collars and I think it helped with this one.

I also used the same neckline for a black silk two-piece dress with no sleeves and no collar. Black 2 pc dress

The other problem I have with Frankenpatterns is the name itself. When patterns are combined well, I don’t think the results are monstrous at all. As an example, here is the first jacket I made from my sloper.

Asymmetric JacketThe pattern I used is out of print, Butterick B5292.

untitled This was my first attempt to apply my sloper to a pattern in a way that required more than just a bit of tweaking. I have to say that when I first placed the sloper pieces on the main pattern pieces, I was intimidated.

Here is what one of the front pattern pieces looks like with my jacket sloper on it.

Sloper Front to Original 2Here is the back.

Back Sloper to OriginalI made this jacket before I made the basic jacket pattern you see here so the contrast was even greater at the time. I also didn’t have a full set of helpful landmarks on my bodice sloper at the time. All I had marked was Center Front and Center Back, which I knew I had to line up with the corresponding landmarks on the commercial pattern. Since then, I’ve added a bustline and waistline on every piece by marking them on the front and then walking the adjoining seams to get them to connect at the same level all the way around. Had I done that to my sloper at the time and made corresponding markings on the commercial pattern, I might have felt more confident.

Because this is an asymmetric jacket, there was a lot to be added beyond Center Front. I used my own side front and side back pieces and my own sleeve pattern, so I didn’t have to worry about any of the differences on the other side of Center Front.

I don’t have a tapered back seam in my bodice or jacket patterns, but the commercial pattern does. I wanted to lay out the back piece on the fold, so I lined it up with the marked Center Back and ignored the tapering in the pattern. So, I was able to ignore everything that was going on on either side of Center Back. I just needed to use Center Back as a point of reference.

As you can see, my sloper is quite a bit shorter than the pattern. I’m average height (5’5″ and a bit). Pattern grading increases both horizontally and vertically. If only that were true with changes in people.

Basically, the only things I needed to figure out were the distance between the shoulder point and a line extending up from Center Front on the front piece and the corresponding distance from Center Back on the back piece. Then I needed to draw in my shoulder seams at my correct angle and stop where I needed to stop in order to come out with a neck seam that was the same length and shape as the neck seam on the commercial pattern. I also needed to make sure that the shoulder seam is the same length in the front as it is in the back.

Here is how my drafted pattern looks overlaid on the commercial pattern.

Front New to originalBack new to Original2I was a little concerned about how short the shoulder seams are, but I wasn’t feeling confident enough to change the neckline and create accurate corresponding changes to the collar stand. When I was sewing the jacket I thought that was a dumb decision because my bra straps might make unscheduled appearances. The next time I make this jacket, I’ll bring in the neckline just a bit and make the corresponding change to the collar stand.

If the seamlines in these pictures look narrow to you, it’s because I like to use 3/8″ instead of 5/8″ seamlines. Only recently I’ve switched back to 5/8″ for sleeves and armscyes because of the method I use for setting sleeves. Yes, it does seem my sewing gets unnecessarily complicated sometimes, but I really do have reasons for these choices. The other odd marking you see on the back pattern piece is the extra Center Back foldline. This is actually a shortcut so that I can use one pattern piece for both the fashion fabric and the lining and still get that pleat in the center back of the lining.

Here is what my pattern for this jacket looks like when compared to the jacket sloper.

Left Front Sloper to NewBack New to Sloper Detail

And here is the finished product on my dress form.

Blue Asymmetric JacketThe fabric is a silk suiting that was lovely to work with and is a delight to wear. But, the jacket could have used more structure. I lined it to the edge in a silk charmeuse print, but with the hidden snaps leaving impressions on the fabric, a front facing would have been a better choice. Still, I love wearing it. And I don’t think it bears any resemblance to a monster.