Rediscovering the Lost Art of Dress

IMG_0434Reading The Lost Art of Dress by Linda Przybyszewski opened my eyes to a great deal that I hadn’t known about how women and girls learned to dress appropriately in the past and how well-educated women carved out careers for themselves in home economics departments of leading universities in this country long before women entered male-dominated professions in large numbers.

One thing the book reminded me of is how comfortable shirtdresses can be to wear and how perfect they are to fill that gap between dressed up and casual. Professor Pski herself favors  this style and shirtdresses were a mainstay of my mother’s wardrobe as well as my own back when a dress was the most casual thing I could wear to the office on a weekday. And so I was inspired to develop a pattern for a shirtdress.

Of course, I had some specific requirements for this shirtdress. First, I never liked wearing dresses that have buttons all the way down the front, because there is always pulling and gapping when I sit in them. I also liked the idea of having release pleats to control the transition between the fitted bodice and a flared skirt.

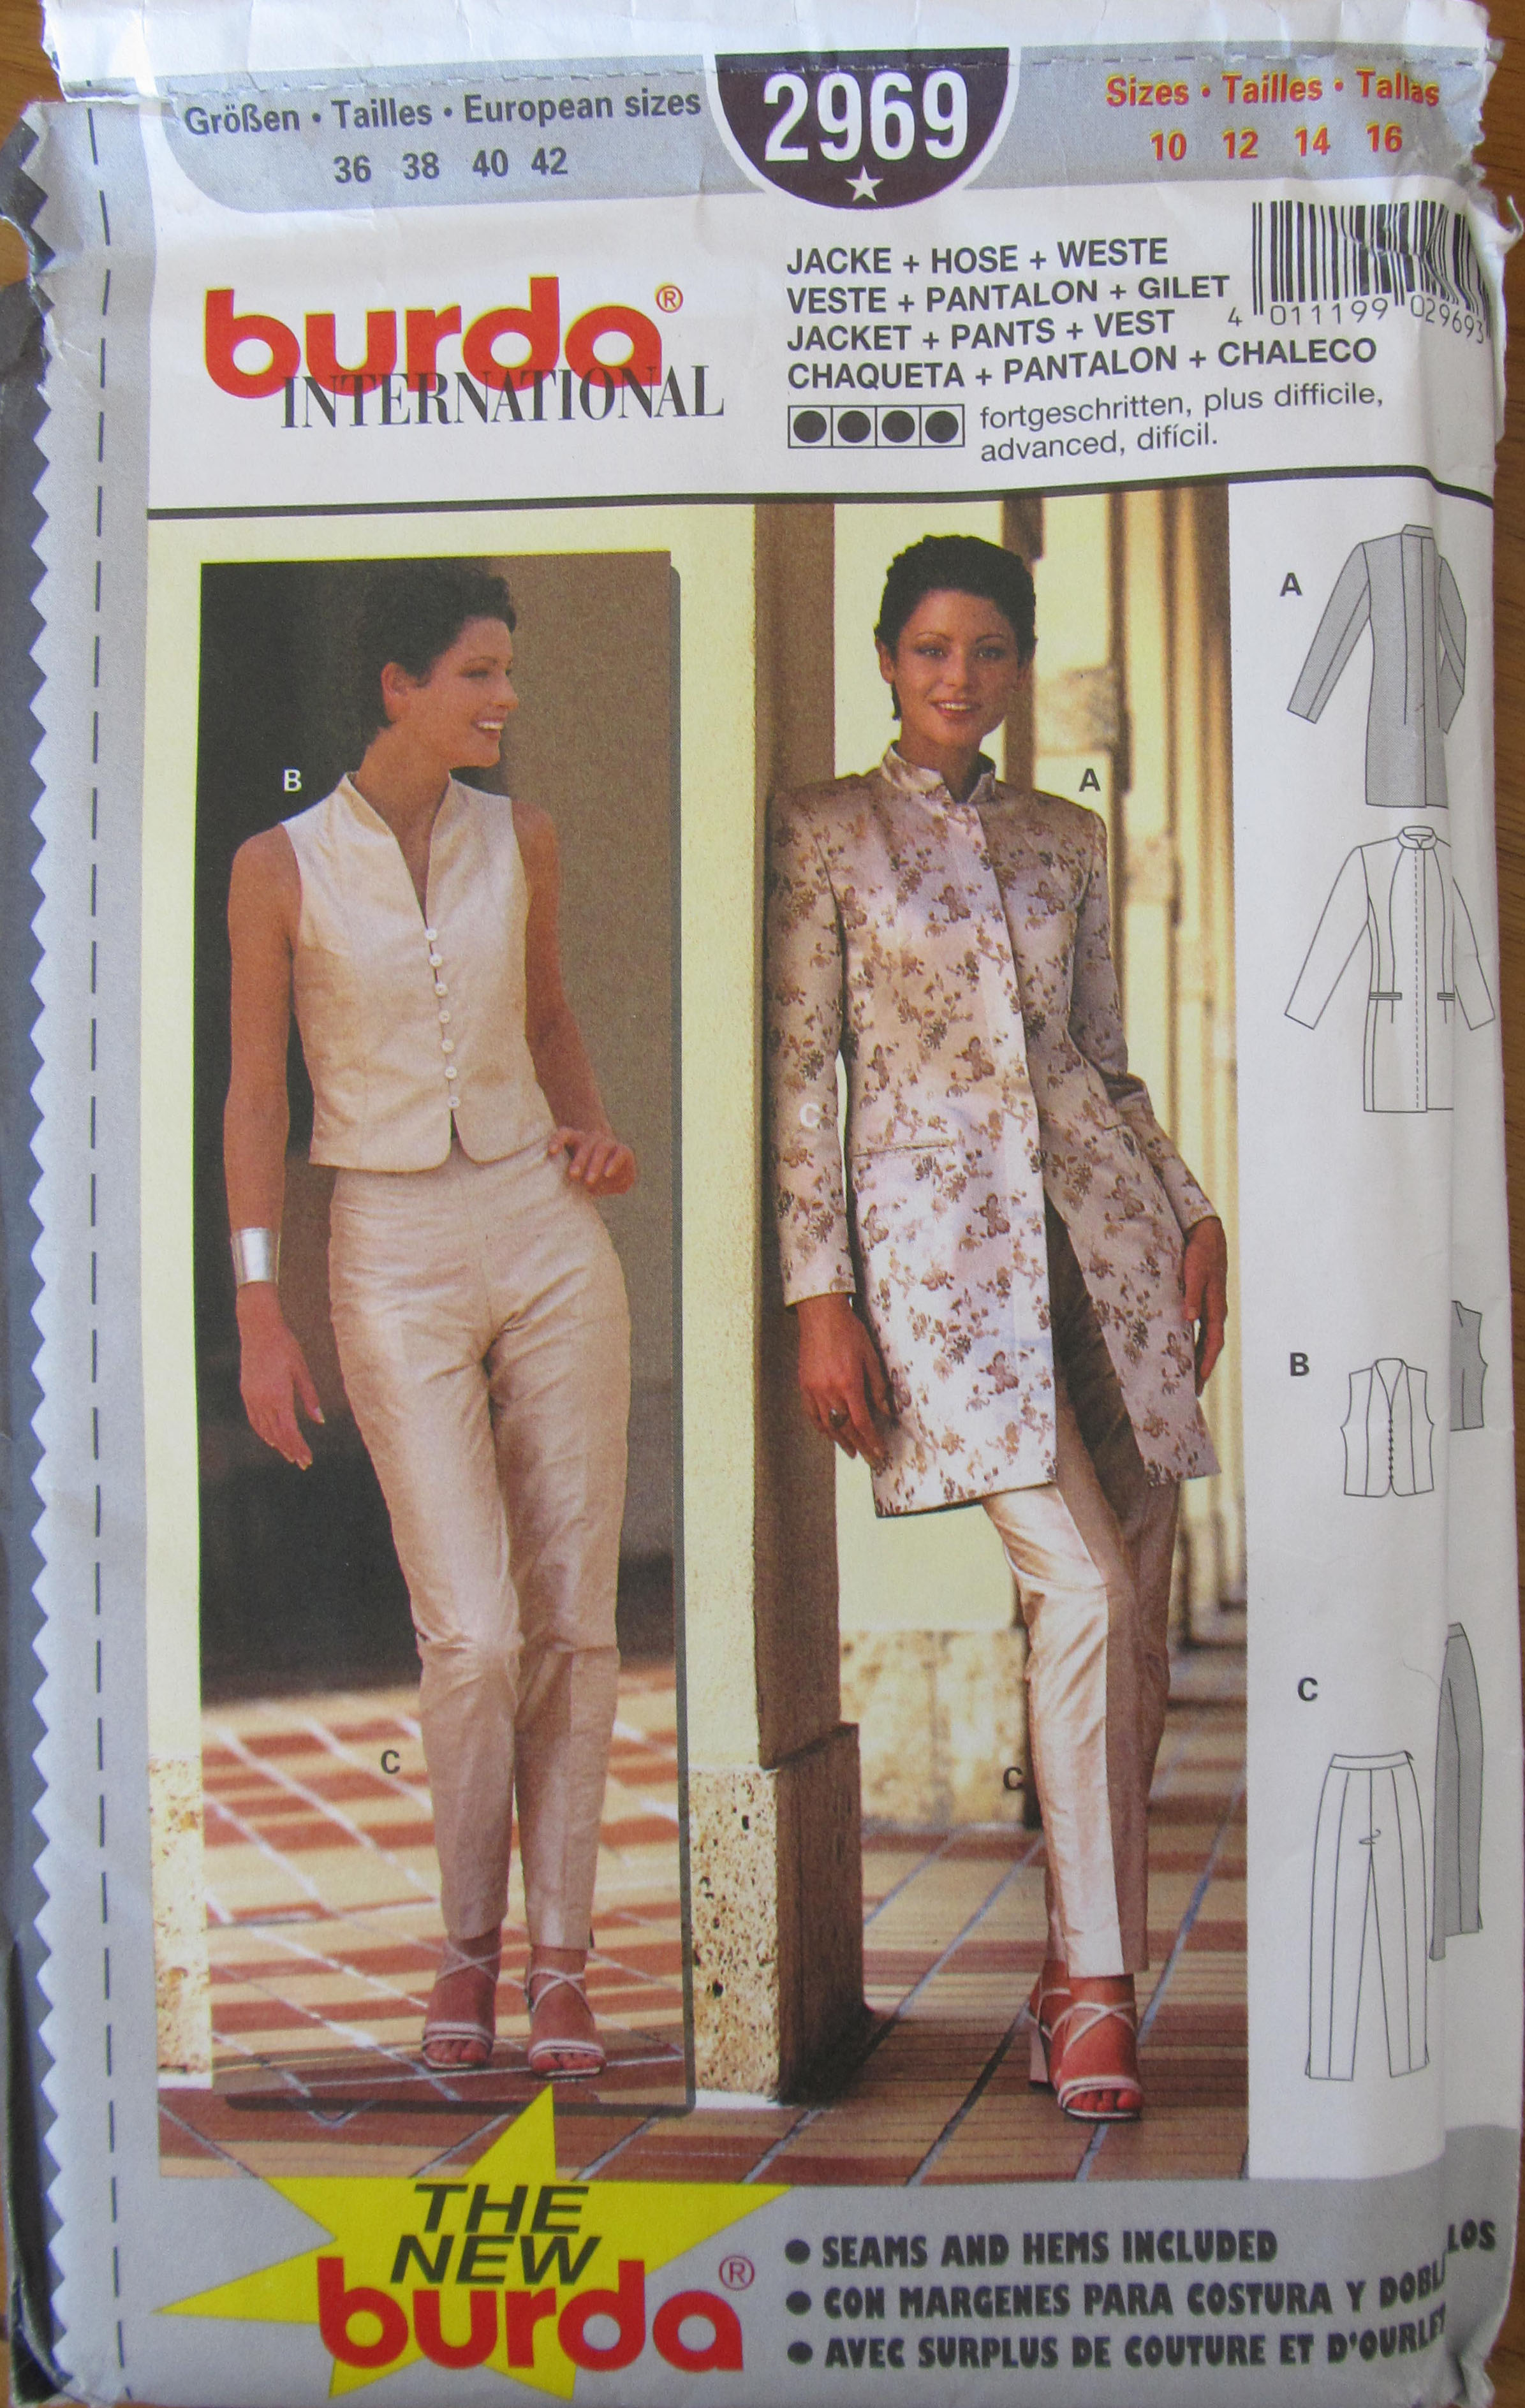
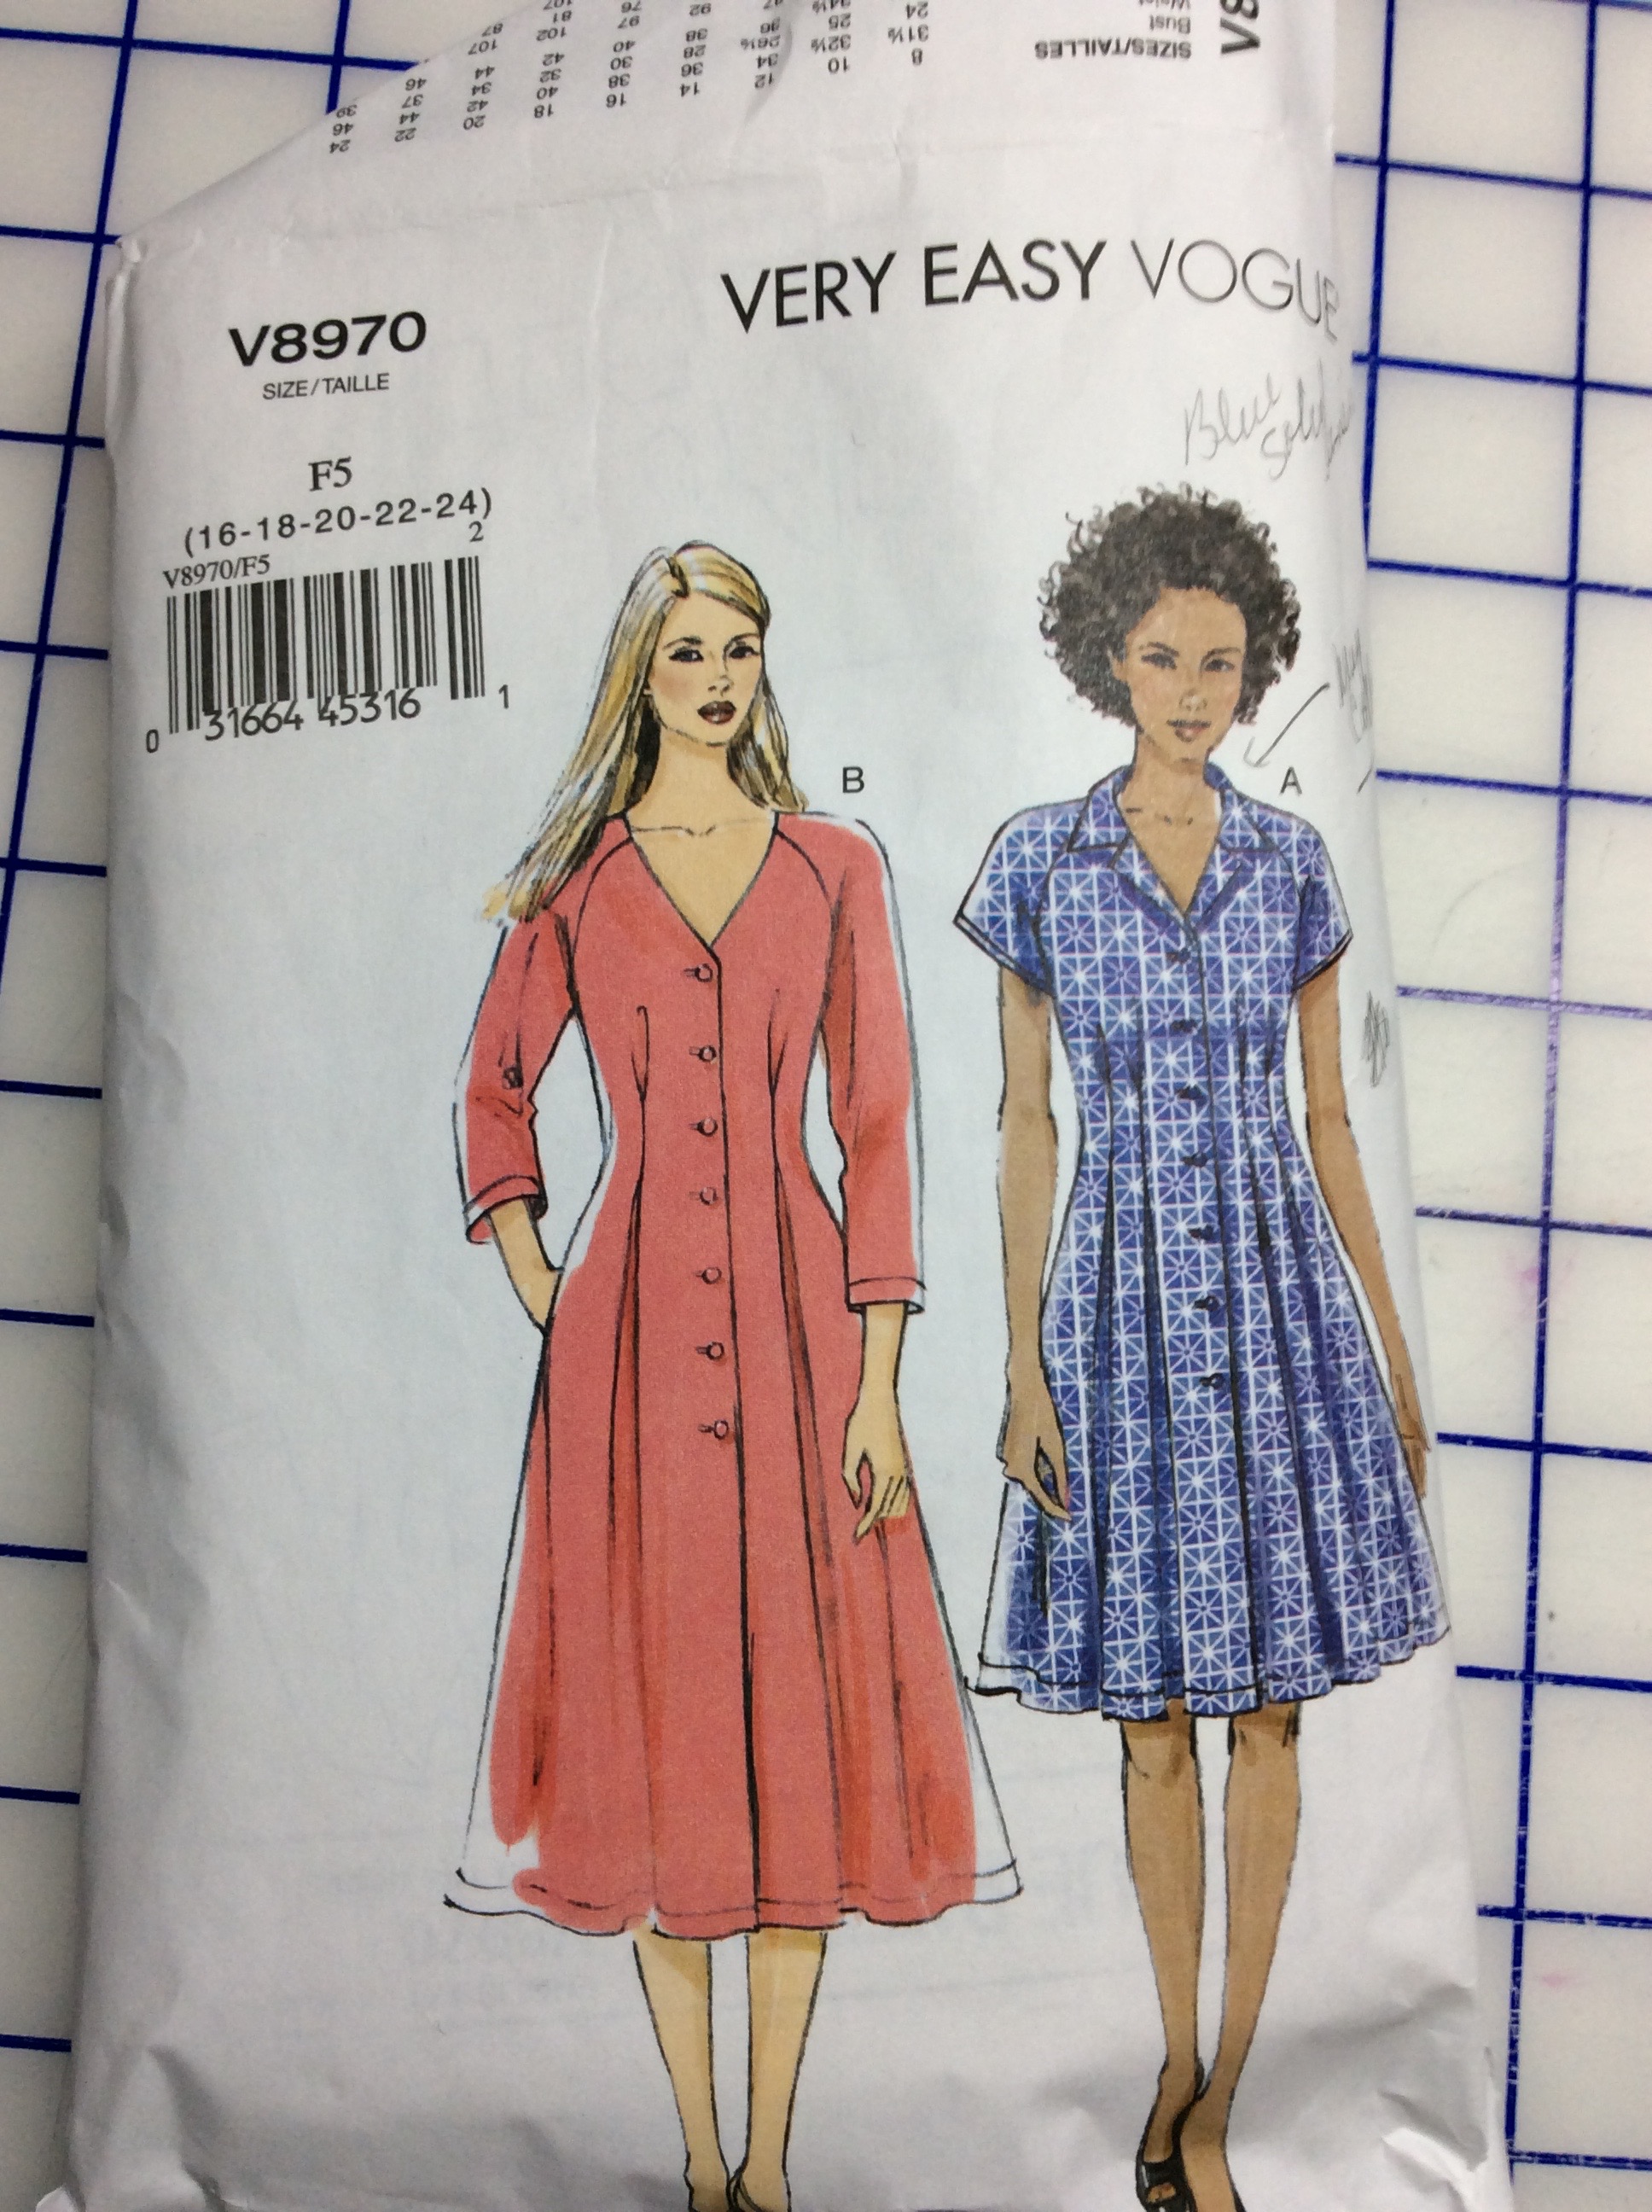
Vogue 8970 pretty much fit what I had in mind in terms of the shape.

IMG_0136
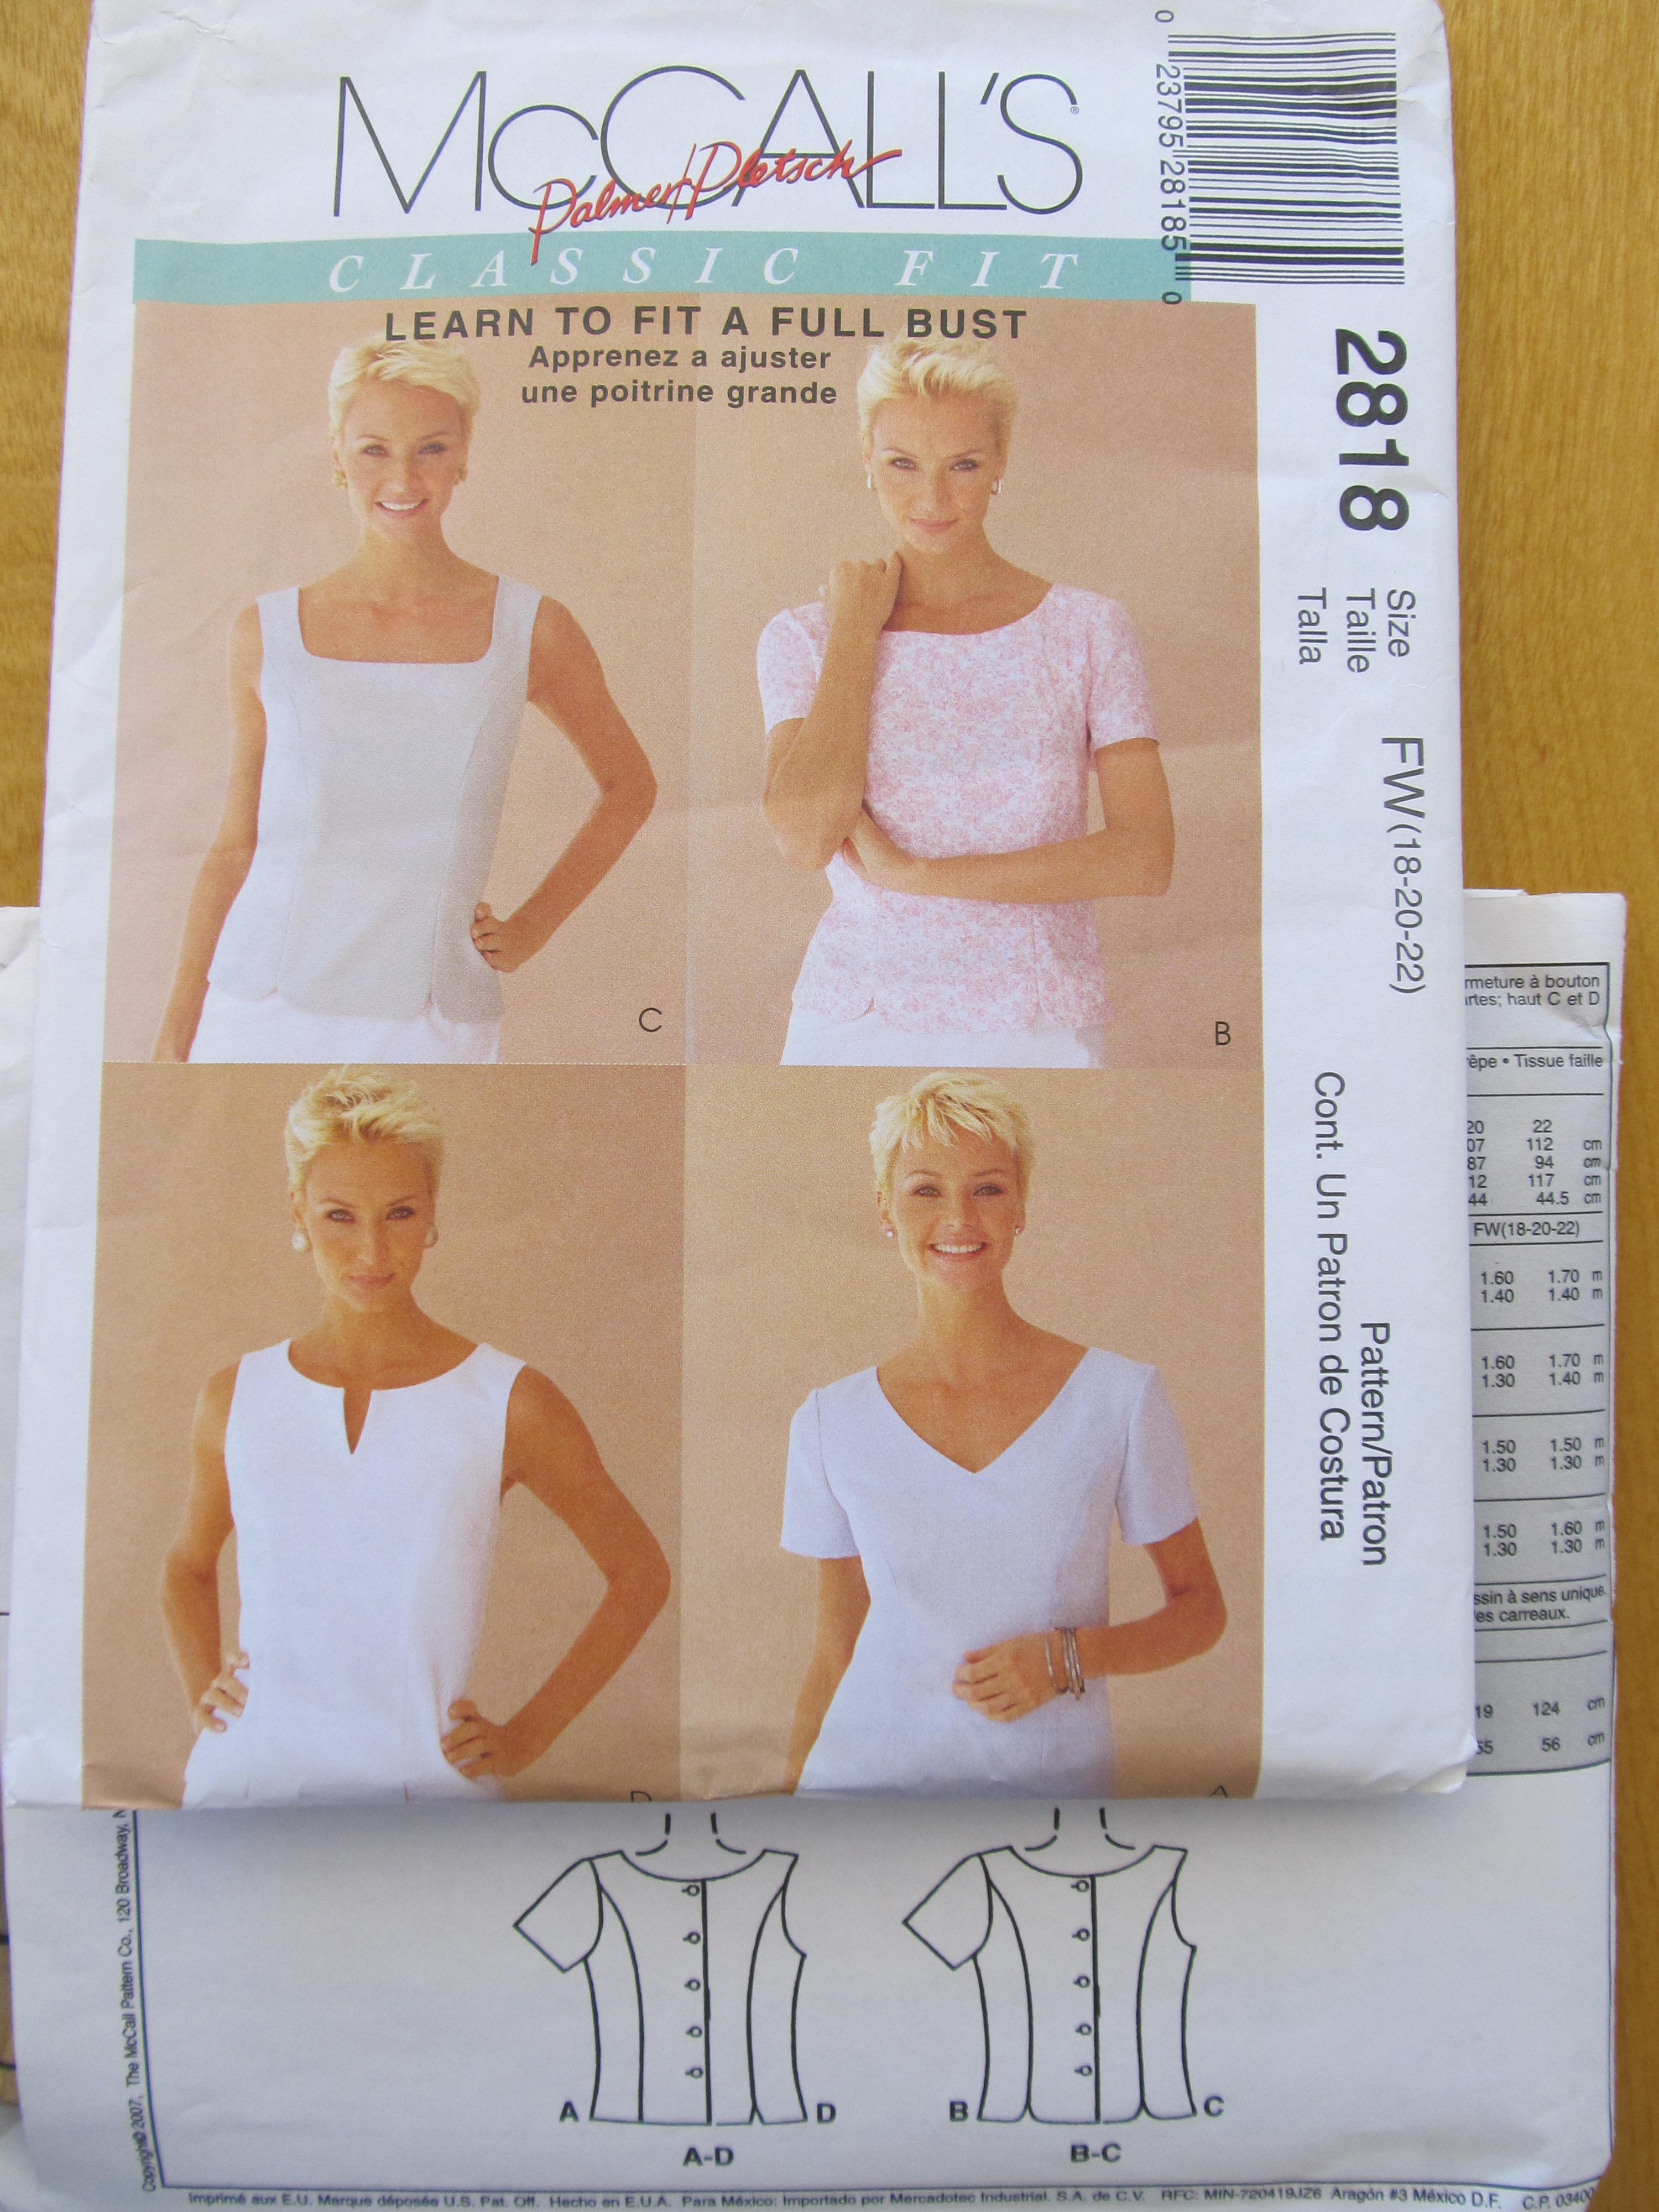
The blouse pattern Vogue 1412 provided the solution I was looking for to avoid having buttons all the way down the front.

IMG_0135This pattern has a few buttons on a placket and transitions to a pleat that extends to the hem. I opted for a facing rather than a placket, but incorporated the pleat.

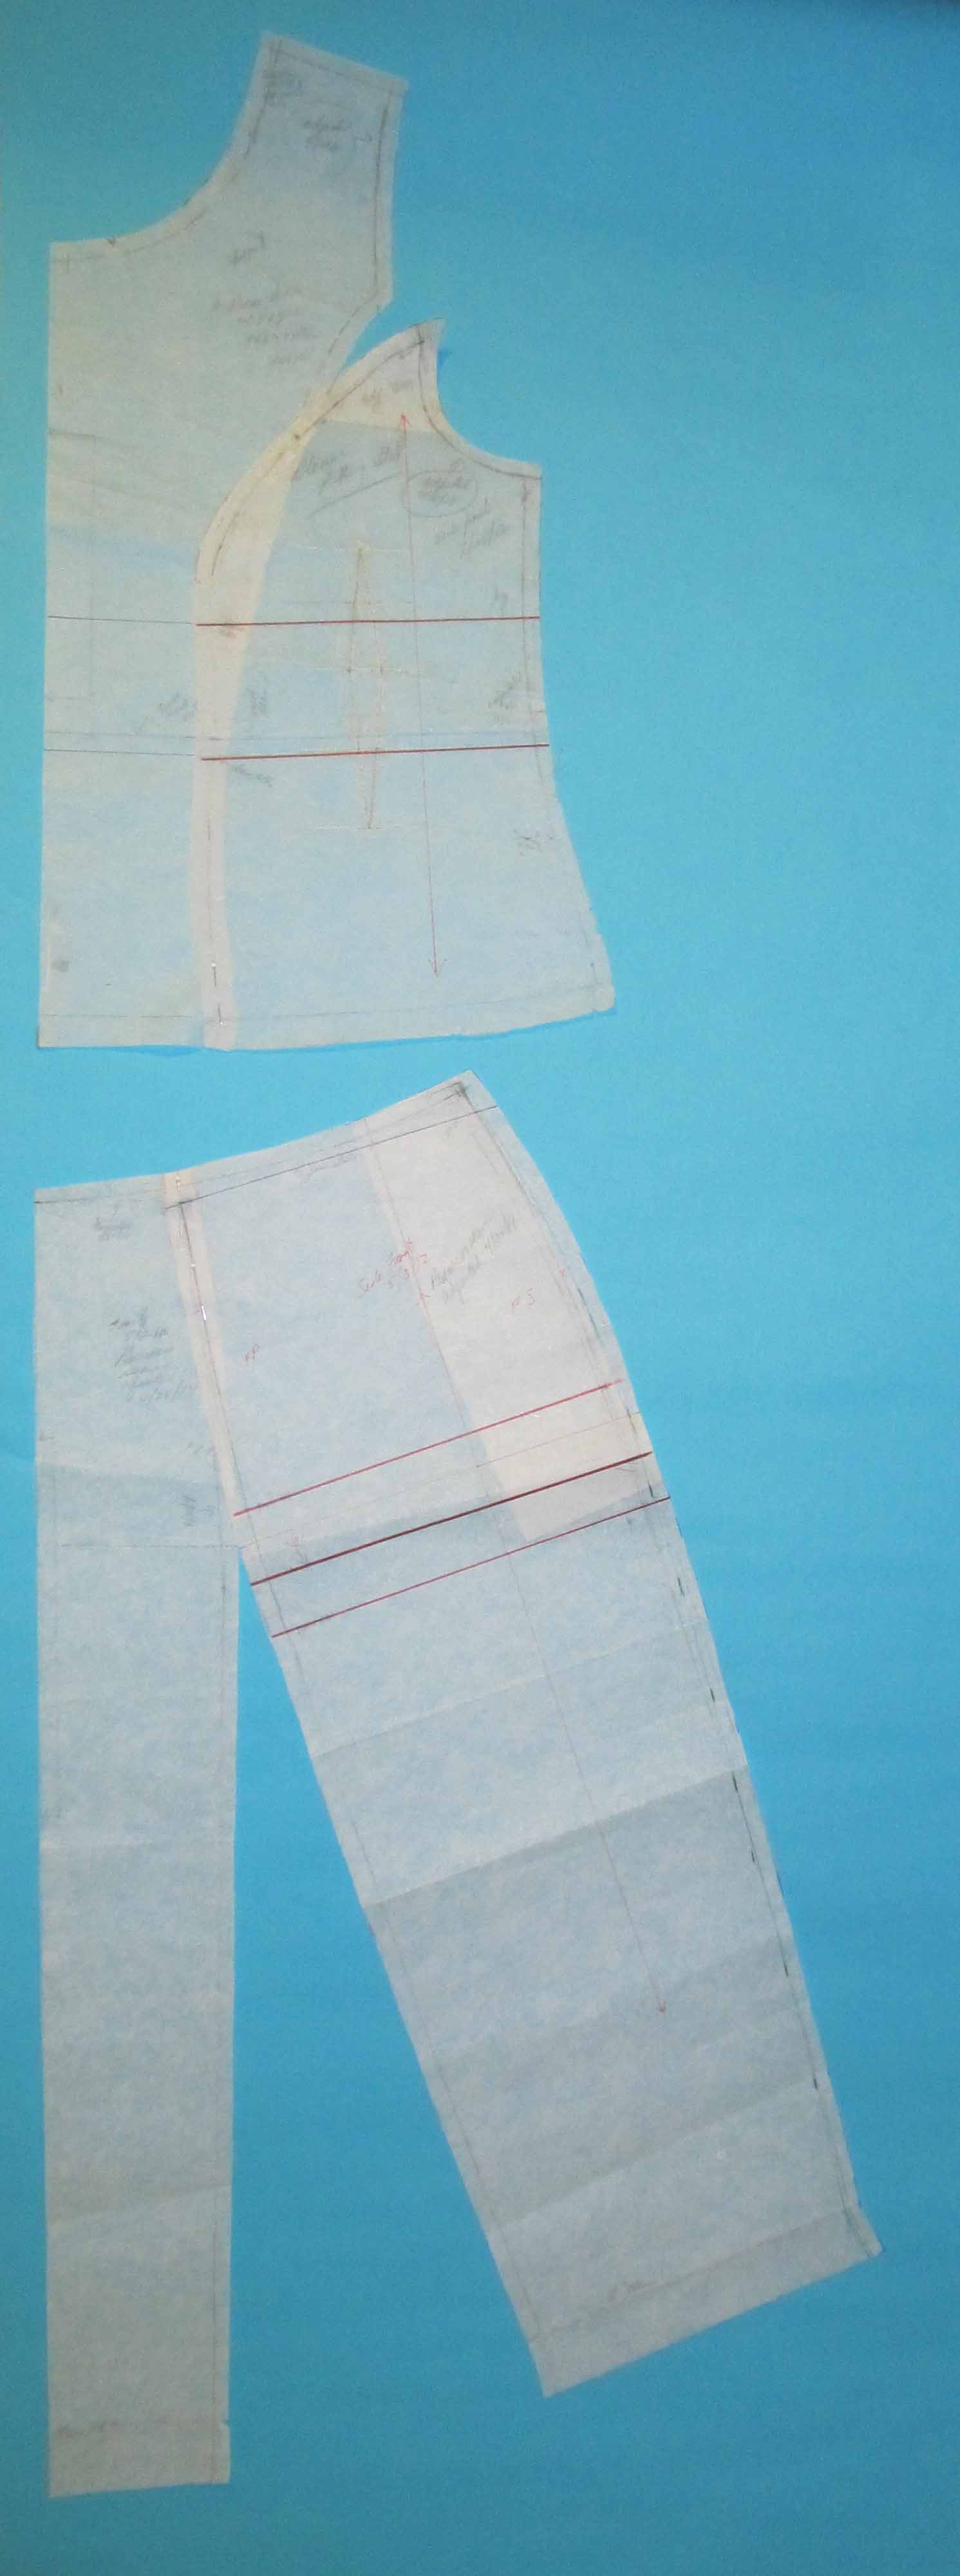
The first order of business in developing the pattern was to get the shape of the skirt. I had a false start trying to trace the side seams of V8970, but quickly found that adapting that pattern to my armscye princess sloper either wouldn’t work or would be much more trouble than it had to be.

Going from the sheath pattern to the shape I wanted for the shirtdress was pretty simple. Yes, there was math involved, but just to the point of approximation.

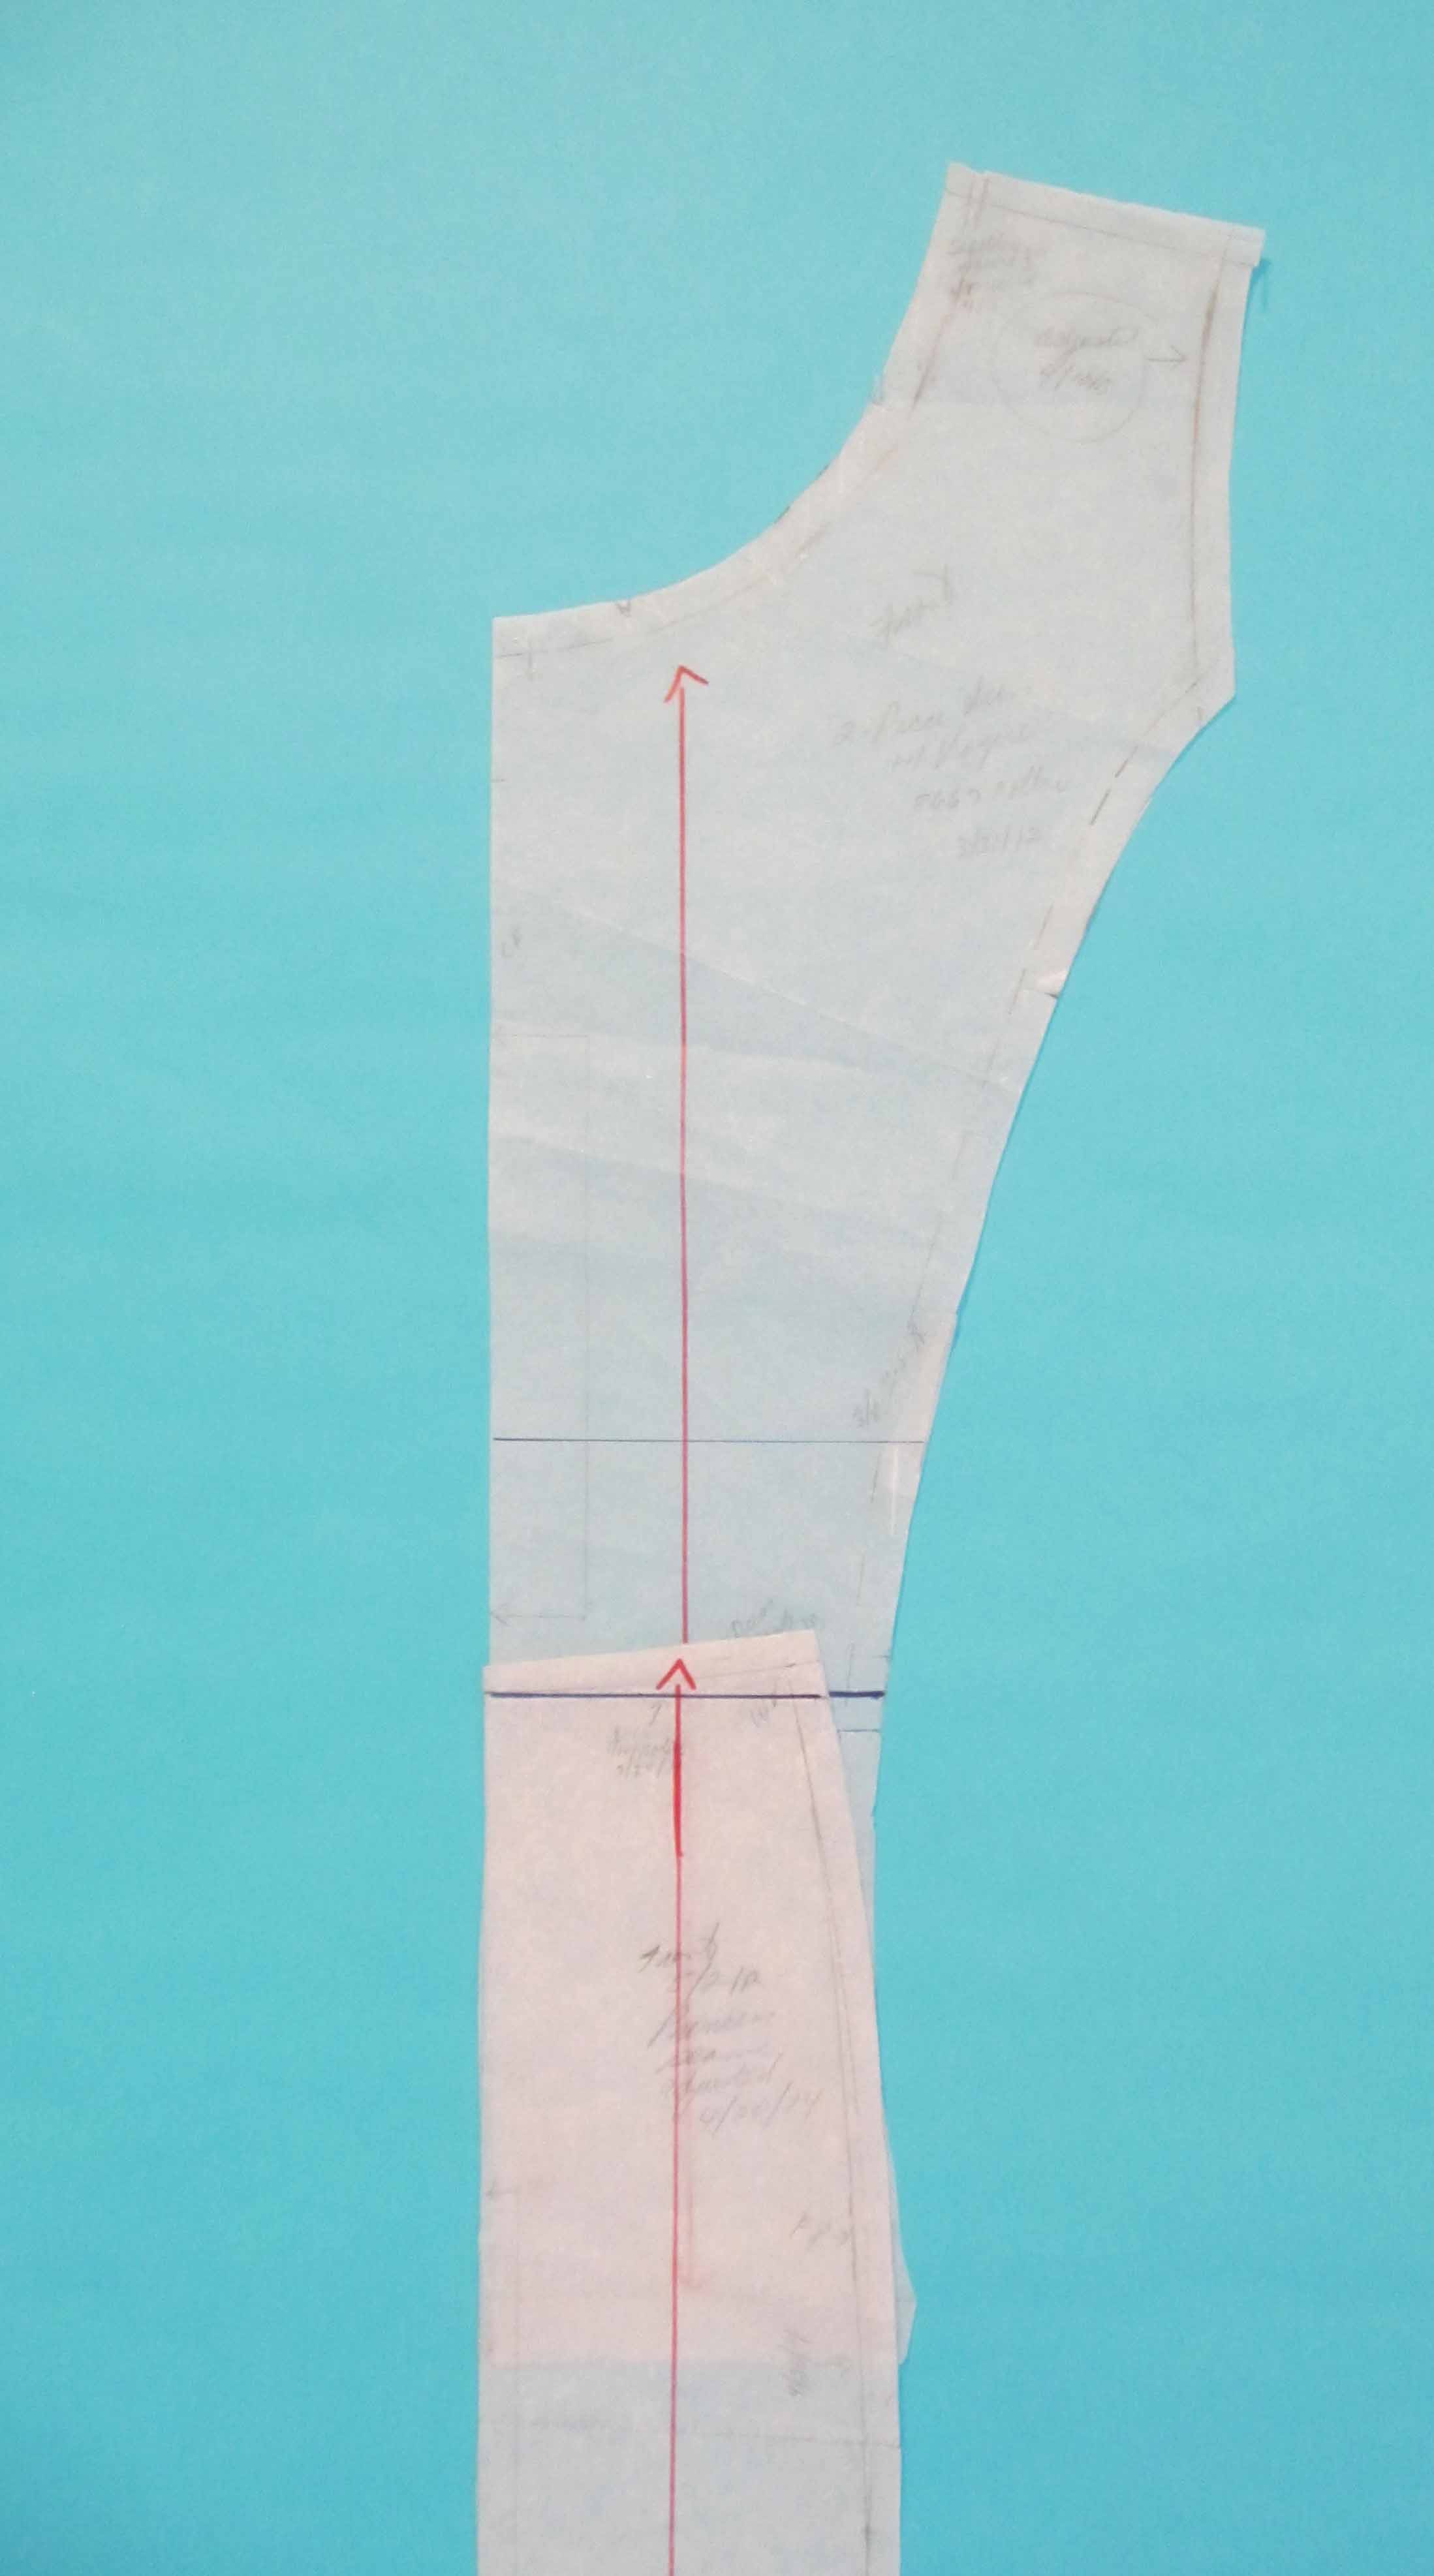
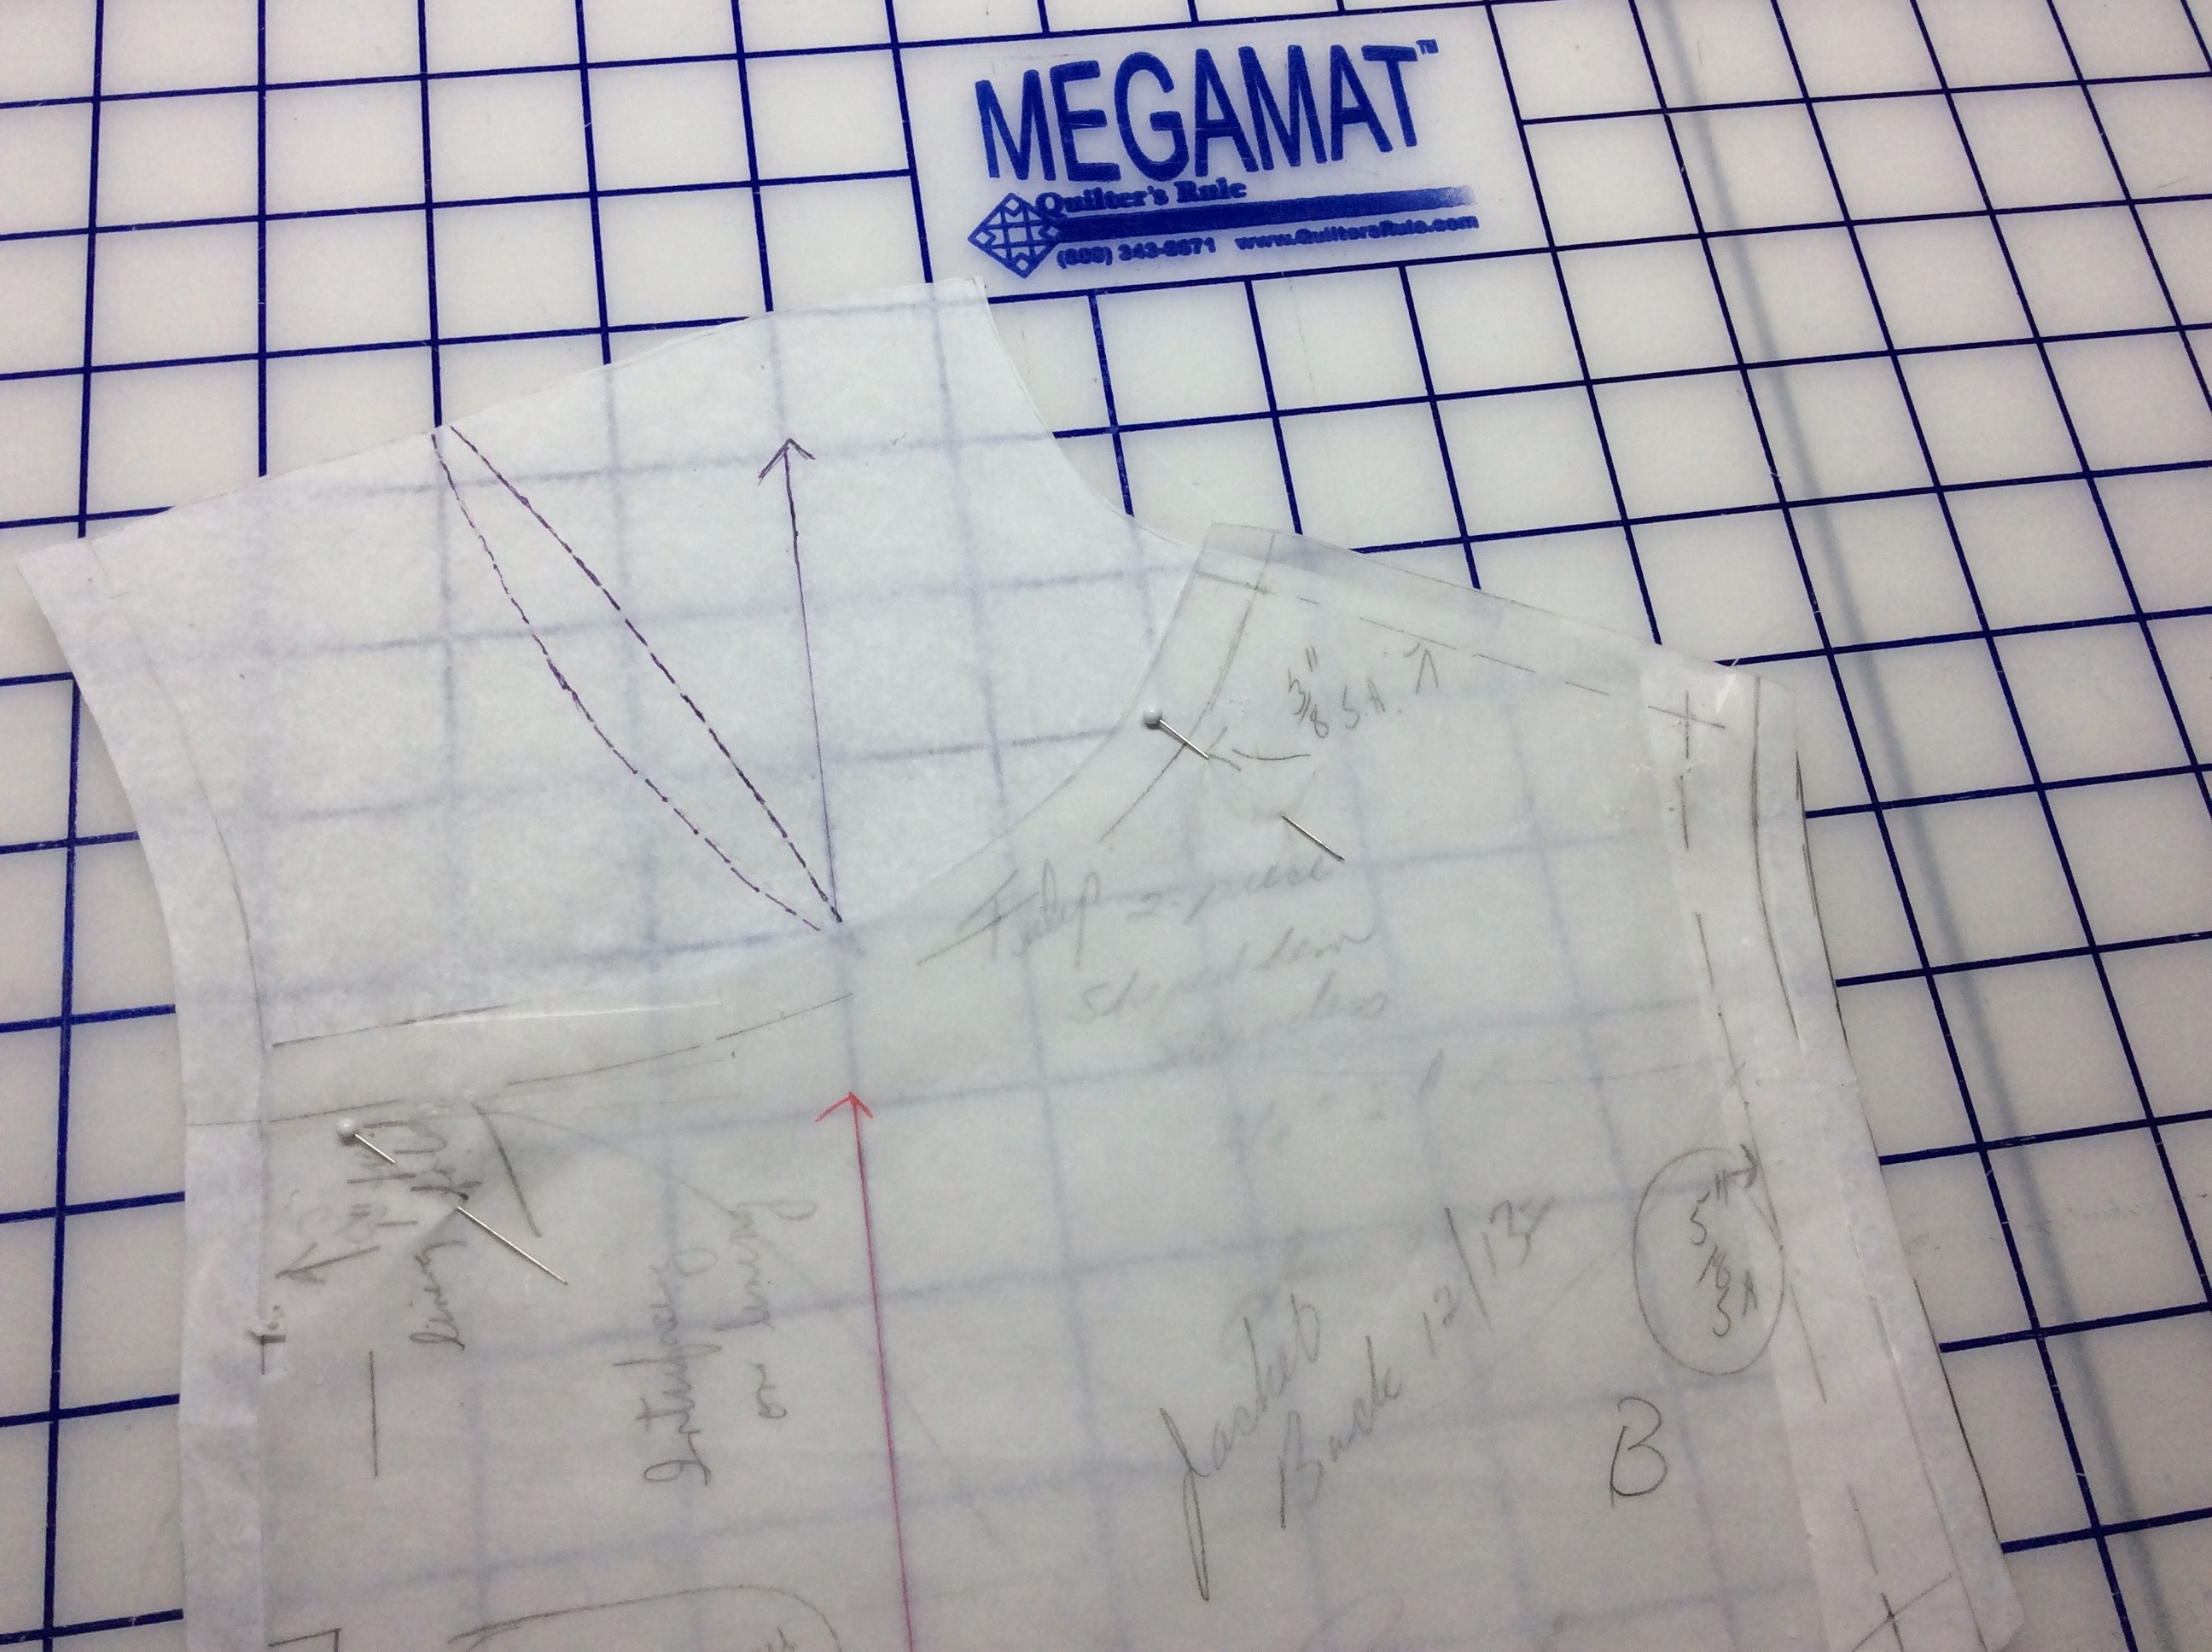
The method consists of cutting the existing pattern into strips, from hemline to a horizontal balance line (HBL) that will be used as a pivot point. Each strip needs to be cut to, but not through, the point where one of the cut lines meets the HBL to form a hinge. Here is an example of how this works.

IMG_0138
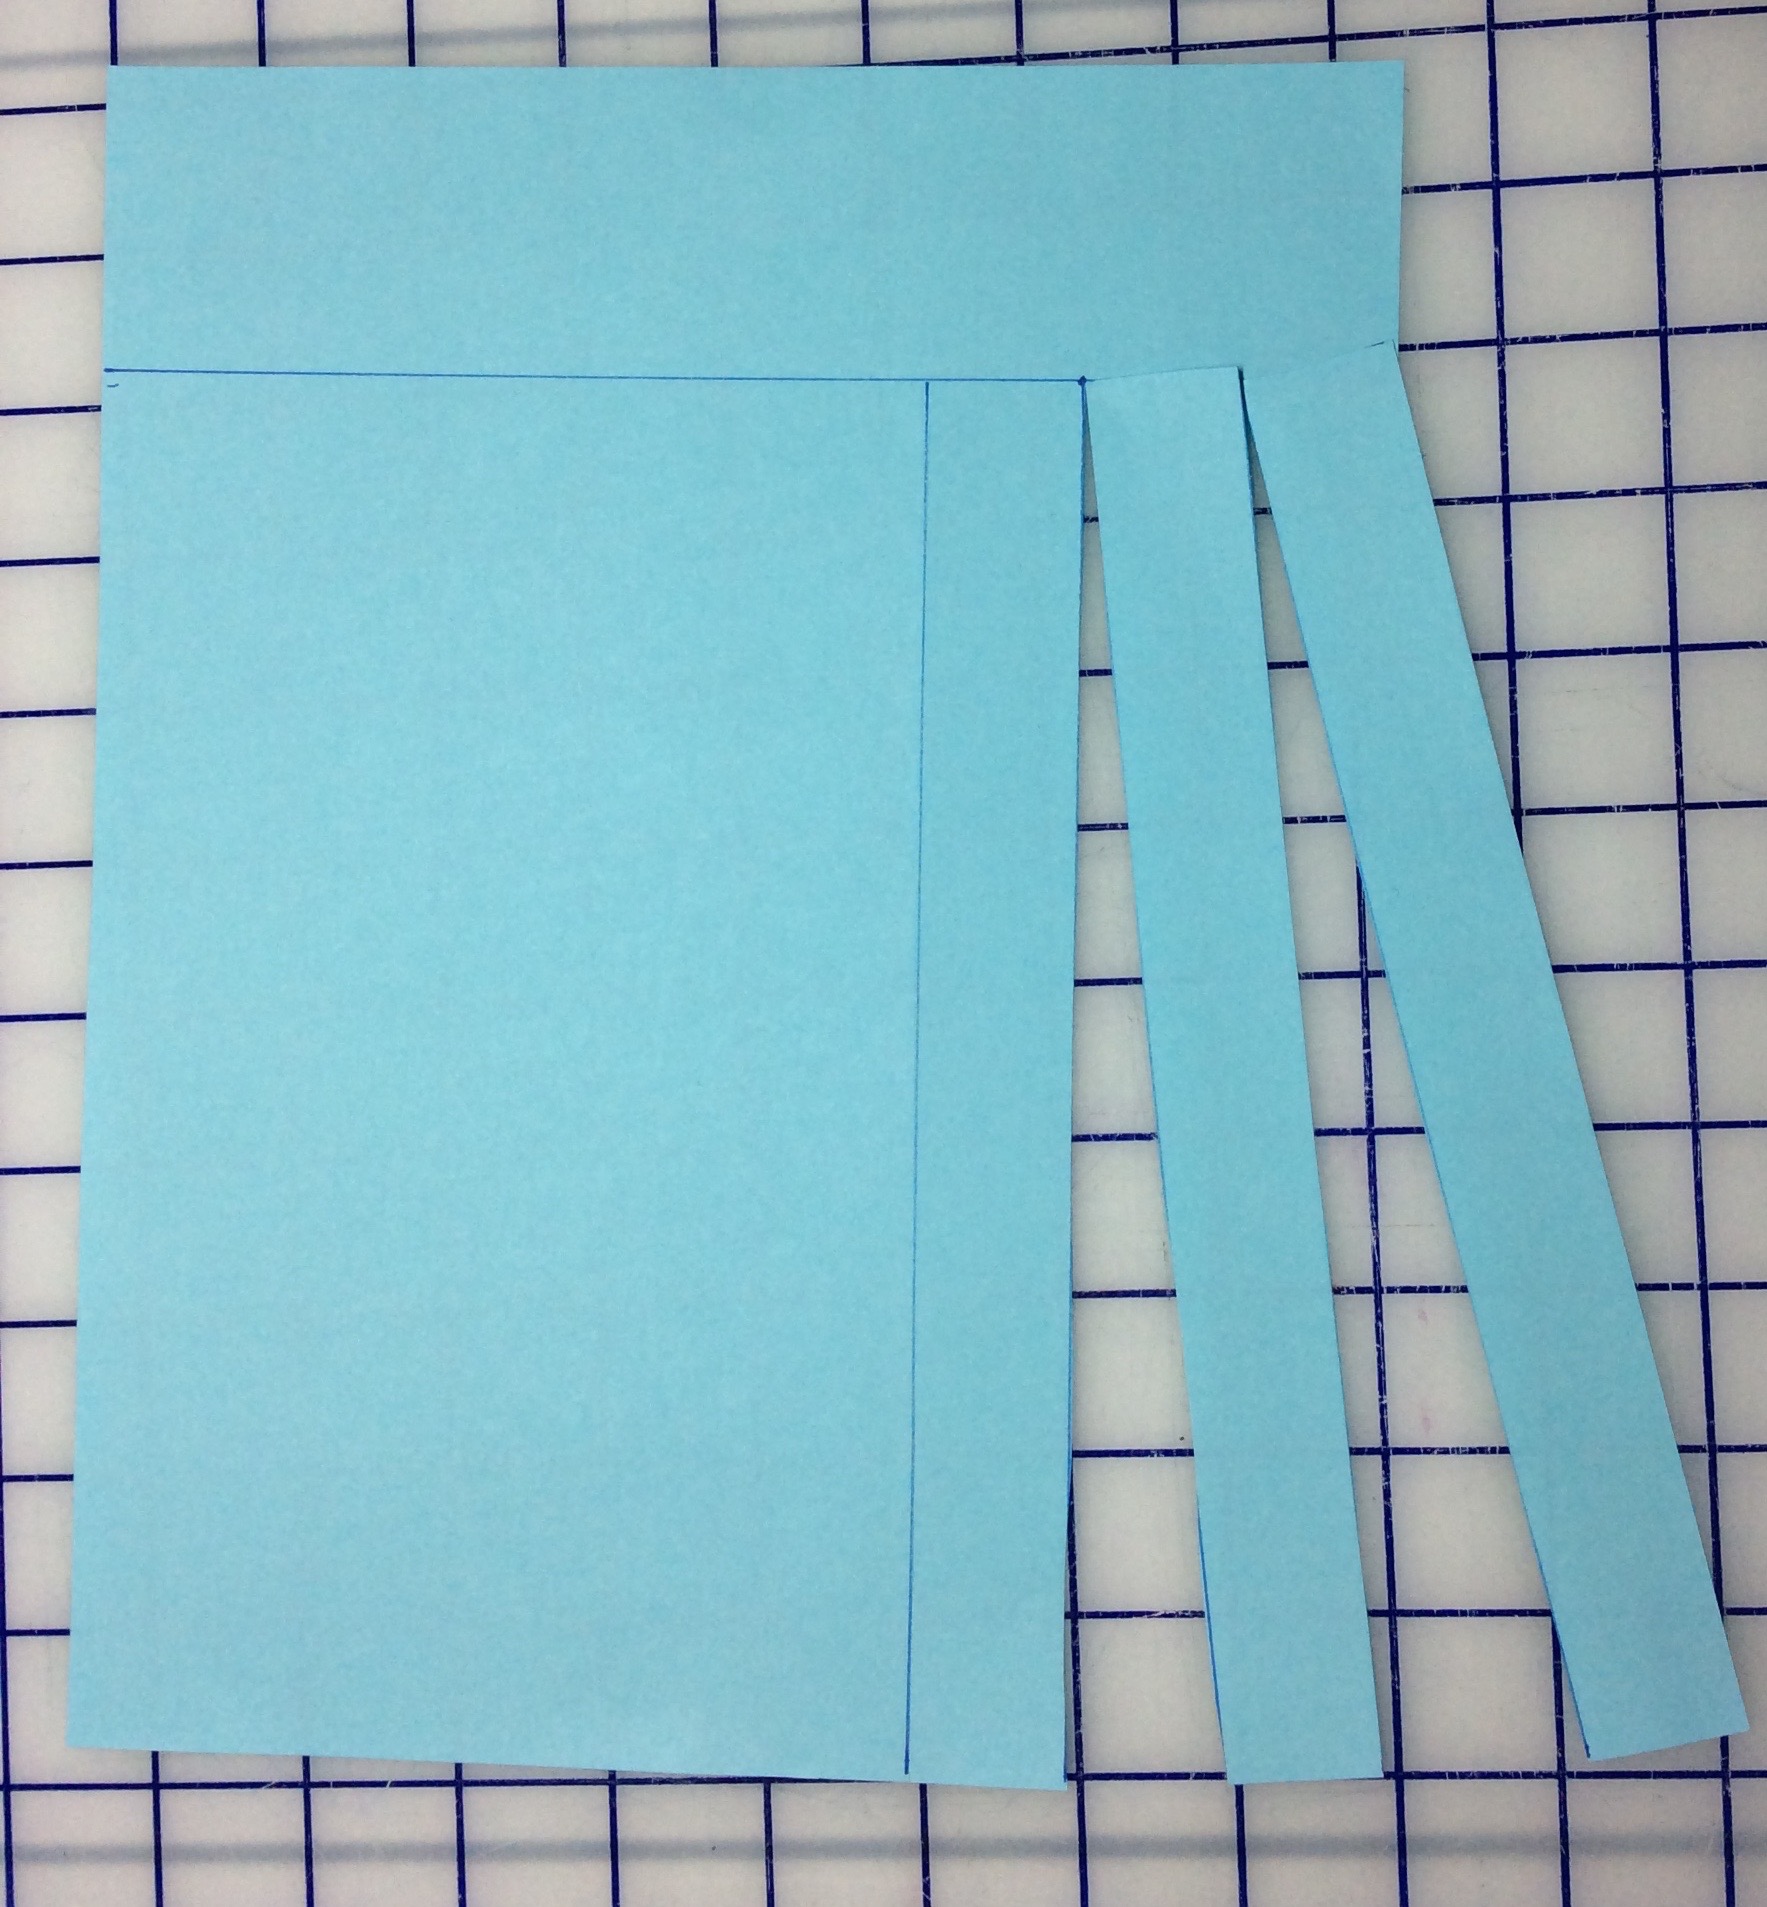
I decided how wide I wanted the dress to be at the hemline, subtracted the total circumference of my sheath pattern at the hem (not counting seam allowances), and divided that number by four. After rounding for convenience, I subtracted the width of each pattern piece at the hemline to arrive at how much I needed to add to each pattern piece. Then it was a question of cutting strips of equal width to the HBL, cutting the hinges, placing more pattern paper under the work and spreading the strips the same distance apart from one another at the hemline. I think I opted for ½-inch spreads to distribute the additions evenly throughout each pattern piece.

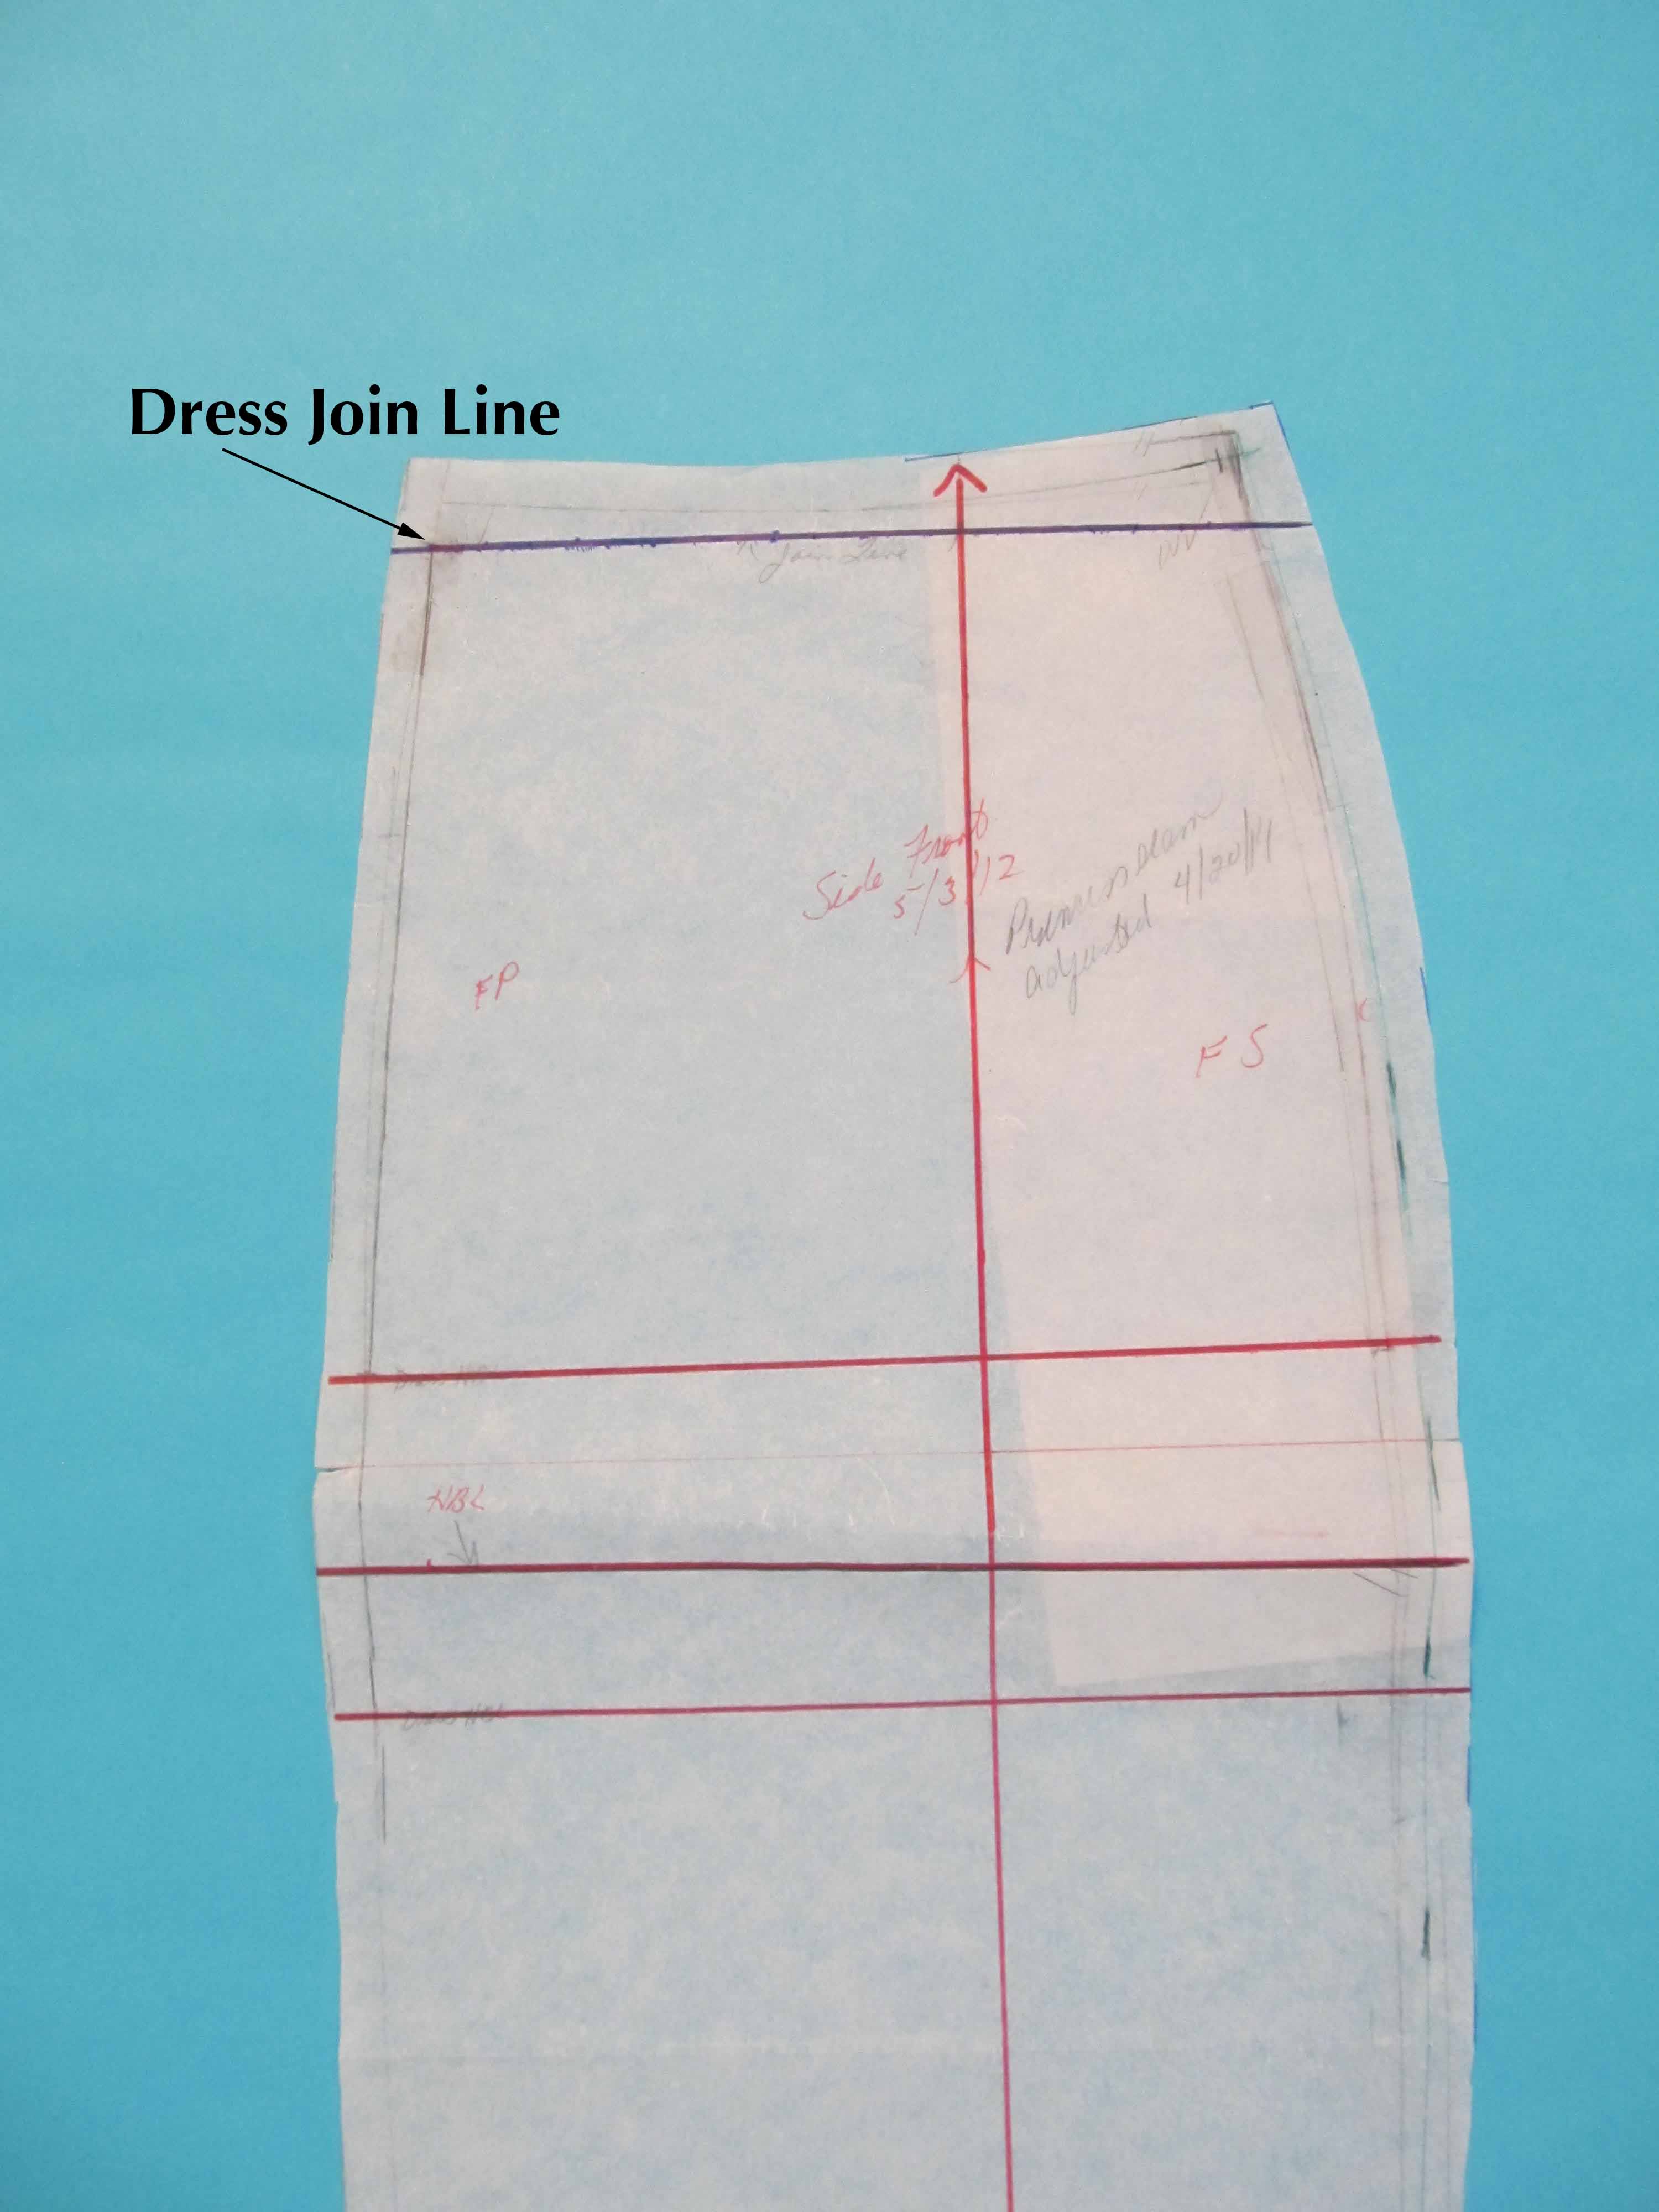
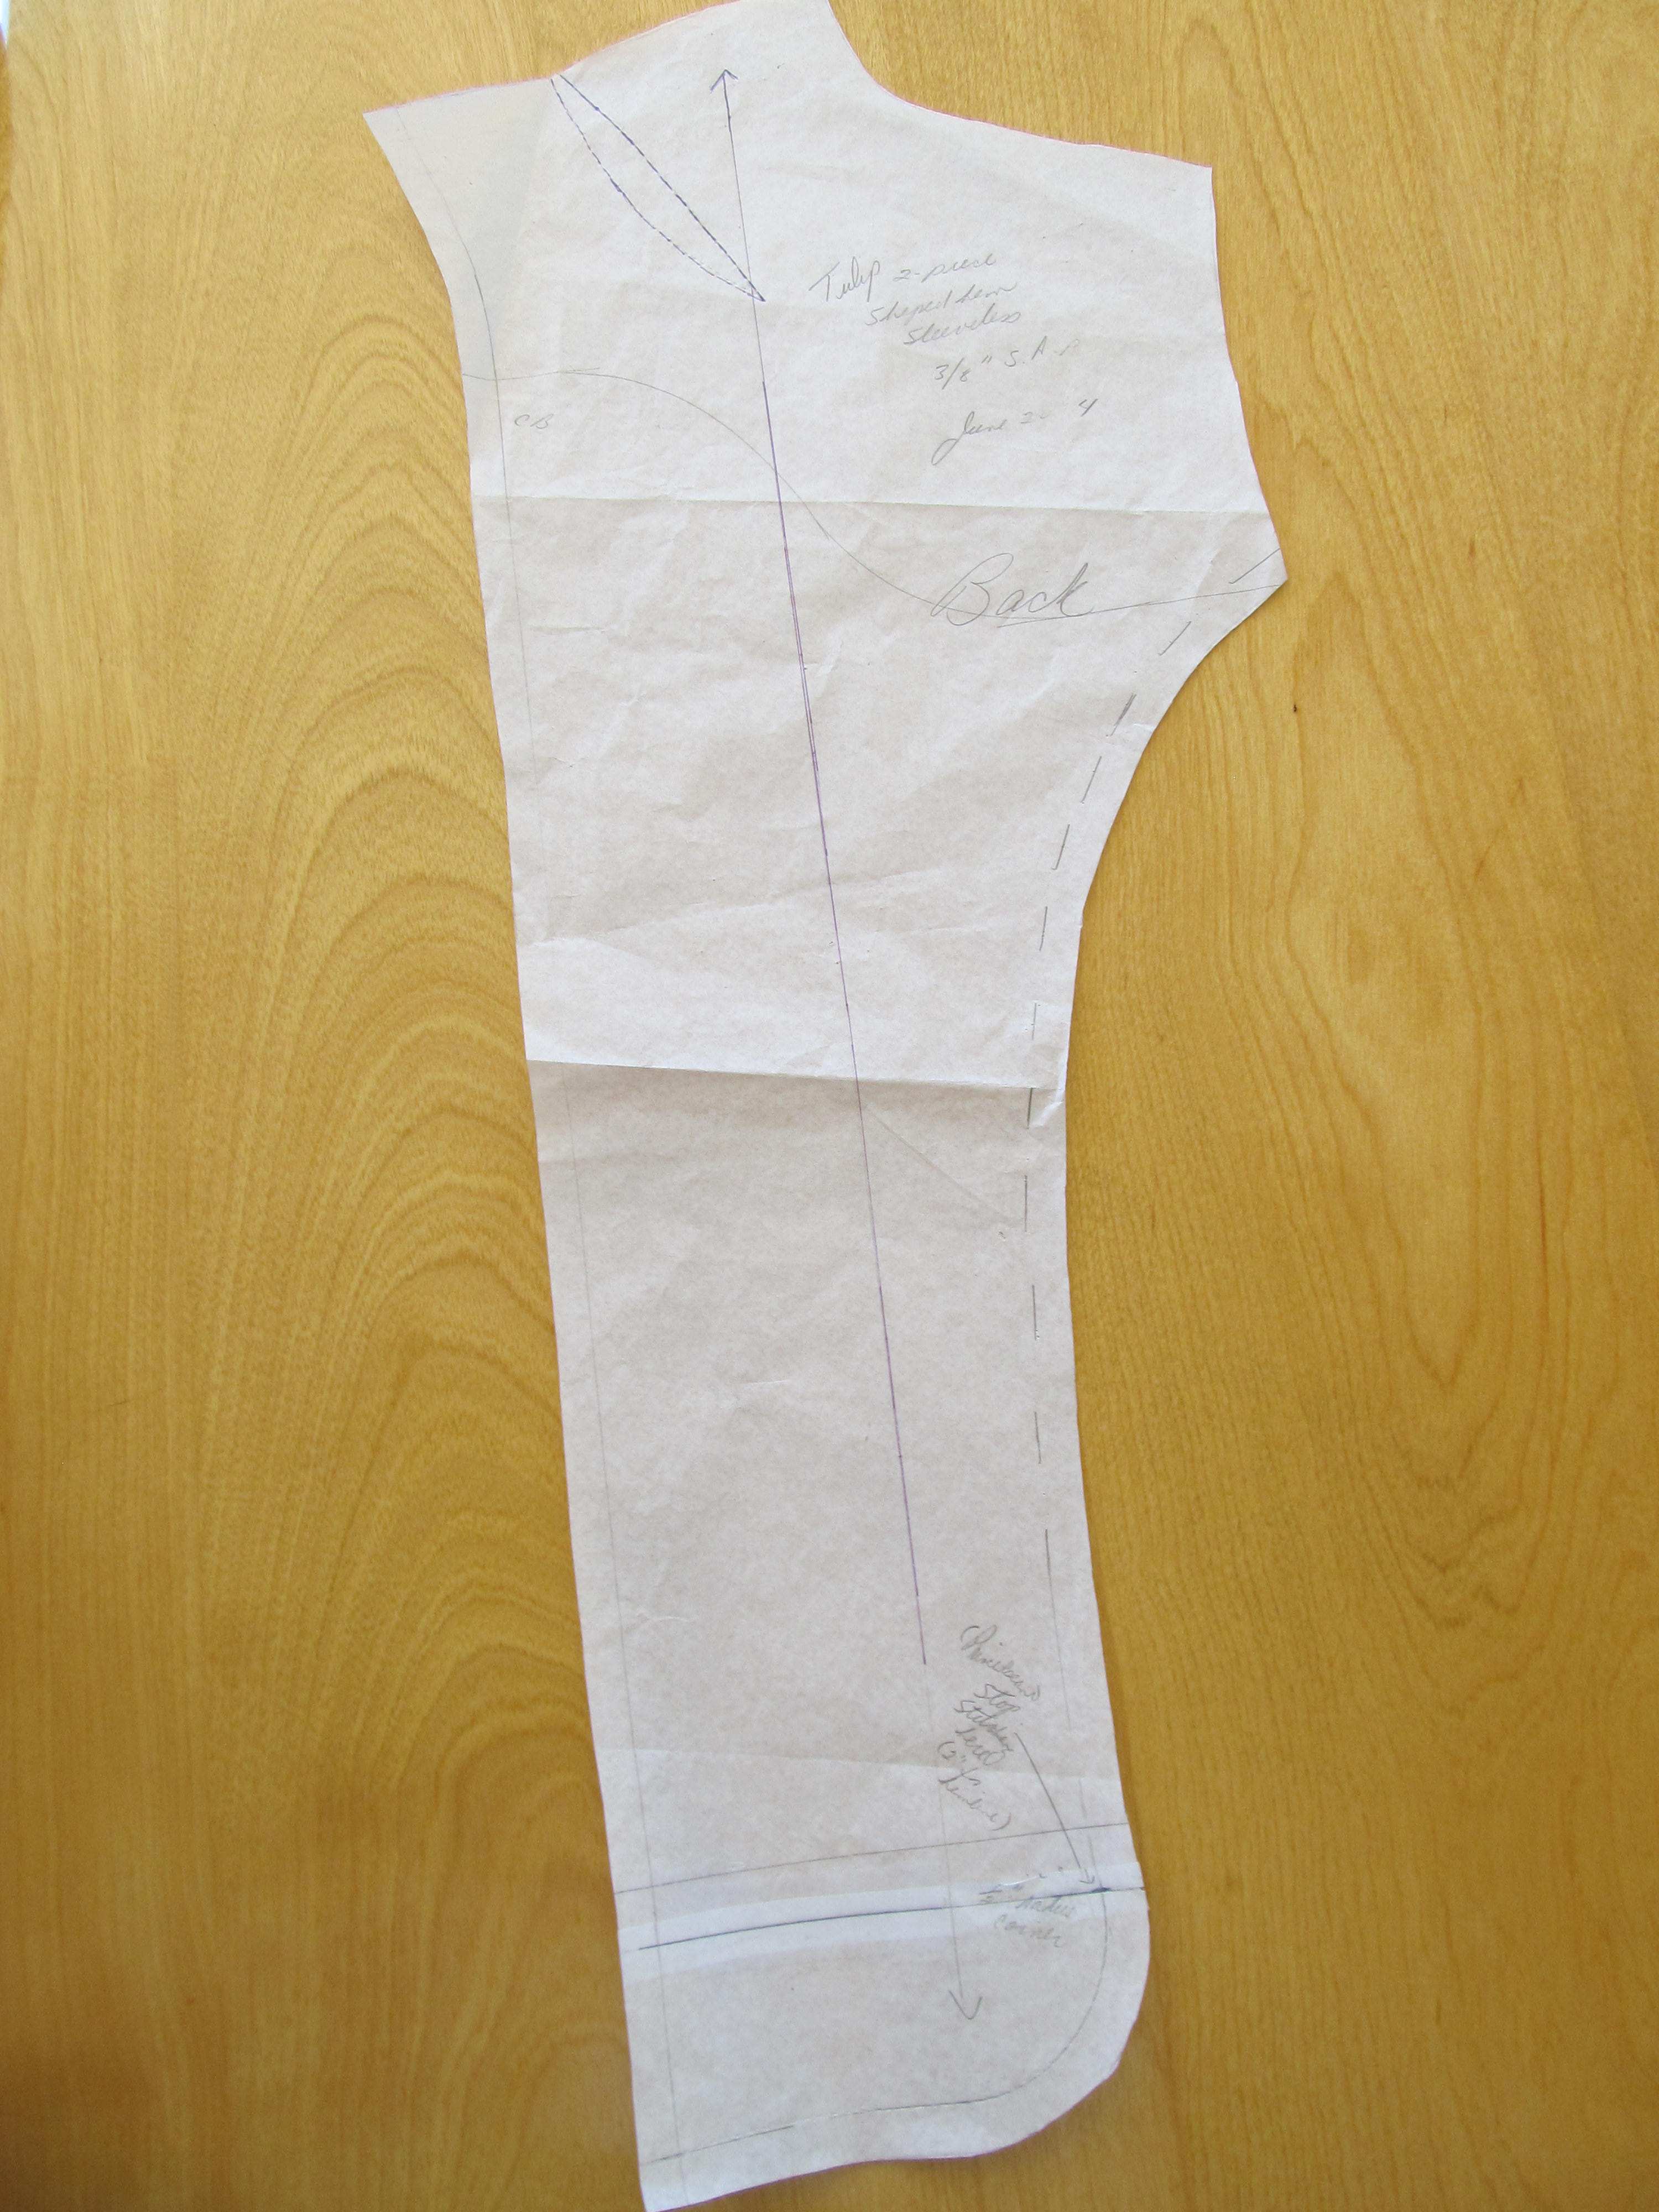
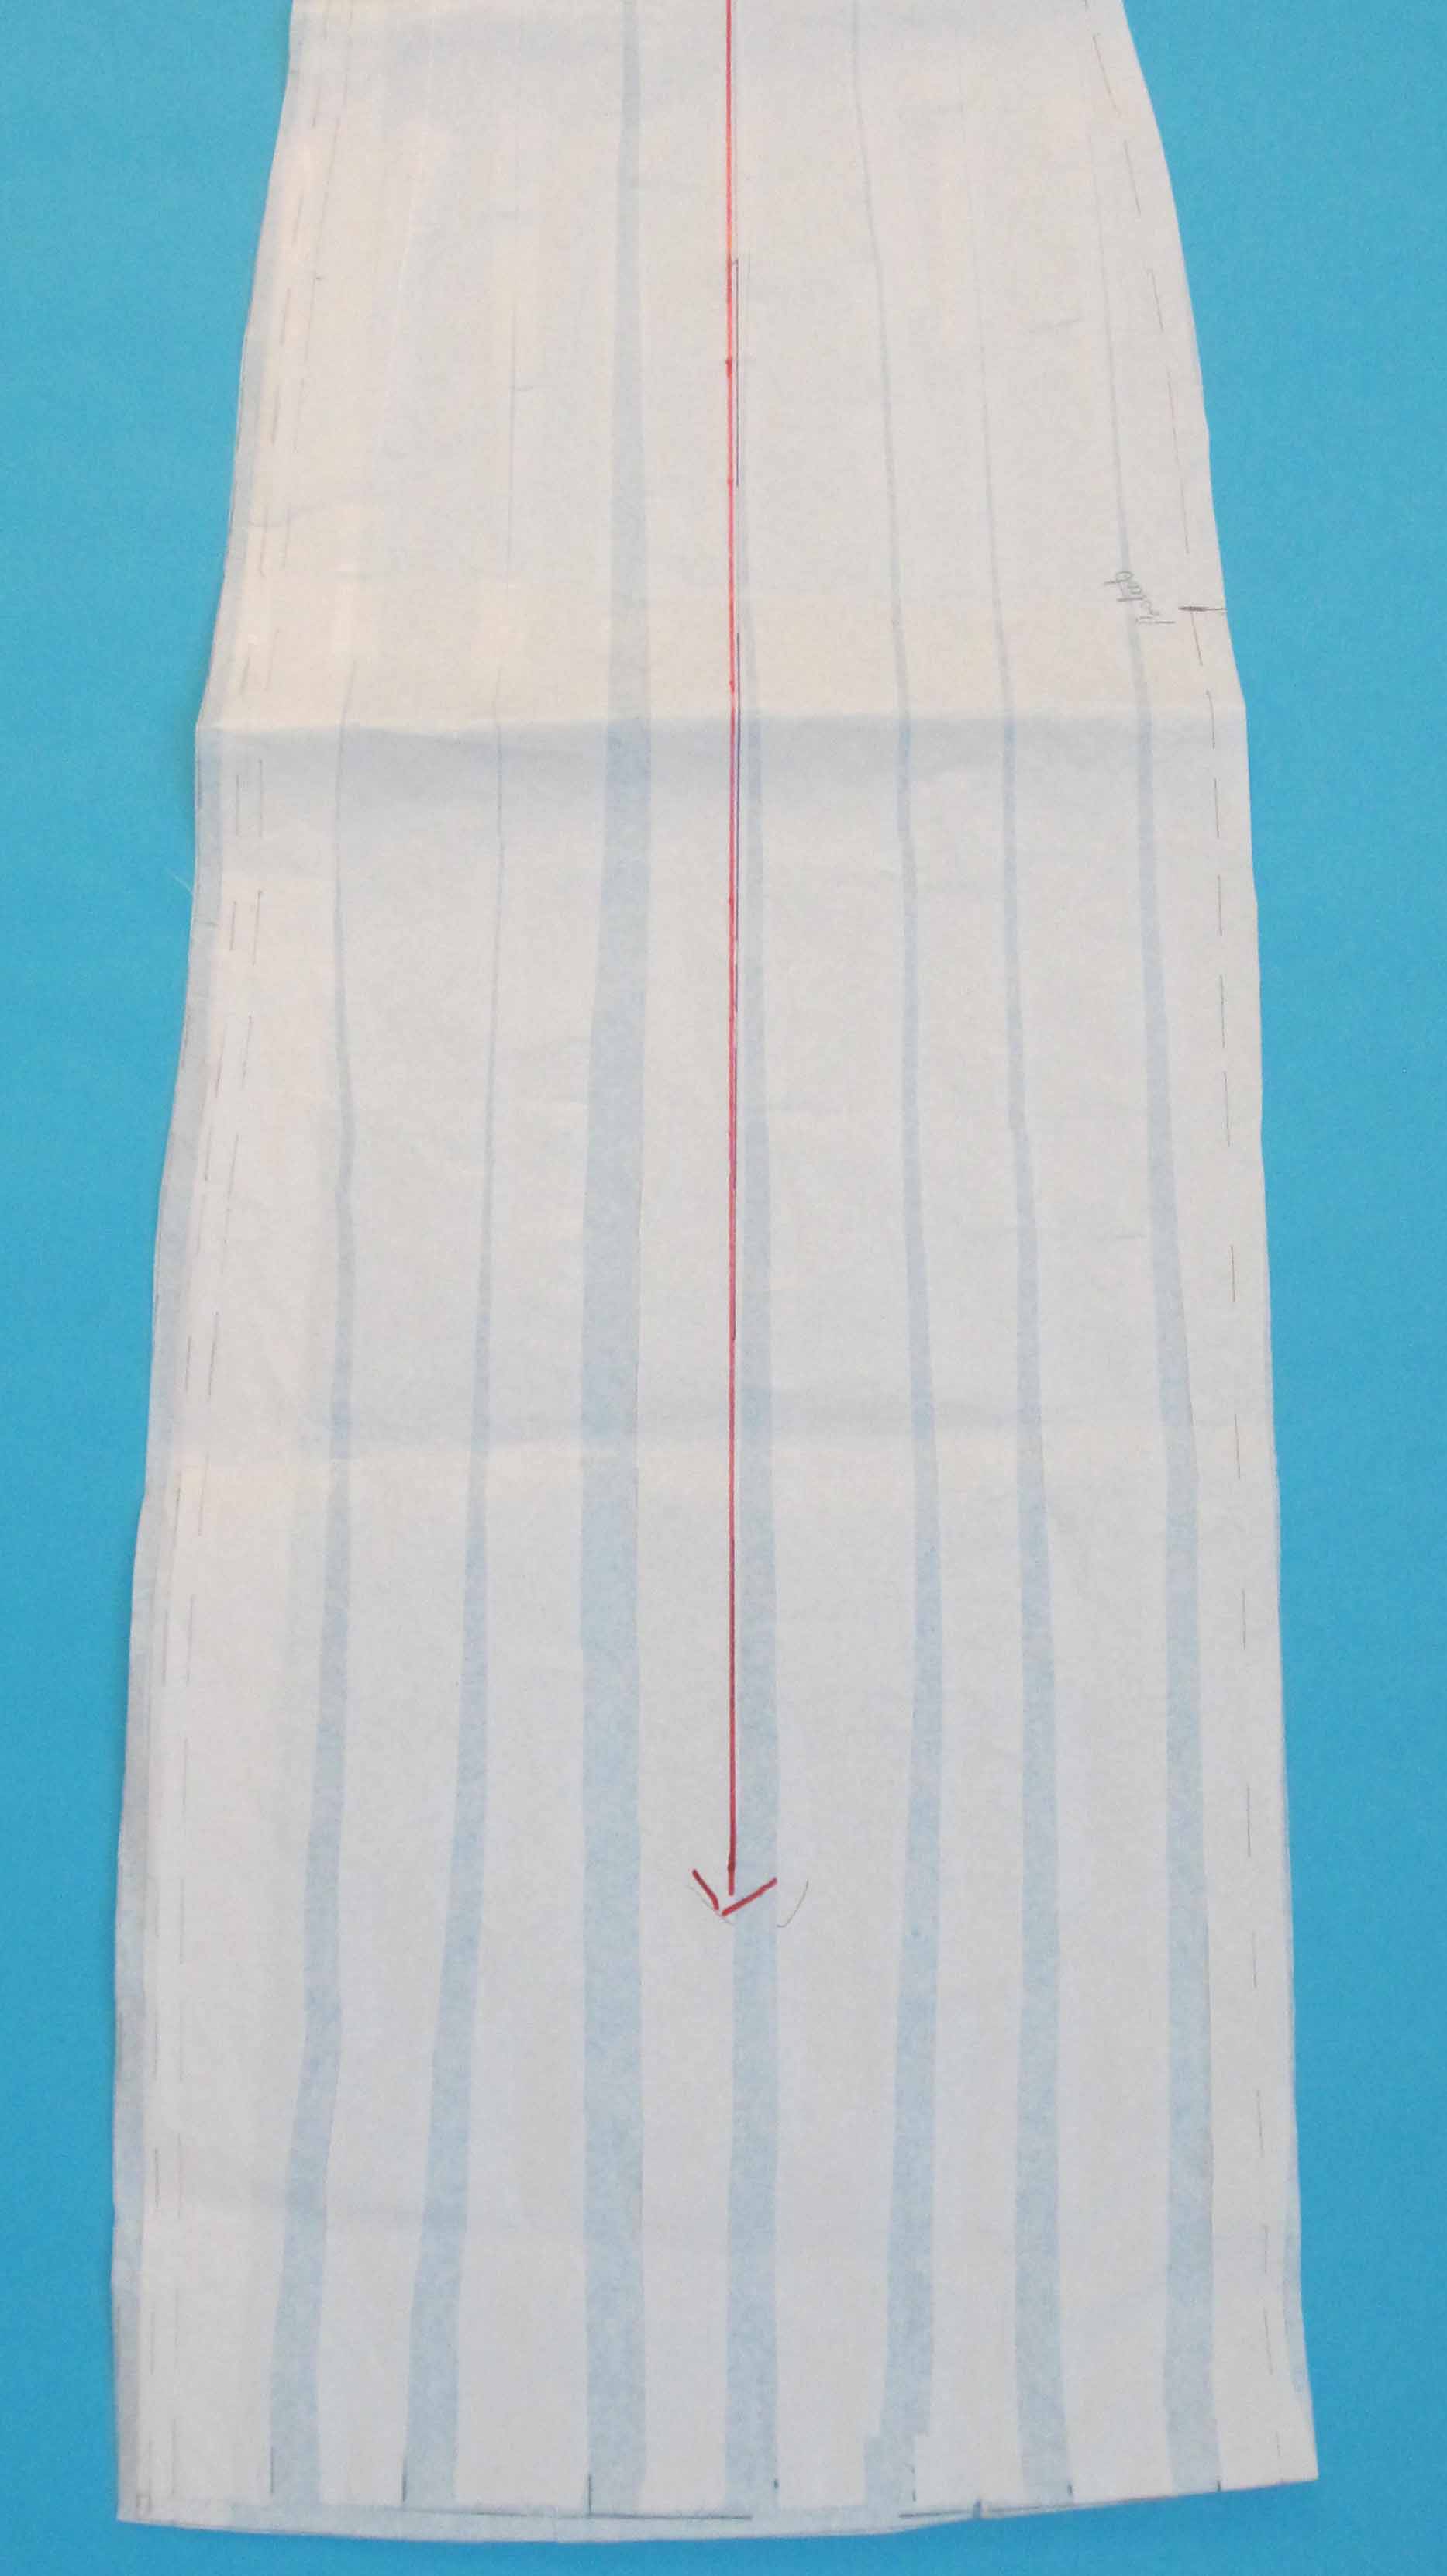
I left center back and center front alone and worked only to one side on those pieces, whereas the side front and side back had to have new graininess drawn after the process was completed. Then I taped it all down and arrived at pieces that look like this at the bottom.

SkirtSpread
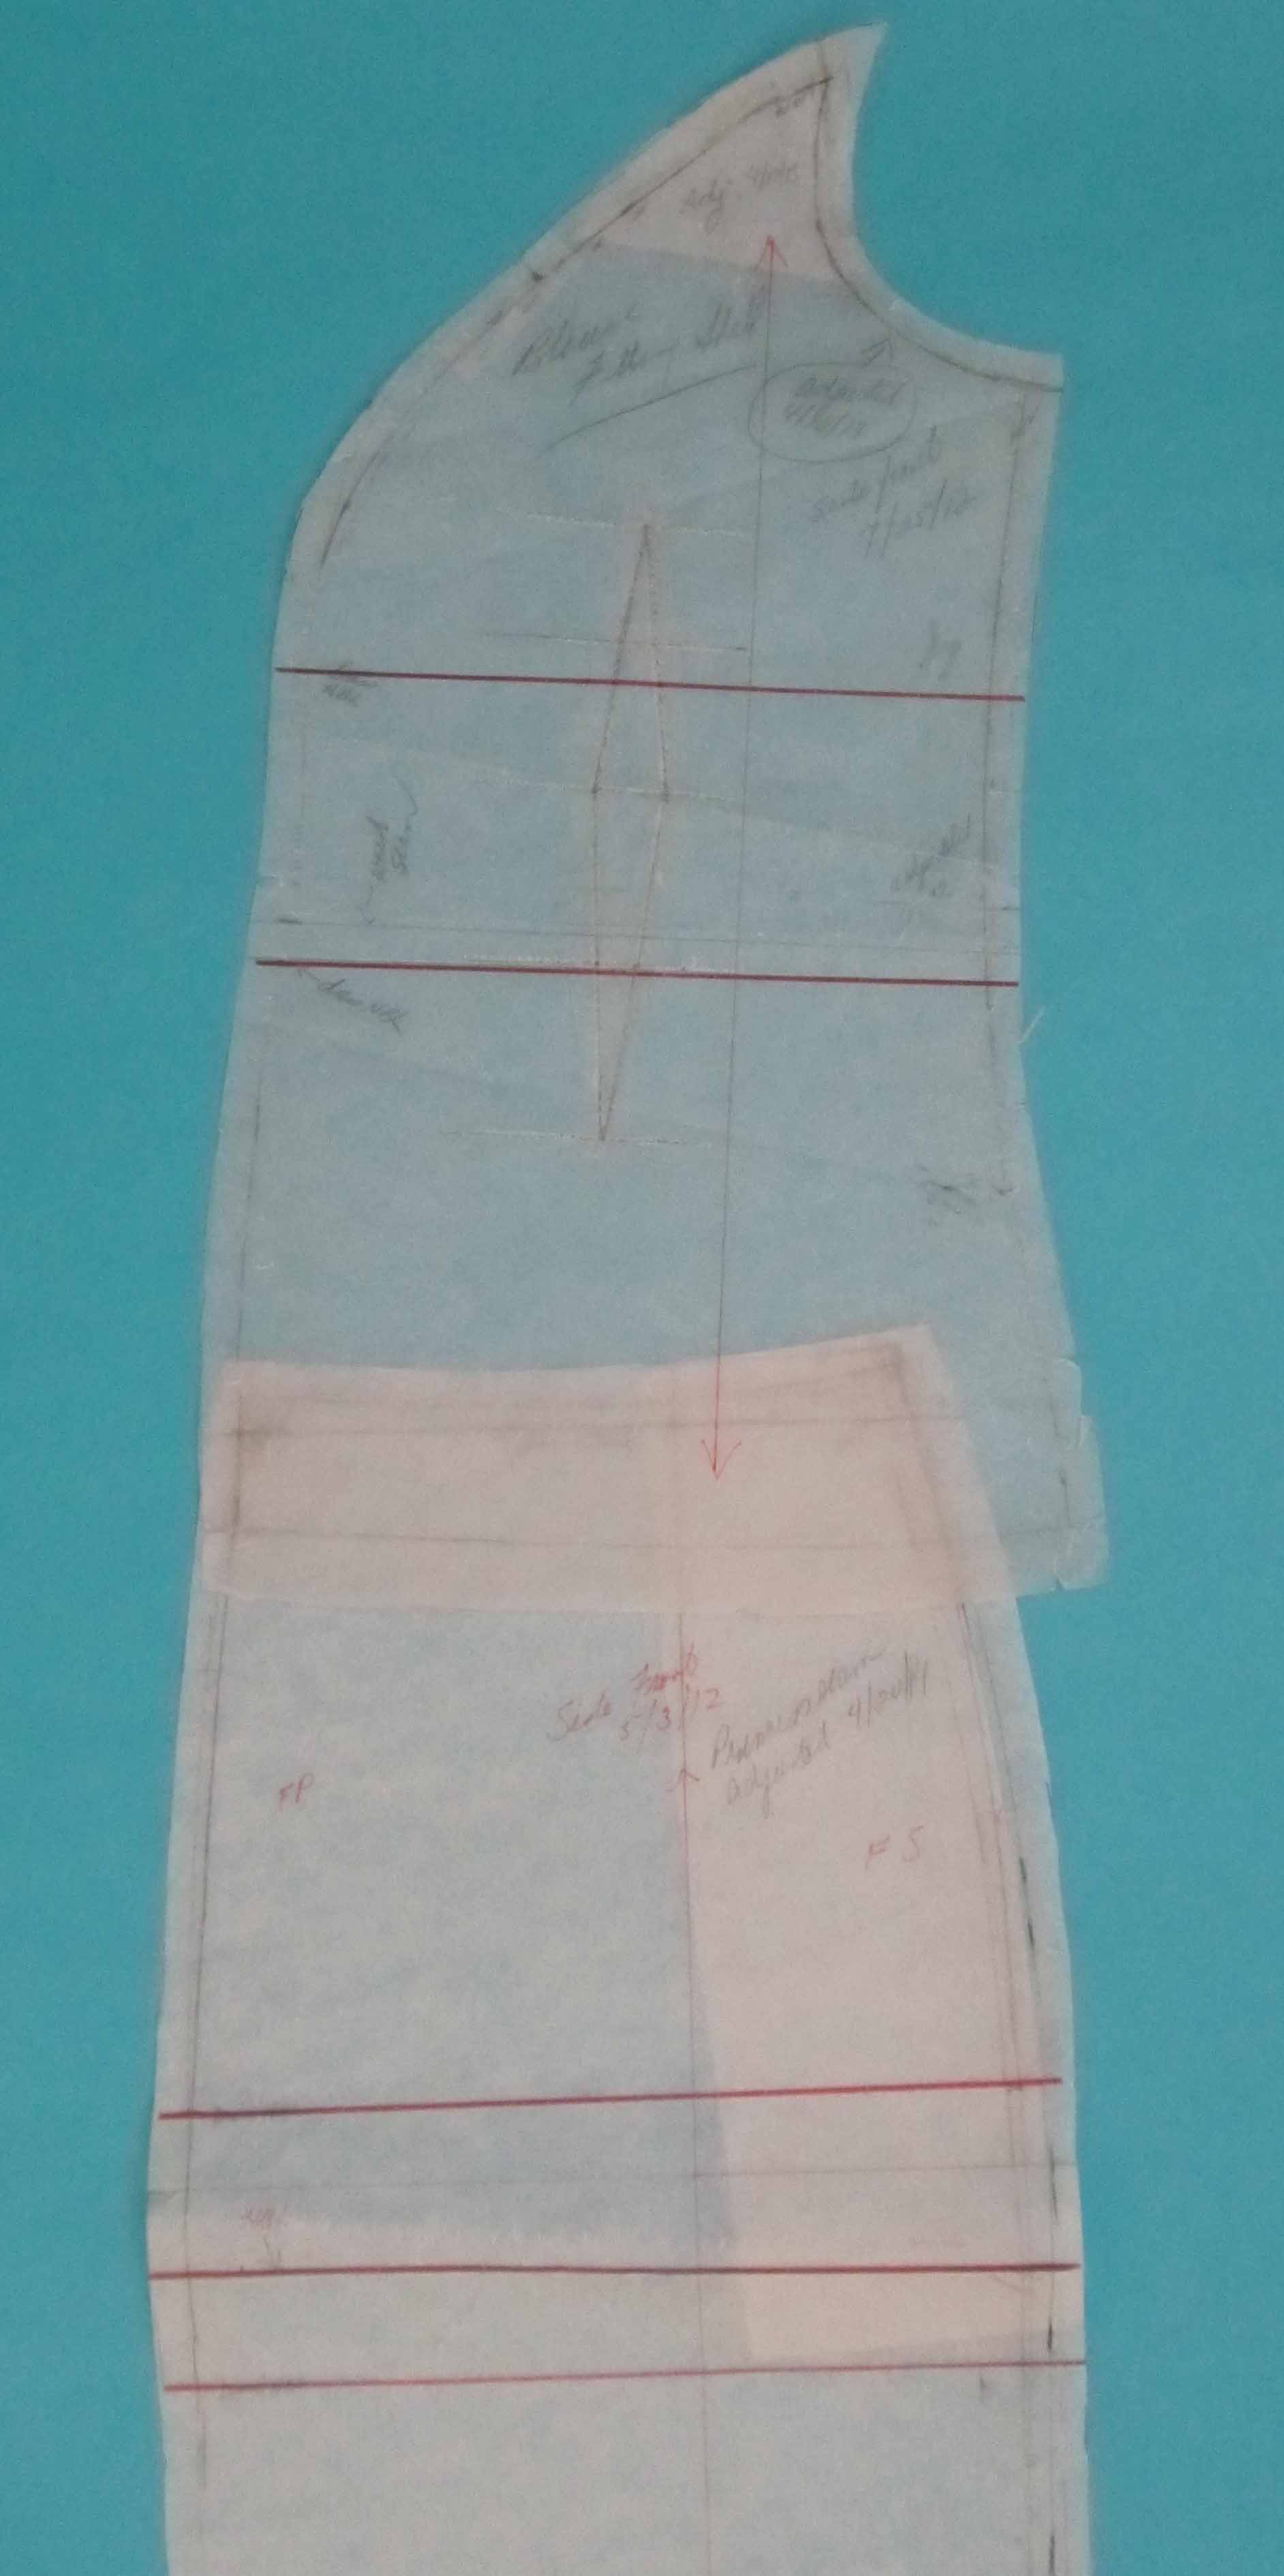
Here is what the pattern looks like in the hinge area.

ShowHinge
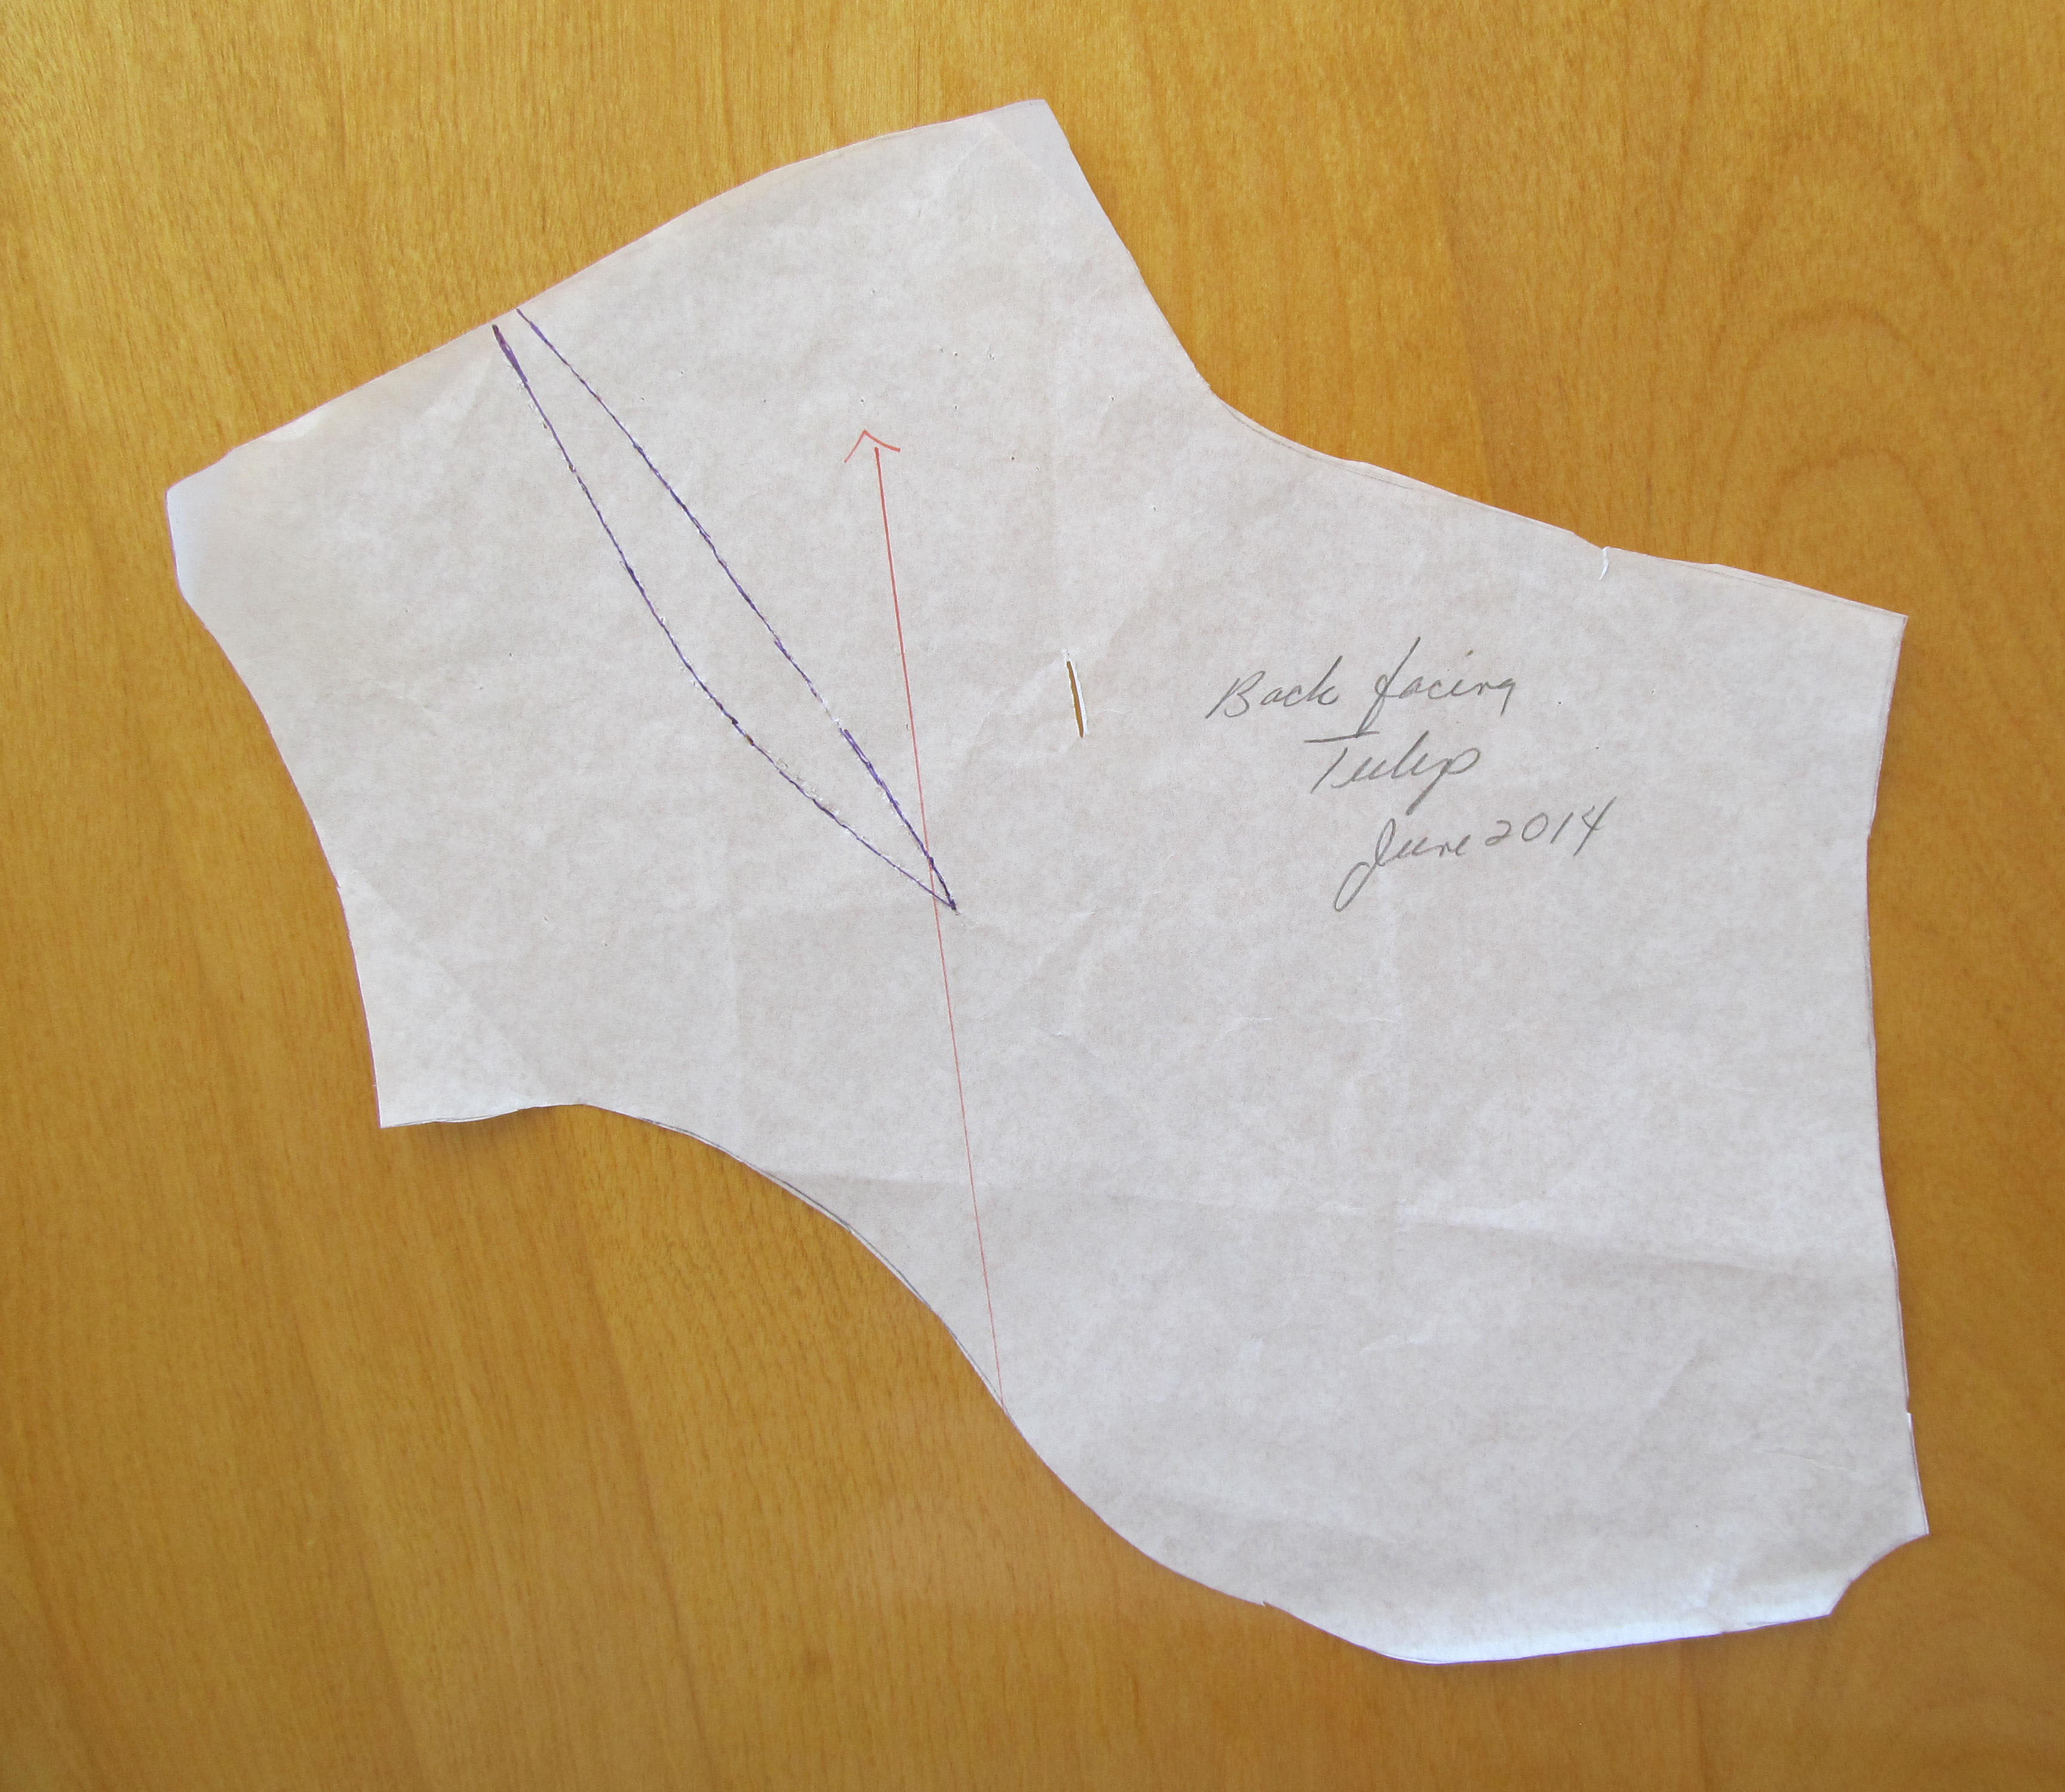
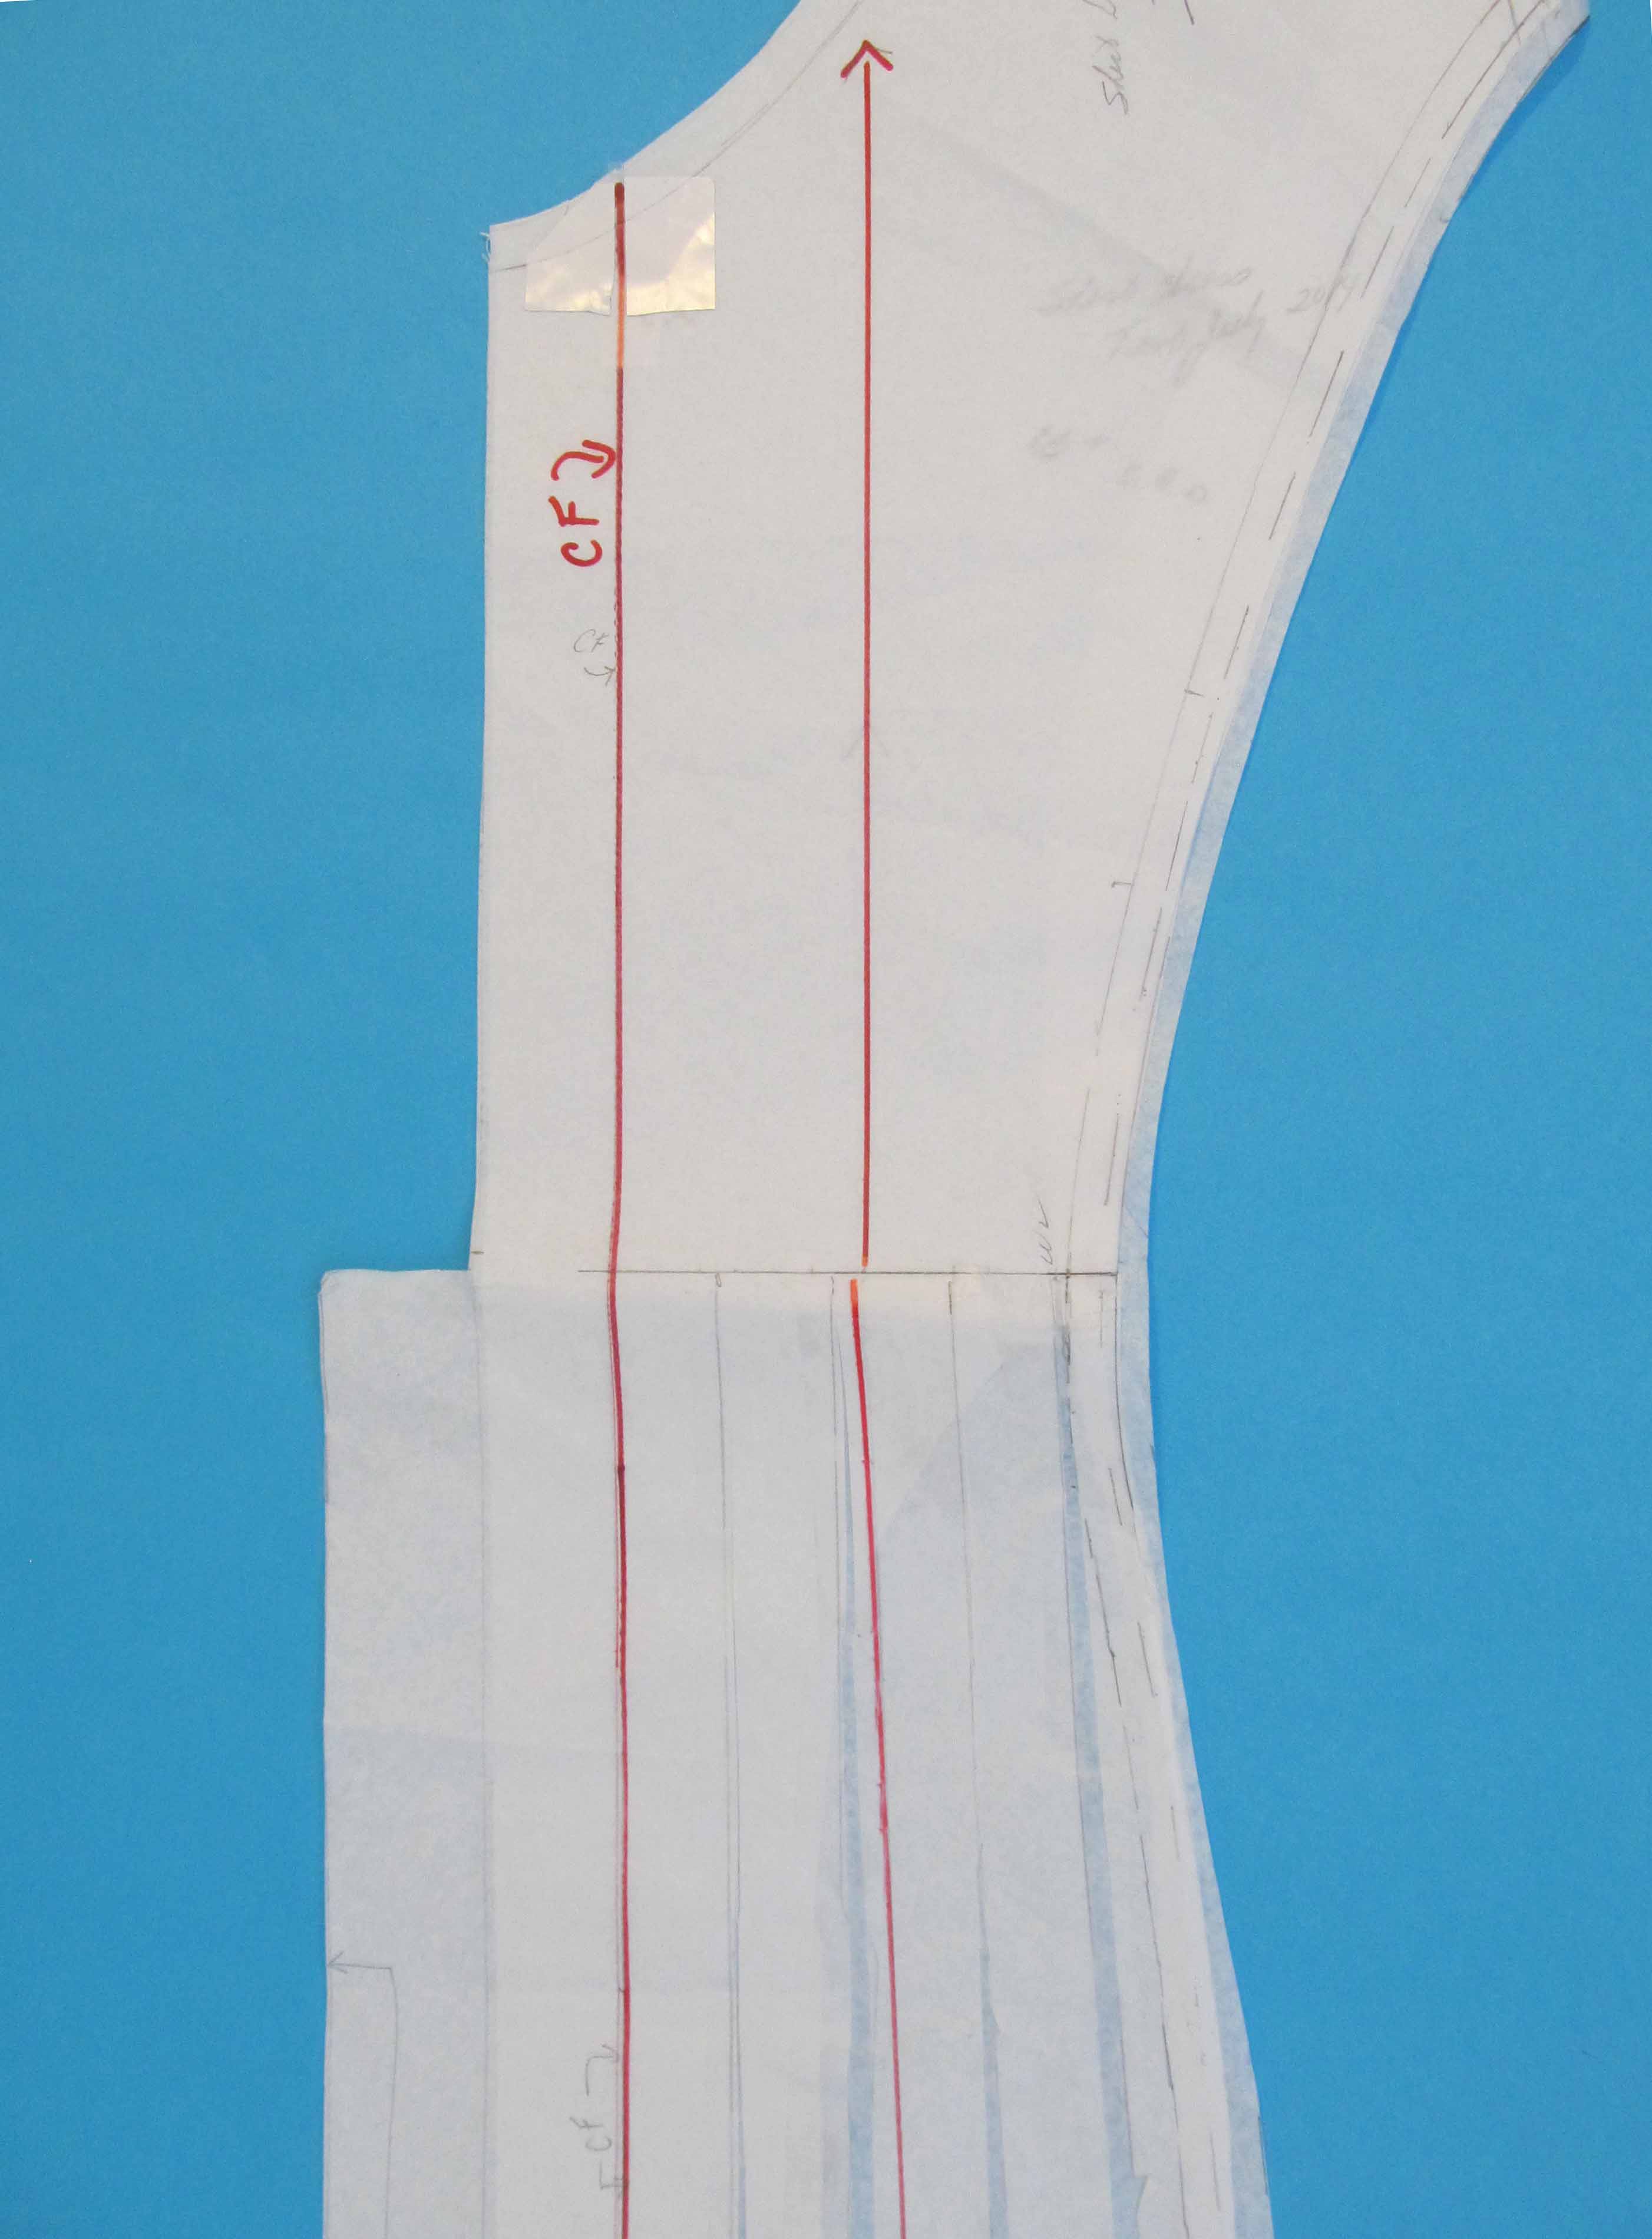
The picture above also shows the extension for the center pleat, which is cut on the fold, and the extension for the opening where the buttons and buttonholes are placed.

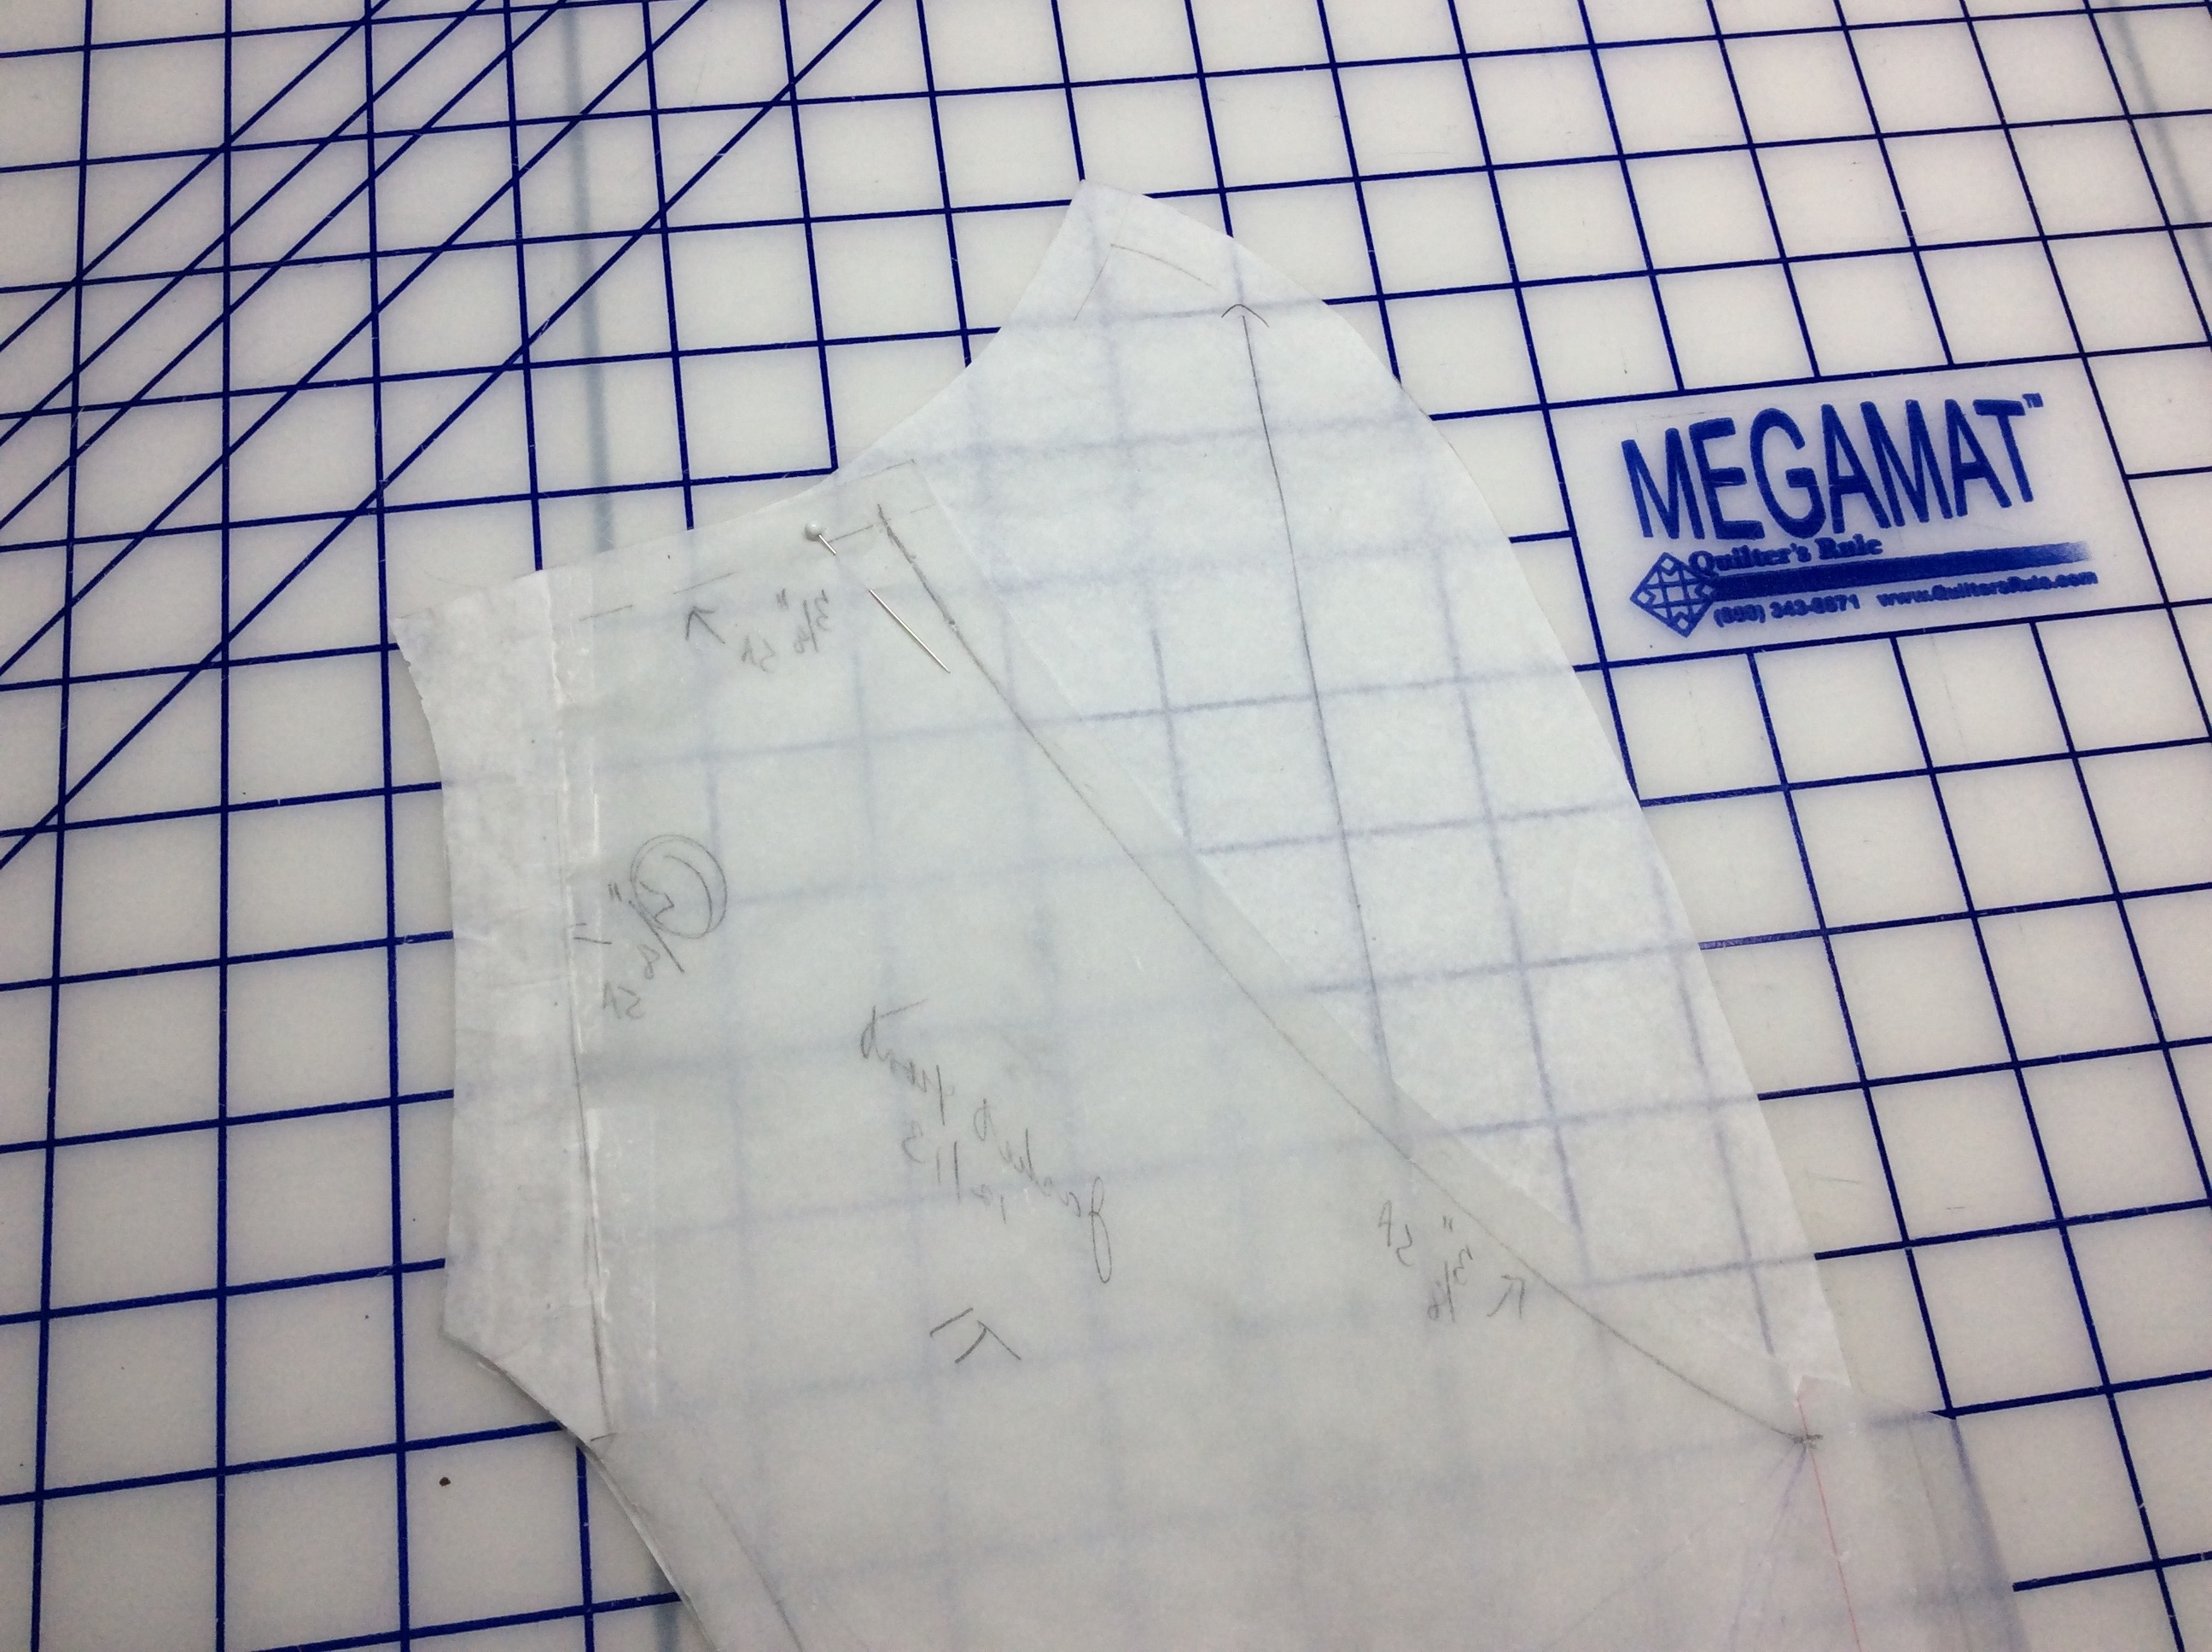
I had a friend mark the placement and depth of the release pleats for me in the side front and side back panels. Here is how that looks on the pattern. Shirtd_SF_Top

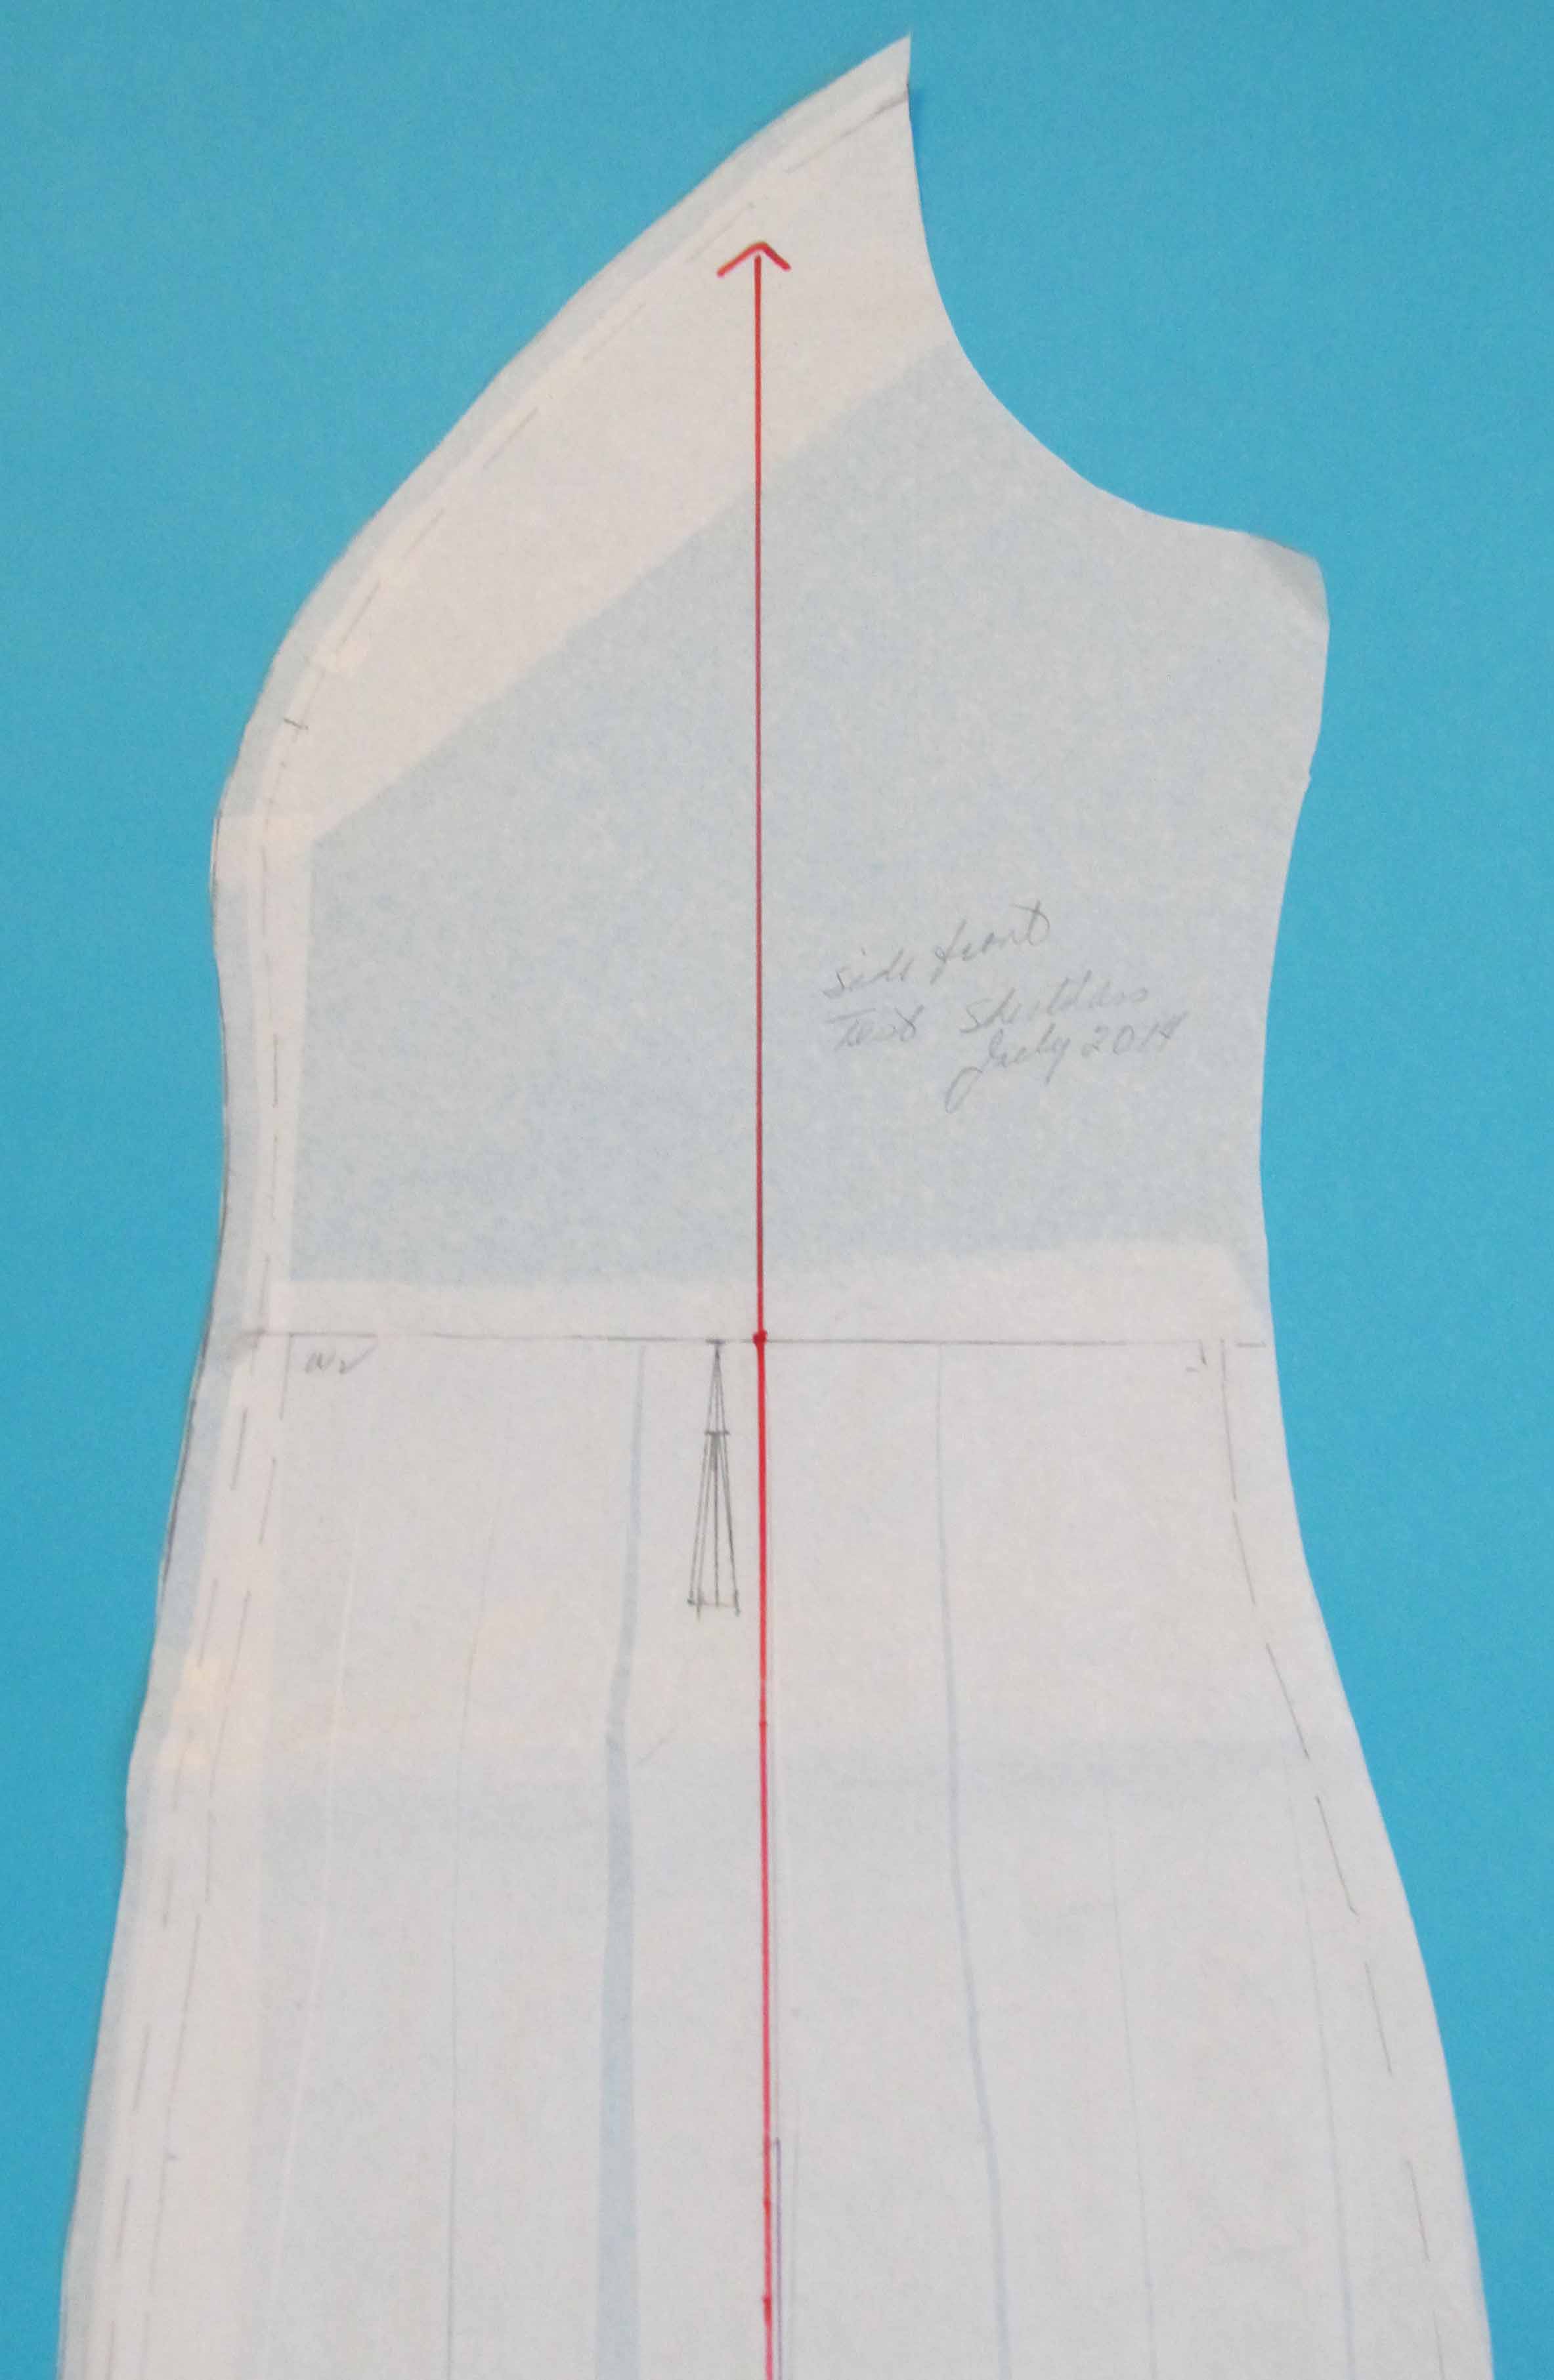
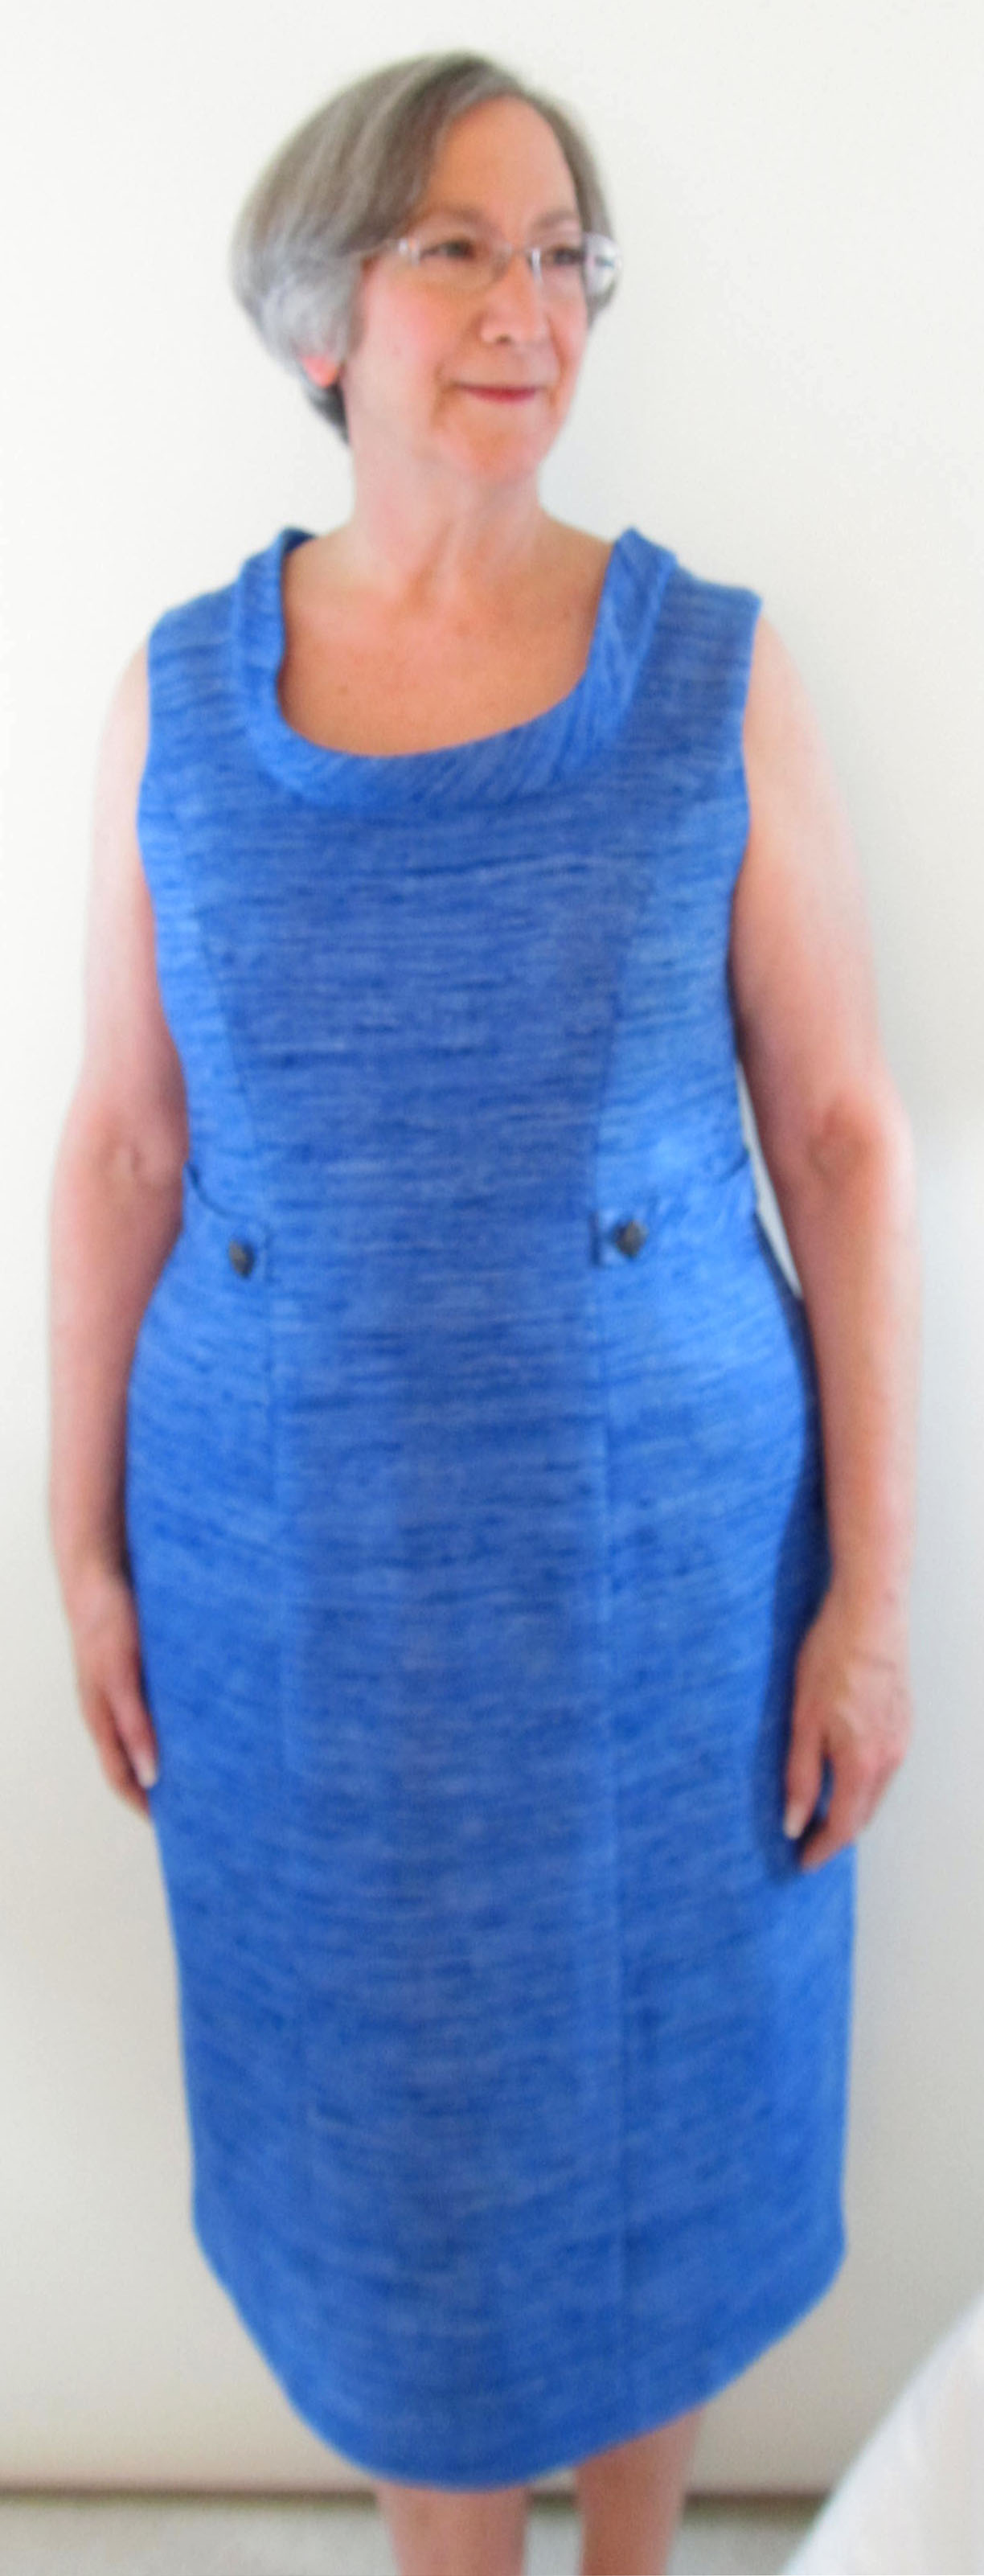
I added in-seam pockets to the pattern and was good to go.

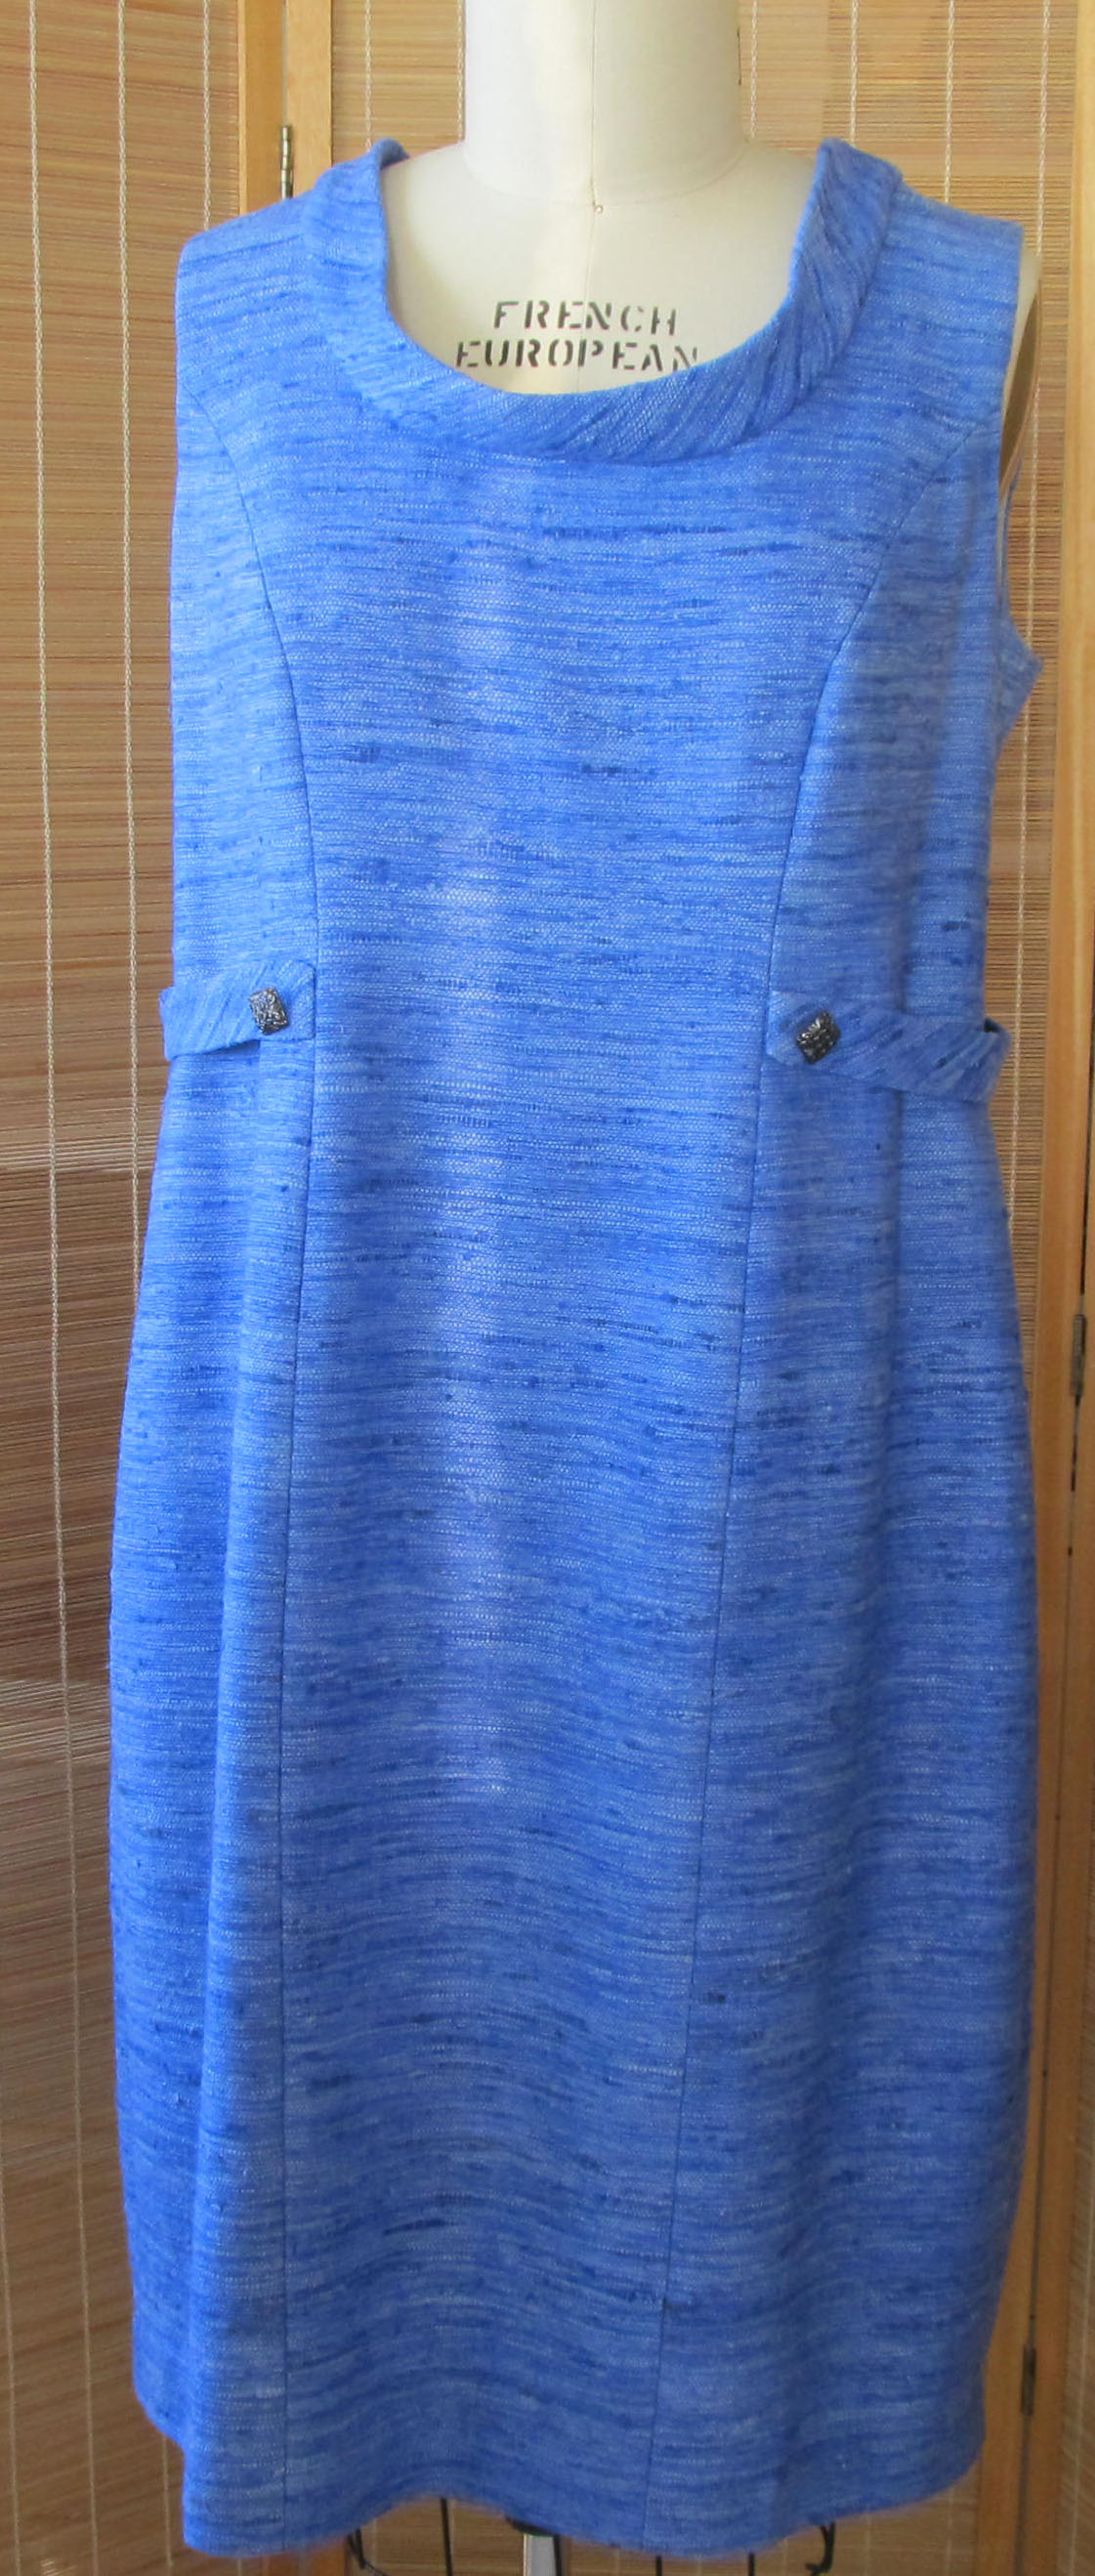
This was another project that I intended to complete in the summer of 2014 in linen. When I didn’t get to the sewing in time, I made the first version of the dress with 3/4 sleeves and turn-back cuffs out of a Liberty cotton lawn lined in white cotton batiste.

Liberty Shirtdress

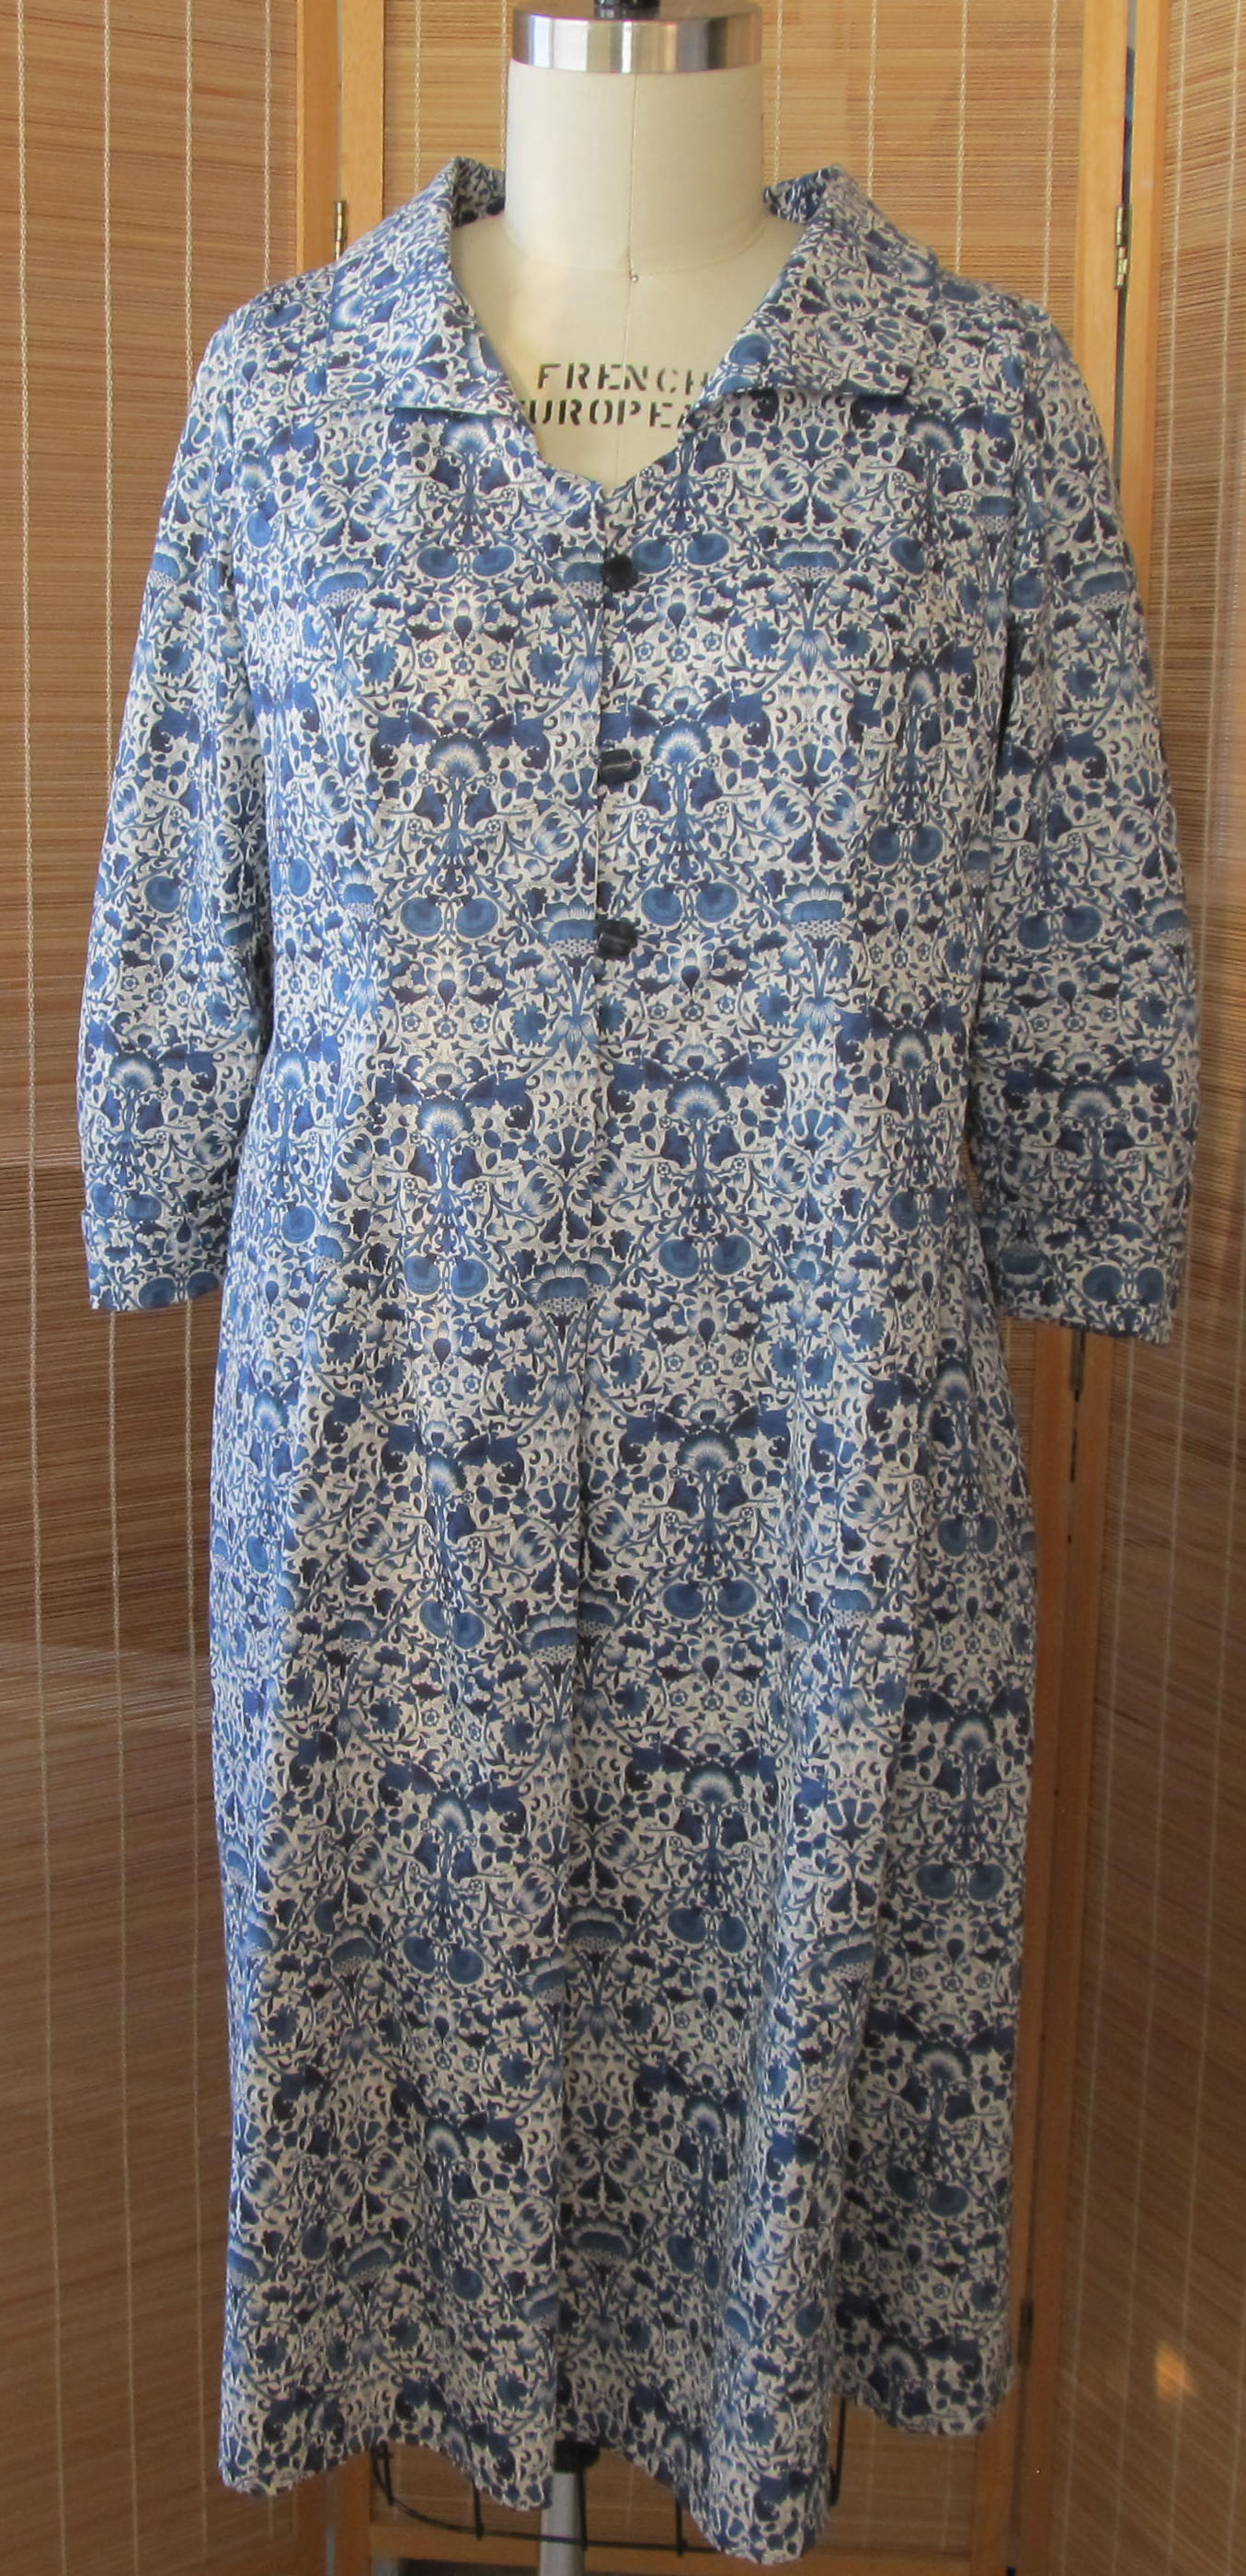
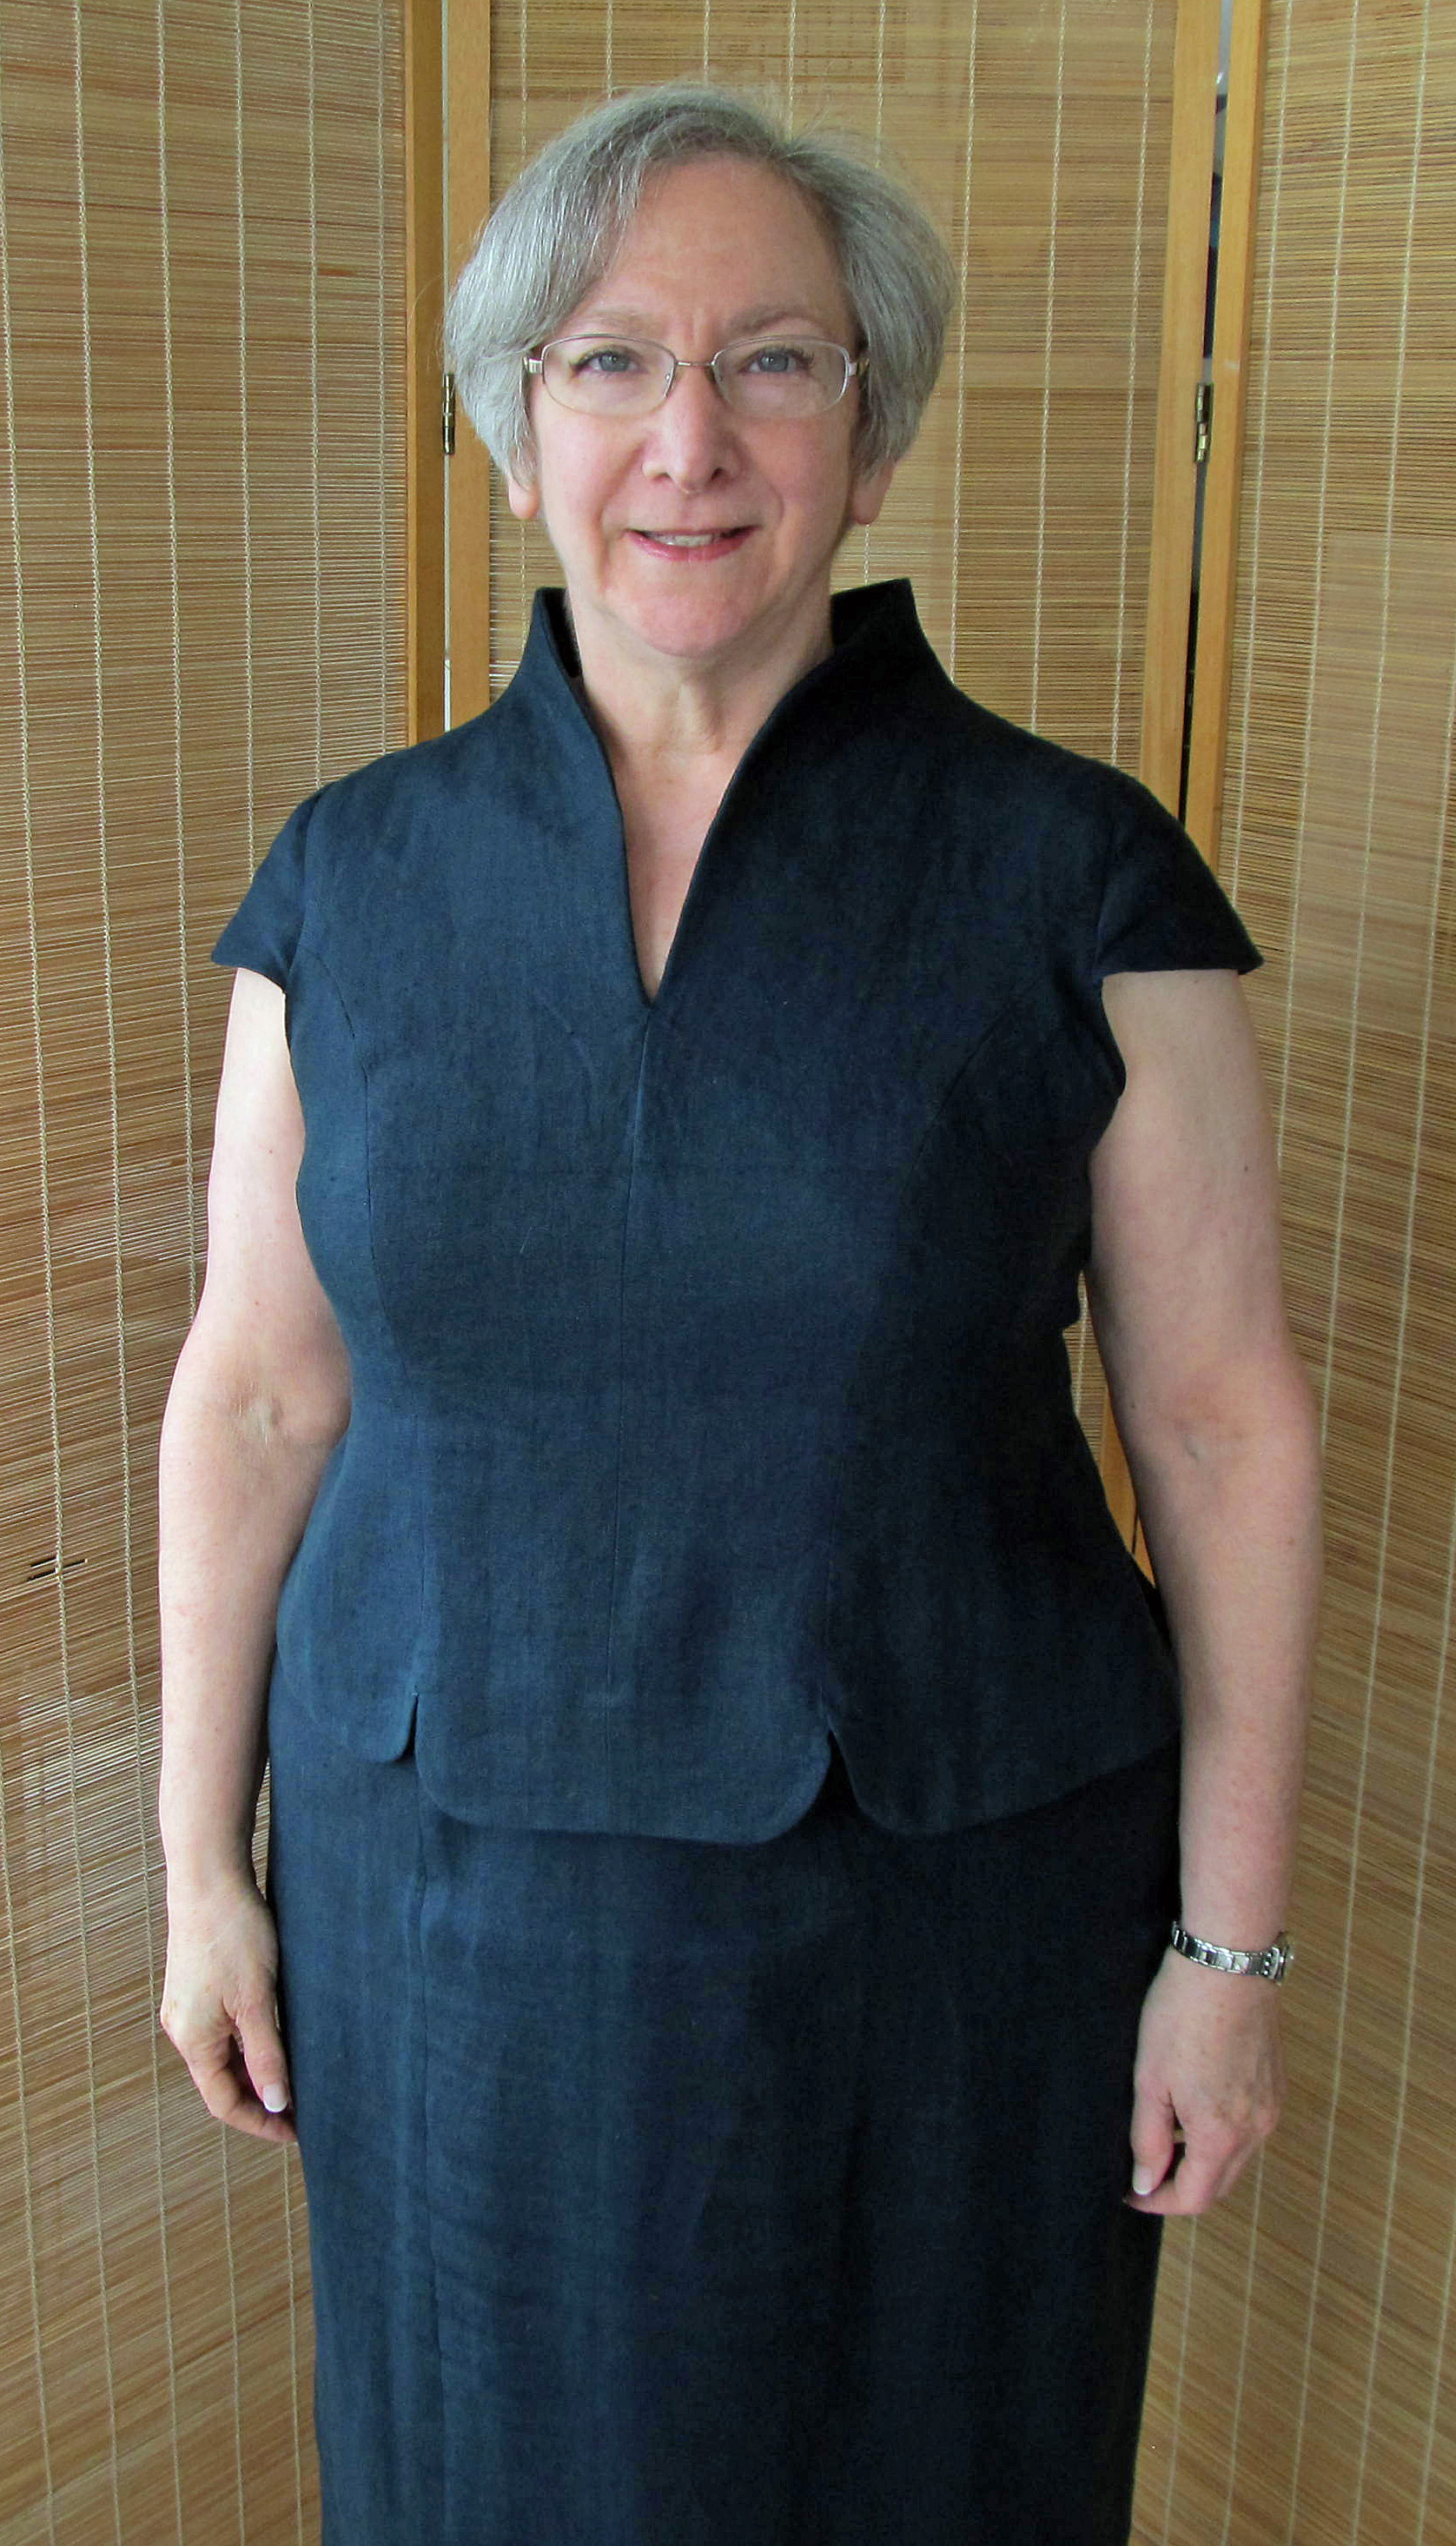
I ran into some issues with buttonholes, so I opted for button loops. I drafted the collar pattern myself and, although I love wearing the dress I decided that next time I would raise the back neck and make corresponding adjustments to the collar. I did that in this linen version, which I finished in July and wore for the rest of the summer.

Linen Shirtdress
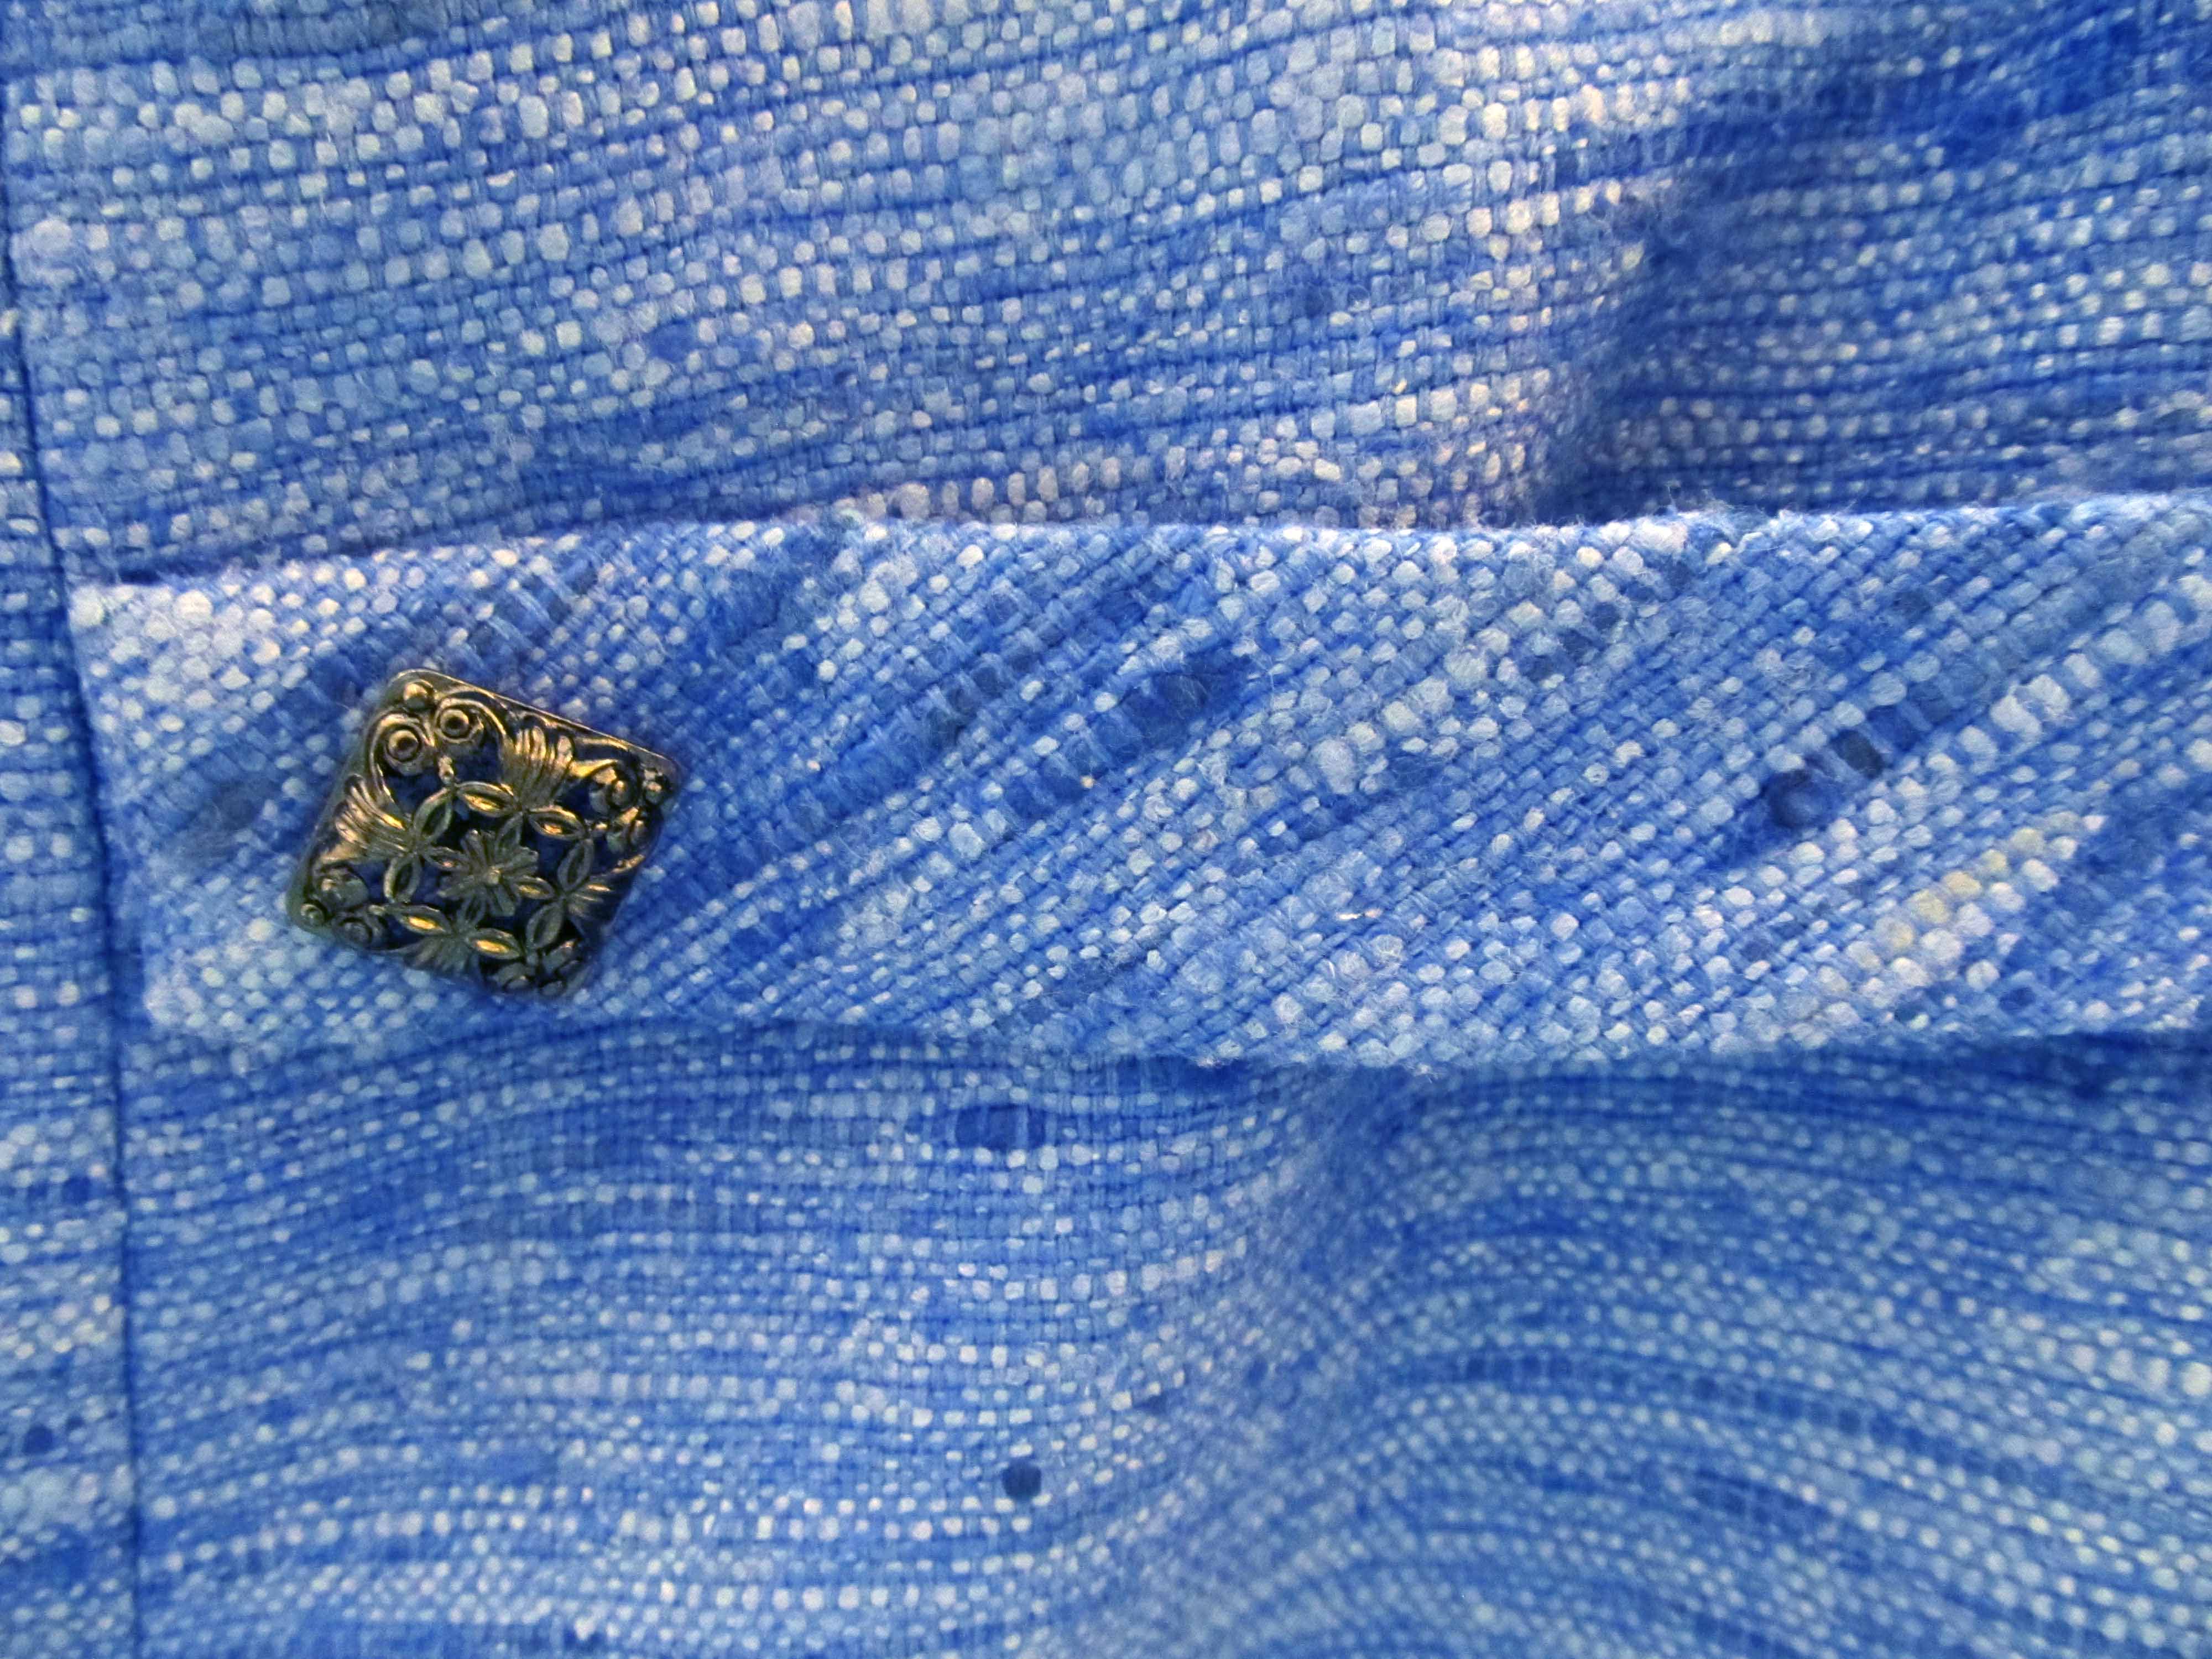
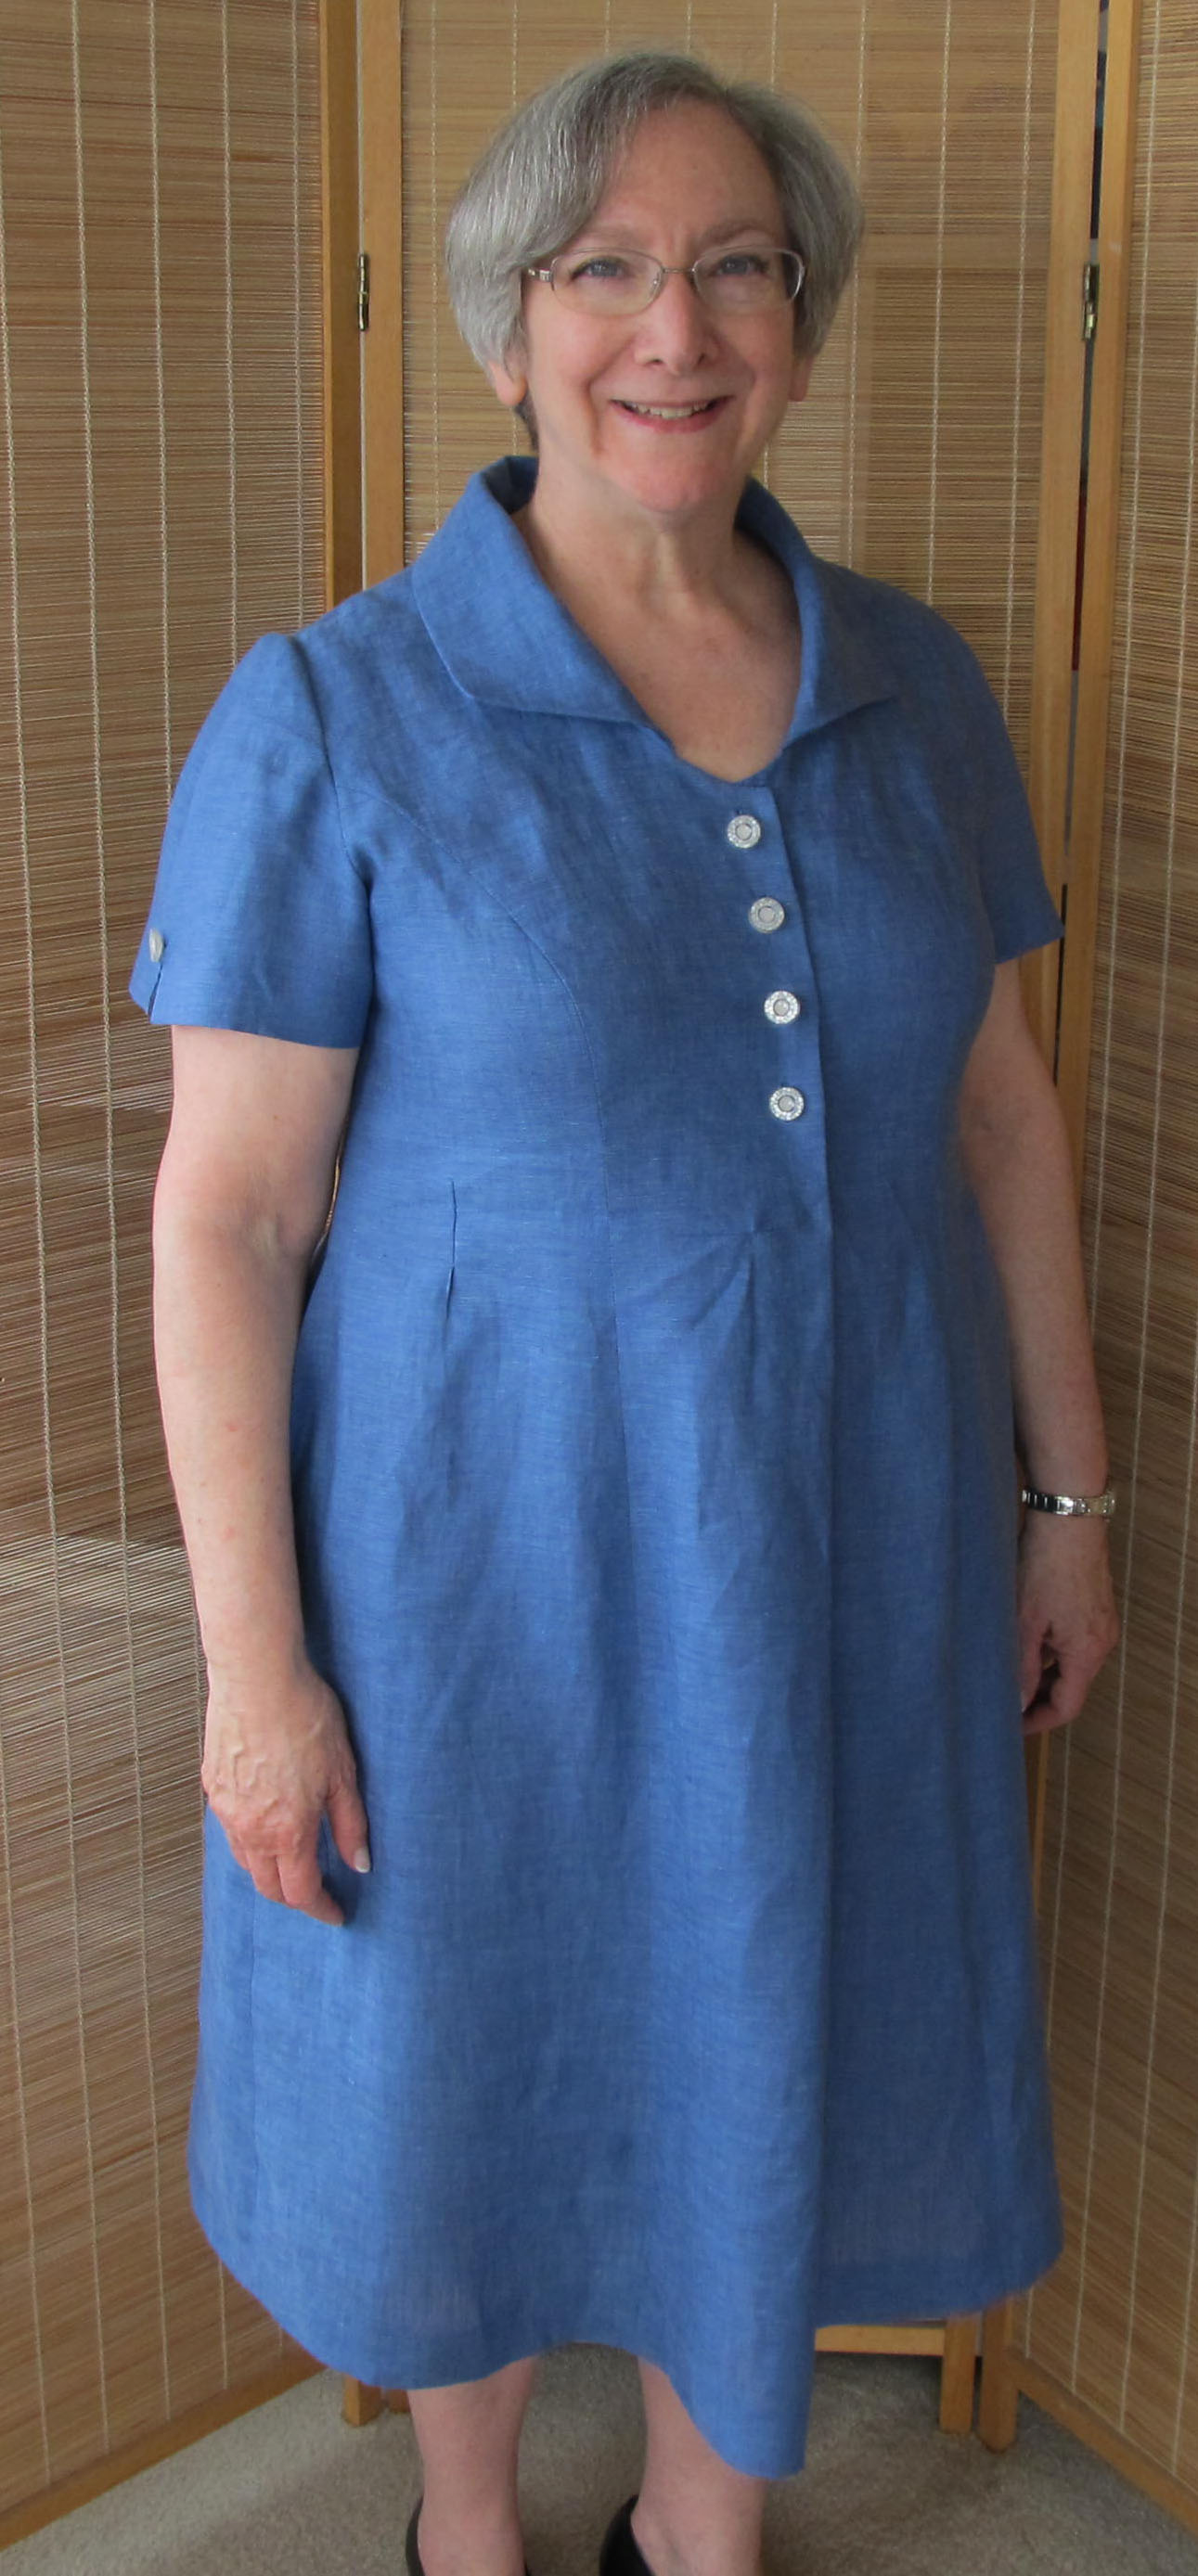
You can see the release pleat clearly in this solid fabric. As you can see, I overcame my buttonhole issues for this version. The buttons on both of these dresses are from Soutache.

I’m much happier with this neckline and the way the collar sits in the back. I definitely want to use the collar again, maybe in a blouse next time.

I have some cotton shirting I want to use for another version of this dress with a Mandarin collar. I also have some crinkle rayon that I think would look nice with a shawl collar. As you can see, this is becoming a staple in my wardrobe.

Connecting the Dots

Blue SheathOkay, time to take the two-piece dress pattern and convert it to a pattern for a sheath dress. No big deal, right? Well, not a really big deal but there were issues.

The first hurdle was to decide where the bodice pattern leaves off and the skirt pattern begins. Why wasn’t it just a matter of extending the bodice piece? Isn’t that how we’re told we can convert commercial blouse or shirt patterns into dress patterns? Yes, that is what we’re told, but it doesn’t work on me.

First, let’s take a look at the two-piece dress sloper, or master pattern.

2pc front

See how the bodice is nipped in a bit, but not as much as the waistband on the skirt, then flares out? If you continue that flare the silhouette wouldn’t be anything close to a sheath.

There’s another problem lurking here. I’m one of those women with a tilted waist. And, because of my shape—lots of tush, less of me at the waist—the center back seam is not the same length as the center front seam. You can get a sense of that tilt from this picture, which also approximates the way the two pieces overlap as worn.

SideSeamOverlapHere’s where working with horizontal balance lines that Sarah Veblen teaches us to use comes to the rescue. When developing a pattern from one that has been fitted using Sarah’s method, there are two things you know for sure. The hem will be parallel to the floor, making hemming a breeze, and the horizontal balance line or lines (HBLs) used in the fitting process will also be parallel to the floor/perpendicular to center front and center back. HBLs are drawn somewhere below the bust on blouses and jackets and in the hip area on skirts and pants. That means I was able to use everything above the HBL in the bodice and everything below the HBL in the skirt for my sheath dress mock-up. The mystery was what the pattern needed to look like in between those HBLs.

You may be wondering why all the angst about something I’m going to mock up in muslin and can fine tune anyway. For one thing, I was still reeling from all the trial and error that had gone into getting a good fit before I started working with Sarah. A big chunk of that time was spent trying to make a sheath dress, and that includes a workshop in which everyone was close to finishing a dress at the end of the weekend and I was still getting a muslin repinned that never made it to a completed garment. In other words, this project had even more baggage than usual associated with it.

In consultation with Sarah, I chose a point on the bodice and a point on the skirt to attach the two pieces. I drew a line perpendicular to center front at that point and walked the adjoining seams (front princess, side seam, back princess) until the line was extended all the way through each of the two garment patterns.

Here is the connecting line on the skirt side front. This picture also gives you a clear view of how much tilt there is to my waist.

Skirt Join

Here is how I ended up connecting the bodice and skirt front pieces.

Connected

Once I mocked up the dress in muslin, I used a fit appointment with Sarah for fine-tuning. We added more shaping to the princess and side seams and everything looked good to go. After transferring the markings to the pattern, I proceeded to make up the dress in a fabulous variegated silk from Emma One Sock. I even used nail polish to make the pull on a black invisible zipper to blend in with the fabric.

ZipperPullBefore attaching the lining, I tried on the dress and absolutely hated what I saw in the mirror. There was nothing wrong with the fit, but it was definitely not flattering.

Before tackling this project, I had asked a couple of teachers, including Sarah, whether a sheath was not the right silhouette for me. That’s why I had opted for the two-piece dress in the first place. Having the skirt hugging the waist underneath the bodice and the bodice skimming over the area between the bottom of the rib cage and high hip seems much more pleasing to me than what I think of as the sack-of-potatoes look when that area is covered by a continuous layer of fabric. But I was told not to give up on a sheath and so I had invested even more time and money and I was feeling as if it was all wasted.

I put the dress on my dress form and walked away from it. Later, I wondered whether adding a collar would help by diverting attention away from the problem area. I played around with some extra fabric, cutting it on the bias and draping it along the neckline on the dress form. It certainly gave the dress a different look, but I just didn’t know. I went on to work on other projects while the dress stared back at me from the dress form.

The next time I saw Sarah, I put the dress on to show her and while she would never in a million years use a term like “sack of potatoes,” she understood why I was unhappy with the dress. Her solution was to add a design element as an “interruption” in the area I was unhappy about. I was skeptical, but it actually worked.

ButtonTab TabBackIt’s just a self-fabric partial belt or tab that sits next to the front princess seam on each side with a decorative button from Soutache, my favorite ribbon and trim store which is right here in Chicago.  The belt crosses the side seam and disappears into the back princess seam on each side. It’s subtle, but I think it’s effective. At least it got me to finish the dress.

Sarah thought I should also add the collar, which surprised me. But that’s what I ended up doing. Here is the result.

Wendy Blue Sheath Sep 2014I’ve worn this dress several times and I feel great in it. I’m planning another one with a different neckline and collar.

Designing the Tulip Dress

tulip dress modeled copyThis dress has a neckline I’ve been wanting to incorporate into a garment for a long time. I first encountered something similar in a knit top from Talbot’s and later in a jacket from Chico’s. I set out on a mission to find a pattern for it, but I never thought they got it quite right. The knit versions collapsed and the patterns for the woven versions stood up a bit but leaned into the neck. Then I saw a picture of a jacket made from a Burda pattern that looked right. I tracked down the pattern on a vintage pattern web site, bought the only size they had and discovered the secret to achieving the effect I was after: darts.

Burda         Back Facing

Shaped darts in the back of the neck, to be precise. One on either side of the center back seam.

The pattern drafting was pretty straightforward.  I decided how high I wanted the neck to go up and extended center back to that point. I curved the line out a bit, which meant using a center back seam instead of cutting the back on the fold. A center back seam also has the advantage of adding structure, which helps prevent the neckline from collapsing.

From the shoulder, I drew a curve to the height I was going for, then connected those two points and added the dart. The picture below compares the final back pattern piece to my jacket block pattern piece. The back seam is at the left in this picture.

9For the front, I wanted the neckline to open out into a shape reminiscent of a tulip. Starting from a copy of my sloper bodice front piece, I marked the same height that I used for the back and drew a shoulder seam that curved from the shoulder point to that highest point. I played with curves from center front to the highest point until I was happy with the shape. Here is a comparison between the final front pattern piece and the front of my jacket block.

8The next step was to test it out. I made a mock-up of the upper part of the front and back pattern piece, sewed in the darts and tried it on. I brought it with me on a trip to work with Sarah Veblen and she made some adjustments.

Mockup FrontMock Up

During that same session, Sarah draped a cap sleeve on me that I used in a blouse and this dress.

The next idea I had to complete the tulip theme of this dress was to incorporate a shaped faced hem like the one in McCall’s pattern 2818.

IMG_0028(Do I have two copies of this pattern? Oh no. I have three. Tracking my patterns in an app is the subject of a future blog post.)

To achieve this, I drew a curve at the bottom of each princess seam with the help of one of those pocket curve templates. I also marked the point where the stitching needed to stop when joining the seams and I drew a line to mark the top of the hem facing pattern piece I needed to make. The curved line drawn toward the top of the pattern piece is the bottom edge of the back facing piece.

IMG_0024

With the pattern work done, I was all set to make the dress. The problem was that I wanted to use the inky navy linen from MarcyTilton.com that I had been saving for just the right summer business meeting-appropriate dress and there wasn’t enough of summer 2014 left for me to get it done. So, I packed the partially-constructed dress away and worked on it in spring 2015. Constructing this dress was an adventure in itself that we’ll cover in the next blog post.