
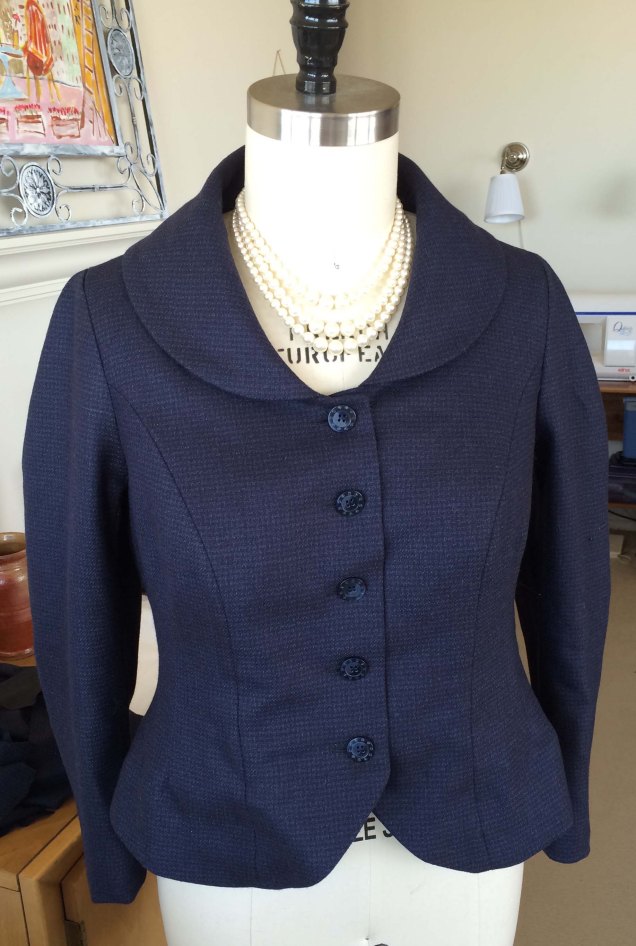
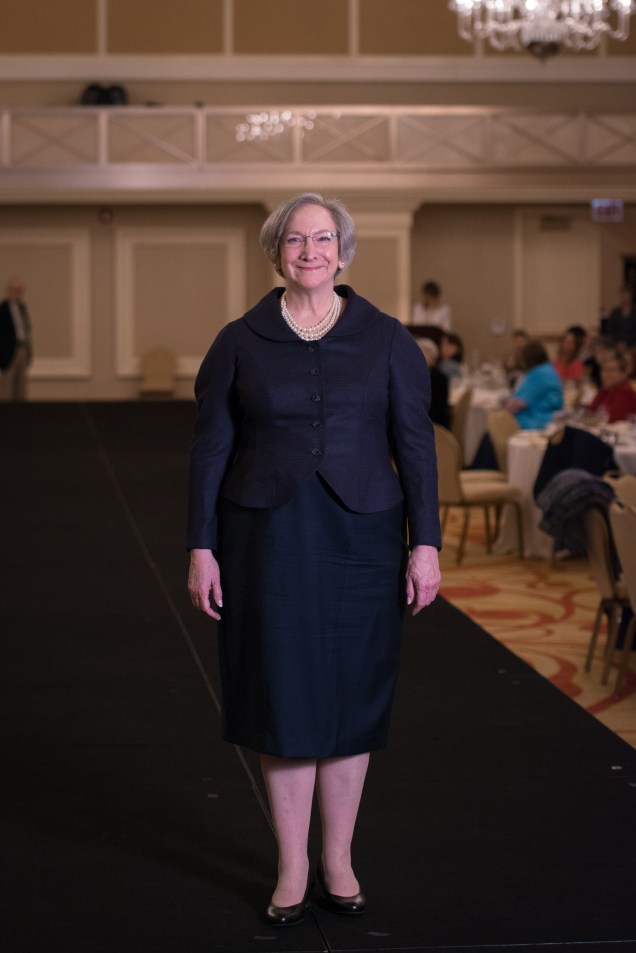
As I mentioned in my last post, one of the garments I showed in the Haute Couture Club of Chicago Fashion Show was a jacket inspired by Le Bar Suit, which was part of Christian Dior’s debut collection in 1947. The fashion show segment was based on a sewing challenge we called “My Homage To…” Setting aside the ribbing and corseting of the original, I really like the idea of dressing in a suit that has feminine contours and sends the message that you don’t have to dress like a man to be dressed for business.
I call this My Homage 2.0, a reference to the admonition we used to hear from tech gurus to never buy the 1.0 version of software. They told us it’s better to wait until the major bugs are worked out and the 2.0 version is released. For those of you who are not of “a certain age,” that’s from the pre-app days when software was an investment and loading it onto your computer took forever.
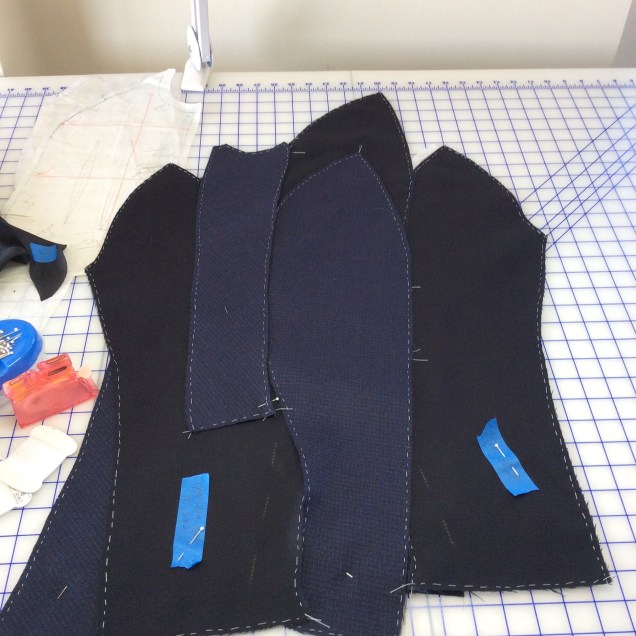
I chronicled some of the frustration I had with the first version of this jacket here. For version 2.0, I made a new muslin mock-up and brought it to one of Sarah Veblen’s You Choose Your Focus Workshop last November. I made the mock-up with 1″ seam allowances (not easy to do with princess seams and muslin that doesn’t drape). My weight had been creeping up (again!) and I felt that I needed a bit more room in the bust. I also mocked up my master jacket pattern for fine tuning at the same workshop. And, just to be on the safe side, I mocked up both my 3-piece sleeve for the Homage jacket and my 2-piece sleeve for the master jacket pattern. I was leaving nothing to chance.
The fabric choice for Homage 2.0 is the lovely navy and black check wool that I had bought from Sawyer Brook back when I first started to plan this jacket. That was probably two-ish years ago.
This was the first garment that I underlined with silk organza. It was daunting hand basting the organza to all those pieces, but when it was done I was so glad I took the time to do it. The wool took on more body without being stiff and was a dream to work with.
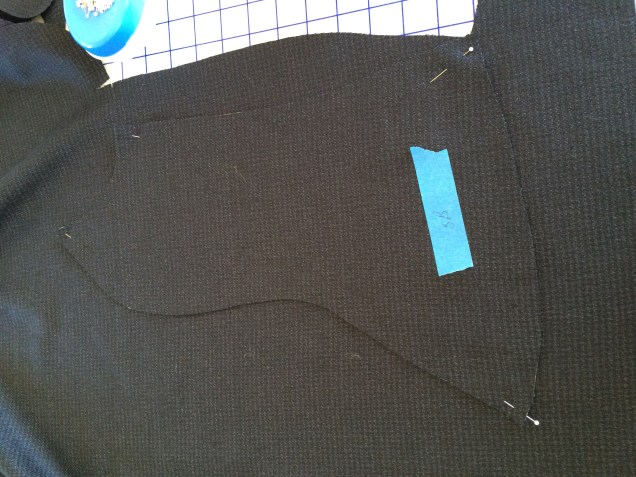
Those tiny rows of checks required careful alignment of adjoining pieces at the hem, a full pattern and cutting from a single layer of fabric.
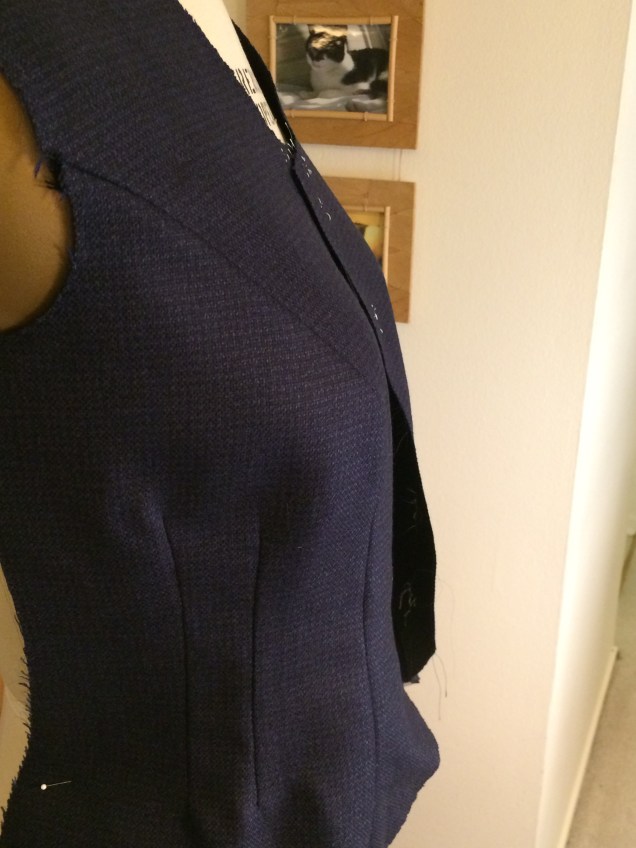
The jacket gets its shaping from armscye princess seams and two vertical darts in the side front panels. Additional structure comes from silk taffeta facings at the flared hem and at the neckline that are interfaced with soft stretch fusible.
The undercollar is also made of silk taffeta and has fusible interfacing. In preparing to make this jacket I was able to clear up some confusion I had about undercollars. I knew the undercollar pattern is supposed to be smaller than the collar pattern so that the outer edge of the collar can be “favored” when pressed, as it is in the following picture.
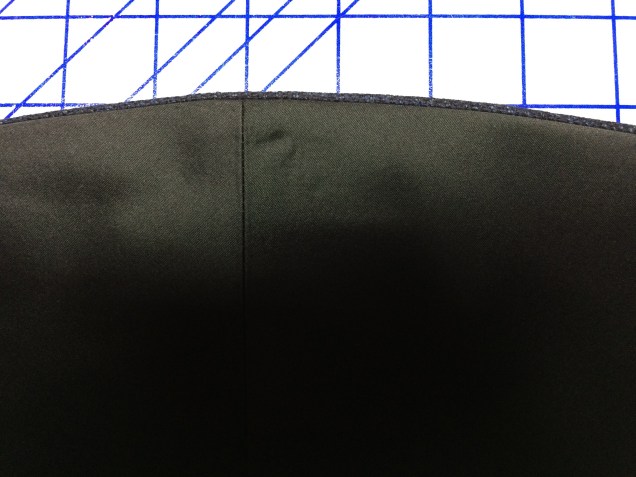
I also knew that the undercollar typically is cut on the bias. What I didn’t realize is that only the outer edge of the pattern is trimmed 1/8 inch, not the neck edge or the short ends. The undercollar is interfaced, but if it happens to stretch during pressing because it is on the bias, it can be trimmed at the neck edge before basting the edges together and attaching to the garment.
There were two issues with this jacket that were disappointing. I used three-piece sleeves, but forgot that they had really long vents. I only had six of the smaller buttons for the jacket and three for each sleeve was not enough for the long vent. I tried to make adjustments after the fact but ran into problems and ended up making sleeves that have no vents and no buttons.
The other disappointment was that I forgot to take shoulder pads into account when developing the pattern. When I attached the shoulder pads, there wasn’t enough room even though they are very thin. So, I had to sacrifice the nice crisp shoulder line they would have given me in the jacket.
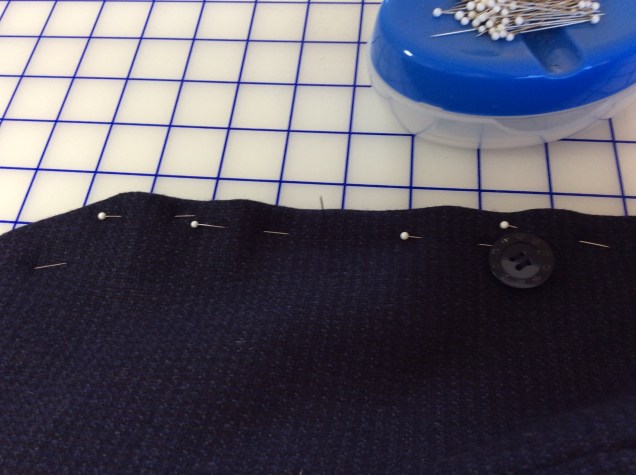
Even though I had used tailor tacks to mark where the buttons and buttonholes would be placed, the markings seemed off to me when the jacket was constructed. I re-measured and pin marked the buttonhole placement and, fortunately, all went well with those. When it came to marking the placement of the buttons, it occurred to me that instead of measuring, I might get accurate results more quickly by pinning the two front pieces together and inserting a pin in the center of the keyhole of the buttonhole, exactly where the center of the button should be.
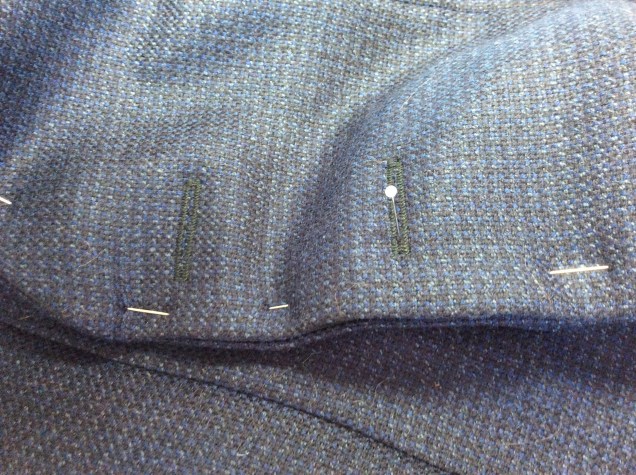 I used that pin as a guide for sewing on the corresponding button. It worked like a charm.
Even with the sleeve and shoulder pad glitches, I’m really happy with the way the jacket turned out. I feel great wearing it.


I bow to your mastery of the matching checks, truly!
LikeLike
Beautiful workmanship! And thank you for the info re the undercollar. I didn’t know that and would never have realized it if you hadn’t discussed it.
LikeLike