Wardrobe Planning and Peace of Mind

Fall is well underway, which means I’m already late in getting my fall-winter wardrobe planning done. There are reasons, of course. There were preparations for the ASG Chicago fashion show last Saturday, for which I collaborated with a friend to coordinate submissions and prepare the lineup and then I wrote the commentary for the 65 entries that walked the runway. There were 67, but one of mine and one other had to be pulled because they didn’t get finished. Before that, I was working on a jacket for a challenge for the Haute Couture Club of Chicago. The challenge topic was actually my idea, so I wasn’t planning to enter the challenge, just show the jacket. It, too, is unfinished. Sigh.

IMG_0445

Oh, and there’s the dress I promised to a very dear, very understanding friend almost a year ago. And then there are the countless garments I have in my head, some of which seem urgent because they belong in my core wardrobe.

So, if the title of this post left you wondering what wardrobe planning has to do with peace of mind, the best explanation I can give is that it helps me clear a calm space in my head.  Sometimes, creative paralysis stems from something other than perfectionism. Or maybe it is actually a form of perfectionism. Sometimes I can’t dig in and do one thing because all the things I have to or want to do are vying for my attention. Pretty soon I’m feeling overwhelmed and I can’t decide what project to work on first because I’m sure I’ll never get through all the projects in time for this season. Does any of this sound familiar?

In reading about strategies for overcoming procrastination or perfectionism (great avoidance activity!) I’ve seen this syndrome described as mental static or mental clutter. The clutter analogy resonates with me, because I’m one of those people who has to take a break from work from time to time just to sort through the piles of paper on (and sometimes surrounding) my desk. I’m convinced it’s impossible to think in the midst of clutter. Yes, organizing papers and tossing months-old to do lists does sound like another avoidance activity, but I find it very useful. I feel as if I’m getting a fresh start when I sit down at my desk again and the writing goes much better.

So, how can this strategy be applied to wardrobe planning for a sewist? I’ve tried lists because I’m a compulsive list-maker. That doesn’t work, because the list goes on and on. I’ve tried flow charts – same problem. Plus there’s the whole mastering-flow-chart-making-time-sucker issue.

Last summer, I stumbled on a method that actually worked. I was “shopping” in my fabric collection (I hate the word stash) for a piece of fabric I thought I had for a blouse I wanted to make when it occurred to me that I should pull out all the summer fabric I wanted to work with and spread it out on a table. I sorted by type – bottom weight, blouse-weight, linen I had planned to use for a dress, and knits.

IMG_0004
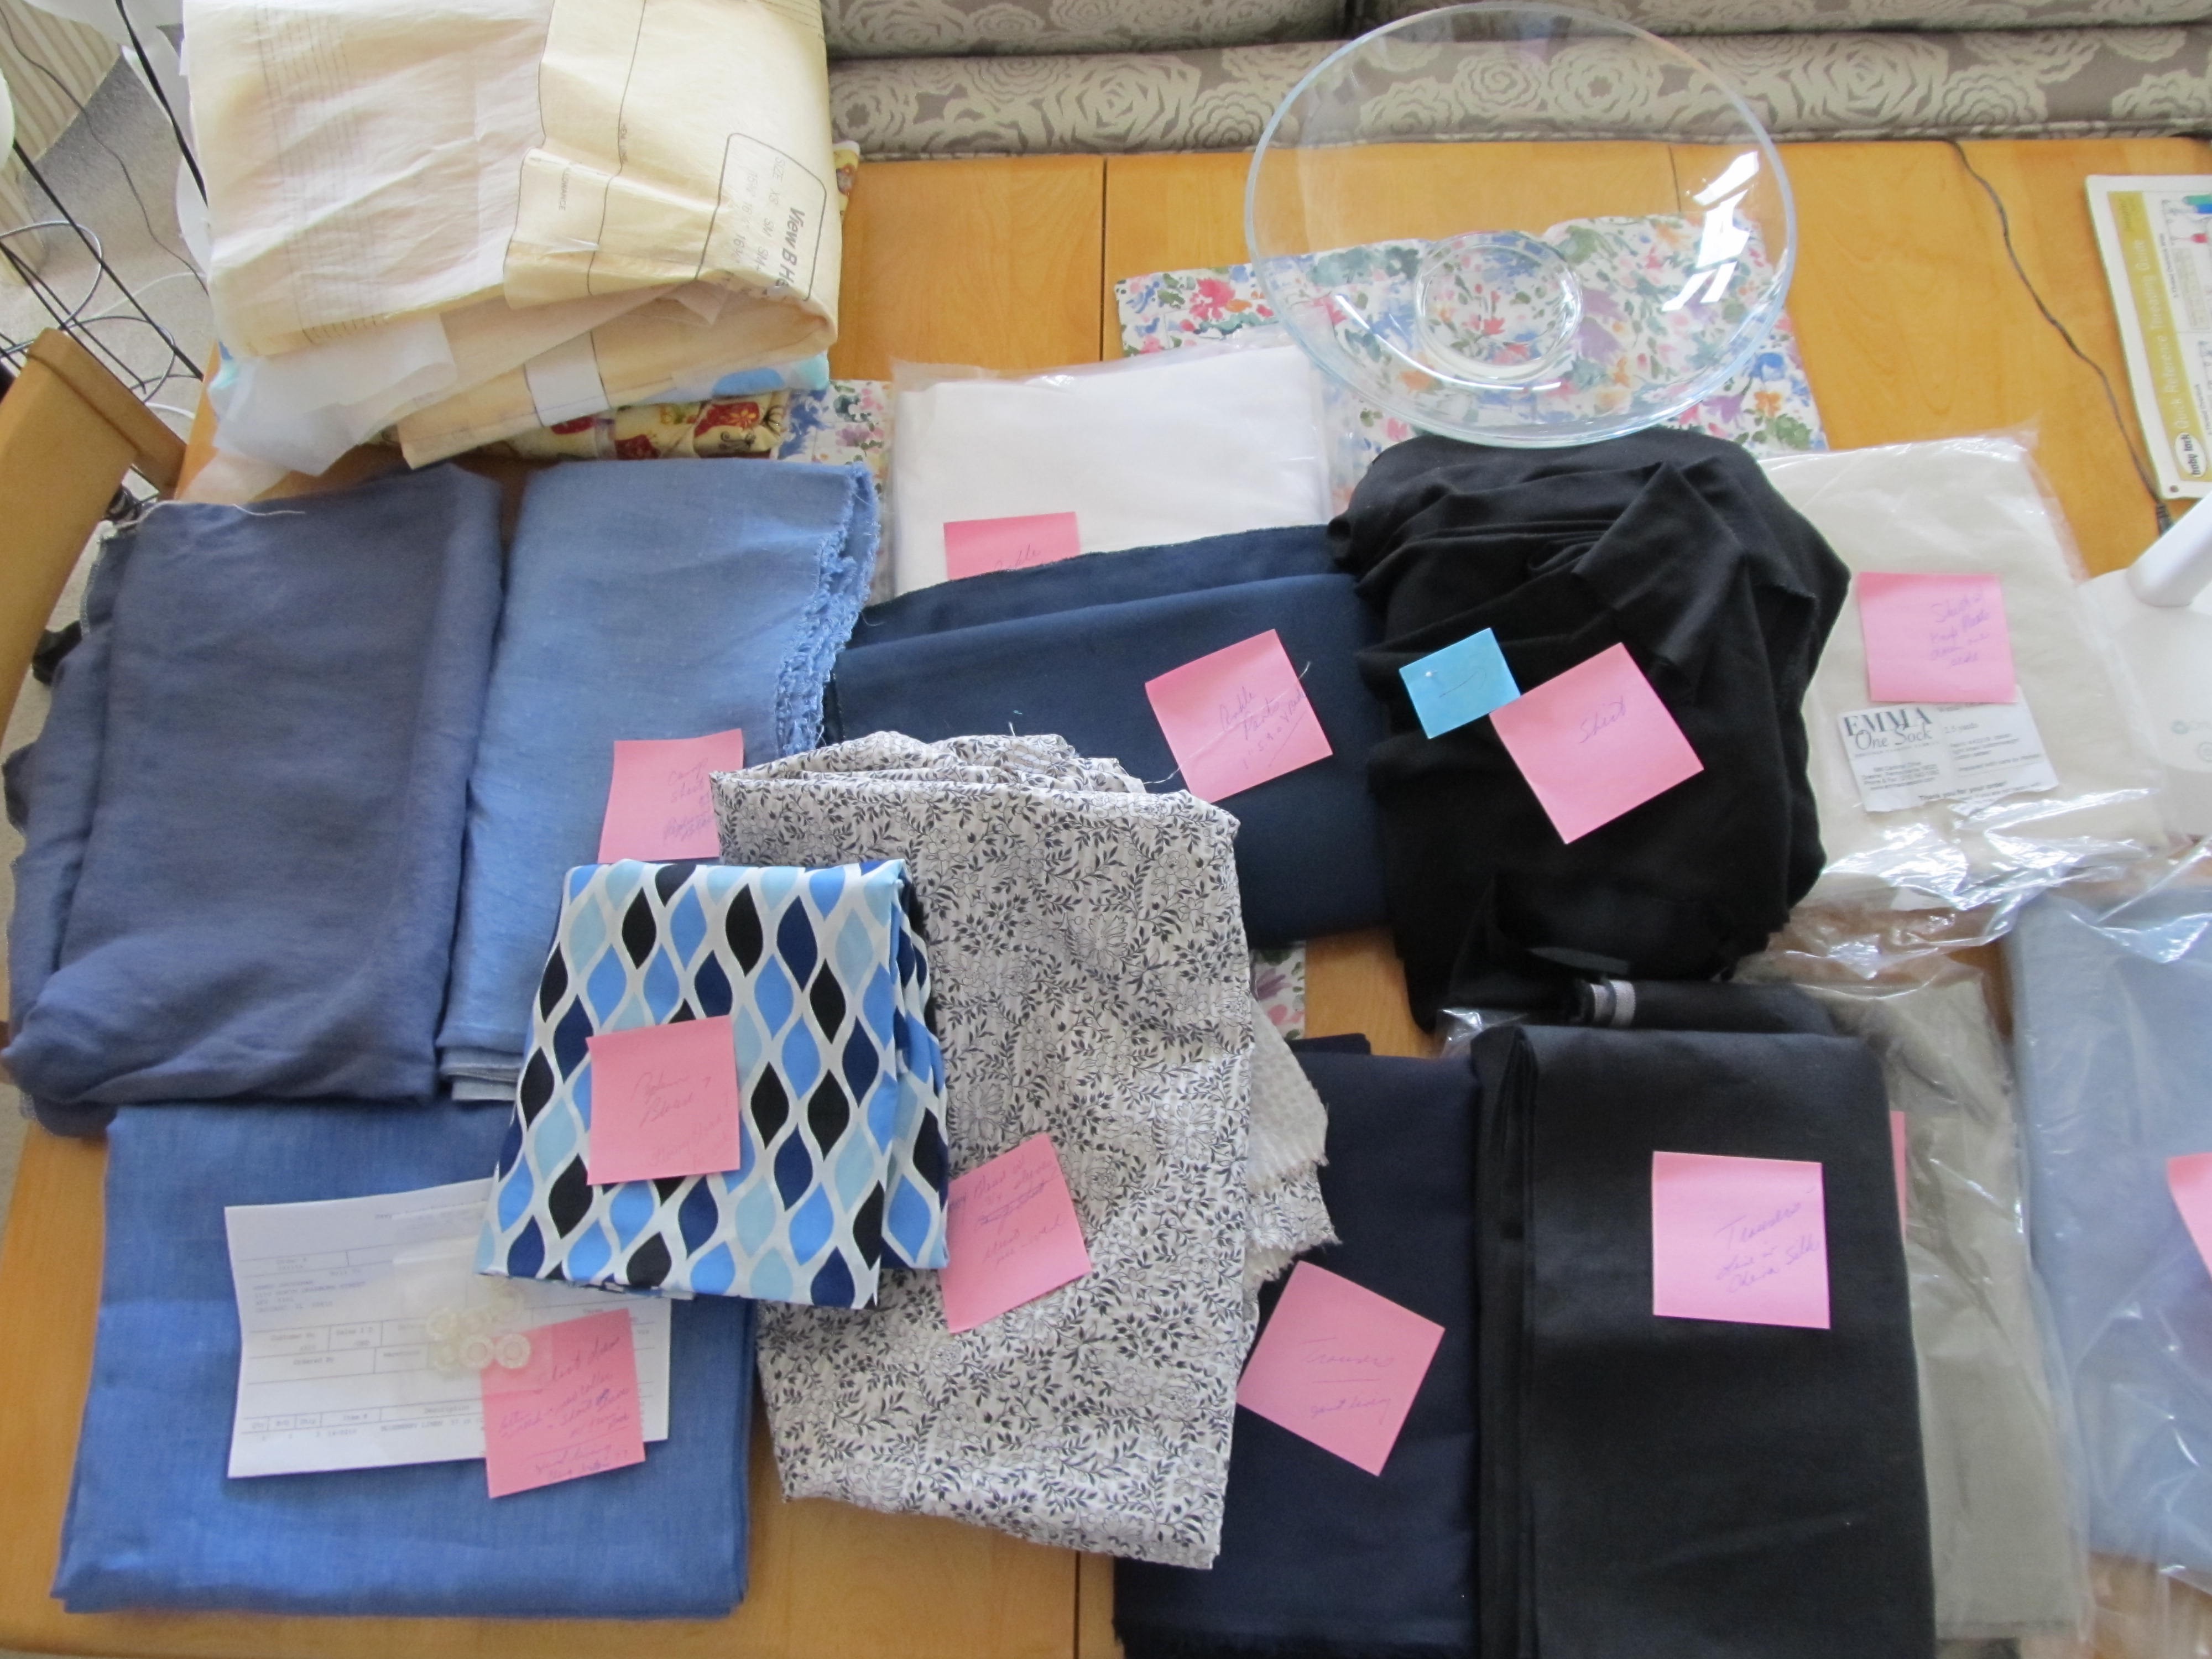
I labeled them with Post-It Notes and what emerged for me was a clear picture of what I wanted to do with each of the fabrics in front of me. It also became clear that I had to eliminate some pieces, or at least defer them until next year.

The next step was to inventory what I needed for the pieces I planned to sew. What linings did I need and did I have them? How about interfacing, zippers, thread, etc.

The last step was to prioritize. What did I find myself reaching for most often that wasn’t in my closet yet?

Of course, summer is really short and it’s even shorter if you don’t get started until July. That means I didn’t get through everything I planned out that day, even after the culling I did. But that really didn’t matter. What mattered is that I had cleared the clutter from my head and created a calm, quiet place that allowed me to work on one garment at a time and enjoy wearing each one when it was done.

The No-Close Topper That Plays Well With Curves

Silk TopperYou may be wondering whether all of my sewing projects start out looking simple and end up being way more involved than I bargained for. A lot of them do, and those are the ones that teach me the most. My seemingly simple project to create a no-close topper to go over a knit tank or sleeveless shell is another example.

I started this project thinking I could take my basic bodice sloper, change the neckline, add seam allowances at center front, draft a front facing, set in my basic sloper sleeves and have a nice layering piece that isn’t a jacket. When I did that, I quickly discovered that, even though the garment would have fit just fine as a blouse with a closure, when left to its own devices the front automatically traveled outward. Not just a little, either. The two front pieces wanted to settle out near my arms. It hadn’t occurred to me that a pattern designed to accommodate my particular bust shape and size would resist staying put. So that’s why RTW makes these pieces so oversized, I said to myself. But if I want to wear oversized, shapeless clothes I don’t have to go to the trouble of sewing them.

At this point, I sewed my first attempt together at center front, called it a blouse and put this project on the list for my next video consultation with Sarah Veblen.

Silk Tulip Top

We discussed a number of solutions and I tried a few in a mock-up, but I still wasn’t getting the look I was after.

After more discussion, we came up with an approach that turned this into a redesign project. The idea was to convert my armscye princess bodice sloper pattern into a pattern that transferred the bust shaping to tucks at the shoulders. This involved dart rotation, a really educational patternmaking exercise.

Patternmaking books tell you that you have to rotate darts (or in this case, princess seams, which are dart equivalents) at the apex. Turns out that’s one of those rules that can be broken. In my case, I needed more fullness at the apex than the princess seams give me, because I wanted the fabric to hang straight over the bust on its own. That meant the dart rotation had to take place below the apex. Here is what that looked like.

Front Convert PrincessAs you can see, the Apex is off to the right and the pivot point is about 1.5 inches below it.

This picture also shows something that I found nerve wracking. I knew that moving away from princess seams was going to mean giving up the great curve-hugging fit I’d worked so hard to achieve with Sarah. I didn’t know whether I was going to like the final product, but this was a test and nothing ventured, nothing gained. The thing that set me back on my heels was the amount of distortion that took place in the shoulder seam. Seeing that dredged up all the missteps and wrong turns I’d taken when trying to make pattern adjustments. I had to remind myself that this was just an experiment and the worst thing that could happen would be I wouldn’t have this type of garment in my repertoire. So, I filled in all the gaps with paper, drew a line from the neck edge to the shoulder point and kept going.

Of course, the overlapping you see at the hem has to be added back in somewhere to provide the correct circumference. For my first muslin test, I put almost all of that into extra fabric at the shoulder that became pleat intake. The rest I added to the side seams.

Here is one of the bodice pieces cut and marked in muslin.

All rotated to shoulderI was pretty sure I wanted pleats, as opposed to just tucks, at least for the woven version. One thing I had to work out was how far down I wanted them stitched. As I worked on this it also occurred to me that a variation with a yoke might be nice, but first I had to get the concept to work.

Skewed pleats and splayedAs you can see, the first test did not turn out well. Although the pleats were marked on grain, they pointed outward on the body.

The next picture shows my experiments with tucks versus pleats stitched almost to the bust.

Muslin Test1_2After trying it out in rayon to mimic the drapiness of the fabric I was planning to use, I still wasn’t happy. I ended up splitting the bust shaping between shoulder pleats and an armscye dart. Here is what that looks like on the pattern.

Front FinalThe back was a more straightforward conversion. Here is what it looked like in development.

Back DevHere is the final pattern piece. All of the intake was rotated to pleats at center back. The center pleat is the deepest.

Back FinalAnd here is the final product on me. The fabric is silk crepe de chine. I love the fabric and I like the topper. It’s completely boxy and oversized, but it isn’t as flattering as the fitted pieces with princess seams. Still, I’m glad I added this to my repertoire.

Topper Modeled