
I know much of my sewing is fussy, but what I think of as the fussy bits are those fine details that can make the difference between a garment I am proud to wear and one that falls under the Five Foot Rule – they look okay but only from at least five feet away. And nobody, but nobody, gets to look inside. Here are some ways I’ve found to avoid the dreaded Five Foot Rule.
Hooks and Eyes
One of the most valuable resources I’ve stumbled upon in my online research for sewing techniques is a series of papers published by the Cooperative Extension of the University of Kentucky. These well-illustrated guides often answer the nagging questions I have that nobody addresses in classes or books and that makes me feel dumb for not knowing the answer. For example, there are plenty of resources that tell us how to sew on a hook and eye but nobody really gets into exactly where they should be placed or when you should use the round eyes, as opposed to the straight eyes that come in the packages. And when you have pieces that meet instead of overlap, which way do the hook prongs point, out or in? In “Hooks, Eyes, Snaps, and Tape Fasteners,” Professor Nadine Hacker answers these and other questions about the nitty gritty details of closures. So, now I know that the straight eye is used when the garment pieces overlap, as they do on waistbands and at the top of lapped zippers, and the round eye is used when the pieces meet, as they do in this bias collar.
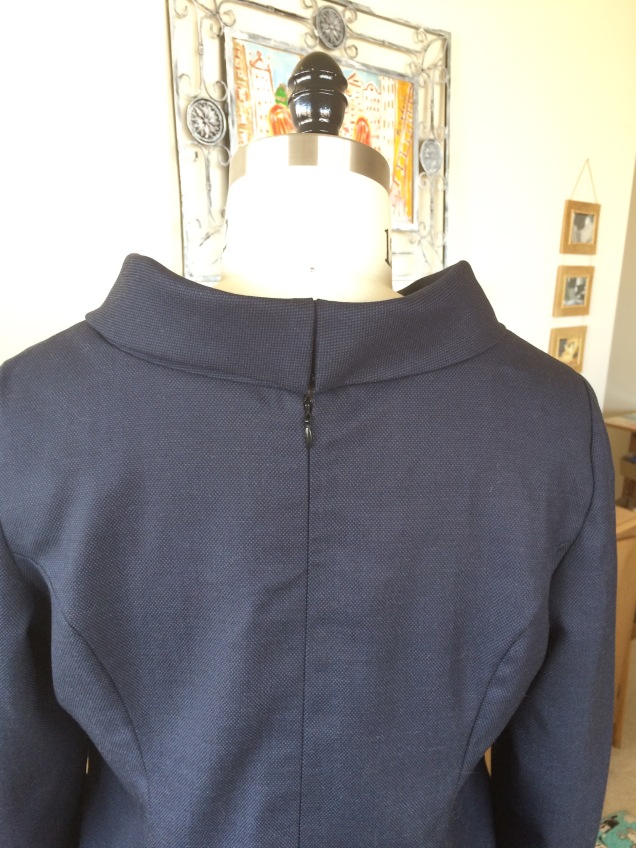
This is still a work in progress. It needs a good pressing, but you get the idea.
Following the instructions, I set the round eye so that it just barely extends beyond the edge of the collar.
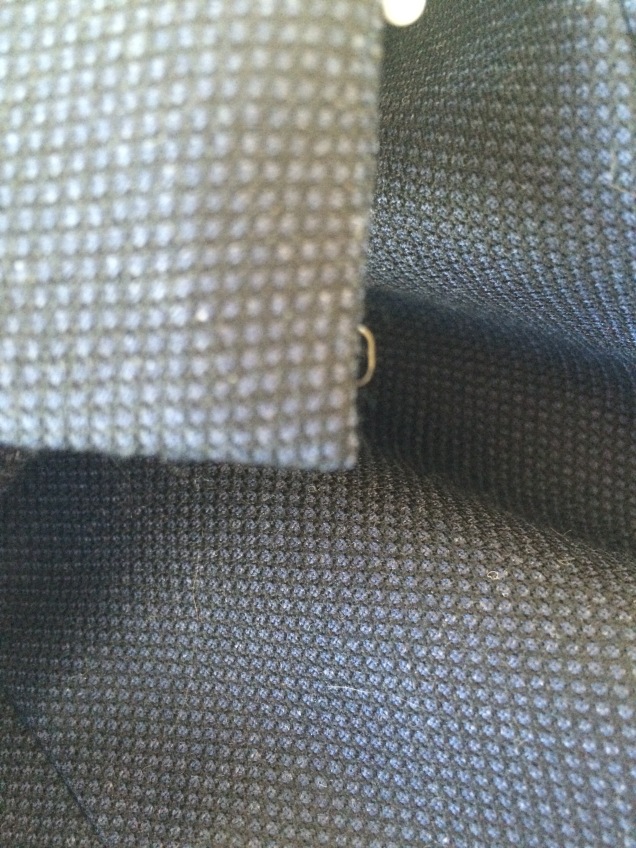
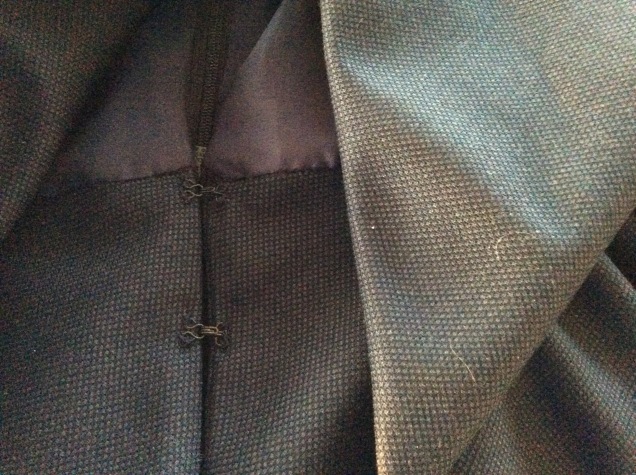
I have a lot of trouble getting the hook to line up with the eye, so I engage the two pieces to and sew the hook on while it is attached to the eye. Oh, and the prongs point away from the fabric on which the hook is sewn.
To get the hook to stay put while I’m sewing the first few stitches, I use a Clover fork pin. More about these handy little tools in a moment.


Here are two of the hooks and eyes sewn in. Perfection is still an elusive goal, but these are a lot better than what I was doing before.
Strategic Snap Placement
Another fussy bit that was tripping me up was snap placement. In this asymmetrical jacket, I had to put in a pin to keep the underlapped front from hanging below the overlap at the hem.
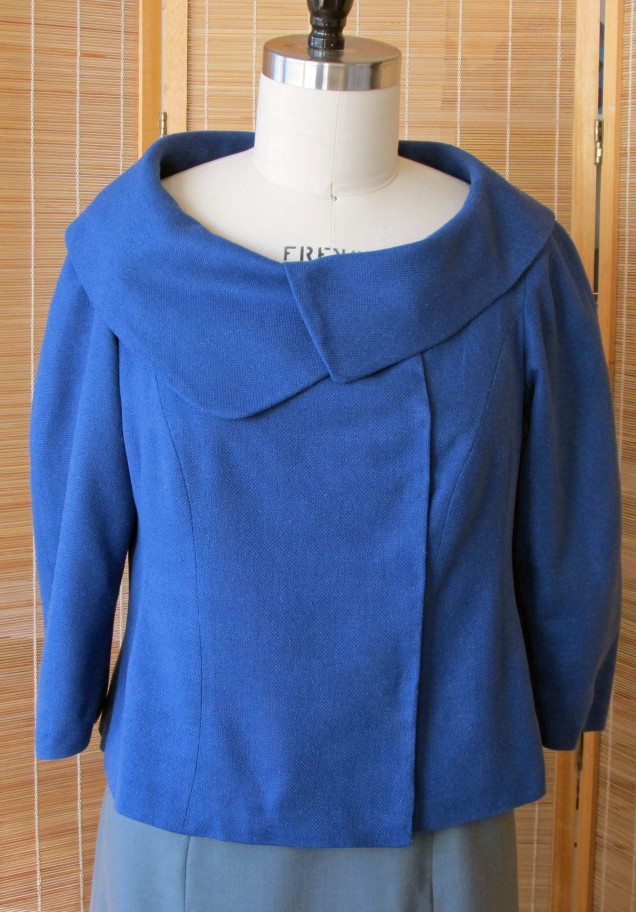
I tried adding extra snaps at the neckline, but it didn’t fix the problem. Finally, I asked Sarah Veblen what to do. Her solution was ridiculously easy: add just one more snap, but place it where the problem was occurring.
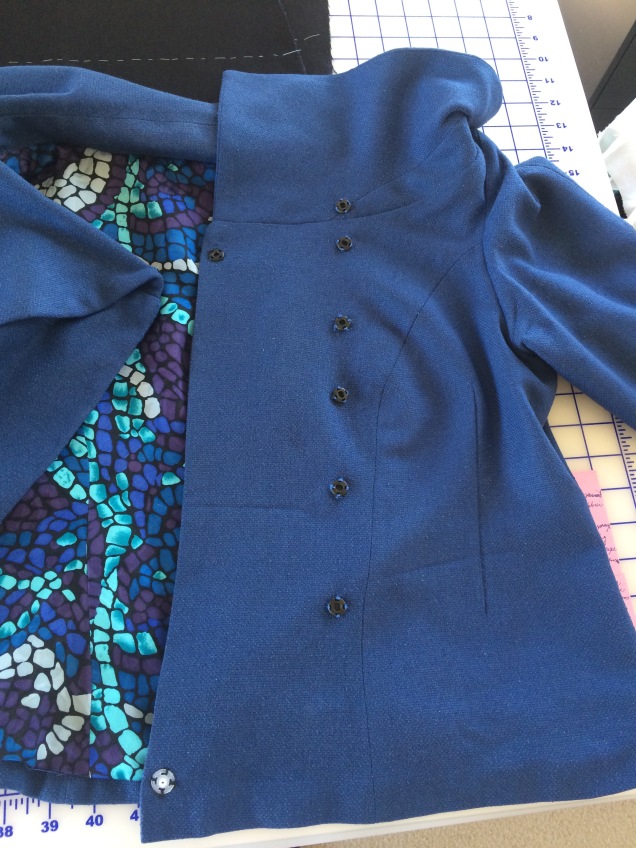
Sarah demonstrated this in a workshop by adding the plastic snap just above the hem at the edge of the underlap side. It works like a charm. I’ve also come around to preferring plastic snaps to metal ones.
Aligning Intersecting Seams
For intersecting seams, I rely on the Clover Fork Pins I mentioned earlier. Susan Khaljie recommends these clever quilting tools for matching stripes and plaids in fabrics that have a lot of play in them and are resistant to staying put with ordinary pins. They hold the fabric exactly where you need it and they work wonders when matching intersecting seams. I use them to align the seam of my two-piece sleeve to my shoulder seam and to align the princess seams on the bodice and skirt of an Empire waist dress.


The connected end slants upward and the prongs lay flat so you sew right over it.

Mitered Corners
Corners are another area that can get really messy. Turning sewn corners will be the subject of a tutorial down the road, but for now I’d like to go over mitered corners. Specifically, using a miter for the corner formed by the hem and vent of a pencil skirt. This is a fussy bit that’s actually fun to do and the results are nice and tidy.
The first step is to mark or press the corner, in this case the hem and the vent extension. I’ve marked where the creases intersect with pins. Next, you make a diagonal fold where the two creases meet and press lightly, taking care not to stretch anything out. The pins are lying directly on top of the creases.


You then bring those two pins together, and create an odd-looking point. I always have to remind myself that I’m now working with right sides together, whereas the creases were made working from the wrong side.
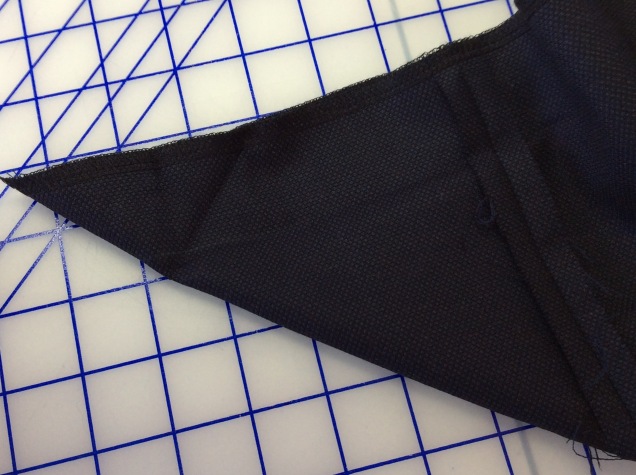
The diagonal fold line is where you need to stitch.
At this point, I test out what I have by turning the corner. This test run is important because the next step is to trim, which cannot be corrected easily. Ask me how I know.


The rough turn test shows that the miters are in the right place and the only thing keeping these puppies from looking good is all that extra fabric inside. So I turn them back and trim off the ends to get rid of the little dolphin noses.
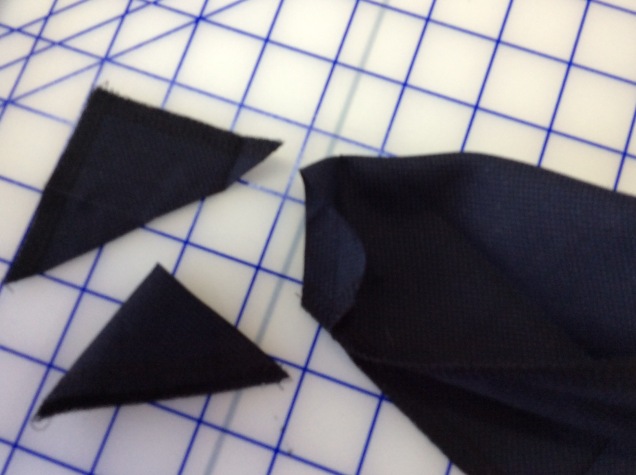 Now they are ready to press, turn and impress.


Goeie informasie, dankie vir die skakel! ♥
LikeLike
Great post Wendy! All those fussy bits sure can be… well, Fussy!! I always seem to have issues with getting the hooks and eyes to match up perfectly especially the smaller sizes.
LikeLiked by 1 person
This is amazing – I didn’t even realize that jacket HAD snaps – just wow! I’m still wrapping my head around mitred corners – it sounds mathy to me – but you are truly a Couture Sewist!!!!!
Scottie Kersta-Wilson 33 E. Cedar #3B Chicago IL 60611 312.933.4445 ImageDiary.com @Image_Diary
>
LikeLike
This mitered corner method is the non-math one. The original method involves actual math!
LikeLike
Beautifully done! Thanks for all the info and great photos
LikeLike
Thanks for all the positive feedback. Here I was worrying that this post was too geeky to be interesting.
LikeLike
Thanks for the tips. I have a shell top that I have a hook and eye at the neckline at the back but keeps coming undone when worn. No doubt I probably put it on back to front or something!
LikeLike
I’m so glad this was helpful.
LikeLike